Enjoy the immersive experience once again
Although Spatial Audio on Apple’s AirPods offers incredible surround sound experiences with dynamic head tracking capabilities, it’s not immune to problems. A “Spatial Audio Not Available” message in the Control Center on your iPhone, iPad, or Mac usually indicates compatibility errors, technical anomalies, or settings conflicts.
This troubleshooting guide will walk you through multiple recommendations and solutions to fix Spatial Audio on AirPods.
1. Check for Spatial Audio Feature Compatibility
Spatial Audio works on the AirPods (3rd generation and later), AirPods Pro, and AirPods Max (including the Beats Fit Pro), but that does not mean that all audio sources support the feature. Most of Apple’s own apps and popular streaming services on the iPhone, iPad, and Mac are compatible with Spatial Audio, but some—like YouTube—aren’t.
If you’re unsure about a particular application, a cursory search on the internet should help determine if it supports Spatial Audio.
2. Update Problematic Apps
If you’re positive that an app or service supports Spatial Audio (e.g., Netflix), try updating the app to its latest version since newer updates often come with bug fixes for known issues. Visit the App Store on your iPhone or iPad, search for the app in question, and tap Update if the option is available.
Likewise, on the Mac, check the App Store to see if an app has any pending updates. If you downloaded the program from the developer’s website, look for a Check for Updates option within the app interface.
3. Refresh the AirPods’ Connection
If you see the “Spatial Audio Not Available” message across different apps or streaming services, refreshing the Bluetooth connection between the AirPods and your Apple device might resolve random glitches preventing Spatial Audio from working.
Just place your AirPods in their Charging Case (or Smart Case if you own an AirPods Max), wait for around 30 seconds, and then take them out again.
4. Restart Your Apple Devices
Another quick fix involves restarting your iPhone, iPad, or Mac since audio-related anomalies within the system software could be causing the problem.
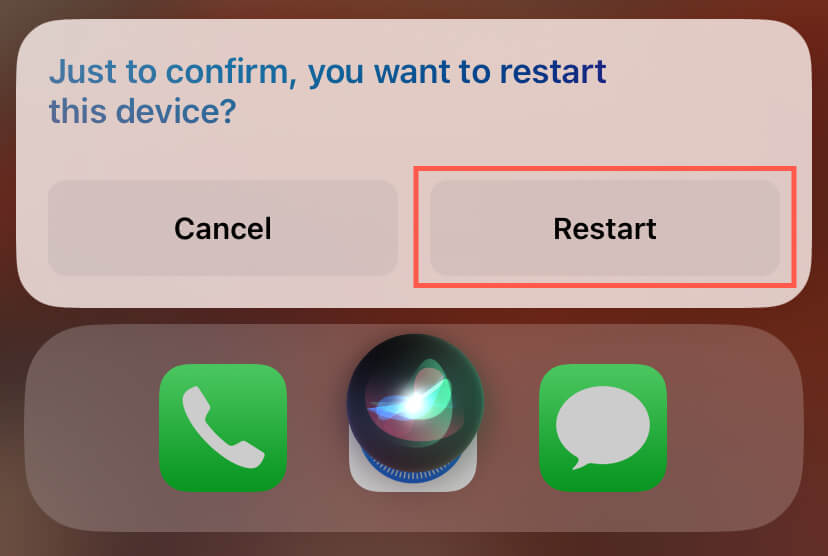
To restart an iOS or iPadOS device, invoke Siri (press and hold the Side button), say “Restart iPhone,” and tap Restart on the confirmation pop-up. On a Mac, open the Apple menu and select Restart.
5. Disable Personalized Spatial Audio
A personalized Spatial Audio profile enhances the AirPods’ precision at tracking your head movements, but incorrectly calibrated data can lead to issues. Deleting the profile can help determine if it’s the source of the problem.
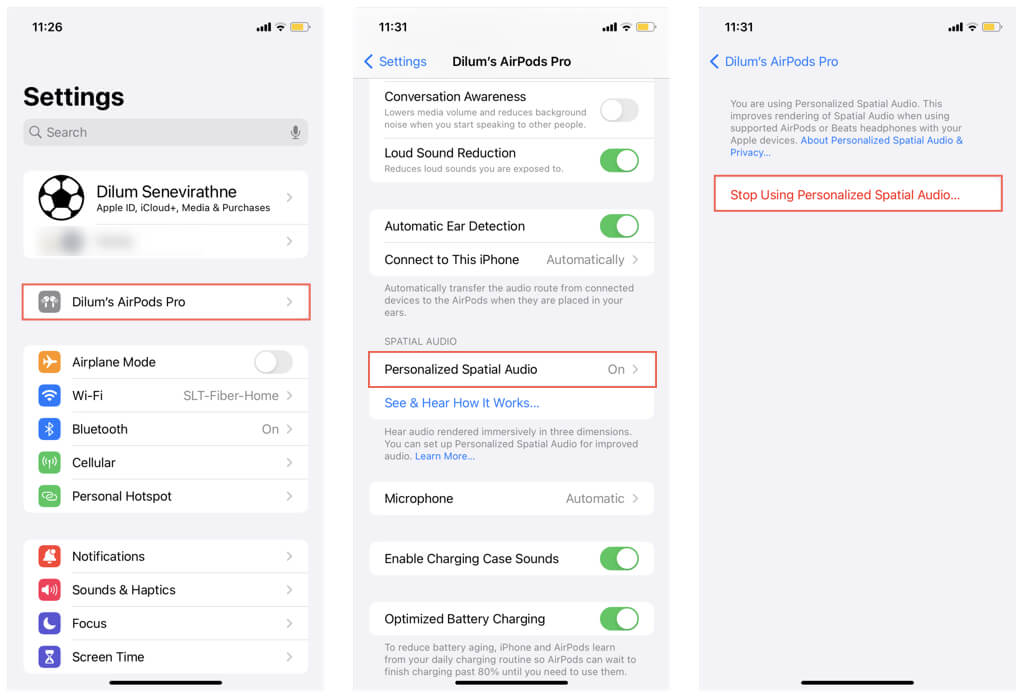
On the iPhone and iPad, open the Settings app, tap [Your Name]’s AirPods, and select Personalize Spatial Audio > Stop Using Personalized Spatial Audio. If you’re on a Mac, open the System Settings app, select [Your Name]’s AirPods on the sidebar, and choose Stop Using Personalized Spatial Audio.
If that fixes the problem, feel free to set up a personalized Spatial Audio profile again—on a Face ID-equipped iPhone running iOS 16 or later, go to Settings > [Your Name]’s AirPods and tap Set Up Personalized Spatial Audio.
6. Disable Mono Audio
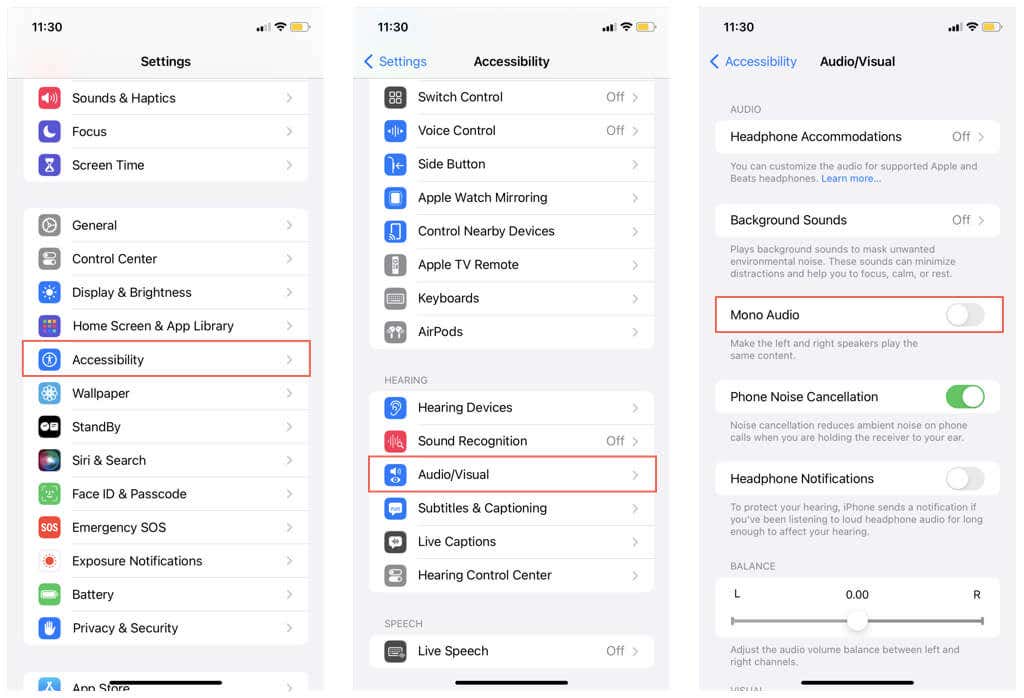
Spatial Audio simulates 3D surround sound and requires stereo audio output to function correctly—it won’t work with single-channel mono audio. To ensure that’s not the case, navigate to Settings > Accessibility > Audio/Visual on your iPhone or iPad and disable the switch next to Mono Audio if active.
On the Mac, open the Apple menu, go to System Settings > Audio, and turn off the switch next to Play stereo audio as mono.
7. Enable Dolby Atmos (Apple Music)
Suppose the “Spatial Audio Not Available” error only occurs with Apple Music. In that case, you must make sure that the app is capable of streaming and downloading tracks in the 3D audio-compatible Dolby Atmos format.
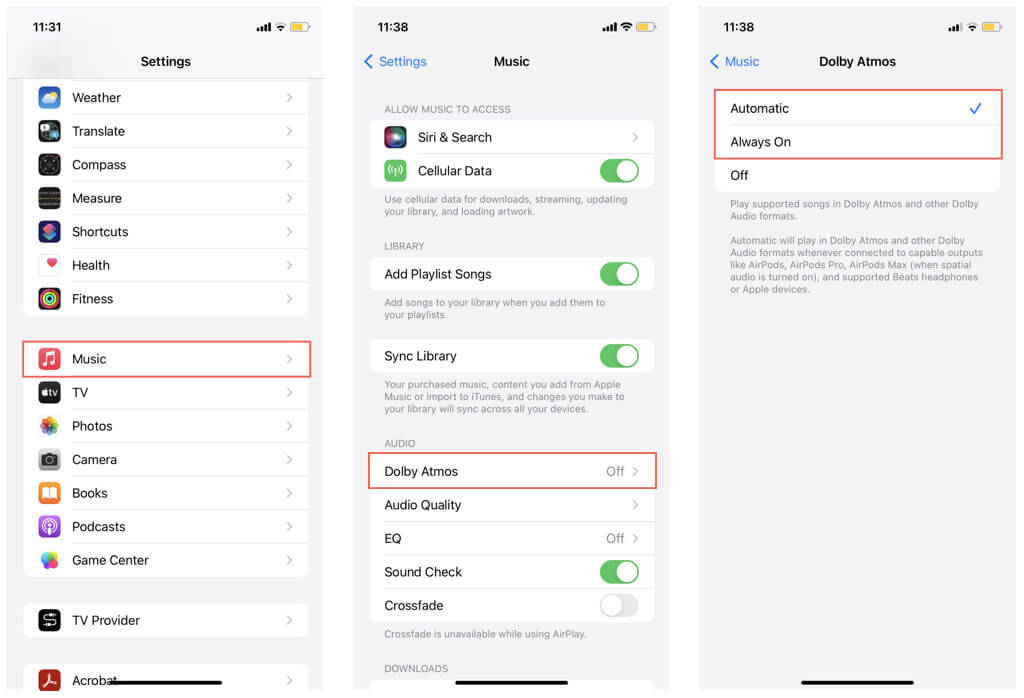
On the iPhone or iPad, go to Settings > Music > Dolby Atmos, select Automatic or Always On, and wait for the Apple Music app to upgrade your previously downloaded tracks, albums, and playlists to Dolby Atmos before playing them to ensure you have access to Spatial Audio.
If you use Apple Music on the Mac, select Music > Settings on the application’s menu bar, switch to the Playback tab, and set Dolby Atmos to Automatic or Always On. Additionally, under General, activate the Download Dolby Atmos option.
8. Perform a Firmware Update
If the “Spatial Audio Not Available” issue persists regardless of the audio source on your iPhone, iPad, or Mac, it’s a good idea to update the AirPods firmware.
To do that, connect the earbuds or headset to a power source and keep the Charging Case or Smart Case next to your iPhone for at least 30 minutes. Any pending firmware updates should automatically install in the meantime.
9. Update iOS, iPadOS, and macOS
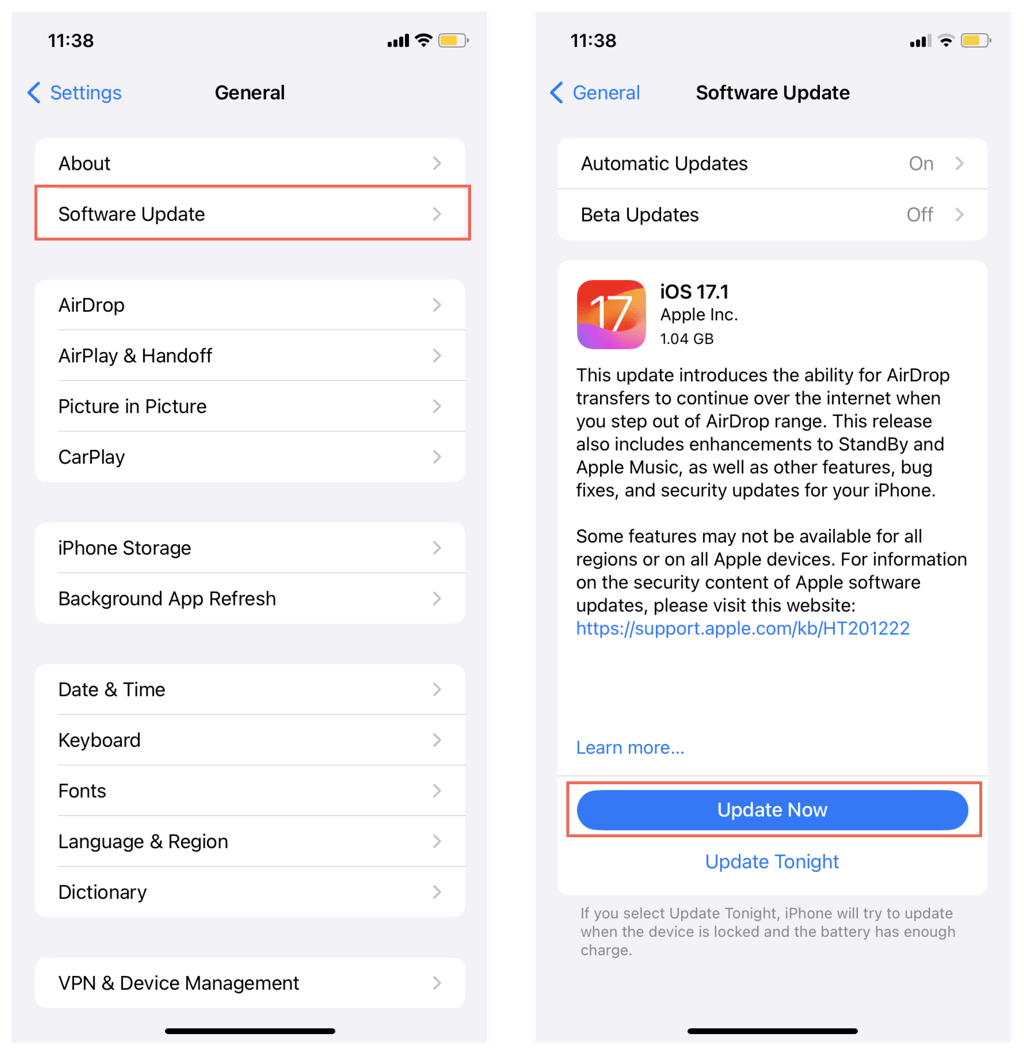
Updating the system software on your Apple devices can resolve underlying system-related problems causing Spatial Audio to malfunction. To update an iPhone, iPad, or Mac, open Settings/System Settings, go to General > Software Update, and select Update Now.
10. Reset Your AirPods
If the solutions above haven’t resolved the issue, consider resetting your AirPods to factory defaults. Doing this can fix corrupt Bluetooth settings that might prevent features like Spatial Audio from functioning properly.
Begin by removing the AirPods from your iPhone, iPad, or Mac—go to Settings/System Settings > Bluetooth, tap the Info icon next to [Your Name]’s AirPods, and tap Forget This Device.
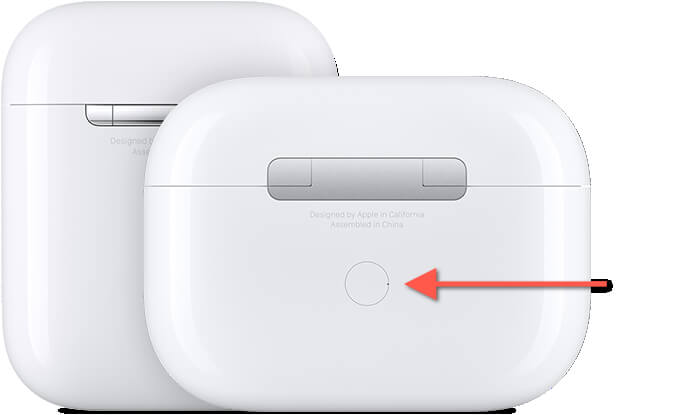
Next, put your AirPods inside the Charging Case, close and re-open the lid, and press the Reset button on the back of the case until the light inside flashes amber, then white.
If you use the AirPods Max, hold the Noise Control and the Digital Crown simultaneously to initiate the reset—you do not have to put the headphones inside its Smart Case.
After resetting your AirPods, re-pair them with your Apple devices. To do that, hold your AirPods next to your iPhone or iPad and follow the prompts on the pairing pop-up. If you’re on a Mac, you must visit the Bluetooth settings window in macOS to connect them.


