Follow these instructions exactly, don't miss a step
Lost your iTunes library due to Windows reinstallation, hard drive crash, or a stolen PC? Don’t panic, because you can easily recover iTunes media purchased through other Apple devices.
Although the entire process is pretty easy, you could encounter several complications if you miss a step. We’ll show you how to transfer your iTunes library to your PC without iTunes deleting or overwriting media files saved on your iPhone.
How to Recover iTunes Library from iPhone to PC
First, to recover your iTunes library you’ll need to reinstall iTunes on your PC. Download the iTunes app from the Microsoft Store. If you can’t access or use the Microsoft Store, download the iTunes setup file from Apple’s website.
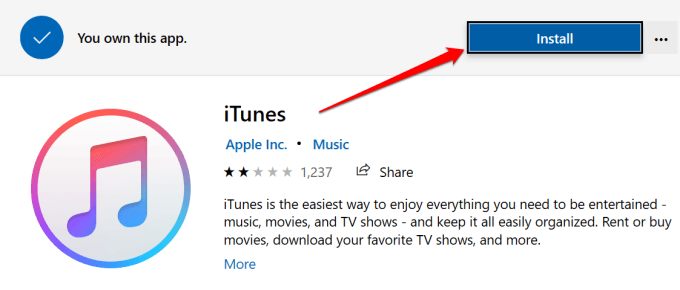
NOTE: Unplug your iPhone from your PC before reinstalling iTunes. Afterward, disable iTunes automatic synchronization (see Step 2 below) before plugging in your iPhone. Failure to do this will delete iTunes media purchases and downloads from your iPhone.
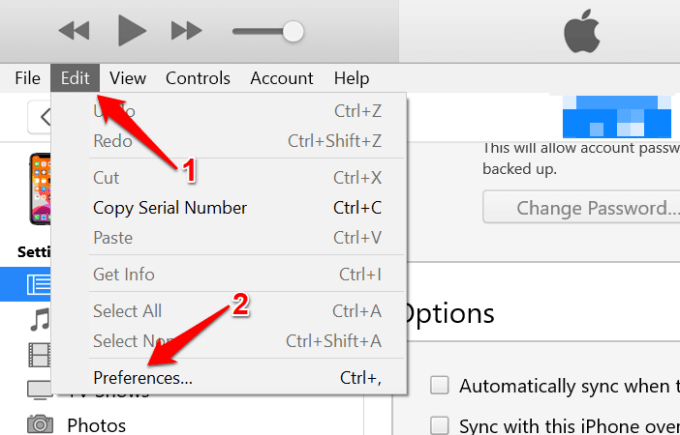
- Select Edit on the menu bar and select Preferences.
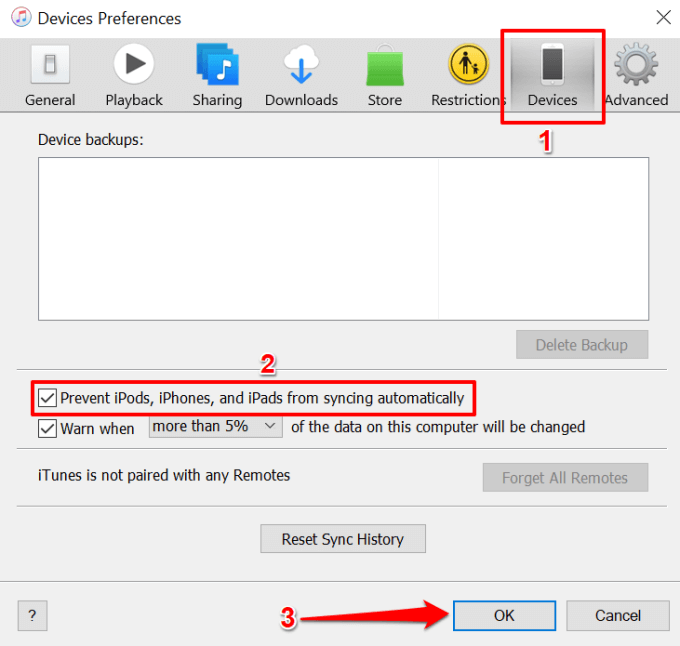
- Go to the Devices tab, check Prevent iPods, iPhones, and iPads from syncing automatically, and select OK.
- The next thing you need to do is authorize the PC to access your iTunes purchases. Select Account on the menu bar, select Authorizations, and select Authorize This Computer.
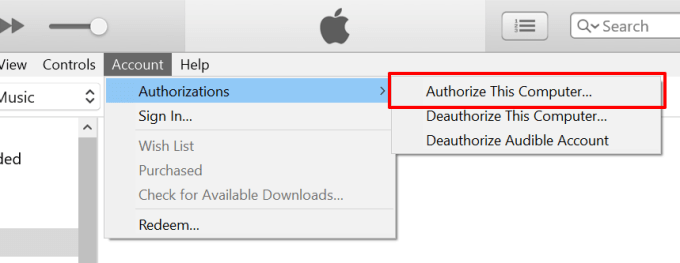
- Provide your Apple ID credentials (the same Apple ID connected to your iPhone) and click Authorize to continue.
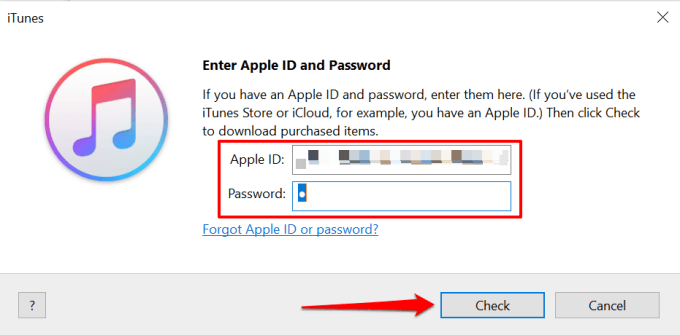
You may be required to enter a verification code if your Apple ID account is secured with Two-Factor Authentication. You’ll get a success notification when the authorization process is over. Click OK to proceed.
- Connect your iPhone to the computer using a USB cable.
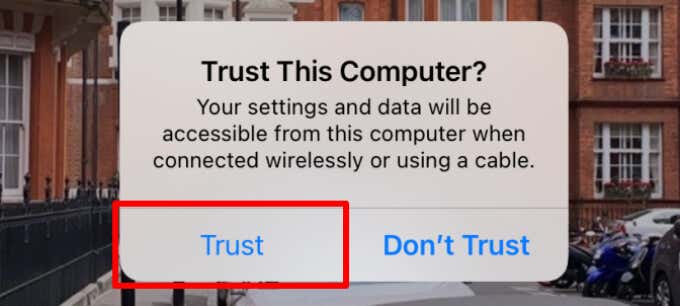
- You’ll get a “Trust This Computer” prompt on your iPhone asking if you want the PC to access your device’s settings and data. Tap Trust and enter your iPhone’s passcode to proceed.
- Select Files on the menu bar, select Devices, and select Transfer Purchases from [device name].
![08-recover-itunes-library-from-iphone-01 - Switching To Mac File > Devices > Transfer Purchases from [device name]](https://www.switchingtomac.com/wp-content/uploads/2021/07/08-recover-itunes-library-from-iphone-01.png)
Alternatively, right-click your iPhone on the sidebar and select Transfer Purchases.
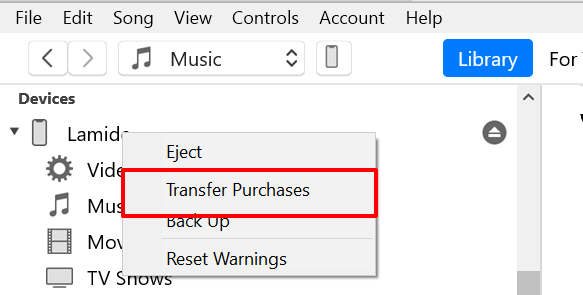
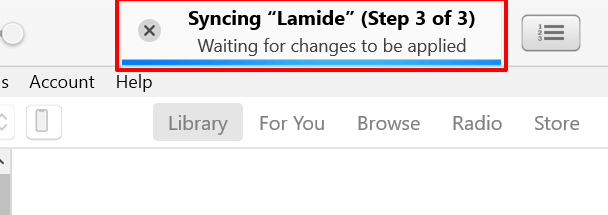
iTunes will scan the connected iPhone and immediately synchronize your iTunes library. The synchronization progress at the top of the app.
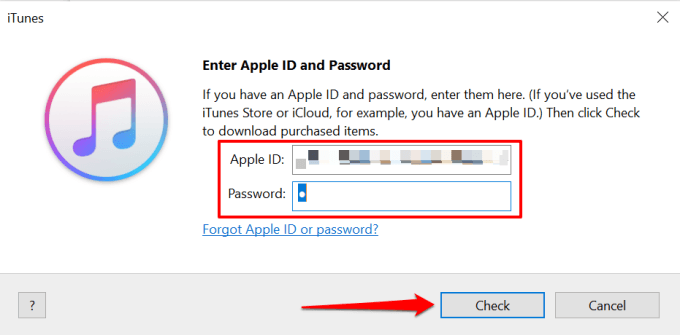
- If you haven’t authorized the PC to access your iTunes purchases (see Step 4 and Step 5), you’ll get a prompt to sign in to your Apple ID account. Enter your account credentials and click Check.
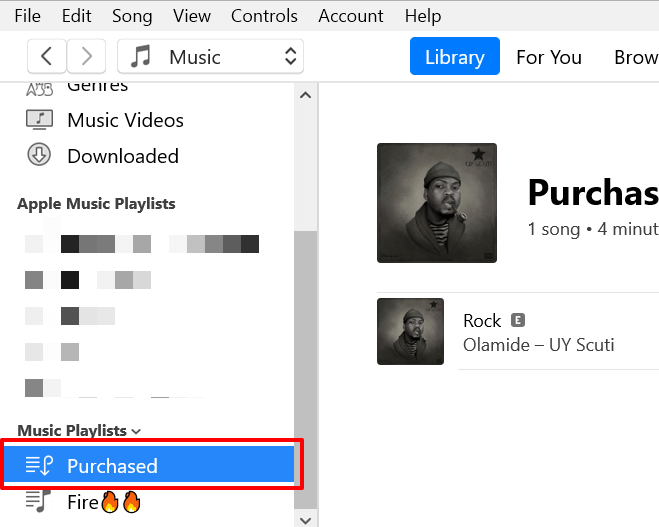
Wait for iTunes to sync your iTunes and iCloud Music Library. This will take several minutes, majorly depending on your internet connection speed. When the transfer is complete, check the Purchased section on the sidebar to access iTunes purchases on your Apple ID account.
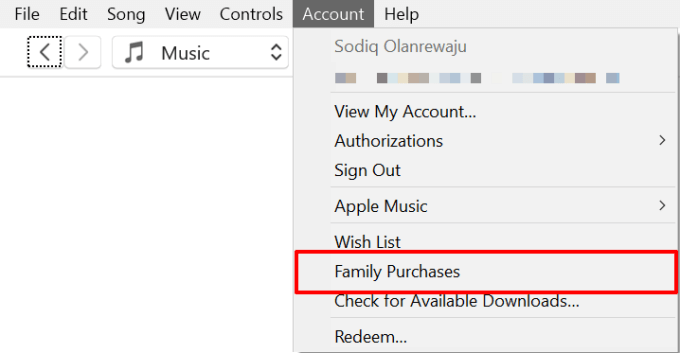
To access Family Purchases, select Account on the menu bar and select Family Purchases.
iTunes Won’t Recover Your Library? Try the Following
Several factors can interrupt the iTunes library recovery process on your PC. We highlight some errors you might encounter and their solutions while trying to recover your iTunes library.
1. Check the Cable Connection
Unplugging your iPhone during the synchronization process will interrupt the recovery of your iTunes library. So will using a frayed, faulty, or damaged USB cable. Close iTunes, plug your iPhone into the PC using an authentic cable, and attempt the recovery process from scratch.
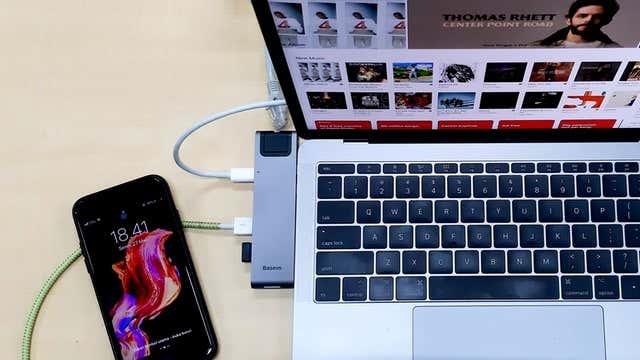
USB hubs can cause interference and other connectivity issues. Therefore, we recommend plugging your iPhone directly into your PC’s port, not through a USB hub or adapter.
Still getting the error messages? Disconnect other USB devices from your PC, connect your iPhone to a different USB port, and try recovering your iTunes library from scratch.
2. Re-launch iTunes
It’s also a good idea to close and reopen iTunes if you’re encountering issues recovering your iTunes library from an iPhone.
Launch the Task Manager (Ctrl + Shift + Esc), select iTunes, and click the End task button at the bottom-left corner.
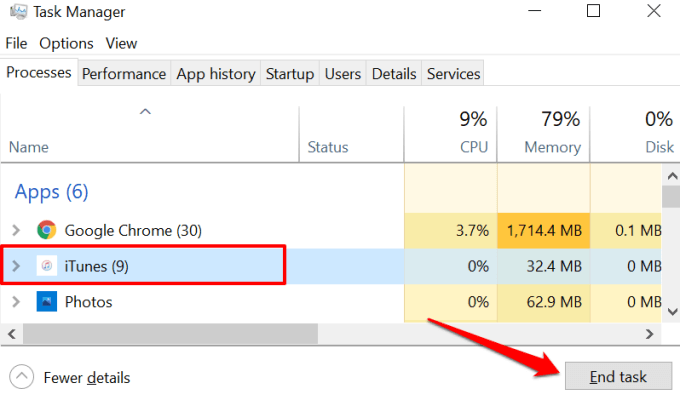
Relaunch iTunes—but this time, as an administrator—and repeat the steps above.
3. Re-Authorize Your Computer
If iTunes won’t transfer your library items and purchases because “you are not authorized” for such action on the computer, that’s because you skipped Step 4 in the section above.
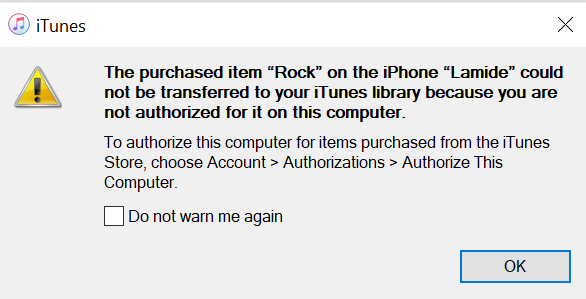
You have to grant the computer access to purchases made from the iTunes Store before you can transfer your iTunes library. That means connecting your Apple ID account to the iTunes app.
Select Account on the menu bar, choose Authorizations, select Authorize This Computer, and enter your Apple ID account information.
4. Retry the Recovery Operation
Is the recovery operation stuck? Or is it taking longer than usual? Click the Activity icon 🛈 to check the status of the library synchronization.
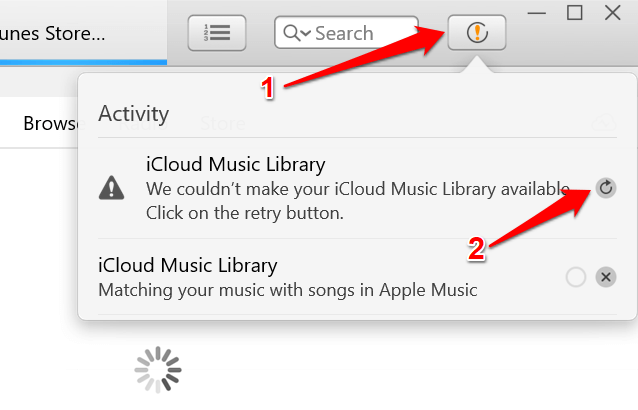
If there’s an error message in the Activity menu, tap the Retry button to restart the process.
5. Update Your Computer
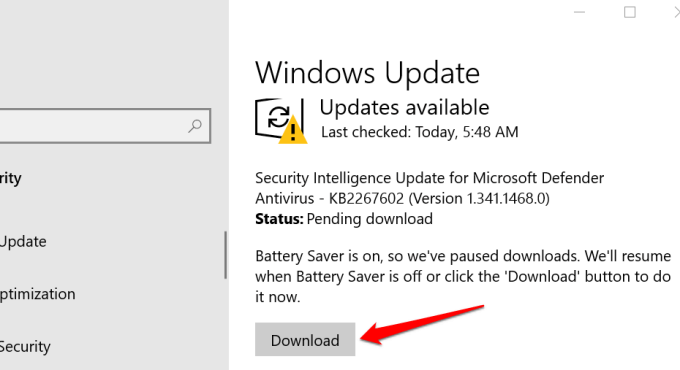
Installing Windows Updates can help fix driver-related issues preventing your iPhone from connecting or transferring your iTunes library to your computer.
Go to Settings > Update & Security > Windows Update and click the Check for Updates button. If there’s a Windows Update available for your PC, click the Download button and restart your computer when the installation is complete.
Let us know if you could recover your iTunes library from your iPhone using the steps in this tutorial. If you’re still experiencing some technical hitches, refer to this guide on fixing iTunes connectivity issues for more troubleshooting fixes.


