Imagine if Michelangelo had used this
Creating art digitally has been made easier than ever with the iPad, Apple Pencil, and a multitude of apps dedicated to making art. One of these apps, which has become extremely popular because of its simple yet powerful design, is Procreate for iPad.
Procreate rivals apps like Adobe Illustrator or Photoshop in its capabilities. It’s mainly useful for illustration purposes and has several different brushes, tools, and features that make drawing, sketching, and painting efficient and fun. You can even create animations using the app.

With a price of $9.99, it’s definitely worth the price for all the features you get. However, you might be unsure of where to start when you open the app, and how to use Procreate to make the type of art you want to make. Procreate is extremely easy to get the hang of, so once you learn the basics you can start making pieces you can be proud of.
Brushes and Sketching Tools
The tool you’ll likely most be using is the brush tools. Procreate makes them simple and easy to access and use. In the top-right corner, you can tap on the paintbrush icon to open the menu with every pre-created brush option.
There are 18 categories of brush textures, with 190 brushes in total built into the app. Some of the basic brush styles you might use most regularly you can find under the Painting or Sketching options.

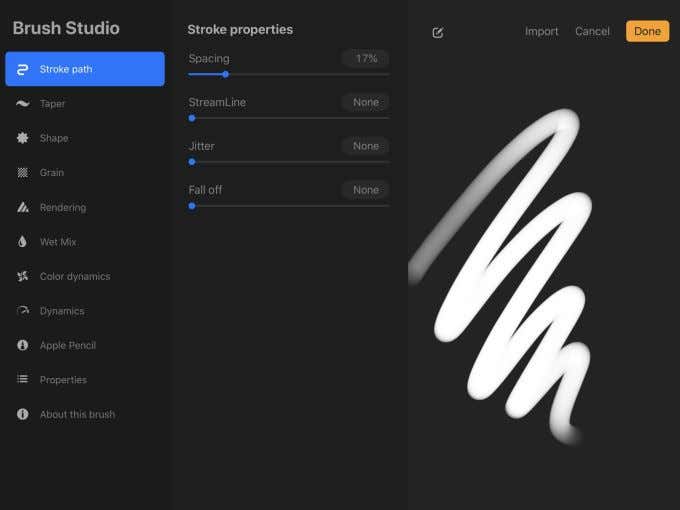
If you don’t see any brushes you want to use, you also have the option to create or import your own brushes. After opening the brush library, you can tap on the + icon in the top right which will bring you to the Brush Studio.
Here, you can play around with multiple different settings to tailor a brush that fits your needs perfectly.

You can also use brushes that others have created by tapping on Import. You can find and download these brushes online. If you want to delete any created or imported brushes, simply swipe a brush option to the left and tap the Delete button.
As far as using your brushes, once you select one, you’re ready to begin using it to draw. If you hold down on the brush, you’ll automatically be able to use an eyedropper tool to change the color of your brush. To change your brush size, you can use the topmost vertical bar on the left.
The bar underneath that you can use to change your brush’s opacity. The middle square between them is another way to access the eyedropper tool. Below the bottom bar are arrow icons that either undo or redo actions. There is also an eraser, which is the middle icon in the top right.
Layering Features
Procreate for iPad also gives you the ability to use layers when making your art. Using these can help you keep different parts of your art from being erased or changed while you’re working on a separate layer. They can easily be hidden or deleted and are an extremely useful tool if you’re working on an elaborate piece.

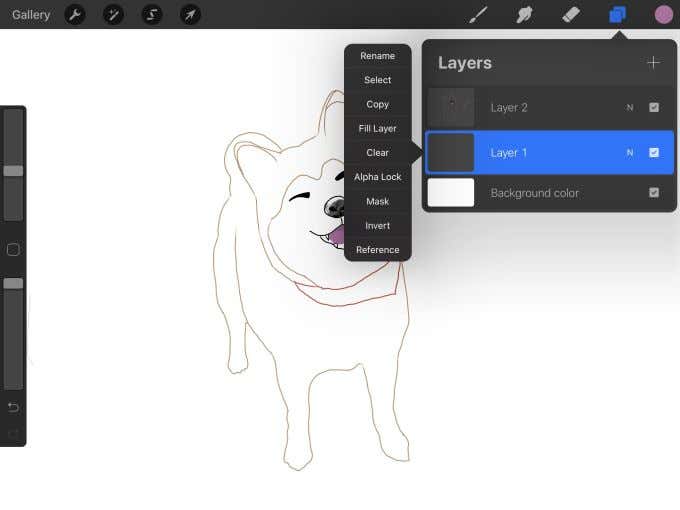
To use layers, tap on the icon with two overlapping squares in the top right corner. You should see the background color layer, as well as the first layer. If you want to create a new layer, just tap the + icon in the top right of the layer menu. You can swipe left on any existing layers to have the option to lock the layer (not allowing any changes to be made to it), duplicate the layer, or delete it.
If you tap on a layer, you can see more settings appear to the left. Here are some of the important settings:
- Rename: Changes the name of a layer
- Select: Selects an entire layer and gives you some editing options
- Copy: Copies an entire layer
- Clear: Clears the layer of anything on it
- Merge Down: Merges a layer to the one below it

If you want to move the order of the layers, just tapping and holding on a layer will allow you to drag it to any spot. If you drag it outside of the layer menu, you can create a new layer that way.
Adjustment Tools And Settings
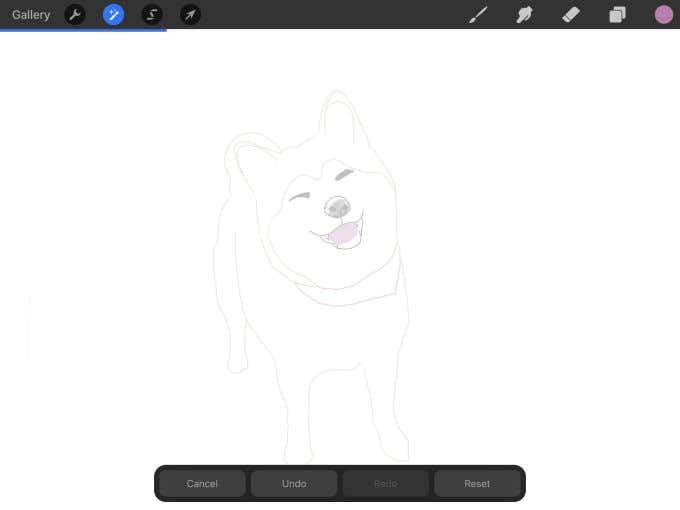
In the top left-hand corner is another set of icons. Under the magic wand, there is a list of adjustments you can make to your artwork. If you choose one of the adjustment settings, you can slide backward or forward on the screen to decrease or increase each respective setting. You can also choose to reset or cancel while making any of these changes.

At the bottom of the Adjustments menu are some color grading options. You can change the hue, saturation, and brightness. Under Color Balance, you can set the balance between cyan/red, magenta/green, and yellow/blue tones Use Curves to set the levels of black/white, red, green, and blue tones. Finally, you can use Recolor to change the colors of parts of your art.
The last icon with the mouse pointer also gives you tools to make some changes to your project, such as flipping, rotating, fitting your art to the screen, or other distortion effects.
Exporting Your Art
Procreate for iPad does save your art automatically, so you don’t need to worry about saving at every interval of work you do. You also can export your finished project in multiple different formats, and the app makes it extremely simple.

Tap on the wrench icon in the top left, and then tap on the Share button. You’ll be able to choose from multiple different file formats to share your work with. You will then choose what quality you want to export to, and then you’ll see all your options for where to export it.
This lets you send your finished work to your Google Drive, your iPad’s documents, and most other platforms where you can save or share images.


