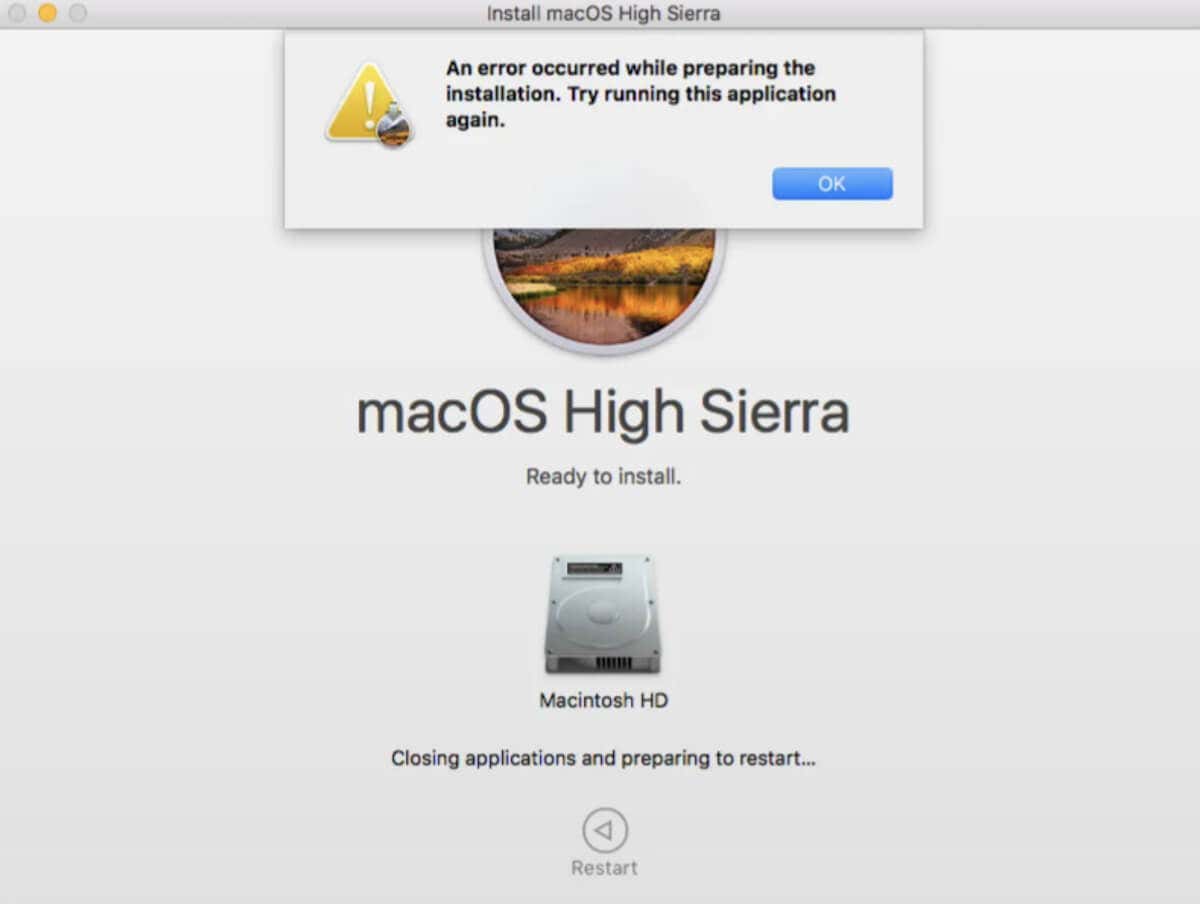
Installing a new operating system can be daunting, especially when unexpected errors occur. One such error that people often encounter is “An error occurred while preparing the installation.”
This pesky error can disrupt the installation process and leave you frustrated, having to start from the beginning. In this guide, we’ll explore the meaning of this error and what can be causing it and provide several solutions.
What “An Error Occurred While Preparing the Installation” Means
When you encounter the message “an error occurred while preparing the installation” on your Mac, the system faced an obstacle preventing it from completing the update process.
This message is like a roadblock in the update process. However, the error message doesn’t provide explicit details about what caused the issue. This message often means your computer has an incorrect date and time set. In other cases, an unstable internet connection or malware could be causing problems. You can troubleshoot it by trying the provided solutions until the problem is solved.
How to Fix “An Error Occurred While Preparing the Installation” on Mac
Let’s start with the simplest and most common fixes, followed by drastic measures such as factory resetting your Mac.
1. Check the Date and Time on Your Mac
Before doing anything else, ensure your Mac displays the correct date and time. This is one of the most common causes of the “An Error Occurred While Preparing the Installation” issue. Here’s how to verify and adjust these settings on your Mac.
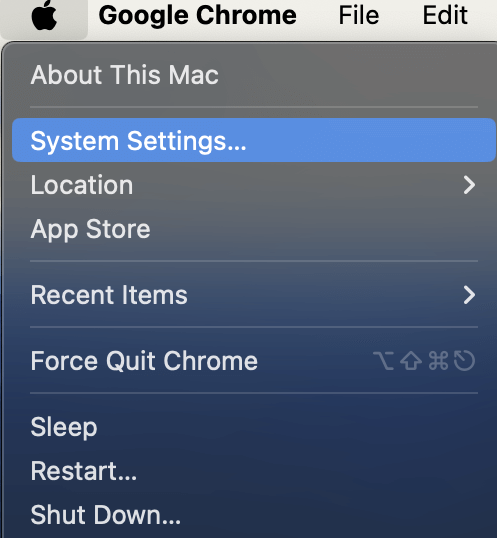
- Open the Apple menu located in the upper-left corner of your screen. From the dropdown menu, select System Settings (or System Preferences).
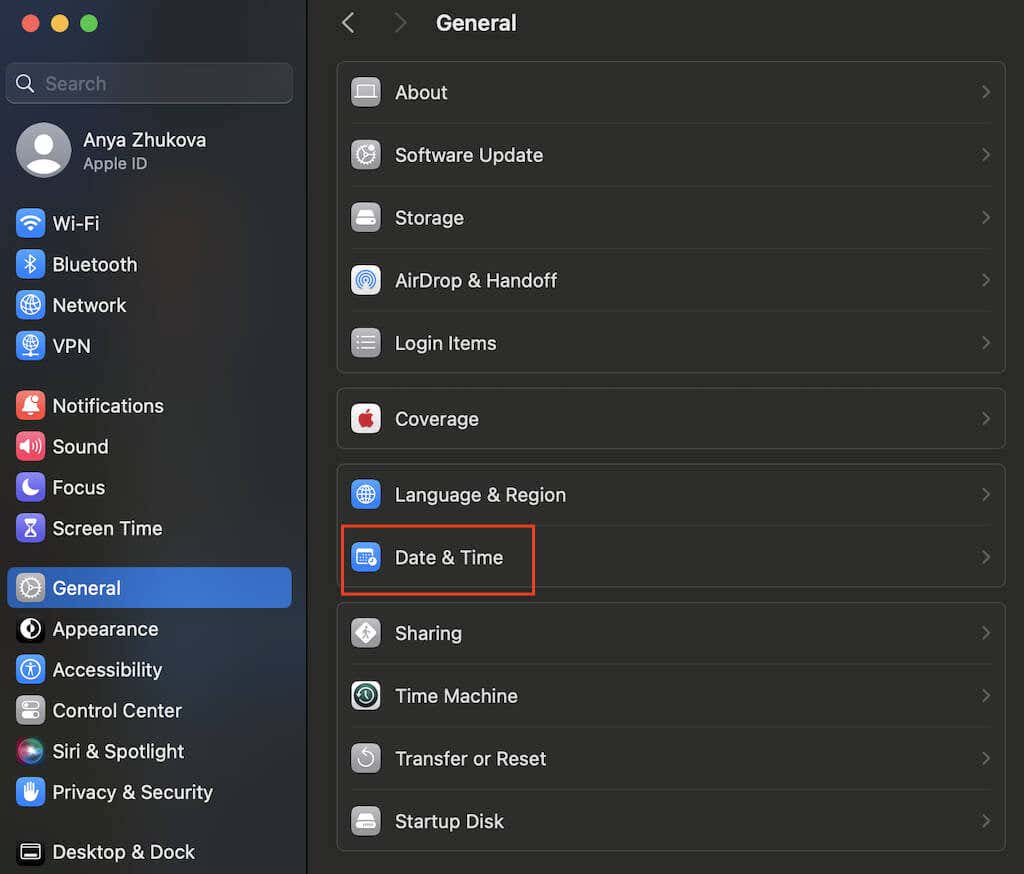
- Within System Settings, navigate to the General section and select Date & Time from the options on the right-hand side.
- In the Date & Time panel, confirm that the displayed time is accurate.
- It’s also recommended that you activate the Set date and time automatically option to avoid facing the same problem in the future.
- Choose your current region from the dropdown menu for better time synchronization.
By checking that your Mac’s date and time settings are accurate, you can eliminate potential conflicts contributing to the installation error. Once finished, exit System Settings to apply the changes.
2. Restart Your Mac
Restarting your Mac can quickly rectify the “an error occurred while preparing the installation” issue.
You can manually restart your Mac or use the macOS Restart feature. Before you do it, back up any unsaved work and close all open applications on your Mac.
When you’re done, use the Power button on your Mac — press it once to initiate the shutdown process. Wait for the system to completely power down. Once your Mac has fully shut down, press the Power button again to turn it back on. Allow your Mac to boot up normally and check if the installation error persists.
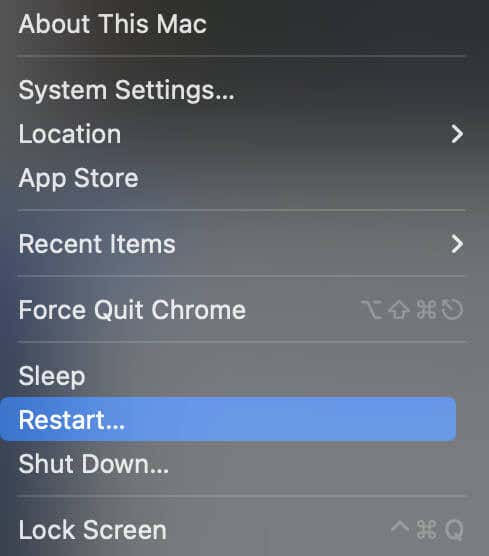
Alternatively, you can use the macOS Restart option to restart your Mac. To do that, open the Apple menu and select Restart to initiate the restart process. Confirm any prompts that appear and allow your Mac to restart. After the restart is complete, check if the error message appears.
3. Check Your Internet Connection
The OS installer requires a stable internet connection to complete the OS installation process. If you encounter issues with your internet connection, such as slow speeds or intermittent disruptions, consider troubleshooting your network. You can restart your router, ensure all cables are securely connected, or contact your internet service provider for assistance.
4. Check Apple’s Servers
If you’ve confirmed that your internet connection is stable but still see the “An Error Occurred While Preparing the Installation” message, the issue may lie with Apple’s servers.
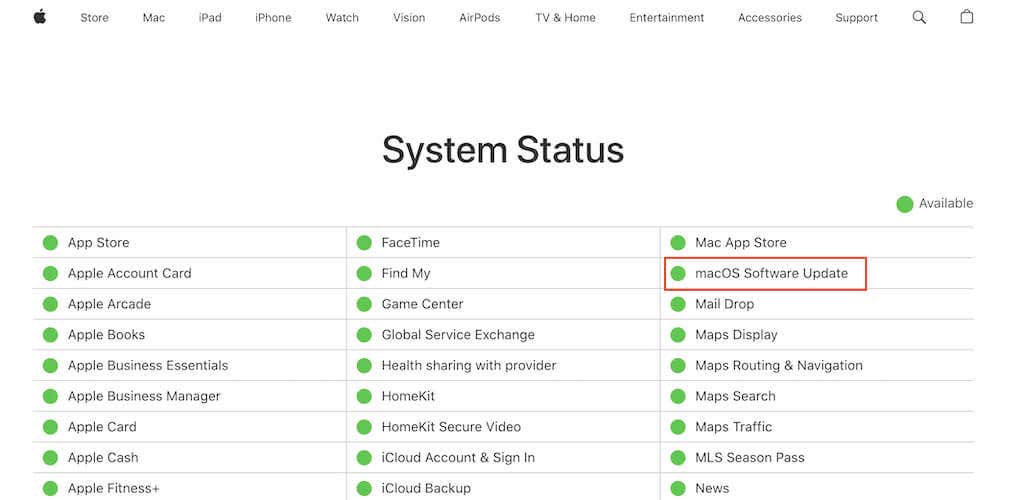
Here’s how to verify the status of Apple’s online services.
1. Go to Apple’s Status Page.
2. Check macOS Software Update status. You’ll find an indicator next to it, either green or red.
Green Indicator: If the indicator is green, the macOS Software Update service functions properly. In this case, you can rule out Apple’s servers as the cause of the problem.
Red Indicator: If you see a red dot next to macOS Update, it means there’s an issue with Apple’s servers. In such instances, you’ll need to wait until the problem is resolved on Apple’s end.
5. Run a Malware Check
Malware can often be the culprit behind various errors and issues on your Mac, including the “an error occurred while preparing the installation” message.
The best solution is to employ an antivirus software specifically designed for macOS. These applications scan your system thoroughly for malware, spyware, and other malicious programs that could be causing the installation error.
Launch your antivirus software and initiate a full system scan. Once the scan is complete, review the results provided by the antivirus software. If malware or suspicious files are detected, follow the recommended actions provided by the antivirus software.
6. Use the Safe Mode
If your Mac’s date, time, internet connection, and Apple’s servers are all in order, try installing macOS in Safe Mode. Booting into Safe Mode loads only essential extensions and performs disk checks. The process varies for Apple silicon and Intel-based Macs, so before you begin, you’ll need to determine whether you’re using a Mac with an Intel processor or Apple Silicon.
For Apple Silicon Macs
- Shut down your Mac.
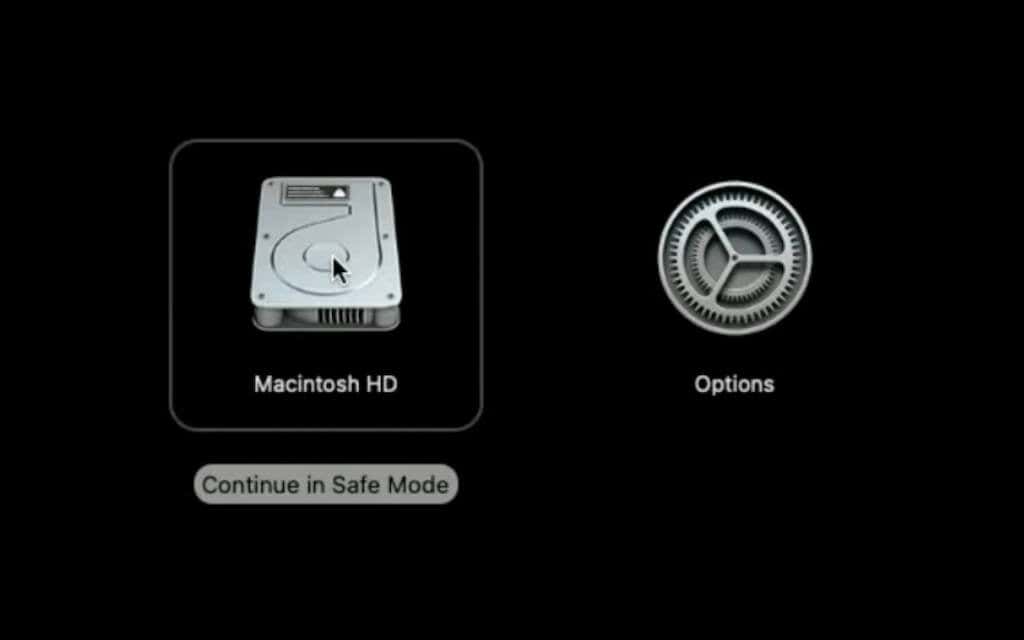
- Turn it on and hold the power button until the startup options appear.
- Select your startup disk, then hold Shift while clicking Continue in Safe Mode.
- Log in when prompted.
For Intel Processors
- Turn on or restart your Mac.
- Immediately press and hold Shift as your Mac starts up.
- Release the button when the login window appears.
- Log in and check for Safe Boot in the upper-right corner.
This method may resolve installation issues by isolating potential software conflicts.
7. Repair Your Disk
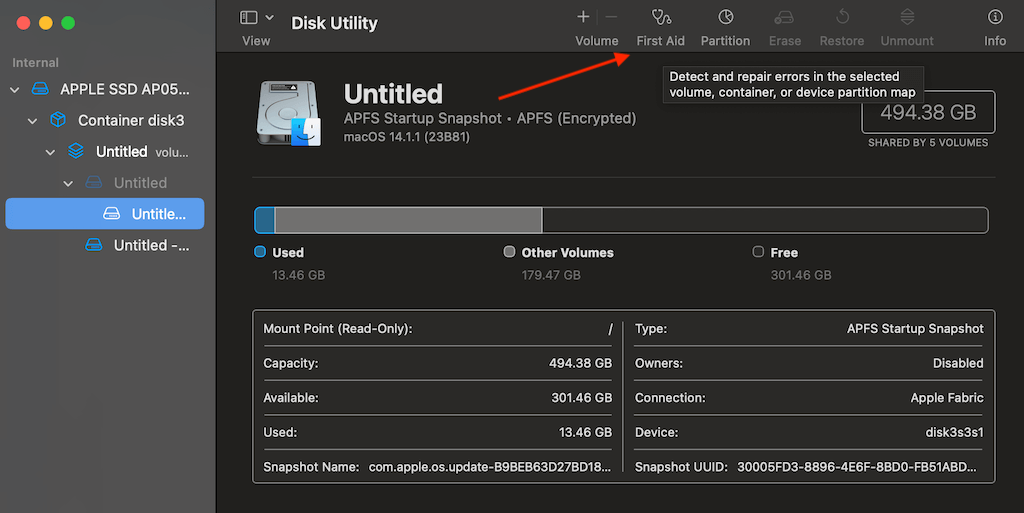
Disk Utility is a powerful tool for identifying and fixing disk-related issues that can cause unexpected behavior or even prevent your Mac from starting up. Using the First Aid feature within Disk Utility, you can scan and repair disk formatting and directory structure errors.
Here’s how to use Disk Utility’s First Aid feature.
- Launch Disk Utility from the Utilities folder within the Applications folder, or use Spotlight to search for it.
- In Disk Utility, select the disk you want to repair from the list of available volumes in the sidebar.
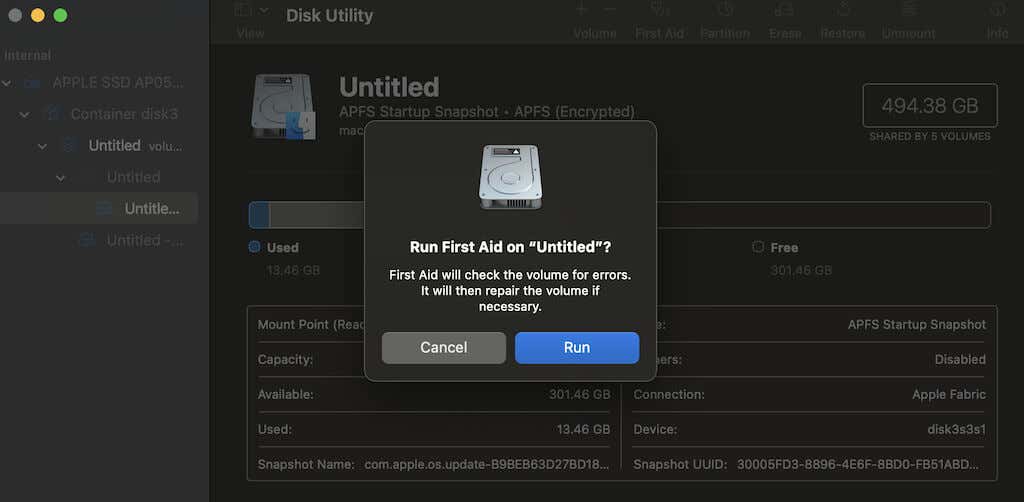
- Select the First Aid button at the top of the Disk Utility window, then select Run to start the diagnostic process.
Disk Utility will scan your disk for errors and repair any issues. Once Disk Utility has repaired any disk errors, try updating or installing macOS again to see if the issue has been resolved.
8. Use the macOS Recovery
Installing from macOS Recovery is another way to fix the recurring error message. It provides access to the latest version of the macOS currently or most recently installed on your Mac.
To start up from macOS Recovery, follow the steps below.
For Apple Silicon Macs
- Turn on your Mac and hold the power button until the startup options window appears.
- Click on the gear icon labeled as Options, then select Continue to proceed.
For Intel-based Macs
- Turn on your Mac and immediately press and hold Command + R until an Apple logo or other image appears.
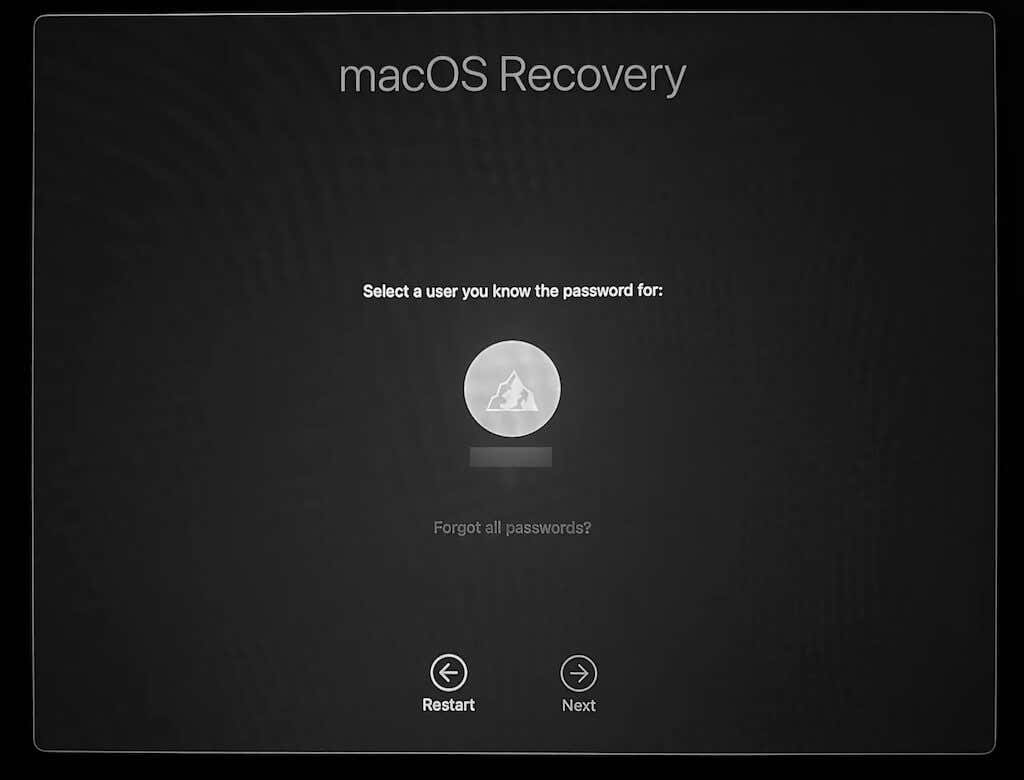
- If prompted, select a user with a known password, click Next, and enter their administrator password.
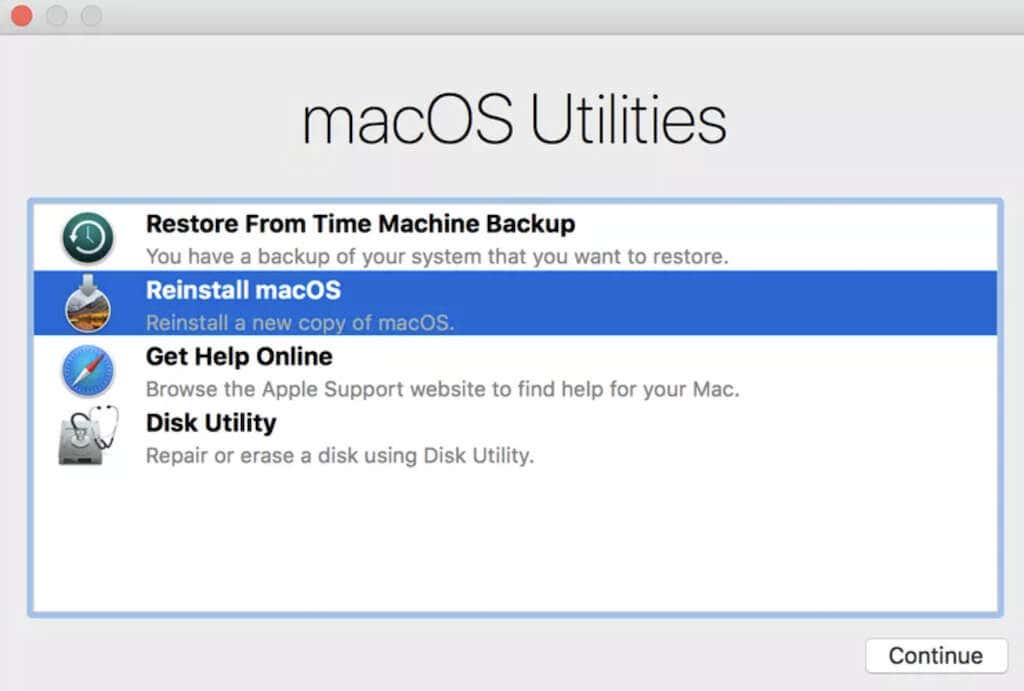
- Once the utility window in macOS Recovery appears, select Reinstall macOS, then click Continue and follow the on-screen instructions to complete the installation process.
If you’ve exhausted all other options and continue encountering the error message, the final step is to erase your Mac and reinstall macOS.
Before proceeding, ensure you have backed up all essential data using Time Machine for easy restoration later.
For Intel Macs without a T2 security chip:
- Boot into recovery mode and select Disk Utility.
- Choose your boot disk and select Erase in the toolbar.
- Follow the on-screen instructions to name your disk and select the APFS format.
- After erasing, quit Disk Utility and choose Reinstall macOS in macOS Utilities.
For Apple Silicon Macs or Intel Macs with a T2 security chip:
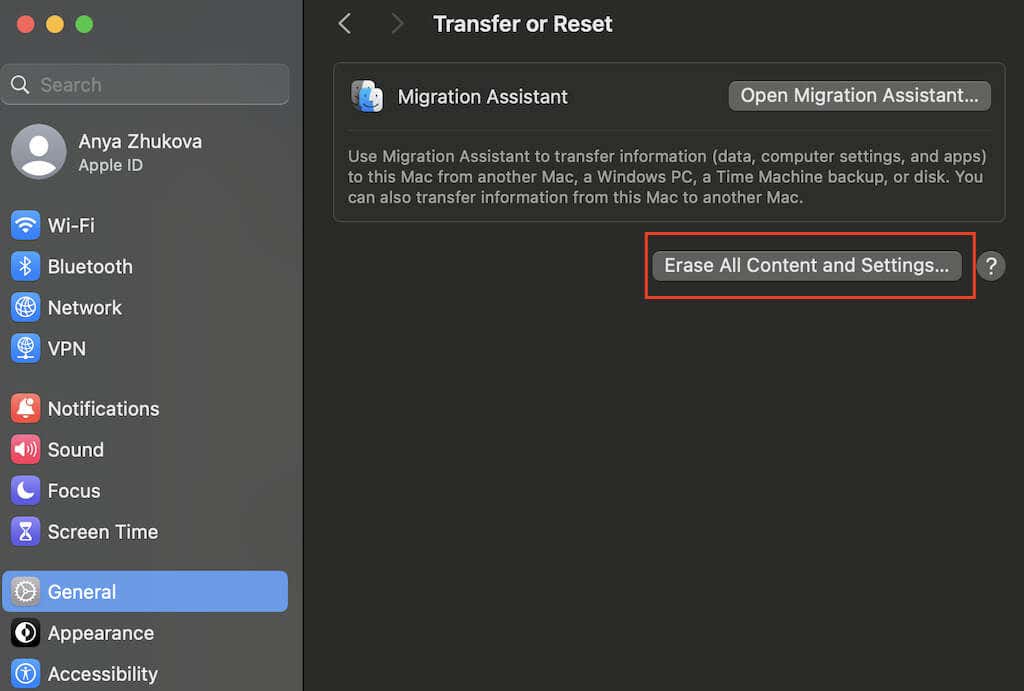
- Follow the path Apple menu > System Settings > General.
- Select Transfer or Reset and then Erase all Content and Settings.
- Follow the on-screen instructions to erase your Mac and set it up again from scratch.
While erasing your Mac is a drastic step, it can resolve persistent installation errors and provide a fresh start for your system.
Let the Troubleshooting Begin
Remember to start with simple fixes like checking the date and time settings, ensuring a stable internet connection, and verifying Apple’s servers’ status. If the problem persists, progress to more advanced solutions such as running Disk Utility and reinstalling macOS.

