Important info if you are having issues
If your MacBook, iMac, or Mac mini freezes, crashes or fails to work as it usually does, then you must take the time to diagnose and troubleshoot the issue. The best way to do this is by entering and using Safe Mode.
But if you can’t figure out how to boot your Mac in Safe Mode or what you must do to fix the device after you’ve done that, you’ll find everything you need to know below.

What Is Safe Mode on Mac?
Safe Mode is a stripped-down version of the Mac desktop that only loads the bare essentials needed to get the device up and running. It starts by checking the startup disk for issues and follows by launching the operating system without third-party extensions, startup programs, or user-installed fonts. It also clears specific areas of the system cache (such as the kernel cache).
This helps you identify the reason behind any persistent issues with the operating system. For example, if an unoptimized or corrupt startup item is what causes your Mac to slow down, booting into Safe Mode should make that immediately obvious. You can then look into the programs that launch alongside macOS and take necessary action.
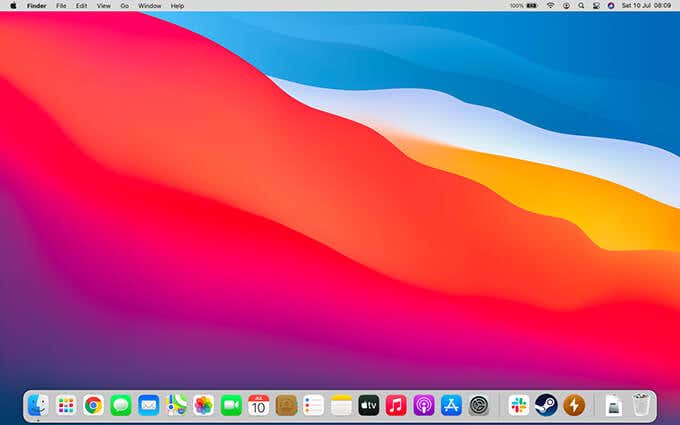
It’s always a good idea to run a cursory check online for any specific issues you might be having with your Mac. Then, try applying any quick fixes to resolve the issue. For example, restarting the device, installing app updates, or updating macOS itself might resolve it. If that fails (or if the operating system is extremely unstable), it’s time to enter Safe Mode.
How to Boot a Mac in Safe Mode
The process required to boot a Mac in Safe Mode changes depending on whether you have a Mac with an Intel or Apple Silicon chipset.
Intel-Based Macs
1. Open the Apple menu and select Shut Down. If your Mac is frozen, press and hold the Power button until the screen goes dark.
2. Wait for 10 seconds and press the Power button. Immediately follow that by holding down the Shift key.
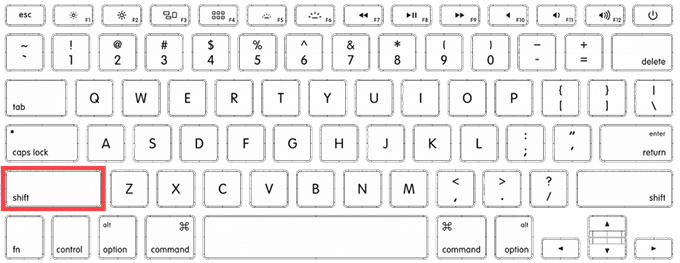
3. Release the Shift key once you see the login screen (it should take a while to appear, so be patient). You should see Safe Boot in red at the top-right of the screen. If you don’t, turn off your Mac and try again.

Apple Silicon-Based Macs
- Turn off your Mac or press and hold the Power button to initiate a force shutdown.
- Wait 10 seconds. Then, press and hold down the Power button until the Startup Options screen appears.
- Select the disk you want to boot into (you’ll most likely see just one labeled Macintosh HD) and press and hold the Shift key.
- Select the Continue in Safe Mode option.
- Follow by releasing the Shift key once you see the login screen. If you don’t see Safe Boot in red to the top-left of the screen, turn off your Mac and try again.
How to Use a Mac in Safe Mode
Most of the time, booting into Safe Mode is enough to fix issues caused by minor disk errors, an obsolete system cache, corrupt fonts, etc. It’s best to follow it by immediately restarting the device in regular mode. If that doesn’t help, re-enter Safe Mode and work your way through the suggestions below.
Update macOS and Apps
Newer system software updates for the Mac contain bug fixes and performance enhancements. If you have issues updating your Mac normally, try doing that in Safe Mode. To do that, open the Apple menu, go to System Preferences, pick the Software Update option, and select Update Now.
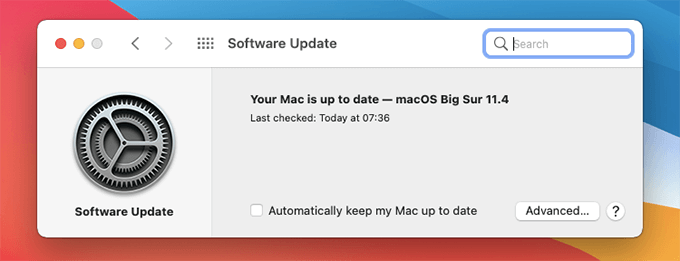
It’s also a good idea to update the apps on your Mac. Open the App Store, switch to the Updates tab, and select Update All to apply all app updates. For apps that you’ve installed outside the App Store, you must locate and use any update options within the apps themselves.
Clear Cached Data
Safe Mode automatically clears various forms of cached data, but it’s also a good idea to delete the complete application and system caches. That helps prevent obsolete files from causing issues.
For example, to delete the application cache on your Mac, open Finder, press Command + Shift + G to invoke the Go to Folder box, type ~/Library/Caches/, and select Go. Follow that by deleting all of the contents within the directory.

For complete step-by-step instructions, check out our guide about clearing the cache on a Mac.
Disable Startup Items
Startup programs can cause slowdowns and myriad other issues, so you should try disabling them in Safe Mode.
- Start by opening the Apple menu.
- Then, select System Preferences > Users & Groups.
- Next, switch to the Login Items tab, take note of all startup items, and remove them from the list.
- Follow that by exiting Safe Mode.
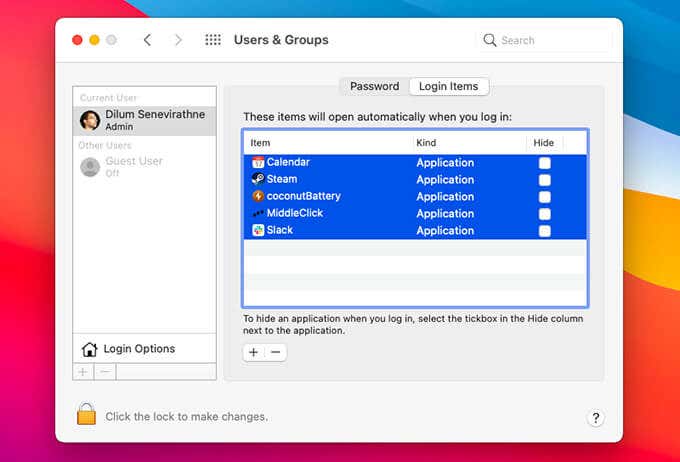
If that helps, try adding each startup program one by one until you identify the item causing issues. You should then keep it disabled and look for app updates that might help fix it. Or, contact the app developer for support.
Delete Sketchy Programs and Extensions
If your Mac starts encountering issues after installing a program, try deleting the program in Safe Mode. To do that, open Mac’s Applications folder and drag the program to the Trash.
Additionally, you must disable any third-party app extensions on your Mac. Select Extensions within the System Preferences pane and start deactivating them.
Restore Fonts
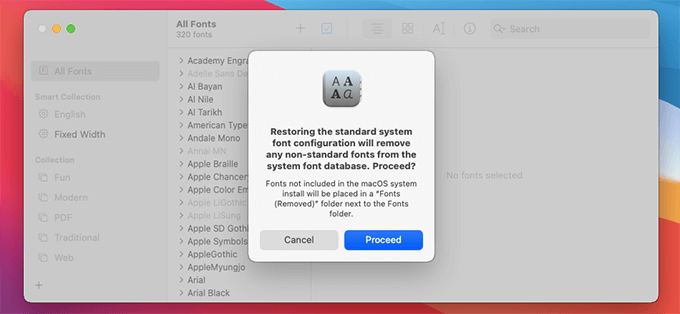
Safe Mode deletes the fonts cache, and that’s usually enough to fix any issues caused by user-installed fonts. But if you continue to have problems (such as with corrupt or jumbled text), you must restore the standard system font configuration.
To do that, open the Font Book app on your Mac and select File > Restore standard fonts. Then, select Proceed to confirm.
Disconnect External Accessories
External hardware accessories and peripherals that you’ve connected to your Mac can also cause issues. First, try disconnecting them from your Mac. Then, if that helps, identify the item causing the problems by connecting them individually and installing any relevant driver updates or support software from the manufacturer’s website.
Create a New User Account
Creating and signing into a new user account on your Mac allows you to identify if the issue is caused by corrupt settings or configurations with your usual account. To do that, go to System Preferences > Users and Groups and select the +-shaped icon to add a new account.
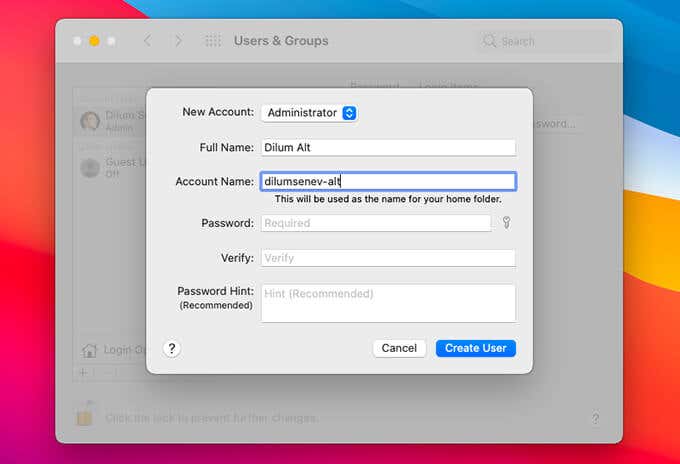
If your Mac works correctly after signing in to the new account, try repairing the disk permission on your Mac. Or, consider migrating to the new account.
What Else Can You Do?
Safe Mode is not the solution to all issues on your Mac. If you continue to experience problems, you might want to look into resetting the NVRAM and SMC. Both actions can improve the stability of macOS.
You can also load your Mac in single-user mode (press Command + S) at startup and run a file system consistency check (use the /sbin/fsck -fy command for that) to fix severe issues with the startup disk. Of course, another viable solution is to reinstall macOS from scratch.
Finally, if none of that helped, you must seek professional help by taking your Mac to the nearest Genius Bar.


