Make sure everything is A-OK
If your Mac is prone to freezing, slowing down, or crashing regularly during normal usage, file corruption issues are likely at play. You can confirm that by running a First Aid scan using Disk Utility on Mac. It not only checks for disk errors but also automatically fixes them.
Disk Utility is accessible from within macOS. But if you have trouble booting into the operating system, you must invoke it via macOS Recovery. The instructions below will walk you through running a check for disk errors using Disk Utility on Mac.

How To Run Check for Disk Errors in macOS
Suppose the issue appears to be minor, and you have no trouble booting into macOS. In that case, you can run a check for disk errors by accessing and using Disk Utility from within the operating system itself.
Note: Before you begin, it’s best to back up the contents of your Mac, just in case something goes wrong while Disk Utility repairs any disk errors.
1. Open the Mac’s Launchpad and select Other > Disk Utility. If you have trouble locating it, try typing Disk Utility into the Search bar at the top of the screen.

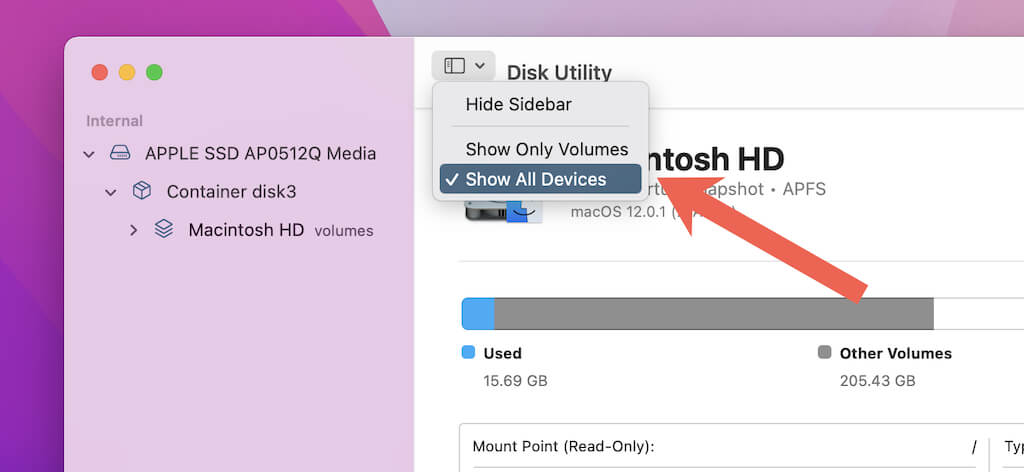
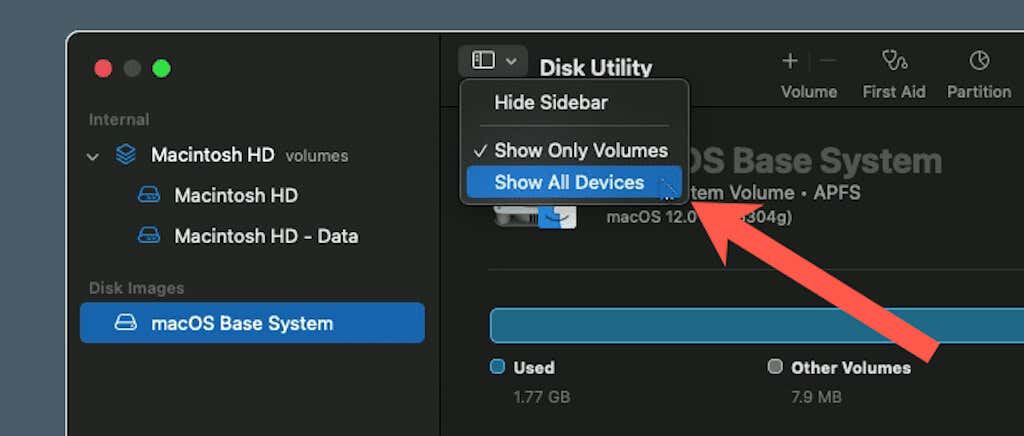
2. Open the View menu at the top of the Disk Utility window and select Show All Devices. That will prompt Disk Utility to reveal all volumes and containers on your Mac’s internal storage within its sidebar.
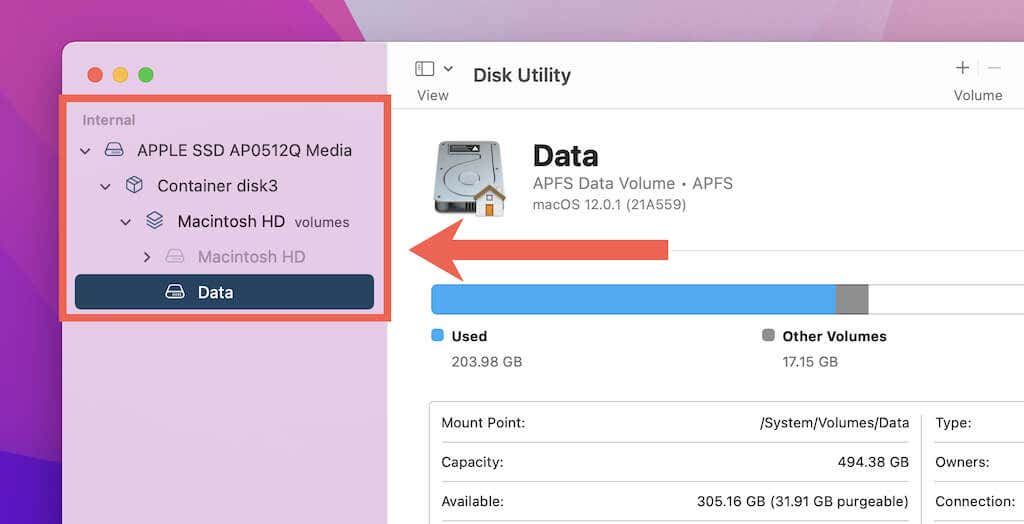
3. Select the last volume on the internal storage drive —e.g., the Data volume under the Macintosh HD volume group.
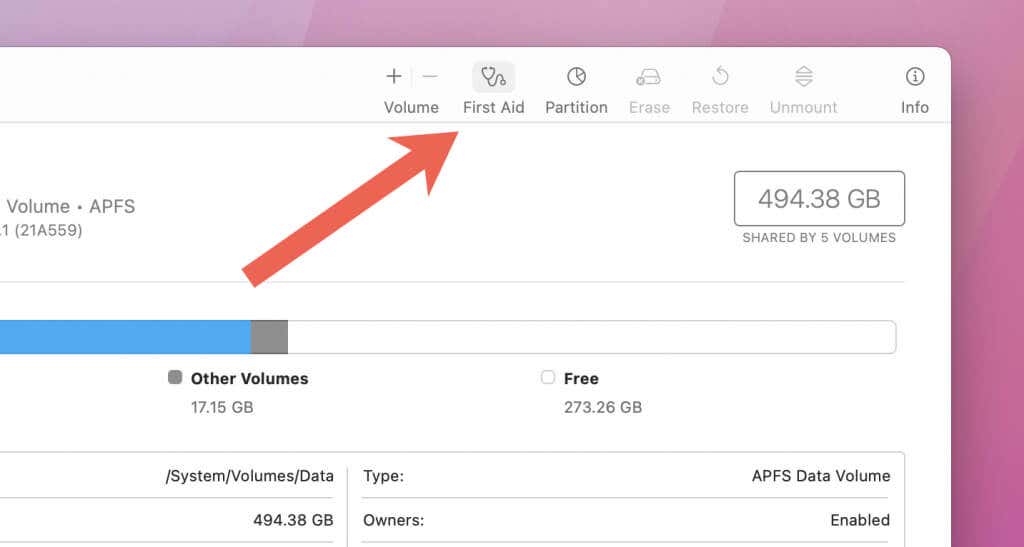
4. Select the button labeled First Aid.
5. Select Run.
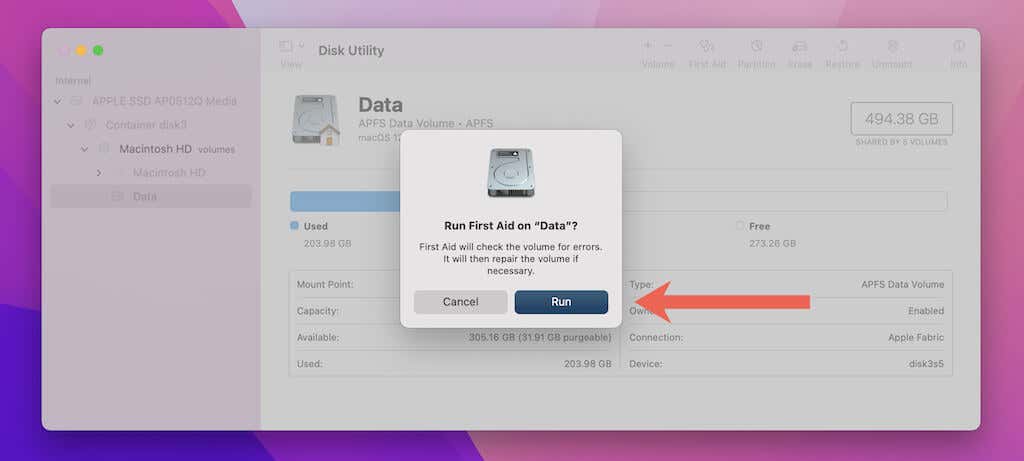
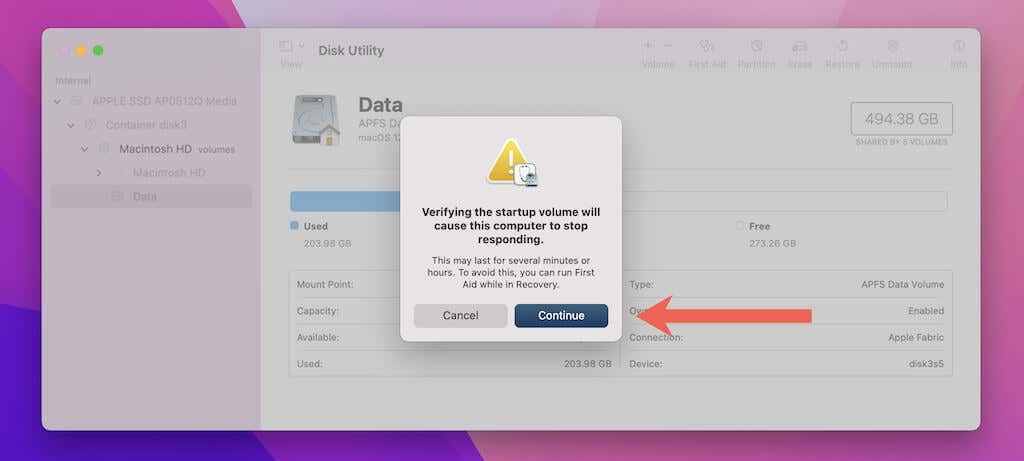
6. Select Continue. Wait until First Aid finishes checking for and repairing any disk errors on the selected volume. Your Mac will appear unresponsive in the meantime.
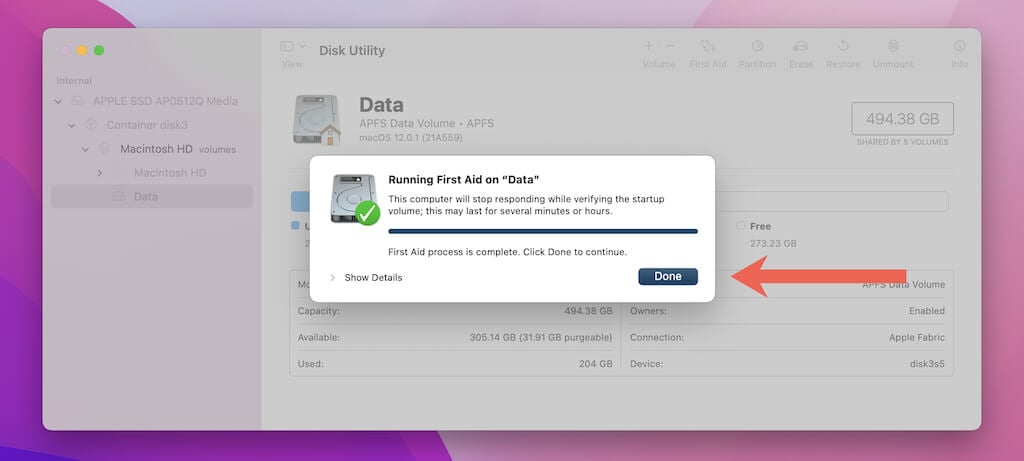
7. Select Done.
8. Repeat steps 3–7 by selecting and running First Aid on the remaining volumes within the drive. Then, focus your attempt on each container. Finally, run First Aid on the entire storage drive.
If Disk Utility on your Mac fails to repair the internal storage drive, it’s best to repeat the procedure in macOS Recovery.
How To Run Check for Disk Errors in macOS Recovery
If your Mac fails to boot into macOS, that usually indicates a severe problem with the internal storage. When that happens, you must invoke Disk Utility and check for disk errors via macOS Recovery. You must also use it if repairing the drive from within macOS fails.
macOS Recovery is an advanced recovery environment independent of the Mac’s operating system. However, the procedure to get into macOS Recovery is different for Apple Silicon and Intel Macs.
Enter macOS Recovery – Apple Silicon Macs
1. Turn off your Mac. If your Mac appears stuck at startup, press and hold the Power button to force shut it down.
2. Press and hold the Power button until you see the Loading startup options message flashes on the screen.
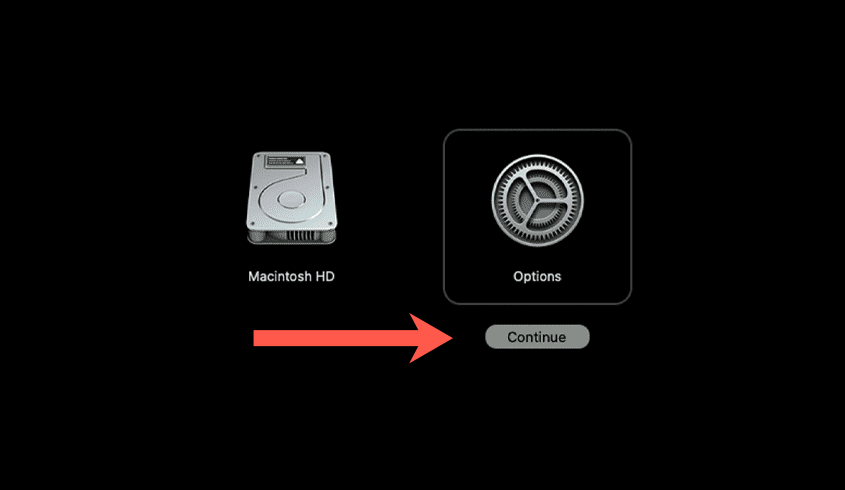
3. On the Startup Options screen, choose Options and select Continue.
4. Select your Mac’s user account, type in your password, and press Enter. macOS Recovery should load momentarily.
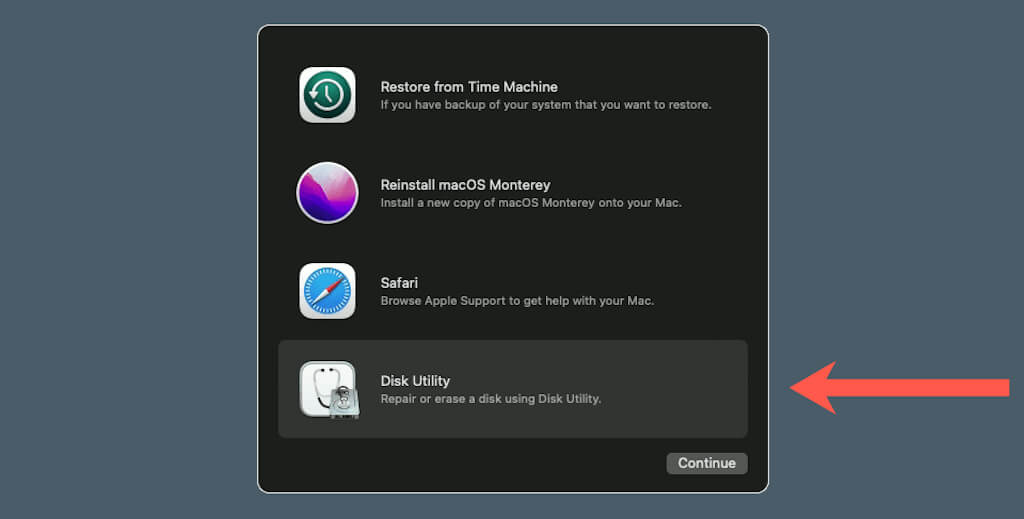
5. Choose the option labeled Disk Utility and select Continue.
Enter macOS Recovery – Intel Macs
1. Turn off your Mac. If your Mac appears stuck, hold the Power button to force shut it down.
2. Turn your Mac on, but immediately press and hold Command + R until you see the Apple logo. macOS Recovery should load momentarily.
3. If prompted, select your Mac’s user account and enter its password to proceed. Then, pick the option labeled Disk Utility and select Continue.
Run First Aid – Apple Silicon and Intel Macs
After loading Disk Utility in macOS Recovery on your Apple Silicon or Intel Mac, follow the steps below to check the internal storage for disk errors.
1. Open the View menu in Disk Utility and select Show All Devices.
2. Select the final volume under the internal storage drive.
3. Select First Aid.
4. Select Run.
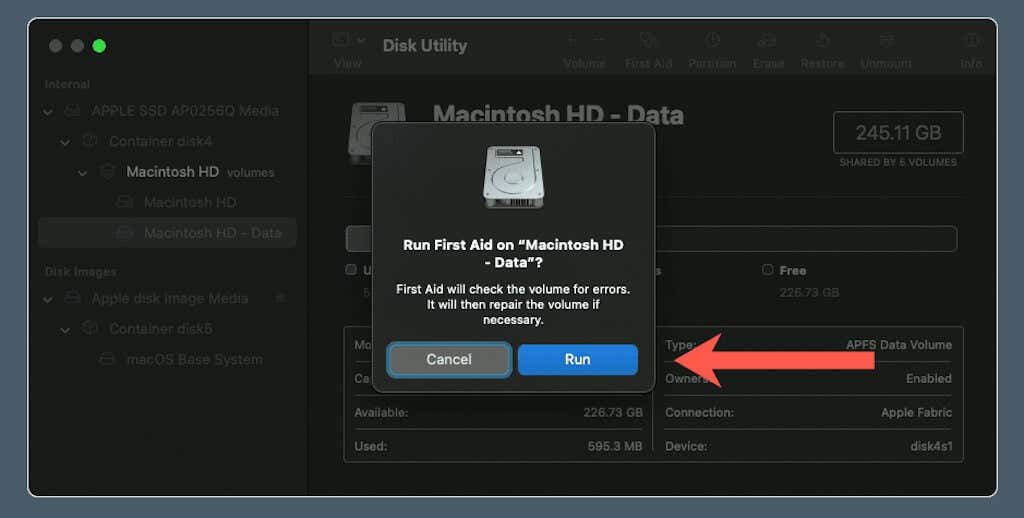
5. Wait for Disk Utility to finish checking for disk errors and select Done.
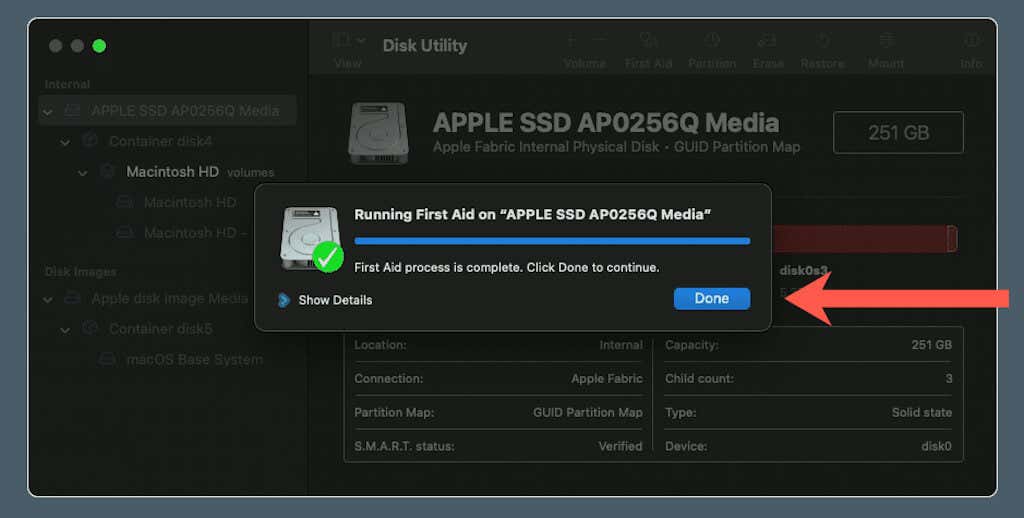
6. Repeatedly run First Aid on the other volumes and containers within the drive.
7. Run First Aid on the entire storage drive.
If Disk Utility finds and fixes disk errors, open the Apple menu and select Restart to reboot your Mac.
What Else Can You Do?
If Disk Utility fails to repair your Mac’s internal storage drive (or if repairing the drive continues to prevent you from booting into macOS), try running an FSCK scan in Single User Mode (press Command + S at startup and execute the /sbin/fsck -fy command). It’s a command-line tool capable of fixing additional drive-related errors.
If that fails, reload Disk Utility in macOS Recovery and erase the drive (pick the Macintosh HD volume group and select Erase). Then, exit Disk Utility and use the Reinstall macOS option to reinstall macOS. If you had Time Machine set up, you could restore your data after reinstallation. For more details, check our complete guide to using macOS Recovery.


