One of these should help you out
It’s essential to have your Mac’s screen-sharing functionality working correctly. You never know when you’ll need it. It could be to project your Mac’s screen to a second monitor or to collaborate with your teammate on a project remotely.
You should be able to share your screen with another Mac or other devices without issues. However, screen sharing can suddenly stop working on your Mac, either via screen-sharing apps or video conferencing tools (Skype, Zoom, Microsoft Teams, etc.). The tips in this article show you how to resolve the problem.

Enable the Screen Sharing Service
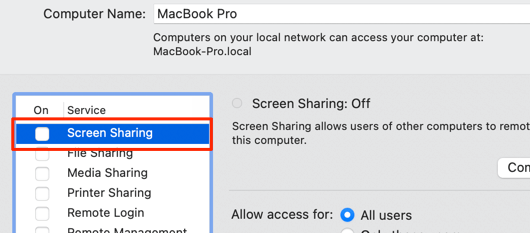
You need to have the system-wide Screen Sharing service enabled to view your Mac’s display on other devices. Open System Preferences, select Sharing, and check the Screen Sharing option.
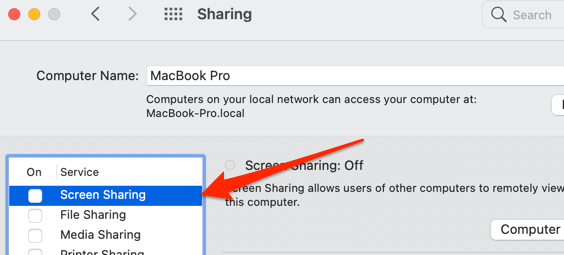
If your Mac still doesn’t show up on other devices, deselect Screen Sharing and re-enable the feature.
Disable Remote Management
macOS has a Remote Management feature that lets you manage your Mac from other devices using the Apple Remote Desktop app. You cannot simultaneously enable both “Screen Sharing” and “Remote Management” on macOS. That’s because the Remote Management tool takes control of the Screen Sharing service.
If you don’t use the Apple Remote Desktop app, disable remote management so you can share your MacBook’s screen.
Go to System Preferences > Sharing and deselect Remote Management.
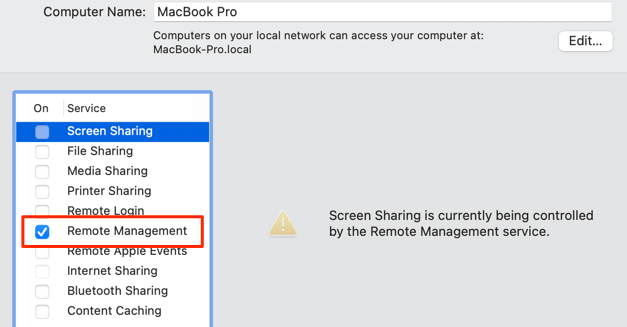
Afterward, check Screen Sharing and check if you can now access your Mac’s screen on other devices.
Switch to an Administrator Account
You need administrative access to use the macOS Screen Sharing service. If you signed in as a Guest user, switch to an administrator account. Click the account name on the Menu Bar (next to the battery icon), select the Administrator account, and enter the account password (or use Touch ID) to sign in.
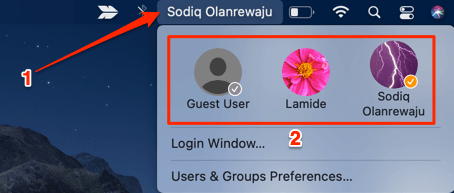
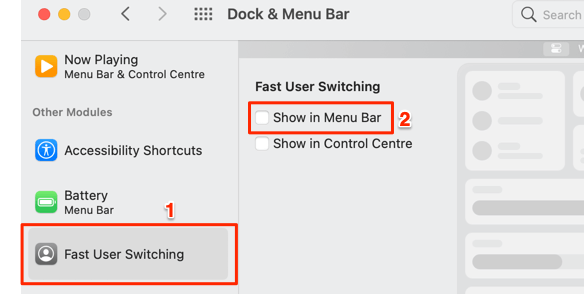
If you don’t find your account name on the menu bar, go to System Preferences > Dock & Menu Bar > Fast User Switching and check Show in Menu Bar.
Connect Your Devices to the Same Network
To share your MacBook’s screen with another computer, you must connect both devices to the same network. Check your Mac’s connection setting to ensure you’re properly connected to the network.
Extend Display Sleep Timeout
A screen-sharing session may come to an abrupt end if either of the devices goes to sleep. Keep your Mac and the other device awake and ensure they don’t go into sleep mode. You can adjust your Mac’s power settings, so it doesn’t go to sleep during screen sharing.
1. Click the battery icon on the menu bar and select Battery Preferences.
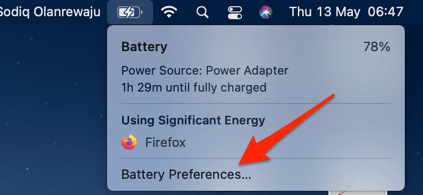
Or, go to System Preferences > Battery to access the Battery Preferences page on your MacBook.
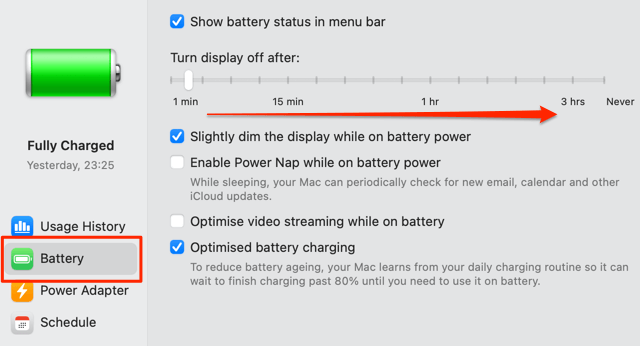
2. By default, macOS turns off your Mac’s display after 2 minutes of inactivity. Move the Turn display off after the slider to the right to increase the display timeout duration—maybe 30 minutes or more.
3. Go to the Power Adapter tab and adjust the display timeout to a lengthier period.
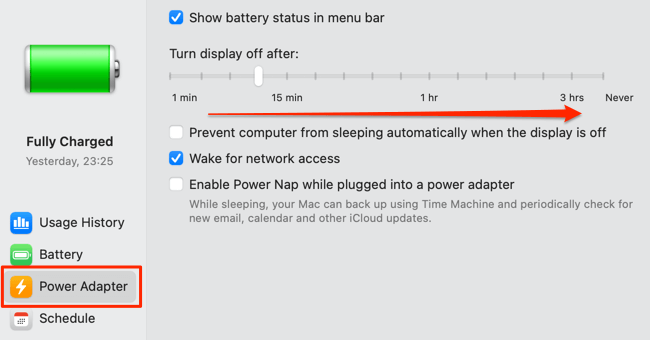
If you use a Mac desktop (iMac or Mac Pro), head to System Preferences > Energy Saver to access the Battery Preferences menu.
Note: Remember always to close your MacBook’s lid or put it to sleep when it’s not in use. Constantly leaving the display on for too long will shorten its battery life and possibly damage your Mac.
Enable Screen Recording Access
The first time an app attempts to record or share your Mac’s screen, you’d get a prompt to grant the app screen recording permission. If you deny the permission (perhaps accidentally), screen sharing won’t work with the app on your Mac.
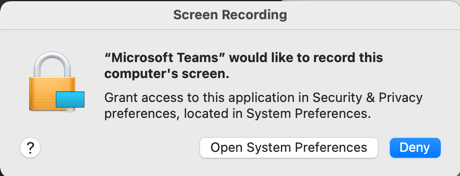
1. Open System Preferences, select Security & Privacy, head to the Privacy tab, and select Screen Recording on the sidebar.
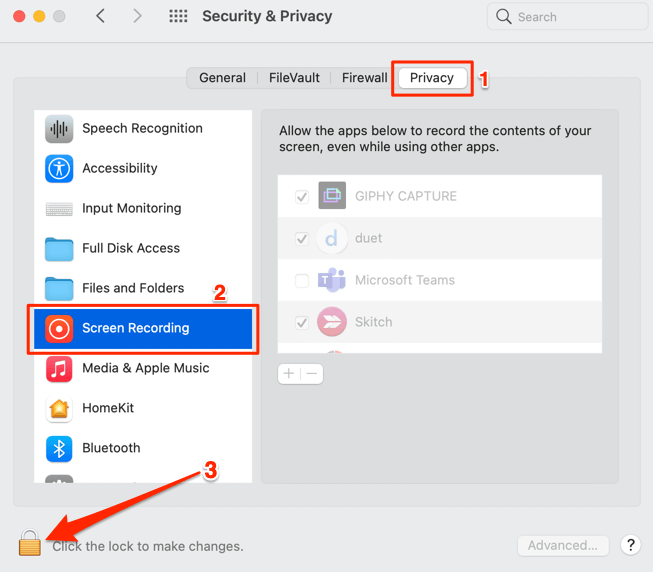
2. Click the lock icon at the bottom-left corner, enter your Mac’s password (or use Touch ID), and ensure the affected app is selected.
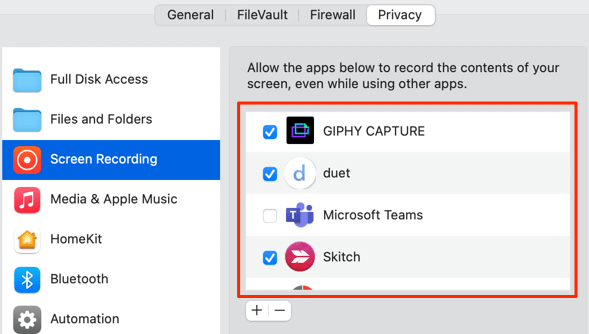
If you can’t find the app in the box, you probably denied the app access to record your screen.
3. Click the plus icon to add the app to the list.
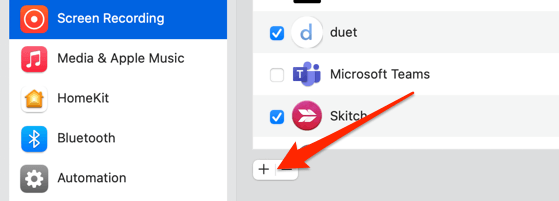
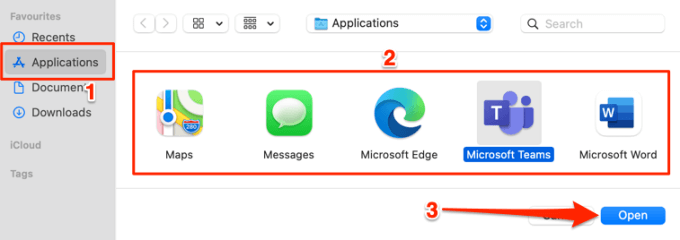
4. In the Finder window, go to the Applications folder, select the app to grant screen recording access, and select Open. Afterward, launch the app and try sharing your screen again.
Force Quit and Restart the App
Many times, force-closing an app can fix issues causing the app’s features to freeze or malfunction. If you can’t use screen-sharing within an app, force quit the app and try again.
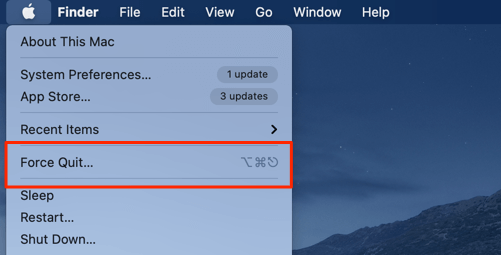
1. Press Command + Option + Escape to open the “Force Quit Applications” window. Or, select the Apple logo on the menu bar and select Force Quit.
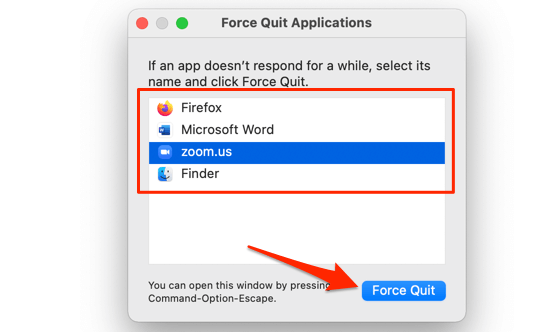
2. Select the problematic app and click the Force Quit button at the bottom corner.
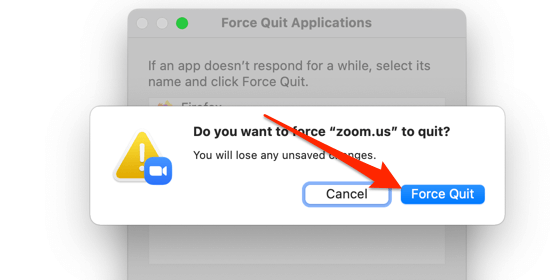
3. Select Force Quit on the prompt.
4. Relaunch the app and check if you can now share your Mac’s screen without issues.
Disable or Change Your Firewall’s Settings
The built-in macOS firewall offers sufficient protection against unwanted intrusion. You don’t need third-party firewall software. Besides slowing down your Mac, many third-party firewalls can block screen-sharing and file-sharing activities. If you have a firewall installed on your Mac, disable the app or ensure it has permission to share your Mac’s screen.
You should also check the configuration of the built-in macOS firewall and ensure the affected app has screen-sharing access. Force close the app and follow the steps below.
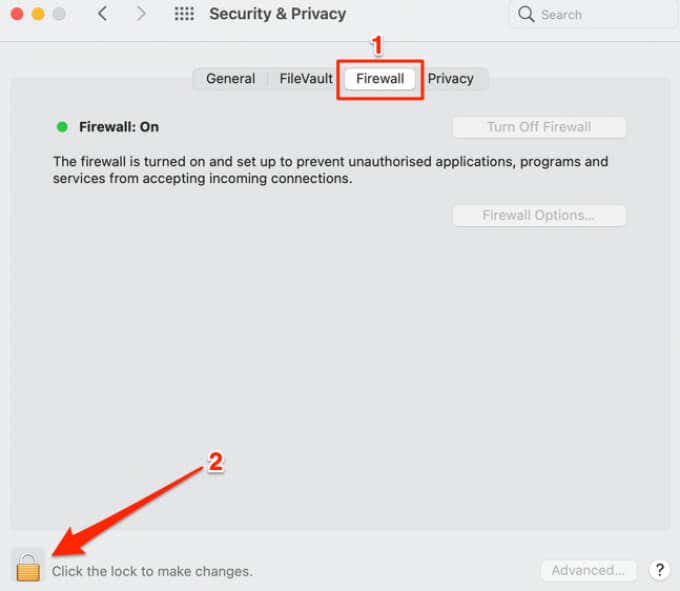
1. Open System Preferences, select Security & Privacy, go to the Firewall tab, click the lock icon at the bottom-left corner and enter your Mac’s password or authenticate using Touch ID.
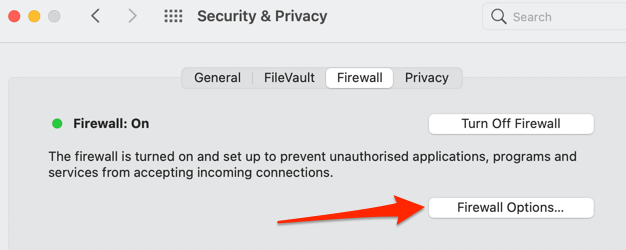
2. Select Firewall Options.
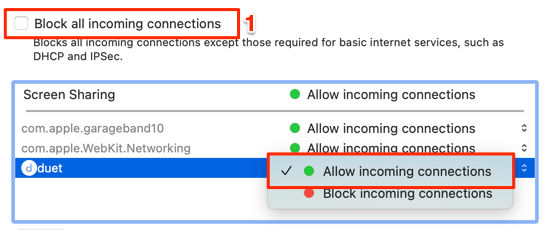
3. Make sure you deselect “Block all incoming connections.” Afterward, check the Screen Sharing box and set the screen-sharing app’s permission to “Allow incoming connections.” If the app is blocked from sharing your Mac’s screen, click the drop-down button and select Allow incoming connections.
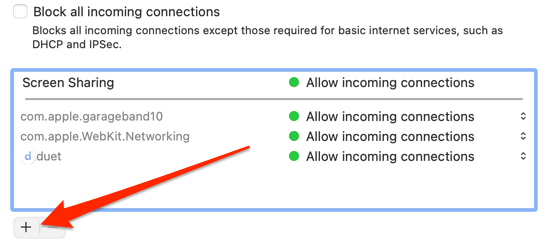
4. If you can’t find the affected app in the Firewall Options, click the plus icon below the “Screen Sharing” box to whitelist the screen-sharing app.
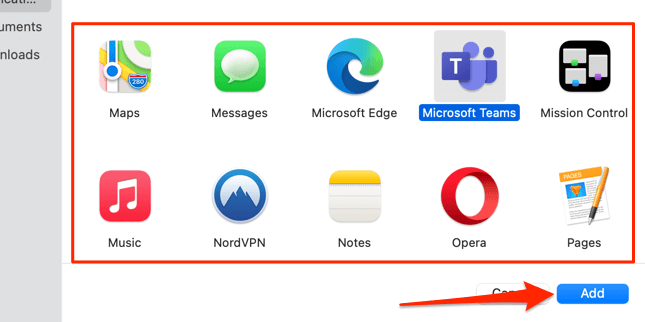
5. Select the app in the Applications folder and click Add.
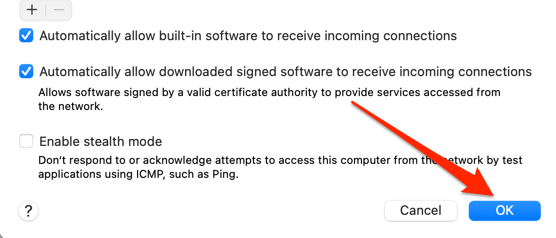
6. Finally, select OK to save the firewall permissions.
Restart Your Mac
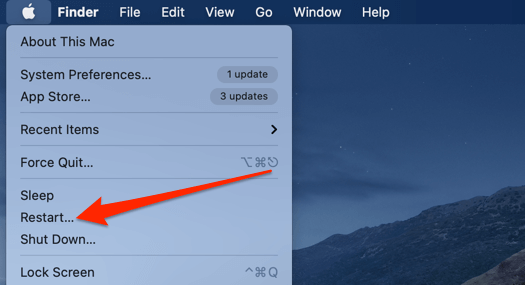
You should power-cycle your Mac if none of the recommendations above resolved Mac screen sharing not working. Click the Apple logo on the menu bar and select Restart.
Be sure to close other apps before restarting your Mac so that you don’t lose any unsaved tasks or documents.
Update the App
Screen sharing may fail to work if the app attempting to record your screen is outdated or buggy. Visit the App Store, the app’s settings menu or the developer’s website to check if there’s an update available for the app. Install the latest version of the app and try sharing your screen again.
Update or Upgrade Your Mac
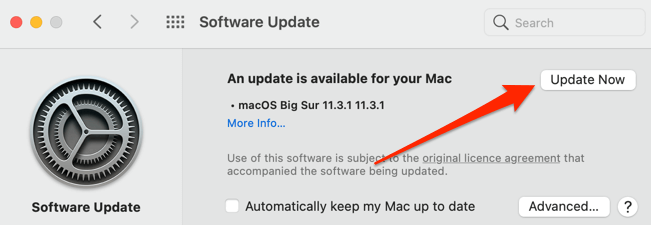
You also need to ensure your Mac is up-to-date. Connect your Mac to the internet, go to System Preferences > Software Update and click the Update Now (or Upgrade Now) button.
Contact Apple Support
In the rare instance that these troubleshooting tips don’t resolve when your Mac screen sharing isn’t working, visit a nearby Genius Bar or Apple-certified technician.


