Allows you to purchase or play content
If you want access to Apple TV purchases on your MacBook, simply signing in with your Apple ID isn’t enough—you also need to authorize the Mac.
This tutorial will show you how to authorize a MacBook for Apple TV. Since Apple limits the number of computers you can authorize, you’ll also learn how to deauthorize devices.
Why You Need to Authorize Your MacBook
Streaming Apple TV+ content through the Apple TV app on your MacBook is straightforward—sign in with your Apple ID, and you’re good to go. But when it comes to watching movies or TV shows that you purchase separately from Apple TV or the iTunes Store, you must authorize the Mac.
Authorization is part of Apple’s digital rights management policy. Apple permits up to five computers—including Macs and PCs—to be authorized anytime. You can easily authorize a new device if you have an available authorization slot. Apple’s mobile devices—like iPhones and iPads—don’t require authorization.
Authorization is also required to access purchases for Apple Music and Apple Books. When you authorize Apple TV for your MacBook, it automatically authorizes the device for Music and Books, and vice versa. You do not have to authorize a computer to play music through an Apple Music subscription.
How to Authorize a Mac for Apple TV
If you haven’t reached Apple’s five-device limit, you can quickly authorize your MacBook for Apple TV through macOS’ native Apple TV app. Here’s what you must do:
- Open Apple TV. You can find it in the Applications folder or launch it from the Dock.
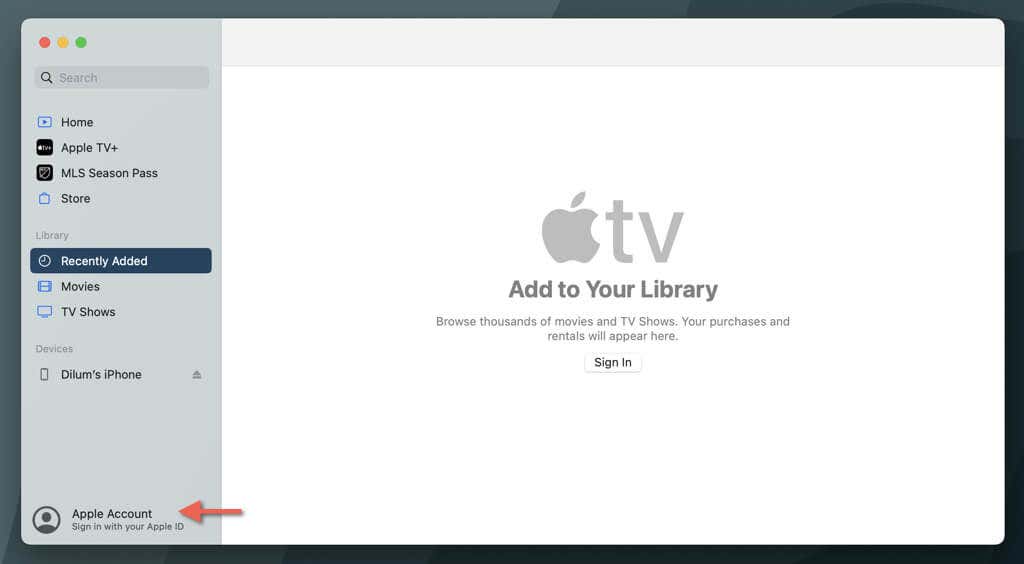
- Select Apple Account at the lower-left corner of the window and sign in with your Apple ID. Skip this step if you’re already signed in.
- Select Account on the menu bar at the top of the screen.
- From the drop-down menu, point to Authorizations and select Authorize This Computer.
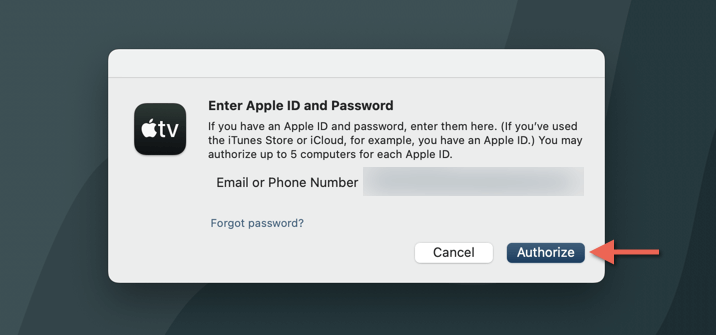
- You’ll be prompted to enter your Apple ID and password. Fill in these details to proceed.
- Select Authorize to complete the process.
Once authorized, the Apple TV app on your MacBook can play all Apple TV and iTunes Store purchases.
Note: If you encounter a message indicating that you’ve reached your Apple ID’s device authorization limit, check the next section for instructions on deauthorizing another computer.
Alternatively, you can authorize a Mac using the Apple Music and Apple Books apps. The steps are identical. Just:
- Launch Music or Books and sign in with your Apple ID if you haven’t already.
- Select Account > Authorizations > Authorize This Computer on the menu bar.
- Fill in your Apple ID credentials and select Authorize.
How to Deauthorize Another Computer
There may come a time when you must deauthorize a computer, especially if you’ve reached the limit of authorized devices—Apple only allows up to five computers to be authorized at a time—or if you no longer plan on using a particular Mac or PC going forward. To do that:
- Log into the macOS or Windows device you want to deauthorize.
- Open the Apple TV, Apple Music, or Apple Books app. If you’re on a PC, open iTunes.
- Select Account on the menu bar.
- Point to Authorizations and choose Deauthorize This Computer.
- Enter your Apple ID and password when prompted.
- Select Deauthorize to confirm the action.
To reiterate, deauthorizing a computer means it can no longer access content purchased from the iTunes Store. However, on Mac devices, as long as you are signed in with your Apple ID, you should still be able to stream content from Apple TV+ without any problems.
The same applies to Apple Music—you won’t be able to stream songs you’ve purchased from iTunes, but you will still have access to stream songs with your Apple Music subscription.
How to Deauthorize All Computers
If you can’t access a computer you’ve previously authorized (for instance, if it’s a device you’ve sold or lost), the only way to free up that slot is to deauthorize all Macs and PCs associated with your Apple ID. It’s unavoidable if you’ve used up all your authorization slots.
Once you do that, you must manually re-authorize the devices you still use. It’s also crucial to remember that you can deauthorize all computers only once per year.
On any authorized macOS or Windows device:
- Open Apple TV, Apple Music, Apple Books, or iTunes.
- Select Account on the menu bar.
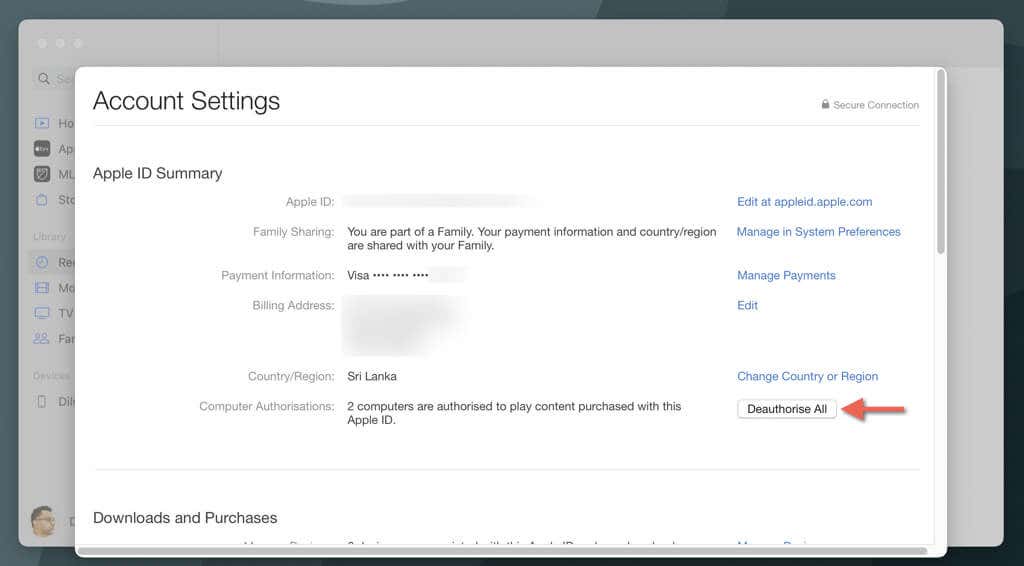
- Select Account Settings or View My Account and authenticate your Apple ID if prompted.
- Scroll down to the Apple ID Summary section.
- Next to the Computer Authorizations section, you’ll see the number of computers you’ve authorized—select Deauthorize All.
- Confirm the deauthorization process and select Deauthorize All again when prompted.
The steps above will deauthorize all computers—not just the ones you don’t have access to. You can then reauthorize the computers you still use—just open the TV, Music, Books, or iTunes on the device and select Account > Authorizations > Authorize This Computer on the menu bar.
Authorize Your Mac to Play Apple Purchases
Authorizing and deauthorizing computers is essential to accessing content you buy from the iTunes Store on Macs and PCs, not just for Apple TV but also for Apple Music and Apple Books.
Remember that you’re limited to authorizing up to five computers anytime. So, if you frequently use your Apple ID across multiple devices, it’s important to manage these authorizations so that you can stream or download your purchases smoothly without complications.

