Plus a great search alternative app
Do you keep running into issues while using Spotlight Search on Mac? Perhaps it fails to locate specific apps and documents. Or maybe it crashes or fails to show up. Many reasons—such as buggy system software, incorrectly configured settings, and corrupt search indexing—often result in Spotlight Search not working on Mac.
This troubleshooting guide will suggest fixes to help you resolve Spotlight-related problems on Mac. These involve restarting the relevant services, double-checking your search settings, rebuilding the Spotlight index, and so on. It’s best to work through them in the order they appear while skipping any that don’t apply.

1. Restart Spotlight-Related Services
If Spotlight crashes or freezes, it’s a good idea to kick things off by force-shutting down the system service that manages your Mac’s user interface.
1. Open the Launchpad and select Other > Activity Monitor.

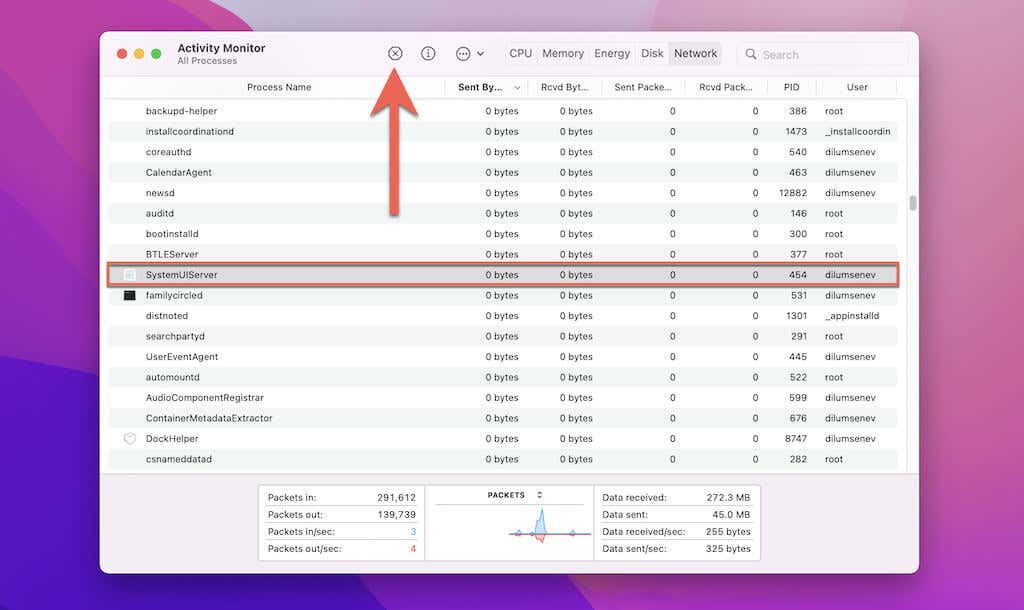
2. Use the search field at the top-right to locate the following service under the CPU tab:
SystemUIServer
3. Highlight the service. Then, select the Stop button at the top of the screen.
4. Select Force Quit.
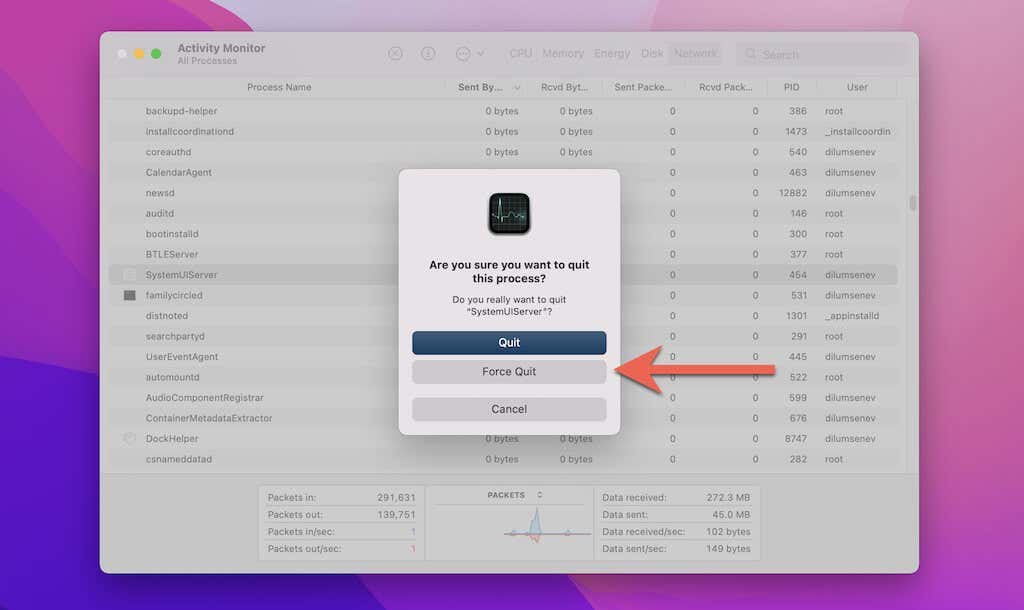
5. Optionally, continue by force-quitting the following services related to the Spotlight Search feature:
Spotlight
mds
6. Exit the Activity Monitor.
2. Restart Your Mac
Next up, try restarting your Mac. The issue might simply result from a bug or glitch in macOS that nothing other than a simple reboot could fix.
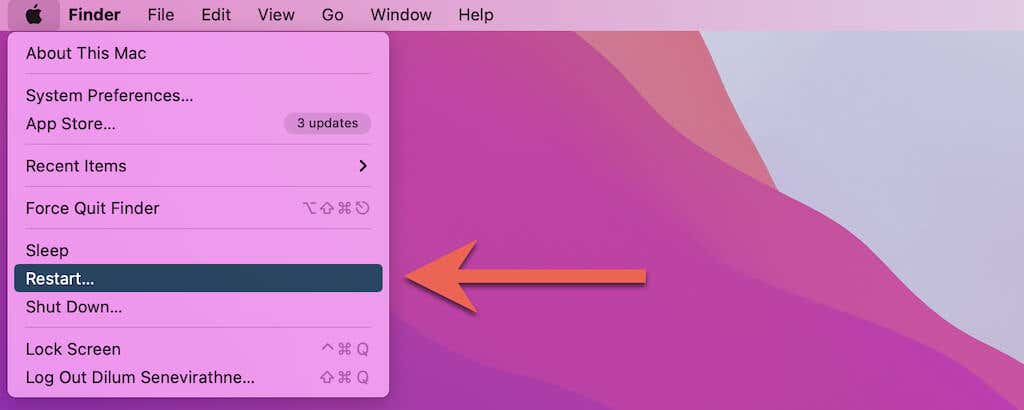
1. Select the Apple logo on the menu bar and choose Restart.
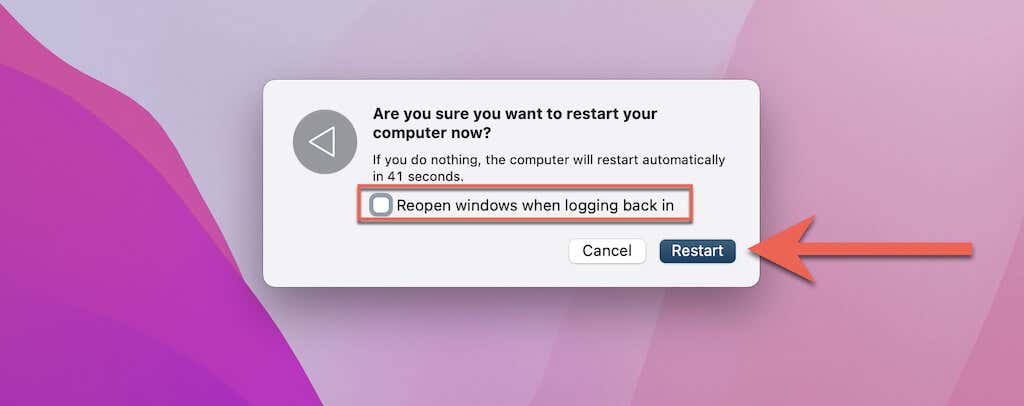
2. Uncheck the box next to Reopen windows when logging back in.
3. Select Restart again.
Tip: Rebooting the system software is a great way to fix Spotlight on other Apple devices like the iPhone, iPad, and Apple Watch.
3. Check Your Keyboard Shortcuts
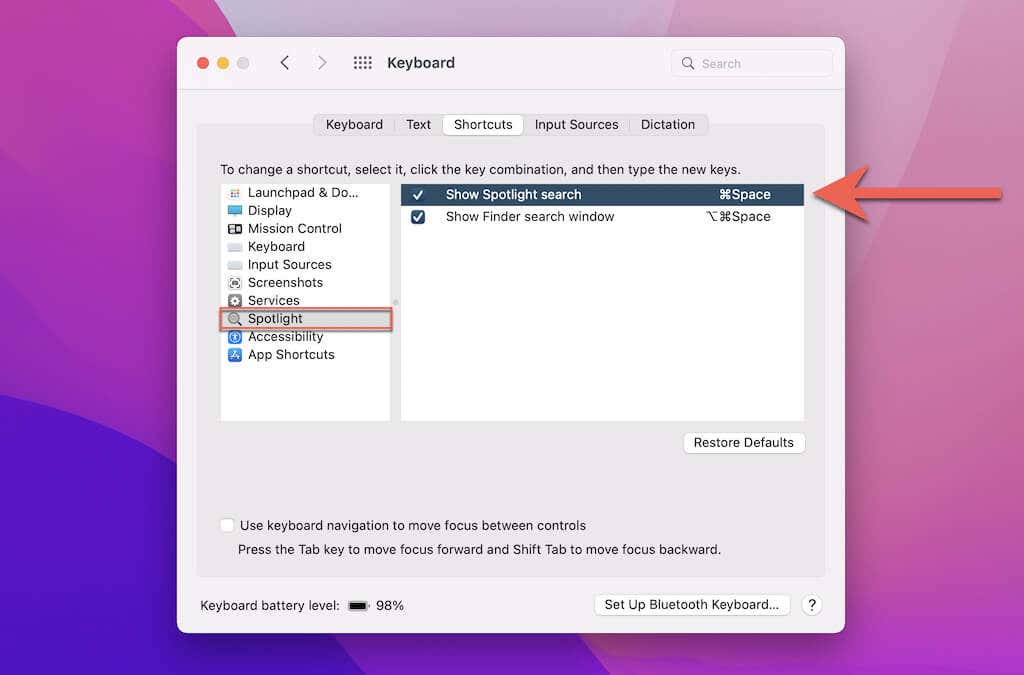
If you press Command + Space or Option + Command + Space, but nothing happens, check if the keyboard shortcut for Spotlight Search or Finder Search is active.
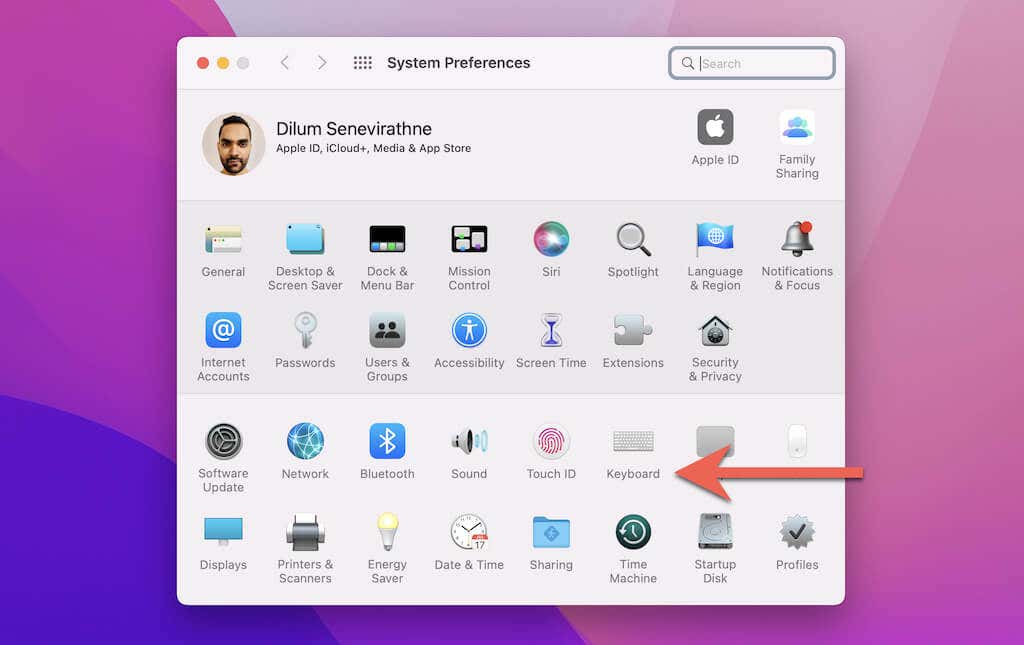
1. Open the System Preferences app. If you don’t see it in the Mac’s Dock, open the Apple menu and select System Preferences.

2. Select Keyboard.
3. Switch to the Shortcuts tab.
4. Select Spotlight on the sidebar.
5. Check the boxes next to Show Spotlight search and Show Finder search window.
4. Check Your Spotlight Settings
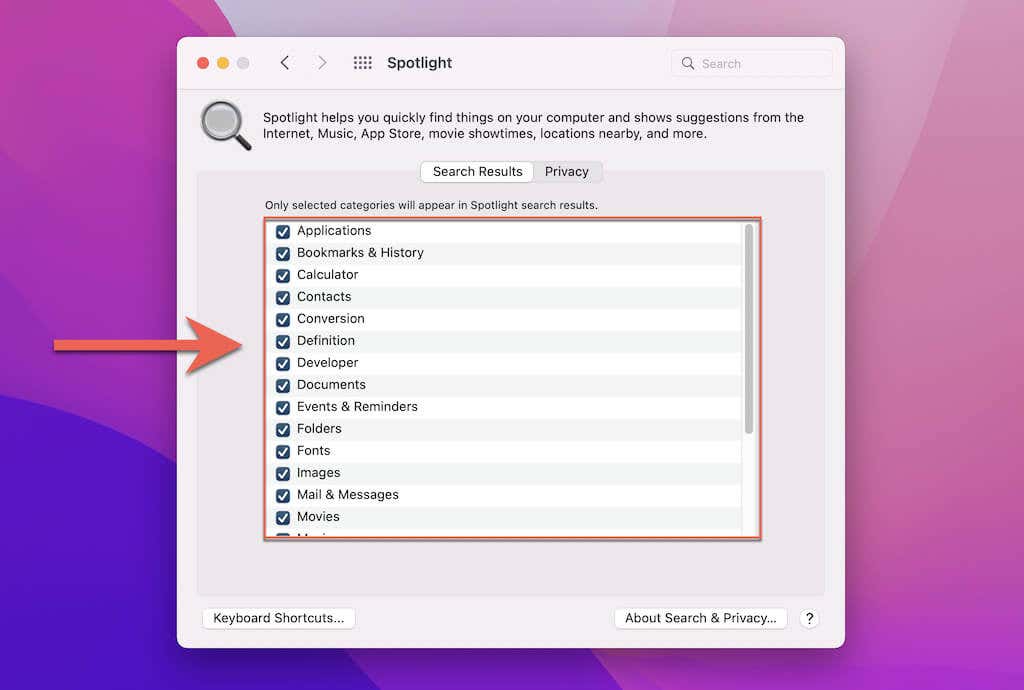
If Spotlight doesn’t reveal specific files or apps in its search results, check your Mac’s search settings. You must then make sure that Spotlight is set up to display the search result categories you want. You may also want to remove items from Spotlight’s exclusions list as needed.
1. Open System Preferences and select Spotlight.
2. Check the boxes next to the categories (Applications, Documents, Siri Suggestions, etc.) you want to appear in Spotlight’s search results under the Search Results tab.
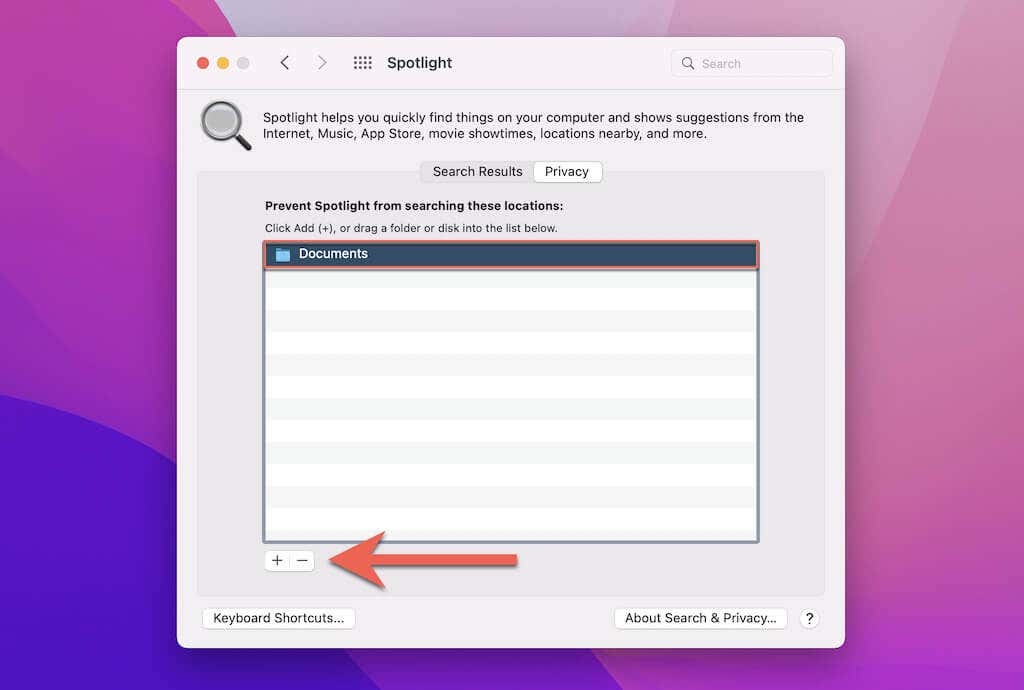
3. Follow that by switching to the Privacy tab to reveal any files, folders, and apps excluded from Spotlight indexing. Then, select and use the Minus button to delete items. That will make them show in search results again.
5. Update Your Mac
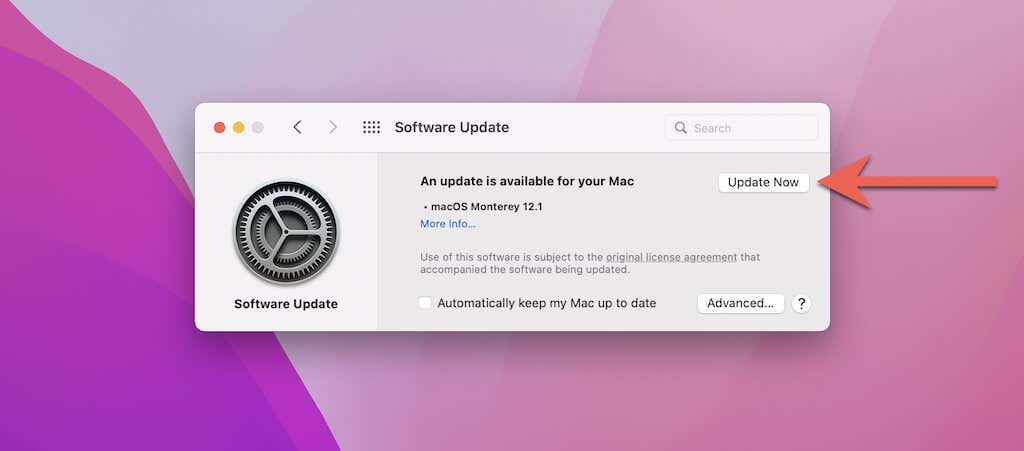
Buggy system software can cause all sorts of issues to crop up on your Mac. For example, if you upgrade to a newer macOS iteration, problems related to Spotlight and other system-related functions are commonplace. The best way to fix that is by updating your Mac.
1. Open the System Preferences app and select Software Update.
2. Wait until your Mac finishes scanning for updates.
3. Select Update Now.
6. Check for Disk Errors
If you continue experiencing Spotlight-related issues, try checking for drive-related errors using the built-in Disk Utility applet in macOS.
1. Open the Launchpad and select Other > Disk Utility.
2. Select Macintosh HD on the sidebar.
3. Select the button labeled First Aid.

4. Select Run.

5. Wait until Disk Utility finishes scanning for and repairing any disk errors. Then, select Done.
Optionally, you can repair drive errors by booting your Mac into macOS Recovery. Do that if Disk Utility detects but fails to fix disk errors.
7. Reindex Spotlight Search
The following fix involves manually rebuilding the Spotlight index for specific directories or the entire internal storage on Mac.
1. Open the System Preferences app and select Spotlight.
2. Select the Plus button and pick the folder or folders you want to reindex. If you want to rebuild the Spotlight index for your entire Mac, drag Macintosh HD from the desktop and into the Privacy tab.
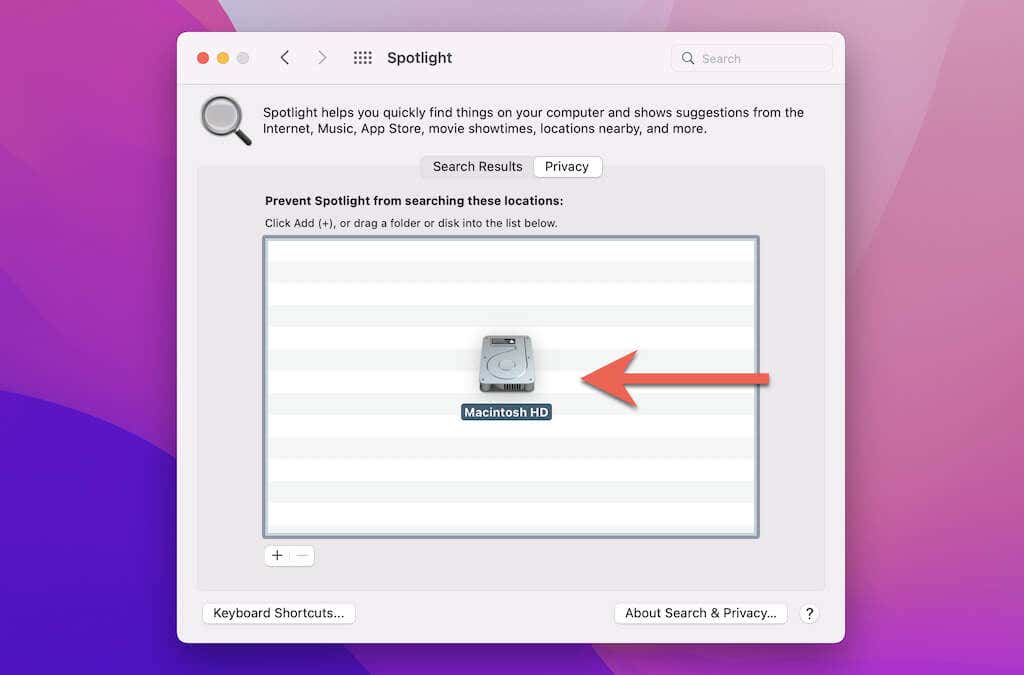
Note: If you don’t see the Macintosh HD icon on your Mac’s desktop, open Finder and select Finder > Preferences on the menu bar. Then, check the box next to Hard Disks under the General tab.
3. Select OK to confirm you want to stop Spotlight indexing for the directory or drive.
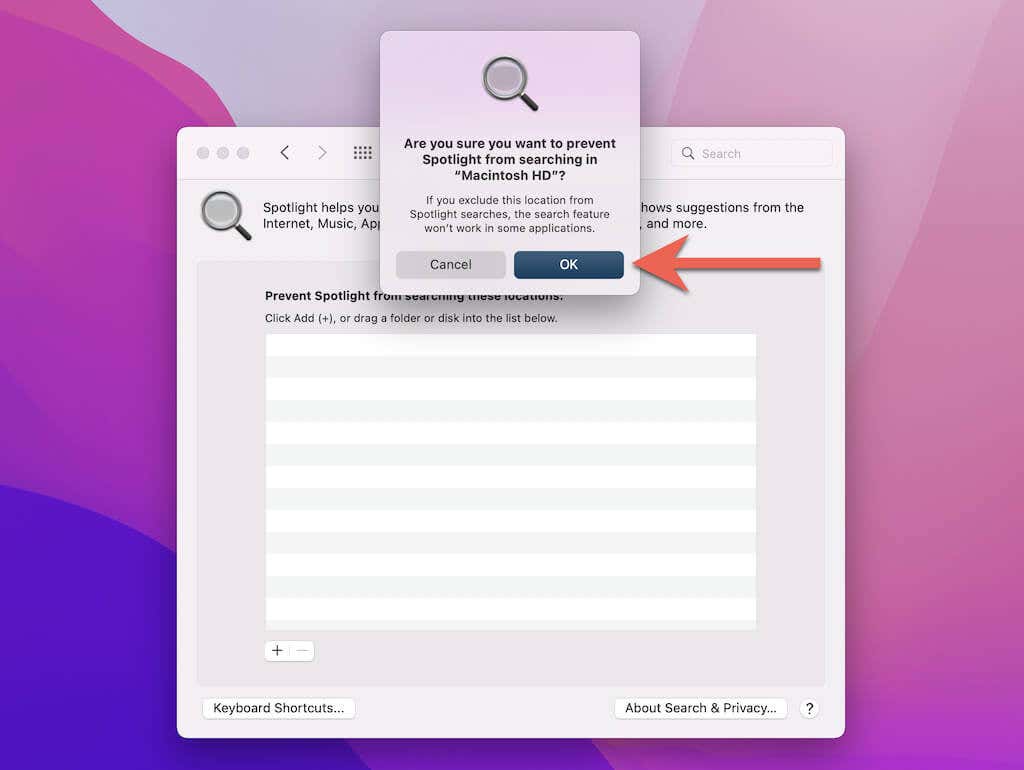
4. Select the item you just added and use the Minus button to delete it. That forces your Mac to rebuild the index. If you choose to reindex the entire internal storage, you may have to wait for up to an hour or more before you can use Spotlight again.
8. Disable and Reactivate Spotlight Index
If Spotlight still fails to work, try erasing and rebuilding your Mac’s search index using Terminal.
1. Open the Launchpad and select Other > Terminal.
2. Run the following command to erase the Spotlight index:
- sudo mdutil -Ea
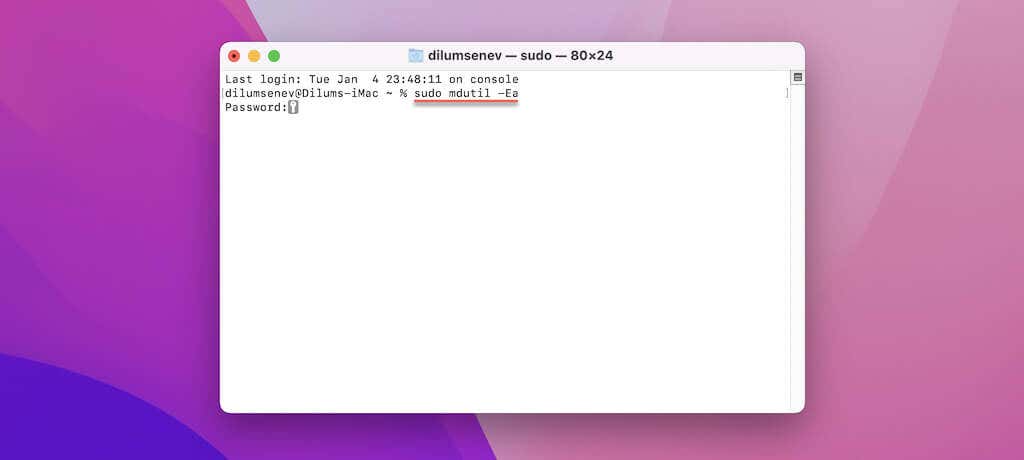
3. Type in your Mac’s password and press Enter.
4. Run the following commands one after the other to deactivate and reactivate Spotlight indexing:
- sudo mdutil -ai off
- sudo mdutil -ai on
5. Exit Terminal.
9. Clear the Mac’s Cache
A corrupt application and system cache on Mac is another reason that prevents Spotlight from working correctly. The fastest way to deal with that involves using a free app called Onyx.
1. Download and install Onyx.
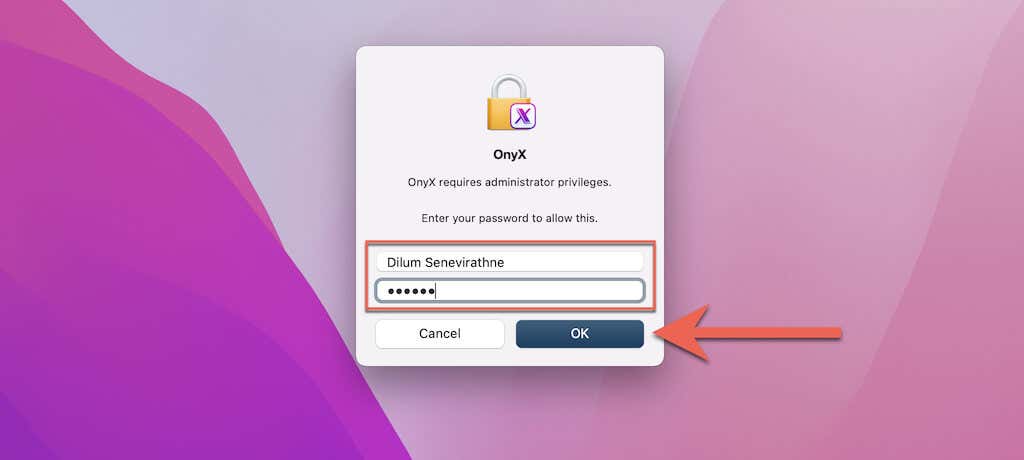
2. Open Onyx and enter your administrator passcode.
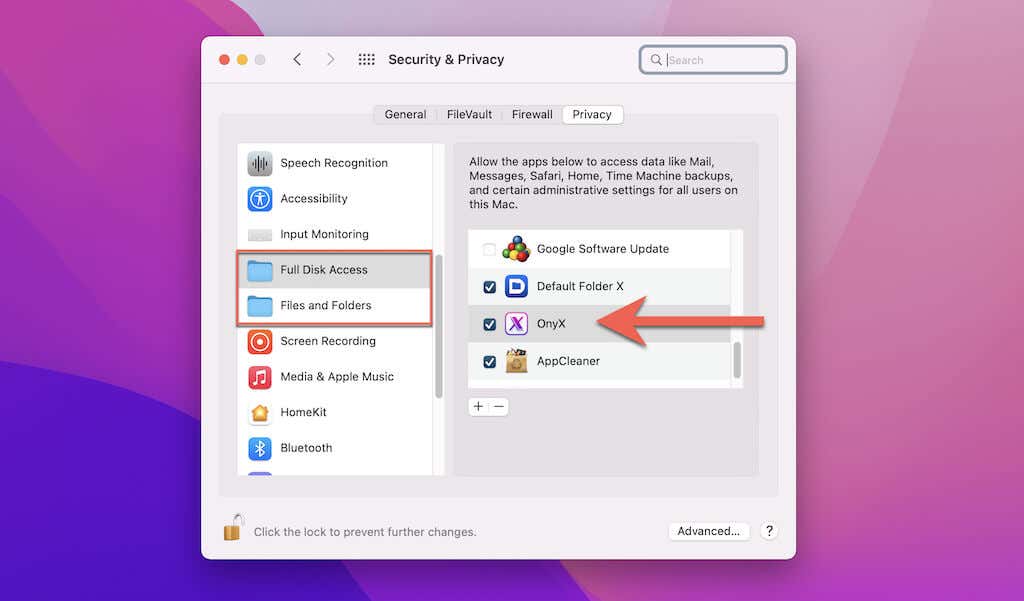
3. Follow the on-screen instructions to provide the Onyx permissions to run on your Mac. That involves selecting Open System Preferences and activating Onyx under the Full Disk Access and Files and Folders sections.
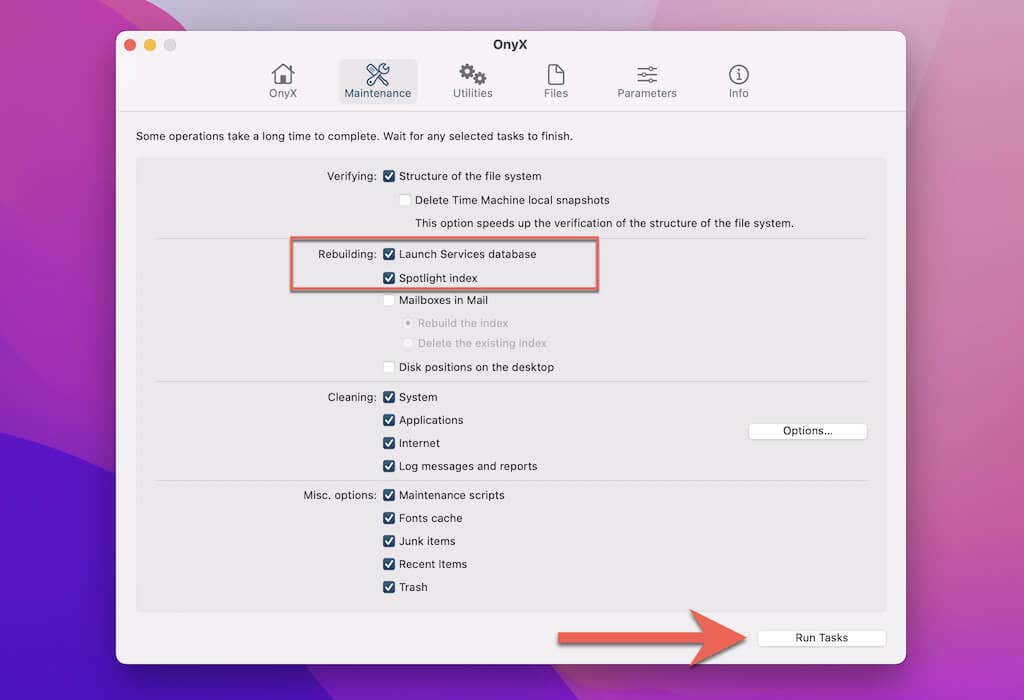
4. Switch to the Maintenance tab.
5. Keep the default selections in place. If you want to rebuild the Spotlight index again, check the boxes next to Launch Services database and Spotlight index.
6. Select Run tasks.
Onyx will begin clearing the application and system caches. Your macOS device will automatically power off and reboot in the meantime.
Back In the Spotlight
If the above pointers failed to fix Spotlight Search not working issues on Mac, try performing additional diagnostics in Safe Mode. If you run into problems even after that, consider installing a Spotlight alternative—we recommend Alfred—and wait for the next macOS update (which will hopefully address the problem). If you can’t wait, your only recourse is to reinstall macOS from scratch or contact Apple Support for extra help.


