Try it, you might like it
It’s easy to think that your Mac is safe and secure on the internet. Though macOS is not as vulnerable as Windows, Mac owners still should consider using a firewall to protect their computers from unwanted intrusion.
The first layer of protection you should use is a firewall, which blocks apps and services from accessing your computer. Use the steps below to configure your Mac Firewall.
What is a Firewall?
A firewall functions as a barrier between your computer and nefarious software on the internet. It protects your computer by blocking access to your computer and allowing only those apps and services that you trust.
macOS has a built-in firewall that we recommend you use instead of a third-party firewall or antivirus software. These third-party software packages run on top of macOS and may slow down your system. The macOS version has a minimal effect on your computer’s performance. It runs in the background, and you don’t even know that it’s there.
How to Enable the Mac Firewall
Like most macOS settings, the firewall control panel is found in the system preferences for macOS. The firewall only takes a few steps to enable. Use the directions below to turn on the Mac Firewall and then configure it if needed.
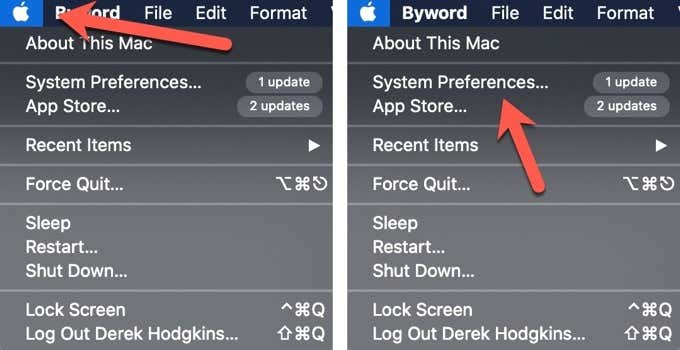
- Select the Apple menu in the upper left corner and then select System Preferences.
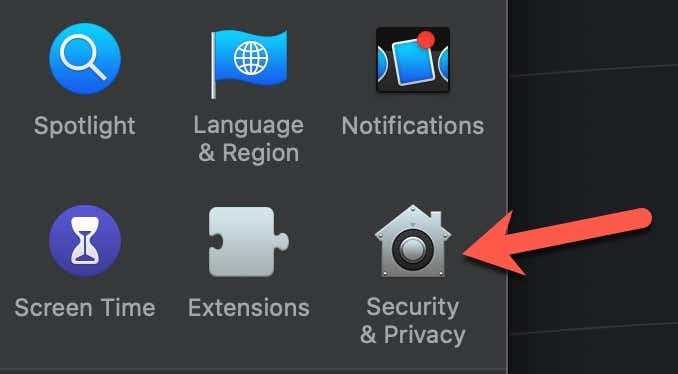
- Select Security & Privacy.


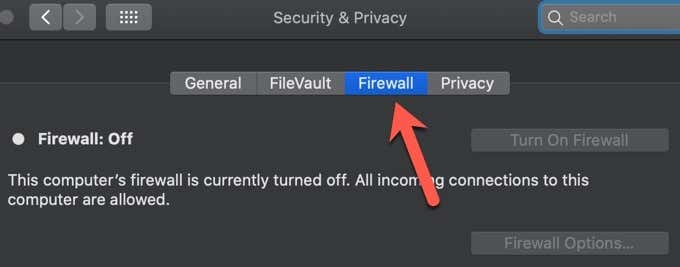
- Select the Firewall tab.
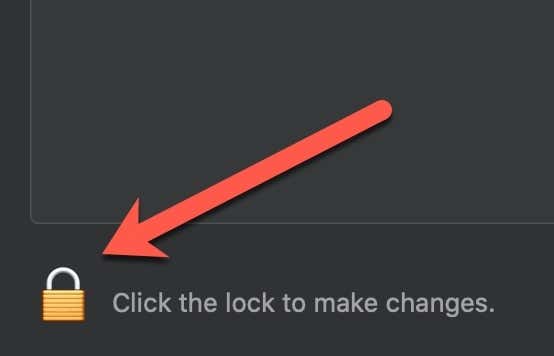
- Select the lock icon in the lower-left corner to unlock the settings.
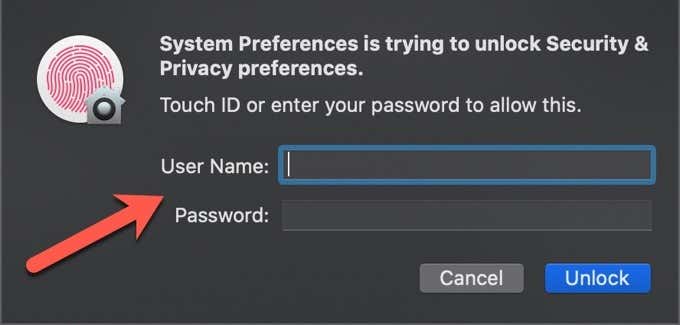
- Enter the administrator name and password when prompted.
- Select Turn On Firewall.
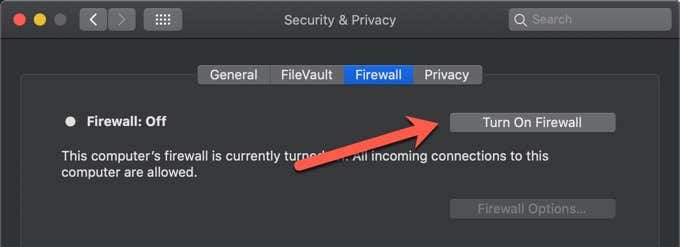
This will enable the Mac Firewall with the default settings. Most apps will be blocked, though some system apps, services, and processes may pass through the Firewall. If everything is working as expected, you can start using your computer and forget the Firewall knowing that it keeps you safe.
How to Configure the Mac Firewall
You need to turn on the Mac Firewall and then configure it so your essential apps are not blocked. You may also want to block apps and services that may pose a threat.
- Select the Apple menu in the upper left corner and then select System Preferences.


- Select Security & Privacy.


- Select the Firewall tab.

- Select the lock icon in the lower-left corner to unlock the settings.

- Enter the administrator name and password when prompted.

- Select Firewall Options to configure the Firewall

- There are a handful of settings that you can change within the Firewall options. The first is Block All Internet Connections. This setting blocks all incoming connections and should only be changed if you know you won’t be using any file sharing, remote access, or similar apps that rely on an incoming connection.

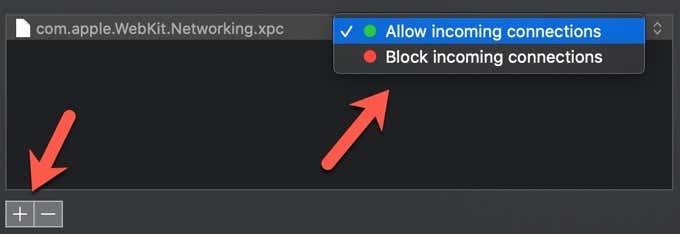
- The next setting you can change is Add +. This lets you add an app or service which then can be set to Allow incoming connections or Block incoming connections. You also can select the Remove – to delete a service or app from the Mac Firewall.
- The next two sections, Automatically allow built-in software to receive incoming connections and Automatically allow downloaded signed software to receive incoming connections, are enabled by default. These settings automatically add trusted apps and trusted to the Firewall’s list of allowed apps.
This is a convenient feature that adds these entries without requiring you to authorize each app or service you install. We recommend leaving them enabled unless you want granular control over the firewall access granted to the apps you install.

- Up next is Enable Stealth Mode. This stealth mode setting tells your Mac to ignore incoming connections that are pinging your computer and asking for information without authorization. This option blocks unauthorized requests from hackers and malware, but it doesn’t block requests from authorized apps and services.
You typically wouldn’t need to enable this setting at home as most home routers offer similar protection. It may be a good idea to enable this setting if you bypass your router and connect directly to the internet. It may also be helpful when using insecure public networks.

- When you are done making changes, you can select OK.

- Last but not least is the Advanced Settings menu which can be used to further secure your computer. In most cases, these settings won’t need to be changed. They let you limit the amount of time a user is logged into a Mac when it’s idle, and restrict users from changing locked system preferences without an admin-level password.

Using the Mac Firewall
You can’t talk about home network security without talking about a firewall. It’s the first line of defense against outside attacks. It blocks unauthorized traffic and prevents malware from infecting your computer. The Mac Firewall is free.
It does a decent job of protecting your computer’s data and hardly affects your computer’s performance. If you spend a lot of time on the internet, you should strongly consider enabling the Mac Firewall. It’s even more important if you visit public places with your laptop.
The Firewall in macOS is easy to turn on/off, so if you decide you don’t want it running in the background, you can turn it off in less than a minute.


