To feel retro or save ink
Except for some really old photos and such stuff, everything else has now been colorized. There are even tools that let you colorize your old photos using some magical algorithms. Despite colors being so useful, there are still times when you may want something in pure black and white.
These are usually the times when you want to save on your color ink and you wish to print something in grayscale. You’ll want to do this especially when it’s a bit hard to find the color configuration option for your printer.
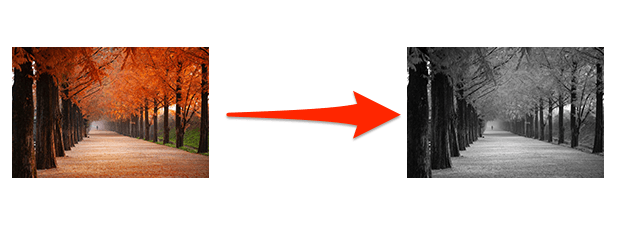
On a Mac machine, there are several ways to turn your photos and PDFs to black and white. All of these methods require no third-party apps as you can get the task done using the built-in apps on your machine.
Convert Photos To Black & White Using The Preview App
Preview has become popular among Mac users as it lets users easily view various types of photo files and PDF documents on your Mac. It’s a great photo viewer app and it has some photo editing tools built into it as well. If you haven’t dug much deeper, you’d probably have no idea about it.
The app consists of some great photo editing tools and one of these tools lets you remove colors from your photos. With this feature, you can have your photos converted to black and white in no time on your machine.
It’s pretty easy to use it but there’s one thing you’d like to know about it. When you do the color conversion in the app, it’s not going to ask you to save the changes. Instead, it’ll automatically replace your color photo with the black and white one.
Therefore, it’s highly recommended you do the conversion on a photo that you don’t need the color version of anymore. Or better, do the task on a copy of your photo.
Open the folder where the photo you want to turn into black and white is located, right-click on the photo, and select Open With followed by Preview to launch the photo in the Preview app.

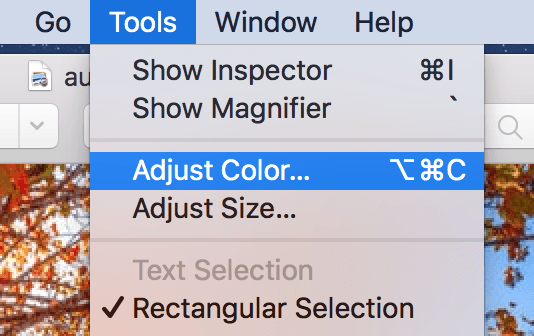
When the photo opens in Preview, click on the Tools menu at the top and select the option that says Adjust Color. Alternatively, press the Command + Option + C key combo.
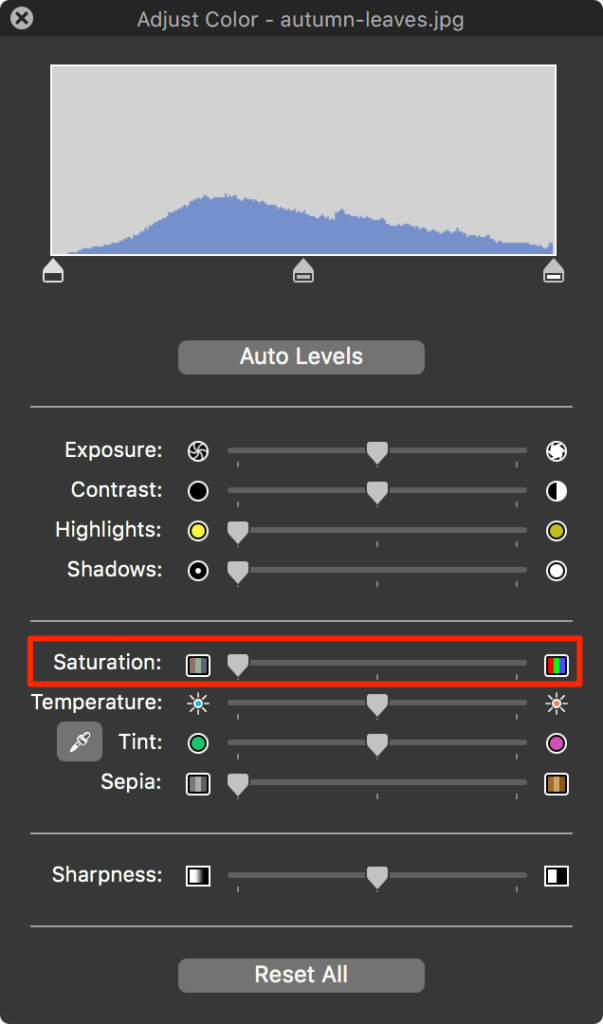
The box that opens on your screen will let you adjust the color settings for your photo. Since you want to remove all the colors from your photo and make it black and white, drag the Saturation slider all the way to the left.
Your photo will instantly turn black and white and you’ll see it in the Preview app for yourself.
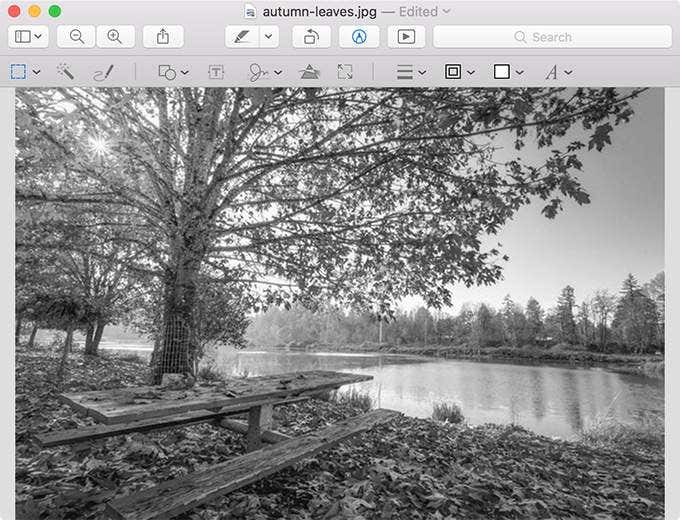
Exit out of the app and your photo will be automatically saved.
Use The Photos App To Turn Your Photos To Black & White
Preview is a convenient option to convert your photos to black and white when your photos are available in the Finder. Most of the time, though, users prefer to save their photos in a photo management app, such as the built-in Photos app on Mac. This is because these apps make organizing your photos much easier than a file explorer tool.
If your photos are also saved in the Photos app, you don’t necessarily need to access them using the Finder to then use Preview to do the conversion. The Photos app itself has some great editing tools built into it and you can use them to retouch your photos.
One of these features lets you remove colors from your photos and here is how you access and use it.
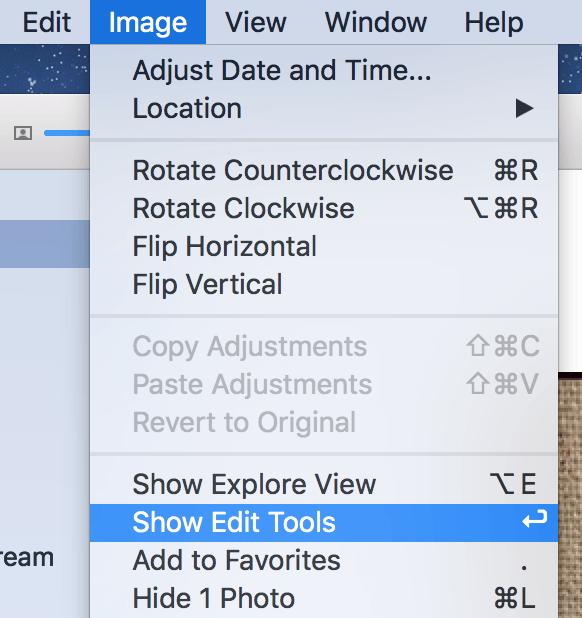
Launch the Photos app on your Mac and double-click on the photo you want to convert to black and white. Then, click on the Image menu at the top and select Show Edit Tools.
All the editing tools available in the app will appear in the right sidebar. Click on the Black & White option and your photo will instantly reflect the changes.

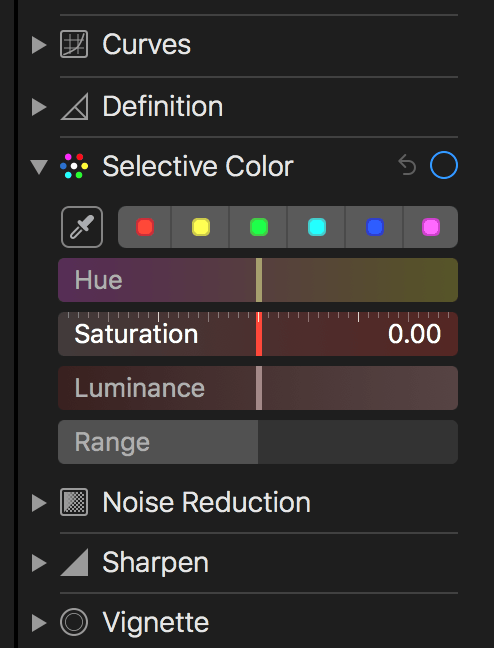
If you don’t get the desired result with the above option, you can try dragging the Saturation slider all the way to the left in the Selective Color section.
Unlike Preview, Photos doesn’t automatically save the black and white versions of your photos. You need to click on the Done button at the top to save the changes. This allows you to revert the changes should you decide not to proceed ahead.
Convert PDF Files To Black & White On Mac
Setting your printer to print your PDF documents in black and white each time you want to print a certain PDF file isn’t time-saving. Instead, you can keep the file colorless, and then it’s just a matter of clicking print to get the file printed.
Getting rid of colors from your PDF documents is easy thanks to Preview on Mac. Here is how you do it.
Right-click on the PDF you want to rob of its colors and select Open With followed by Preview.

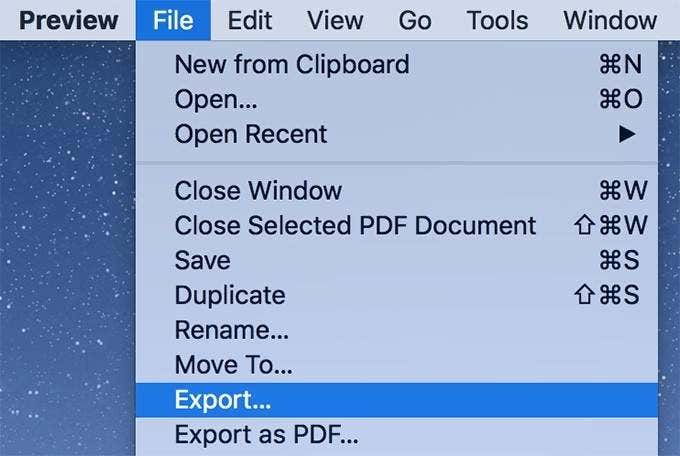
When Preview opens, click on the File menu and select Export. It’ll let you export a color-less version of your PDF file.
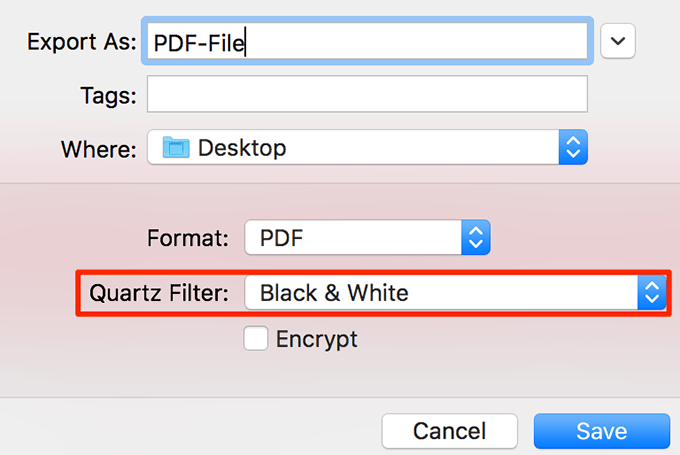
The following screen is where you apply the magic. From the dropdown menu that says Quartz Filter, select the option saying Black & White. Then choose a location to save your file and click on Save.
The file that you just exported from Preview will be completely black and white. All of its colors will be gone and you now have a printer-friendly version of your original color-consuming PDF document.
Conclusion
Turning your photos and PDFs to black and white is useful in many scenarios such as when you’re sending your file to someone and they need to print it in black and white but they don’t know how to do it. Your original B&W versions will make things a whole lot easier for them and sometimes for you as well.


