Trust us, you'll be glad you did
Losing access to your iCloud data is a nightmare scenario. Still, in iOS 15, Apple has added a new feature called iCloud Data Recovery Service, which can get (some) of your data back when the worst happens. It’s easy to set up on iOS or macOS, and if you take the time, you’ll be thanking yourself one day.
What Is the iCloud Data Recovery Service?
The iCloud Data Recovery Service is a feature of iCloud security that lets you regain access to your photos, notes, documents, device backups, and most other types of encrypted data.
Note that there are limitations. First, it has to be data that’s been synced to the cloud. So if your device has been lost or damaged before syncing was possible, the data is unrecoverable.
Second, any data that uses end-to-end encryption can’t be recovered. The point of end-to-end encryption is to hide the data from everyone else, even Apple. Without your passcode (the decryption key), your Keychain, Messages, and health data are not recoverable. To access such data, you need a working device that’s logged into iCloud.
How the iCloud Data Recovery Service Works
The idea behind the iCloud Data Recovery Service is that you’ll nominate a trusted friend or family member to be your backup when you forget both your device passcode and Apple ID password.
Once you’ve nominated your “Account Recovery Contact.” This can be anyone who is over the age of 13, has their own Apple ID, and has an Apple device updated to the latest version of its operating system.
iCloud Recovery and iTunes Backup are Different
As of macOS Catalina, the iTunes application has been replaced by Apple Music, Podcasts, and Apple TV. The iTunes app acted as the central hub where you would sync content to your iOS device and make backups to local storage.
iTunes still exists as a Windows app, and Windows users can use iTunes to make a local backup of their device. If you’re using Catalina or later, you can still make a local backup of your iOS device using your Mac, but that functionality is now in Finder.
Whichever local backup method you choose, this is different from iCloud Data Recovery as you have to manually make a local backup to your Mac or PC
Who Needs To Set Up the iCloud Data Recovery Service?
Unless you have absolutely no one you can trust, it’s probably best for every iCloud user to set up data recovery with a recovery contact. Even if you don’t feel like you need it personally, you may want to act as the recovery contact for someone else. If you have friends or family who are prone to forgetting their credentials, it’s a good idea to convince them to set it up. Remember that this isn’t something that you can activate after the fact.
The steps for activating the service are slightly different depending on the device you’re using. The steps outlined below are for iOS 15, iPadOS 15, and macOS Monterey.
Setting Up the iCloud Data Recovery Service on iOS
The following screenshots are from an iPhone 11 Pro running iOS 15, but should be similar to any iOS device on iOS 15 or later. To set up iOS Data Recovery on your iPhone, do the following:
- Open the Settings app.
- Select your name.

- Select Password & Security.

- Select Account Recovery.
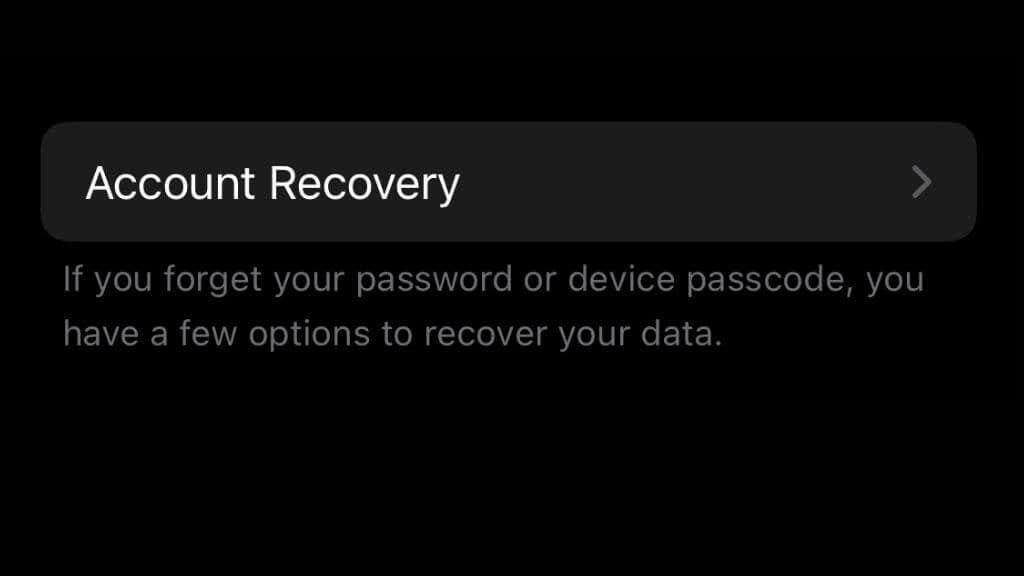
On this screen, you can do several things. To set up iCloud Data Recovery, choose Add Recovery Contact and select a trusted person from your contacts.
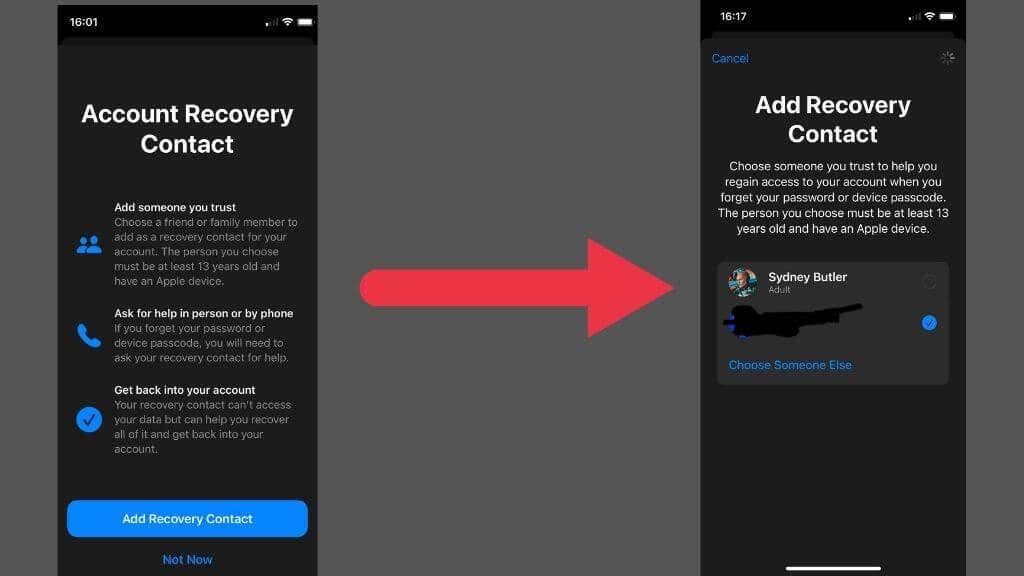
Once you’ve completed the process, they’ll receive a message, which you can edit first, and if they accept, they can help you get your data back from your iCloud account on iCloud.com if your phone is lost, stolen, or you forget your password.
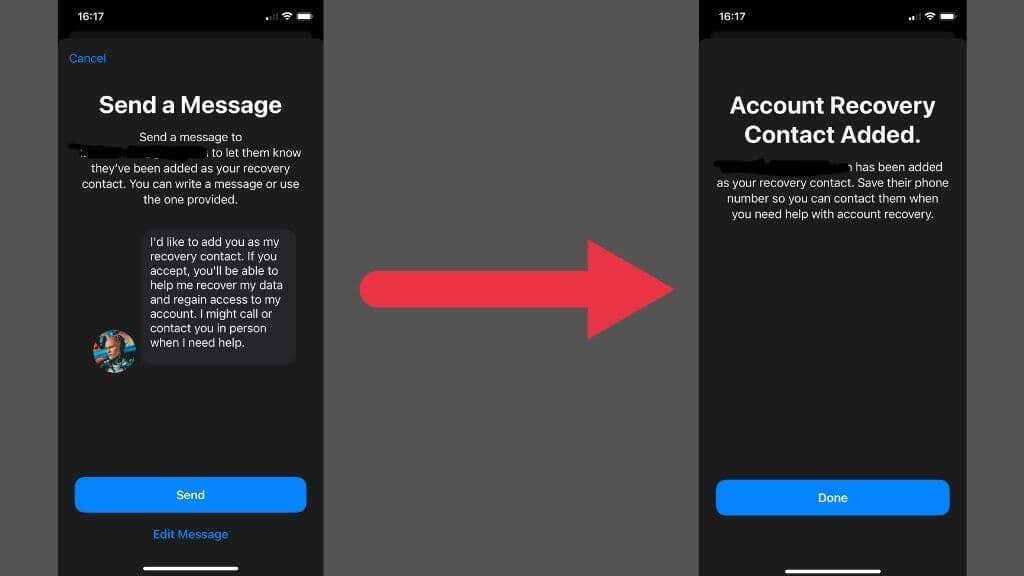
The other option is to create a recovery key, which makes it possible to recover your account and access your iCloud data without another person’s assistance. However, this option comes with some special considerations, covered later in this article.
Setting Up the iCloud Data Recovery Service on iPadOS
The steps to activate iCloud Data Recovery on an iPad are very similar to iOS. Here’s what you need to do:
- Open the Settings app.
- Select your name.
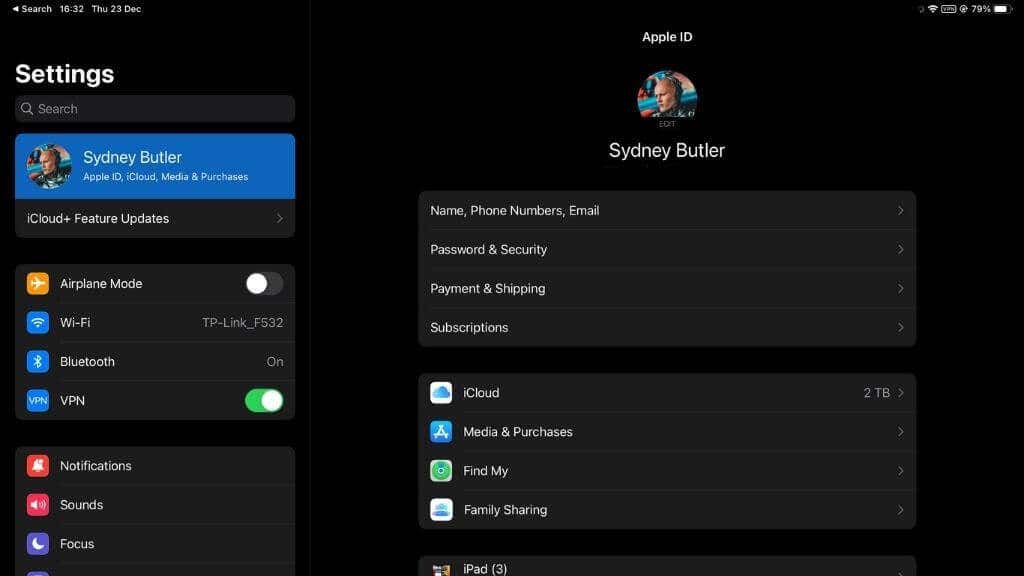
- Select Password & Security.
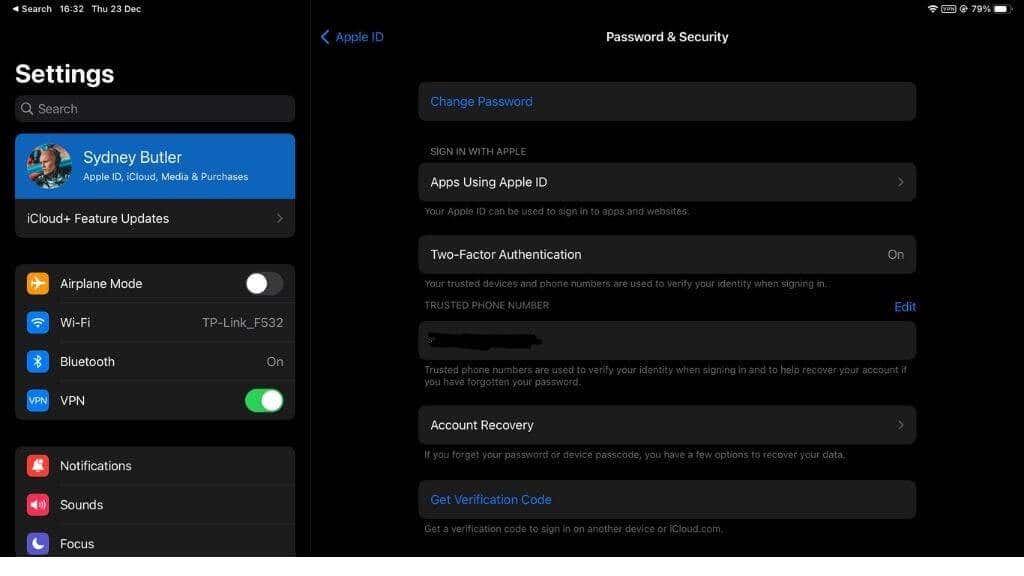
- Select Account Recovery.
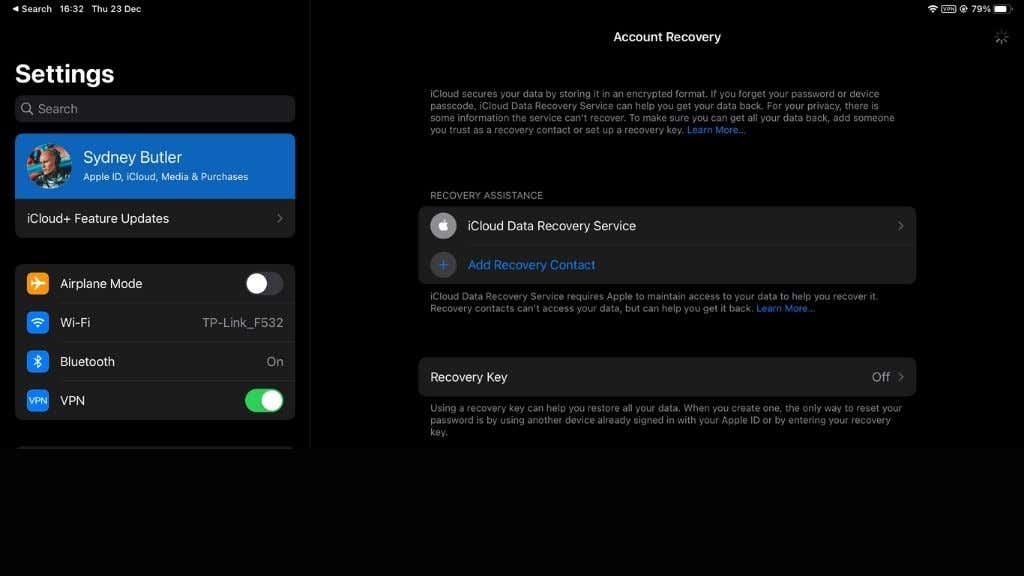
Like the iPhone method above, you can now add a recovery contact you trust.
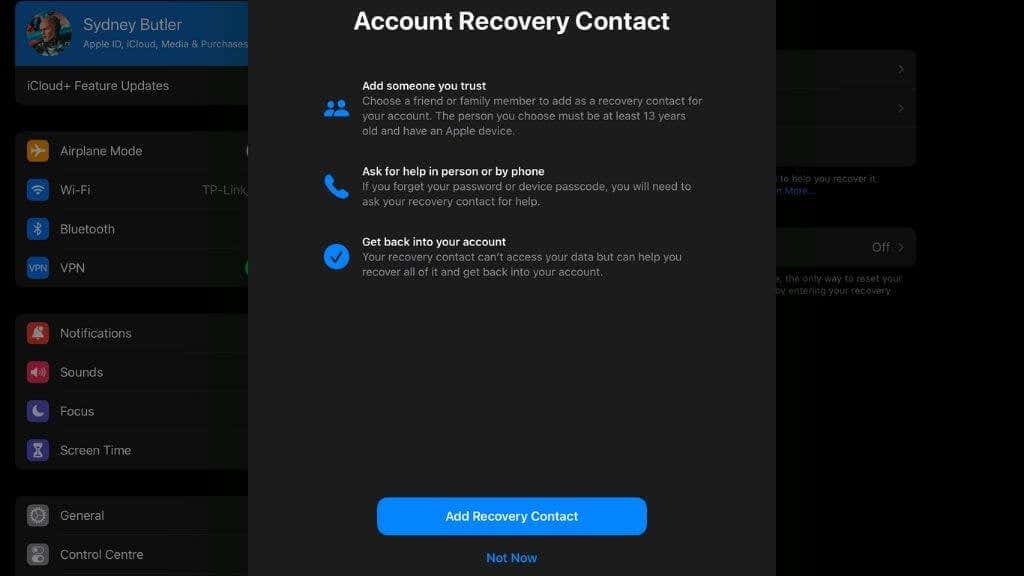
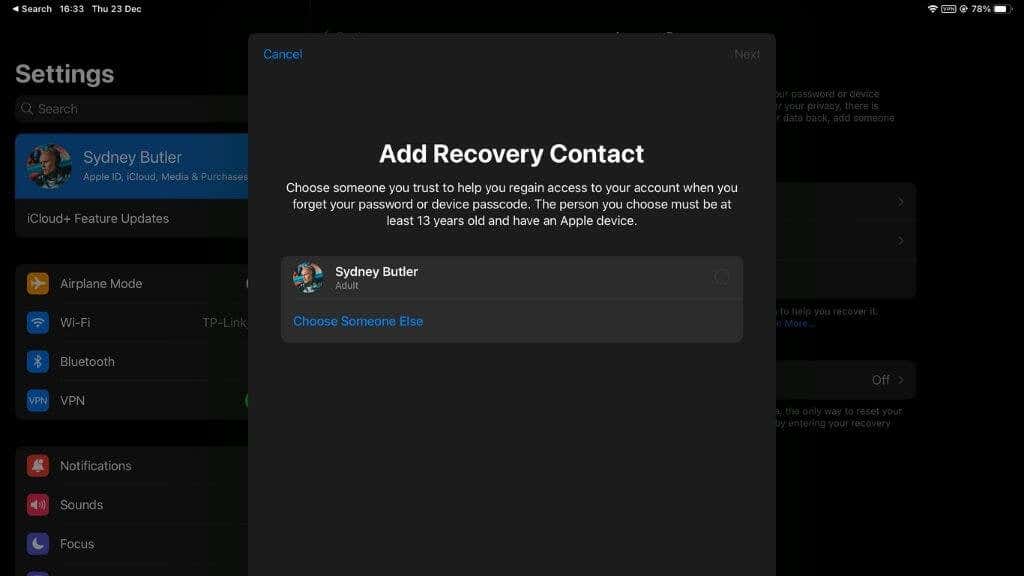
Don’t choose the recovery key option until you’ve read our important notes about it below.
Setting Up the iCloud Data Recovery Service on macOS
If you have a MacBook or Mac, the process is slightly different from iOS devices. The following screenshots were taken on an M1 MacBook Air running macOS Monterey. Here’s how to set up iCloud Data Recovery on macOS:
- Select the Apple Icon at the top-left of the screen.
- Select System Preferences.
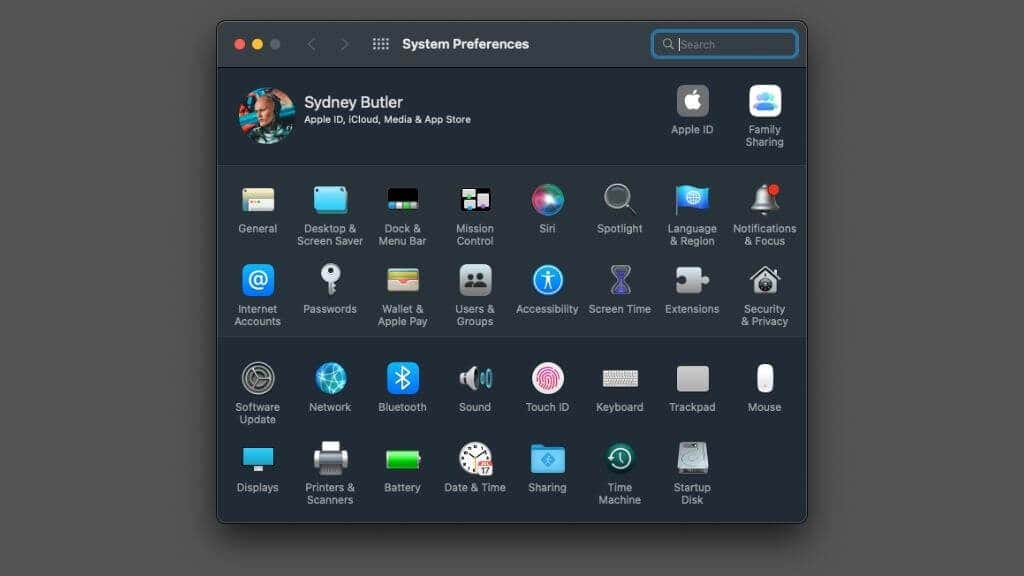
- Select Apple ID.
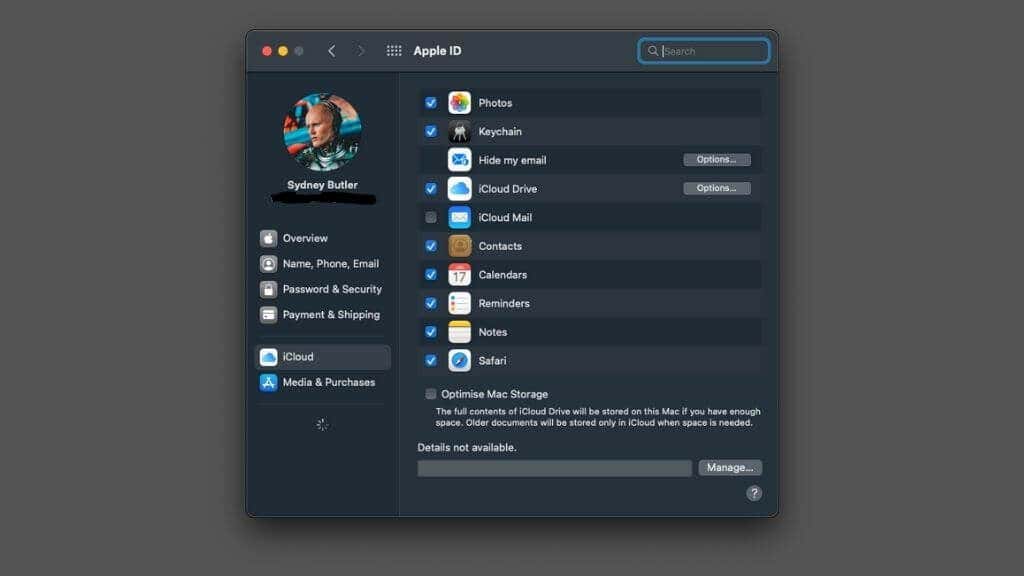
- Select Password & Security.
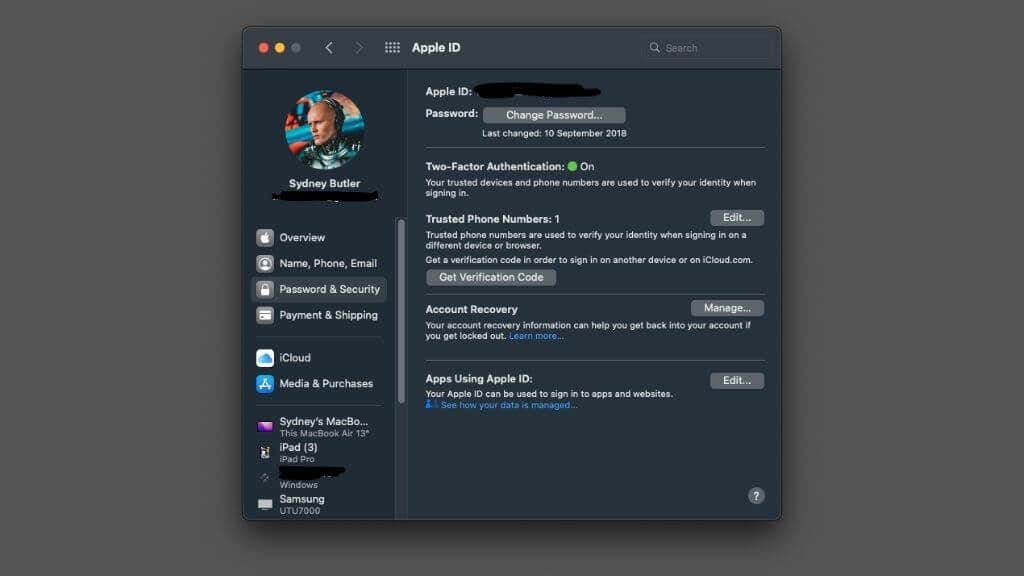
- Select Account Recovery.
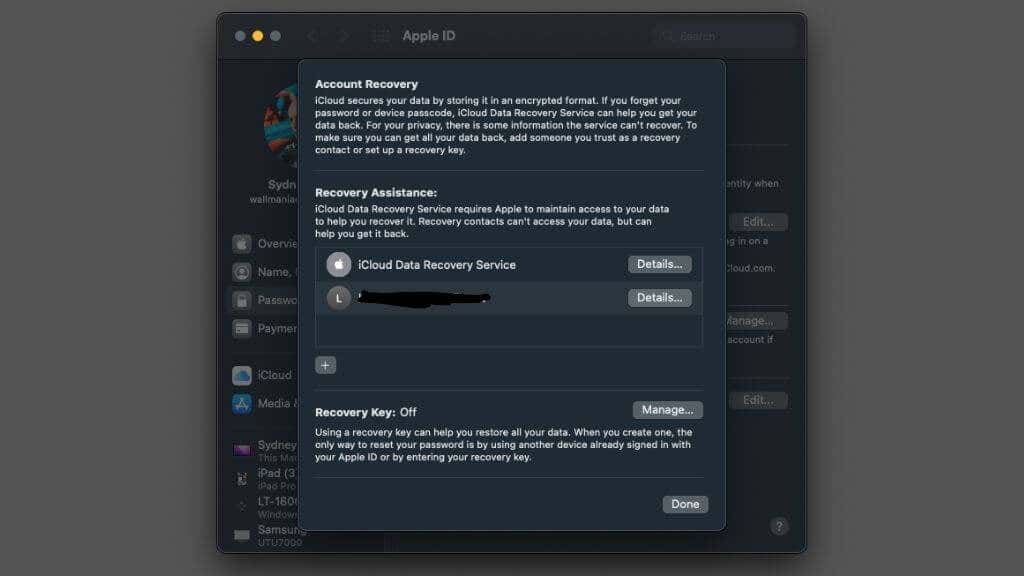
- Next to Account Recovery, select Manage
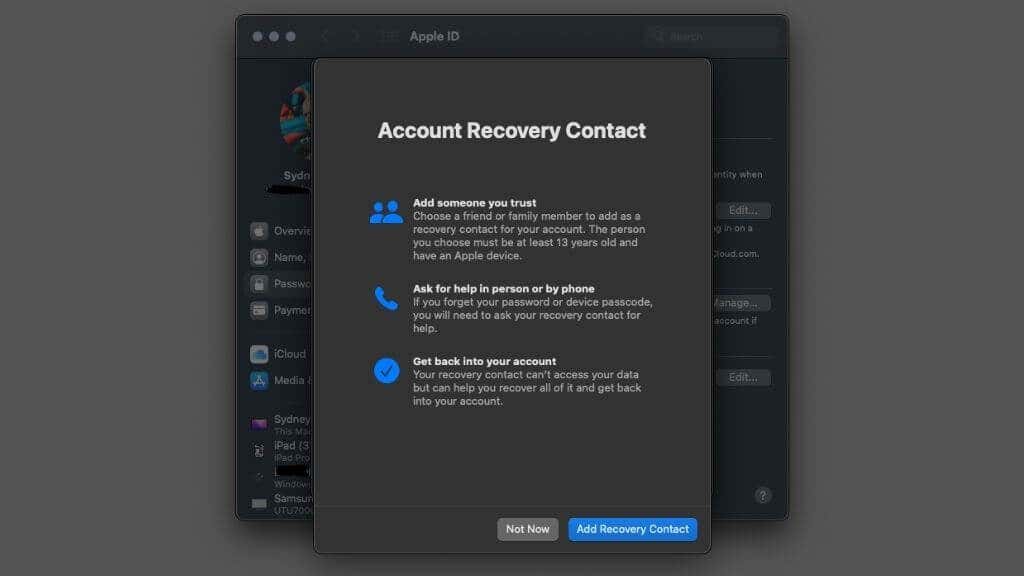
- Under Recovery Assistance, select the “+” icon to add a recovery contact.
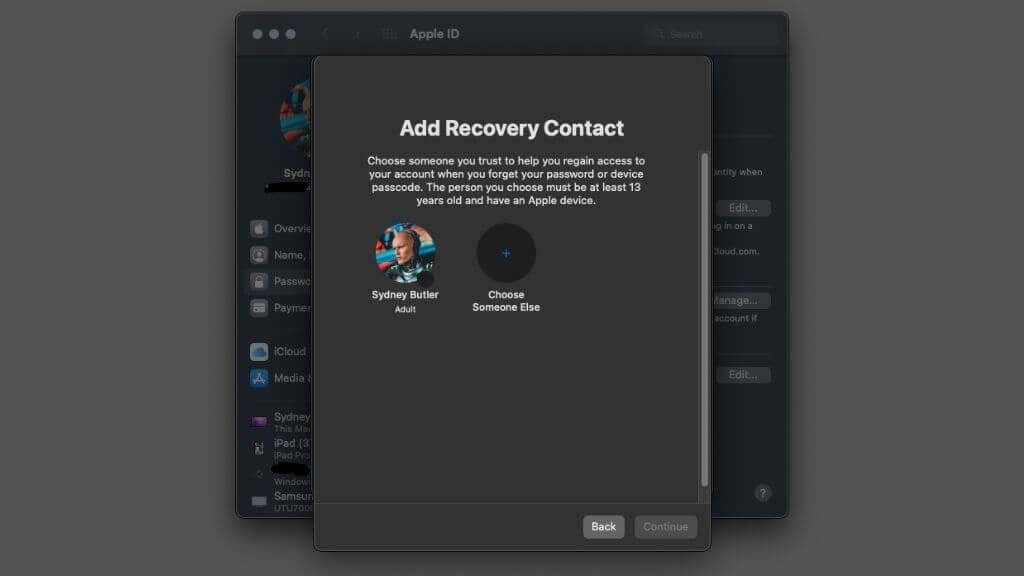
You can also add a recovery key here or enable or disable 2FA, but please read the next section before you do so.
Should You Use a Recovery Key?
If you choose to use a recovery key and lose it, it’s no longer possible to recover your account using the standard Apple account recovery process. It is a more secure way to secure your account since hackers can’t use your information to abuse the standard account recovery process. However, you’ll need your recovery key, a trusted phone number, and an Apple device running at least iOS11 or macOS High Sierra. Since a recovery key is so secure, you need to keep copies of it in a place you won’t lose access to but is also not accessible to unwanted persons.

It’s important to note that you should not set up the recovery key option at this time if you’re already using two-factor authentication (2FA). The recovery key and 2FA recovery method seem to interfere with each other. As mentioned above, using a recovery key blocks the standard recovery method enabled by 2FA. It’s better to pick just one of these two recovery options. If you don’t have elevated security needs, it’s better to stick with 2FA, which is more than enough for most users.
Don’t Just Use One Backup Solution
While it’s good to have a fallback access solution to your iCloud backups, it’s never a good idea to put all your eggs in one basket. The good news is that you can easily backup your data to multiple cloud services.
For example, you can install Microsoft OneDrive or Google Photos and have these apps automatically upload your information to their data centers. So even if you lose access to your iCloud backup, there are other places you can go to get your data back. With so many ways to secure your information, there’s no reason to be the victim of lost data ever again.


