When you get stuck on the logo screen
Despite how incredibly stable the system software on your iPad usually is, it’s not without issues. If it ever gives you any serious trouble, you must try using Recovery Mode. That could very well be the difference between getting your iPad back on track quickly versus a lengthy visit to the Genius Bar.
Below, you’ll find everything you need to know about launching and using your iPad’s Recovery Mode.

What Is iPad Recovery Mode?
Recovery Mode is a unique recovery environment that allows you to update your iPad’s system software or restore it to factory settings. It’s a fallback mechanism for instances where you can’t use the iPad’s built-in reset options to restore the device. If you encounter any of the scenarios below, you must use Recovery Mode.
Stuck on the Apple Logo
Is your iPad stuck at the Apple logo? That usually happens after a botched system software update, or a backup restore gone wrong. Getting into iPad Recovery Mode should allow you to reinstall the system software and (hopefully) get the device working again. It should also come in handy if your iPad appears stuck in a continuous boot loop.

Computer Doesn’t Recognize iPad
If you experience constant crashes or freezes on the iPad, you can reset it via iTunes/Finder on a Mac or PC. However, if your computer has trouble detecting the device, Recovery Mode can force iTunes/Finder to recognize it. You can then update or reinstall the system software without issues.
Downgrade iPadOS Beta
Do you have a beta version of iPadOS installed on your iPad? If you keep running into issues, resetting the system software via iPad Recovery Mode will automatically downgrade the system software to the latest stable release.
iPad’s Already in Recovery Mode
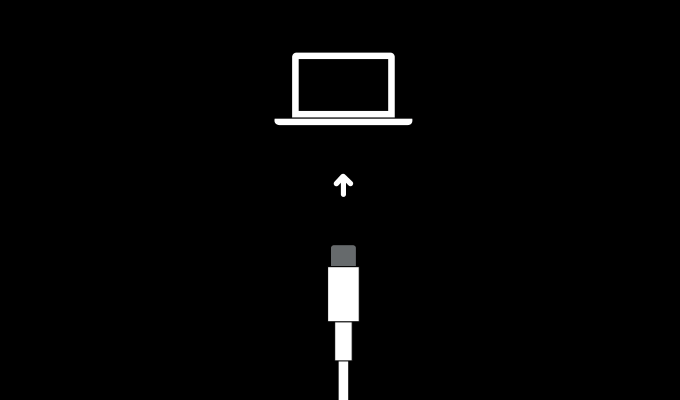
Rarely, your iPad may boot into Recovery Mode by itself. That already implies something seriously wrong with your tablet, so you must either update or reset it. Skip ahead to the section that walks you through how to use Recovery Mode on an iPad.
What You Need to Launch Recovery Mode on iPad
You must use iTunes/Finder on a Mac or iTunes on a PC to enter and interact with Recovery Mode on the iPad. It’s also best to run the most recent iTunes or Finder versions on your Mac/PC before going ahead.
You can grab the latest iTunes updates via the Mac App Store or the Microsoft Store. If you use a Mac with macOS Catalina or later, you must update the operating system itself to use the most up-to-date instance of Finder—go to System Preferences > Software Update to update your Mac.
Additionally, you must have an appropriate USB cable (USB-A to Lightning, USB-C to Lightning, USB-C to USB-C, etc.) at hand to connect the iPad to your Mac or PC.

Once you’ve prepared everything, you can force-restart your iPad and launch Recovery Mode. Or, you can get to it directly while turning on your iPad.
How to Force Restart an iPad and Launch Recovery Mode
If you’ve turned on your iPad, you can launch Recovery Mode by force-restarting the device.
iPads That Don’t Have a Home Button
1. Open Finder/iTunes on your Mac or PC.
2. Connect your iPad to your Mac or PC.
3. Press and quickly release the Volume Up button.
4. Press and quickly release the Volume Down button.
5. Press and hold the Top button. Your iPad should restart, and you should see the Apple logo shortly after that. Keep holding it down until you see the iPad’s Recovery Mode screen.

iPads That Have a Home Button
1. Open Finder/iTunes on your Mac or PC.
2. Connect your iPad to your Mac or PC.
3. Press and hold both the Home button and the Top button. Your iPad should restart. Keep holding them down until you see the Recovery Mode screen.

How to Boot an iPad Directly Into Recovery Mode
If you’ve turned off your iPad, you can directly enter Recovery Mode while booting it back up.
iPads That Don’t Have a Home Button
1. Open Finder/iTunes on your Mac or PC.
2. Connect the USB cable to your computer.
3. Press and hold the Top button, and then connect the cable to your iPad. Keep holding the Top button down until you see the Recovery Mode screen.

iPads That Have a Home Button
1. Open Finder/iTunes on your Mac or PC.
2. Connect your computer with a Lightning to USB cable.
3. Press and hold the Home button, and then connect the cable to your iPad. Keep holding down the Home button until you see the Recovery Mode screen.

How to Use Recovery Mode on iPad
Once you enter Recovery Mode, iTunes or Finder will automatically prompt you with options to update or restore your iPad.
Update iPad in Recovery Mode
You can use Recovery Mode to update your iPad without erasing your data. That alone should help fix any severe issues with the system software most of the time. If that fails, you can follow up by resetting the device.
1. Select Update on the Recovery Mode screen in iTunes/Finder.
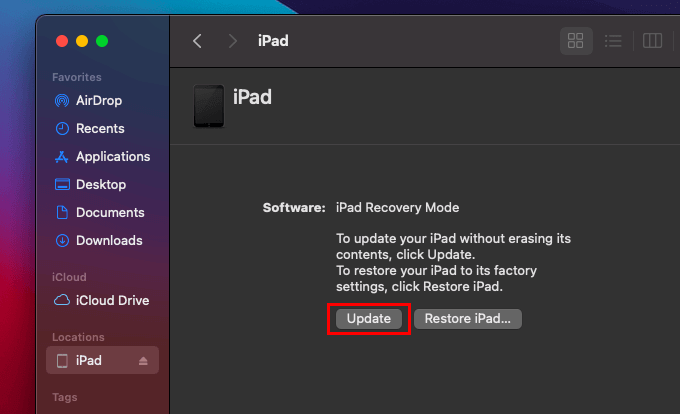
2. Select Update again to confirm.
3. Wait for iTunes/Finder to download the iPadOS system software file to your Mac or PC.
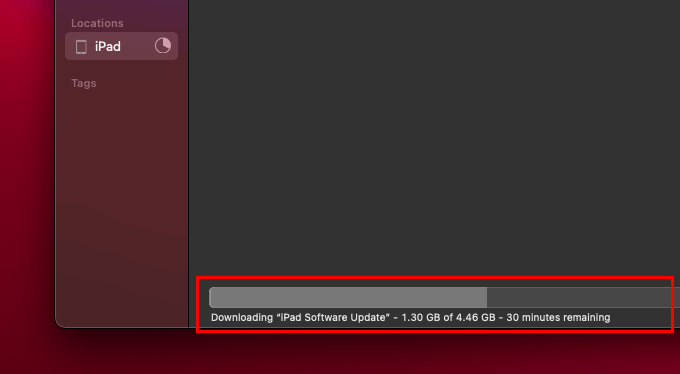
Your iPad may automatically exit Recovery Mode if the download takes more than 15 minutes. Re-enter Recovery Mode again if that happens; the download should automatically resume.
4. iTunes/Finder will automatically extract the system software file and update your iPad. That should take a few minutes.
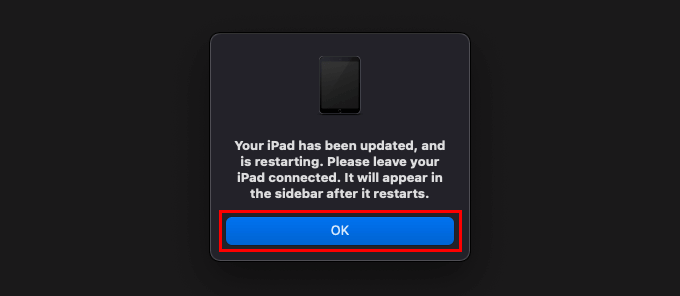
5. Select OK and wait for your iPad to restart. Enter your device passcode and check if your iPad works correctly.
Restore iPad in Recovery Mode
You can use Recovery Mode to reset your iPad to its factory settings. It will end up deleting all locally stored data permanently. However, if you have an iCloud or iTunes/Finder backup, you can restore your data after the reset procedure.
1. Select Restore iPad on the Recovery Mode screen in iTunes/Finder.
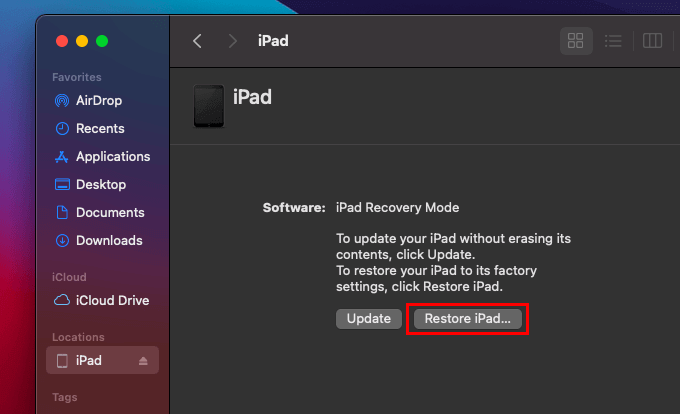
2. Select Restore and Update to confirm.
3. Wait for iTunes or Finder to download the iPadOS system software file to your Mac or PC. If you tried updating your iPad a moment ago, you wouldn’t have to download the file again.
4. iTunes or Finder will extract the contents within the file and reinstall the system software on your iPad.
5. Select OK and wait for your iPad to restart. You can then select the Restore from this backup option if you want to restore your data from an iTunes/Finder backup.
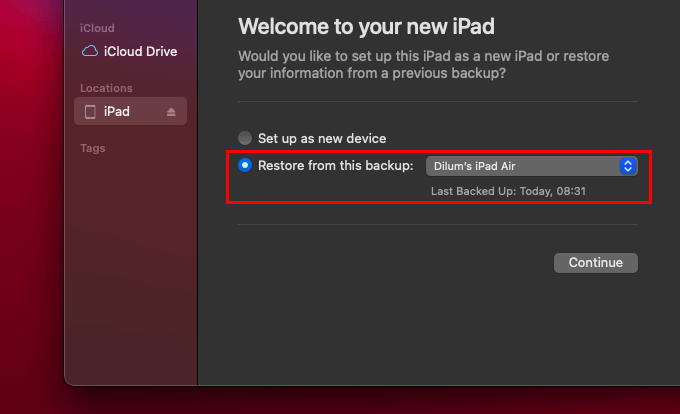
Alternatively, select Restore from iCloud Backup while setting up the iPad to restore your data from an iCloud backup.
What If Recovery Mode Fails?
If Recovery Mode fails to fix your iPad, you can go a step further and use DFU (Device Firmware Update) Mode to reset the device. If that fails as well, your best option is to book an appointment at the nearest Apple Store or Genius Bar.


