In case you don't have another monitor
Mac screens get smaller and smaller, but that doesn’t mean that the software you’re using does. If you’re struggling with screen real estate on your Mac, you’ll need to look at ways to use the space more effectively. A good way to do this is by using macOS’ built-in features for split screens to see and use multiple windows at once.
You can split your screen in half, with two windows on the left or right. There are also third-party tools for split screens like Moom you can use instead, which allow you how to split the screen on a Mac into quadrants, using each of the four corners. Here’s how to split screen on Mac devices using these tools.

How To Split Screen On Mac Devices
If you’re using macOS, you’ll already be familiar with the round, colored window control buttons in the top-left corner of any open window. The red, circular button closes a window and the yellow, circular button minimizes it. The green button, however, is used for manipulating your window while it’s currently active.
- To see what options you have available to you, hover over the green button using your mouse or trackpad. You may need to click the button and keep it held down to view these options in older versions of macOS.
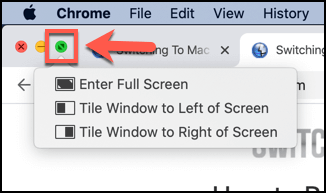
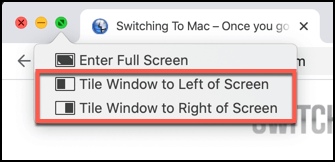
- A pop-up menu will appear underneath the green icon. These include options to Enter full screen which, as the name suggests, will maximize your open window to use your full screen, hiding the Dock and other elements. More importantly, however, are the two split view options—Tile Window to Left of Screen and Tile Window to Right of Screen.
- Clicking either of these options will resize your open window to take up half of the available screen—it’ll also hide the Dock and menu bar. You’ll need to select a second window to take up the other half of the screen at this point.
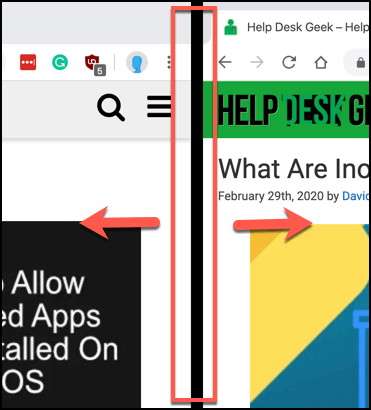
- By default, windows using the split view feature will share the screen equally. You can change this once the windows are in place by using your keyboard or trackpad to press and hold the black bar in the middle of the screen, then moving the bar left or right to resize your windows accordingly.
You can only use macOS’ built-in split view feature to see two windows, side by side, and they will enter full-screen mode by default. If you’d prefer not to use full screen, leaving your Dock and menu bar visible, you can resize the windows into a similar position.
- To do this, hover over the green window button in the top-left while holding down the option key on your Mac keyboard. The icon you’ll see while hovering over the green window button will change from two arrows to a plus symbol.
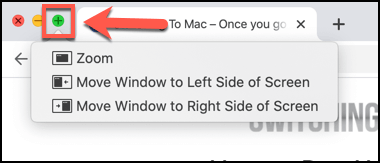
- Alternative options will appear in the pop-up menu below the green window button. You can maximize the window without entering the full-screen mode by pressing the Zoom option. However, to tile your window to use half of the screen, click the Move Window to Left Side of Screen or Move Window to Right Side of Screen options, depending on which side of your screen you want to use.
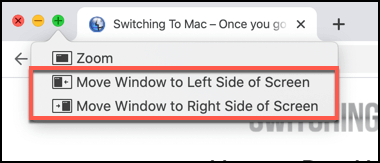
- Clicking either of these options will resize the window to take up half of your Mac screen but, unlike the full split-view options, you’ll still be able to view and use your Dock and menu bar. You won’t be able to resize both windows together at the same time, however, unlike the full split-view mode.
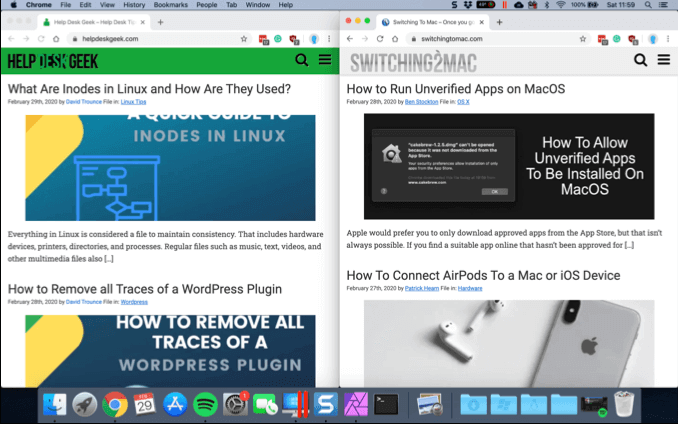
Resizing Windows Using Moom On macOS
If you want to use a split view mode on macOS that allows you to resize more than two windows at the same time, you’ll need to consider using third-party window management software. Several free and paid options are available, but we recommend using Moom. A free trial of the software is available to try it out on your Mac before you subscribe.
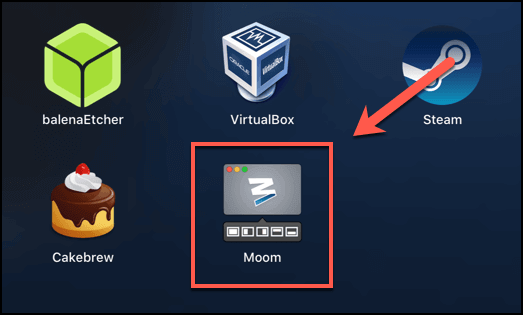
- To start, download the trial from the Moom website, or purchase and install Moom from the Mac App Store. Once installed, you can launch Moom from the Launchpad, or by clicking the Applications folder in Finder.
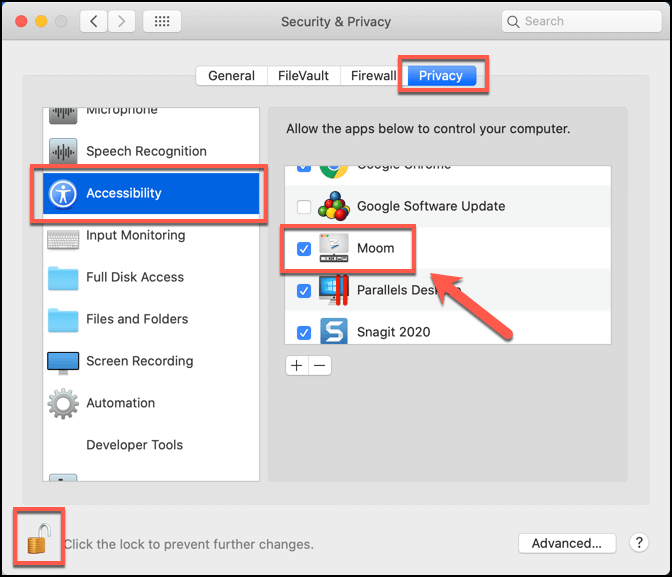
- You may need to authorize Moom to have accessibility access. To do this, click the Apple menu icon in the top-left, then press System Preferences.
- From here, click Security & Privacy > Privacy > Accessibility and make sure the option for Moom is enabled in the Allow the apps below to control your computer list.
- You may need to click the lock icon in the bottom-left and provide your password or Touch ID credentials to be able to make changes first.
- If you have any problems using Moom after enabling accessibility access, restart your Mac, then relaunch Moom after restarting.
- Once Moom is running, hover over your green window button in the top-left of an open window. The default macOS drop-down menu will be replaced with Moom’s own, with different icons showing different display modes. The icons with a gray block on the left or right will resize your window to take up the left or right of your screen.
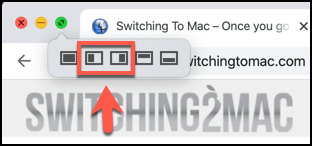
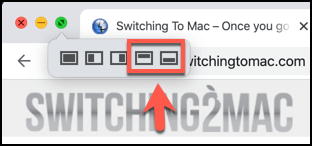
- You also have options to resize your windows to take up the top or bottom of your screen, splitting your display in the middle horizontally. Press the icons with a gray block at the top or bottom to resize your window to take up the top or bottom of your screen instead.
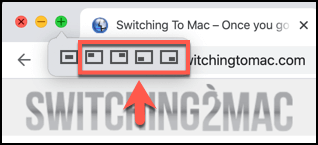
- Moom also allows you to split your screen on your Mac into quadrants, resizing windows and placing them in the top and bottom corners on both the left and the right. Press and hold the option key to view these options, then hover over the green window button. Press any of the shown icons in the Moom drop-down menu to resize your windows accordingly.
Maximizing Your Screen Real Estate On macOS
Whether you use the built-in split-view mode or you decide to use a third-party app like Moom to control your windows, you should try to make full use of your screen real estate on macOS. Knowing how to do split-screen on Mac devices can only get you so far, however—you may decide one display just isn’t enough.
Before you buy a second screen, however, think about using an iPad as a second monitor instead. Let us know your macOS tips for making full use of the macOS display in the comments below.


