Live Photos can turn ordinary pictures into whimsical or even useful moving images. If you haven’t checked out this feature yet, we’ll show you how to turn on Live Photos on iPhone and then view, edit, and change effects for the pictures.
What Are Live Photos on iPhone?
Apple introduced Live Photos in the fall of 2015 as an enhancement to ordinary photo-taking. When you snap a Live Photo, your iPhone’s camera captures about 1.5 seconds of the scene before and after you tap the Shutter button.
The result is a moving or animated photo. This unique feature can help you capture something you might miss, add subtle movement to still images, and turn static photos into mini videos.
Keep in mind that Live Photos can be larger in size and consume more space than still images. If you need help managing storage, look at ways to free up storage space on your iPhone.
To capture Live Photos, you need an iPhone 6s or later. If you have ProRAW or HEIF MAX turned on, the Live Photos feature is unavailable.
How to Turn on and Take Live Photos
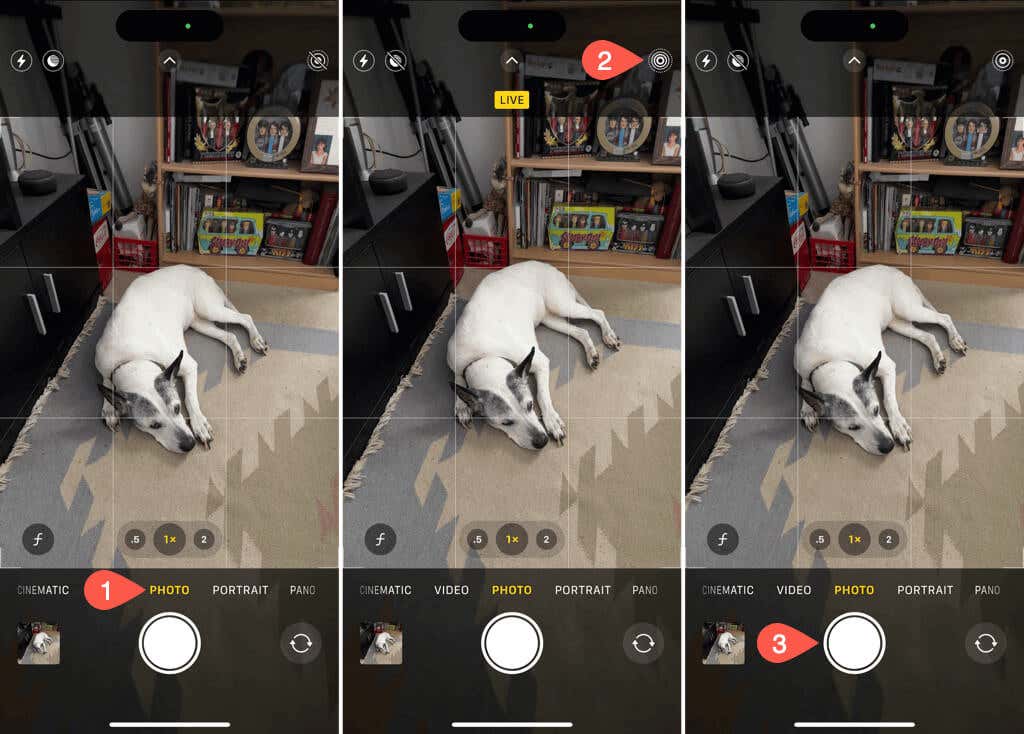
While the Live Photo feature should be enabled by default, you may notice that the pictures you capture are ordinary photos, not animated ones. If so, follow the steps below to turn on the feature and snap a Live Photo.
- Open the Camera app and enable Photo mode. You can do this by sliding the modes across the bottom until you reach Photo.
- Tap the Live Photos button (circles) on the top right. You’ll see the line through the button removed with the word “Live” display and the icon animate briefly.
- Use the Shutter button to capture the photo.
To see a preview after you snap the shot, tap the thumbnail on the bottom left. Then, long-press (tap and hold) the photo to see it in action.
About Turning on Live Photos
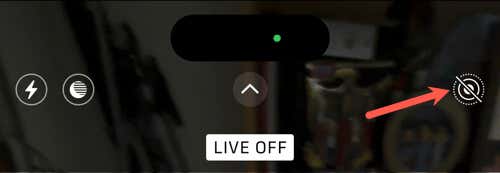
It’s important to keep in mind that once you turn on the Live Photos feature in the Camera app on your iPhone, it stays on. This means every picture you capture will be a Live Photo until you turn it off.
To disable the feature, open the Camera app and tap the Live Photos button on the top right. You’ll then see a line through the icon and “Live Off” briefly display.
How to View Your Live Photos
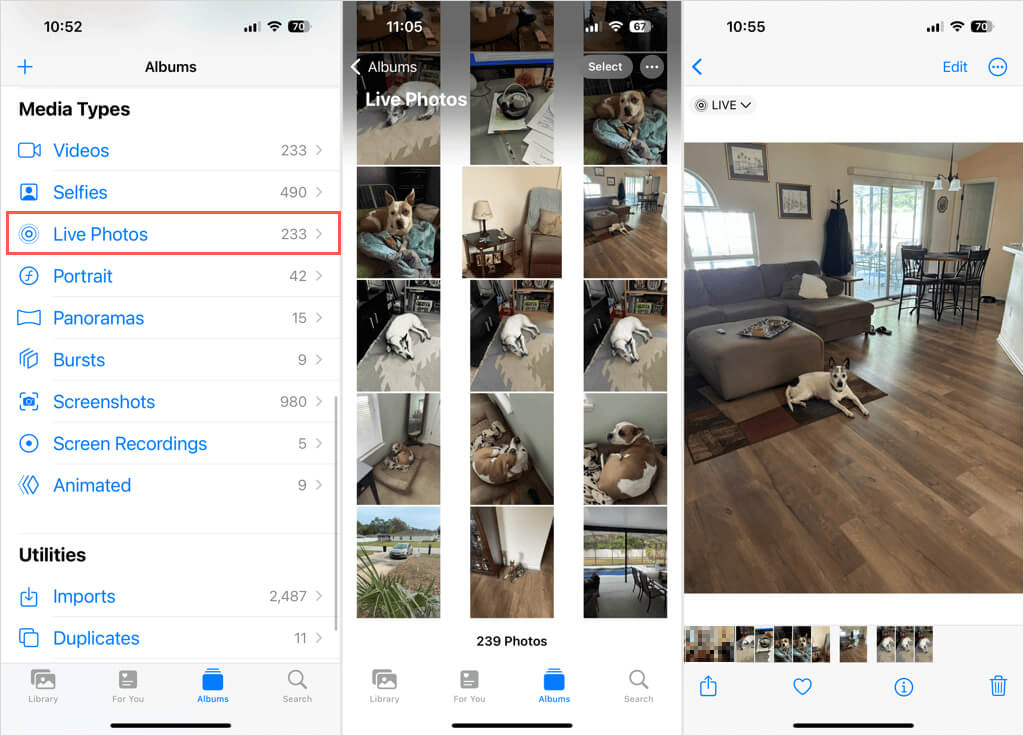
While you can see your Live Photos in the Recents album or another you move them to, Apple provides you with a dedicated spot as well. This lets you see all Live Photos in one place.
- Open Photos and go to the Albums tab.
- Move towards the bottom to the Media Types section.
- Select Live Photos. Note that you can also see the total of Live Photos you have to the right.
- Choose a photo to open it in full view and long-press to see its movement.
How to Change Live Photo Effects
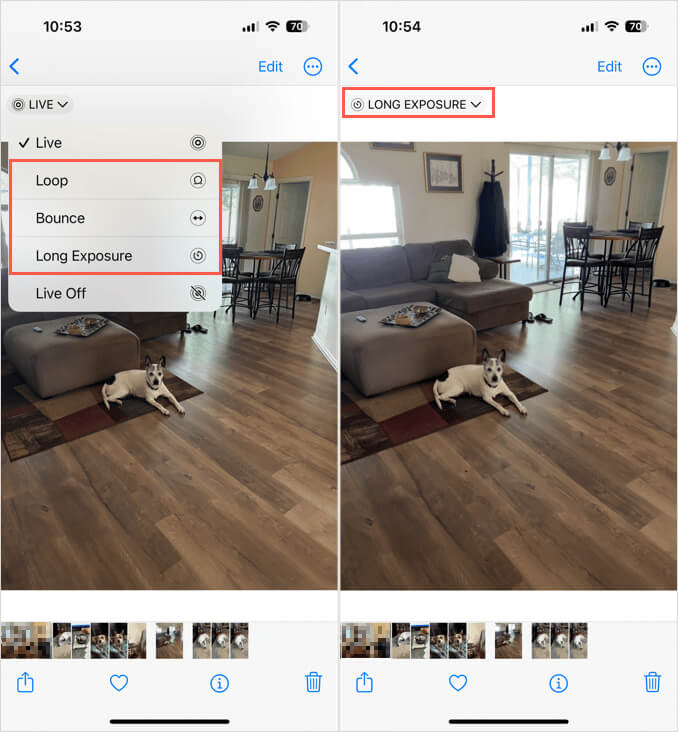
Because a Live Photo is like a mini video clip, you can apply effects to it that make it move differently.
- Open the Live Photo and tap the Live drop-down menu on the top left.
- Choose from Loop, Bounce, or Long Exposure.
- Loop: Create a continuous video loop.
- Bounce: Rock the photo back and forth.
- Long Exposure: Capture the motion with long exposure. To learn more, check out our article on long exposure shots on iPhone.
- Once you choose the new effect, it adds the effect to the photo automatically.
Tip: If you want to remove the Live Photo effect and turn the picture into an ordinary image, open the Live drop-down menu and choose Live Off.
How to Edit a Live Photo on iPhone
You can edit Live Photos on your iPhone just like other pictures you take. This lets you do things like resize the photo or add a filter.
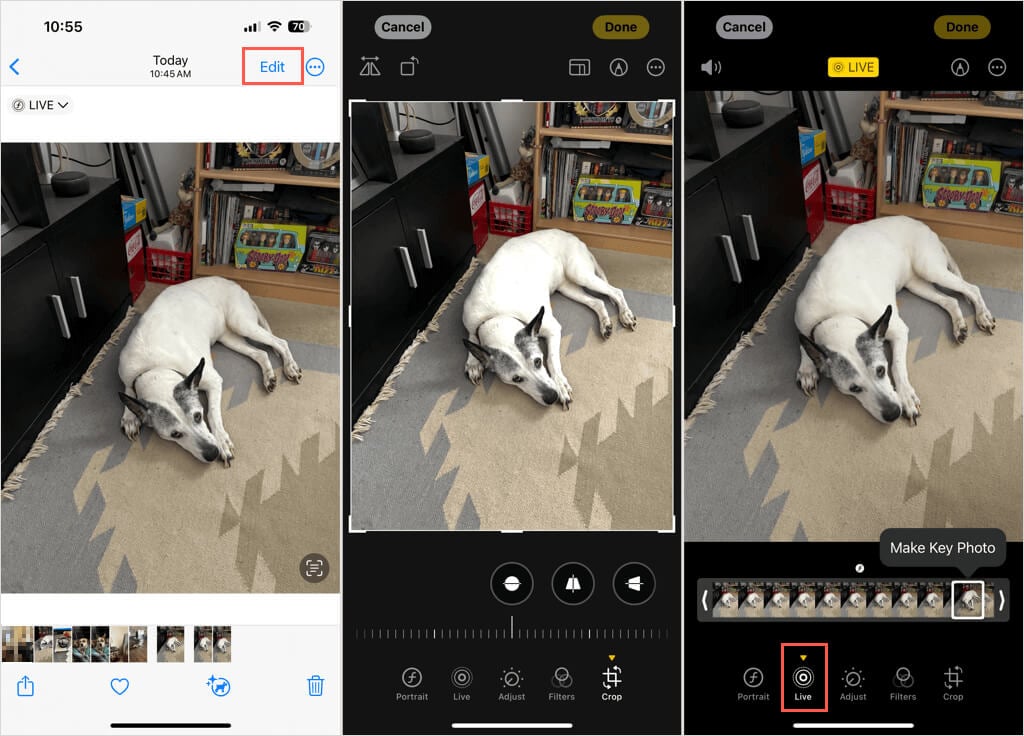
- Open the Live Photo and tap Edit on the top right.
- Use the tools as you normally would to adjust, crop, rotate, or flip the photo.
- To view a specific frame or set the key photo, tap the Live button (circles) at the bottom.
- Use the slider at the bottom to move through each frame. Tap Make Key Photo if you want a particular frame as the main image for the picture.
- Tap Done on the top right when you finish with your edits.
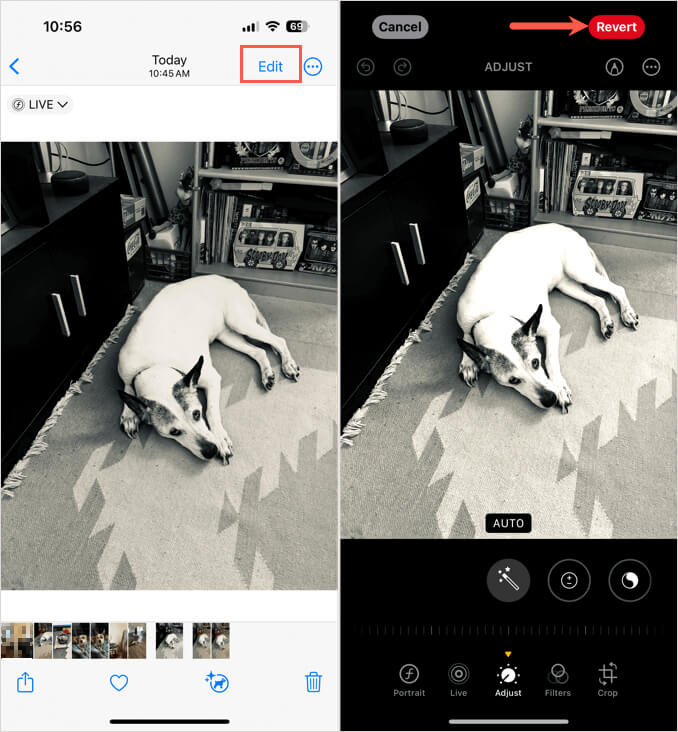
If you make changes to a Live Photo and want to undo them, follow Step 1 above and then tap Revert on the top right. This returns the Live Photo to its original state.
Note: If you use a third-party app to edit your Live Photo, this may remove the Live Photo effect from the picture.
Enjoy Your Live Photos
There are plenty of pictures that could benefit from the Live Photos feature. Think of capturing what happens right before someone poses for the camera or those few seconds right after you snap the shot. Those are the kinds of moments when Live Photos can be priceless.
For more, look at how to turn a Live Photo into a GIF for even more fun ways to use the pictures.

