From the easy to the more difficult
Time Machine offers an incredibly convenient way to safeguard the data on a Mac. But while Apple’s local backup solution is super-easy to set up and use, it isn’t perfect.
Connectivity issues, disk errors, and many other reasons can prevent Time Machine from backing up data correctly.

The steps below should help resolve any issues when Time Machine is not backing up your Mac. Specifically, these steps deal with the following set of issues:
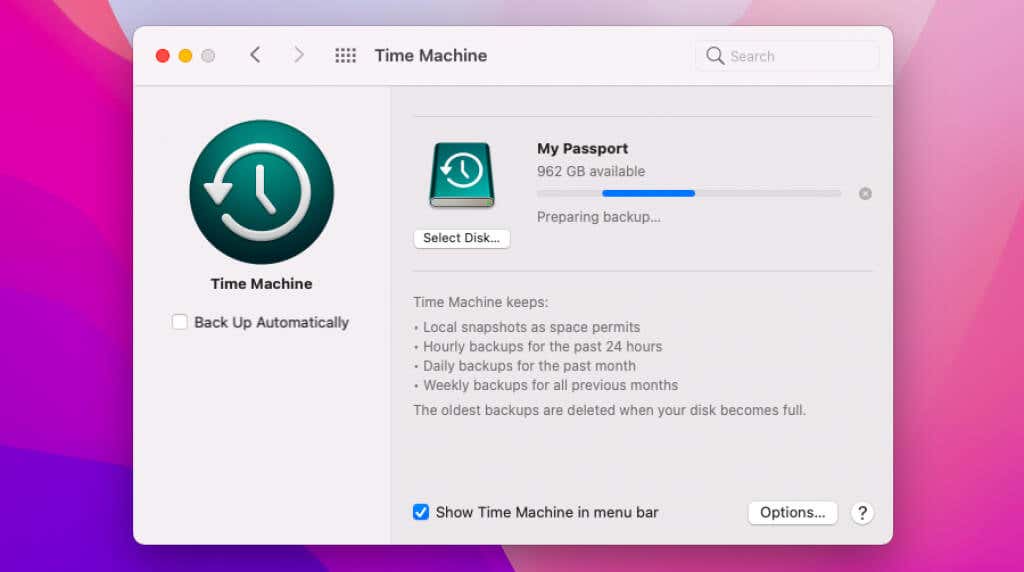
- Time Machine is stuck at the “Preparing Backup” stage.
- Time Machine takes too long to complete.
- Time Machine results in errors while backing up—e.g., “The operation couldn’t be completed.”
- Time Machine fails to detect an external drive or NAS drive.
1. Wait For a While
Did you just set up Time Machine on your Mac? If the internal storage has hundreds of gigabytes of data, your first backup can take hours to complete. So it’s a good idea to check back again later once Time Machine has run in the background for an extended period (preferably overnight).
If Time Machine is still preparing the backup or hasn’t progressed beyond a specific point, continue with the other fixes below.
2. Delete Backup and Retry
Stopping Time Machine and running it again can also help fix a stuck backup.
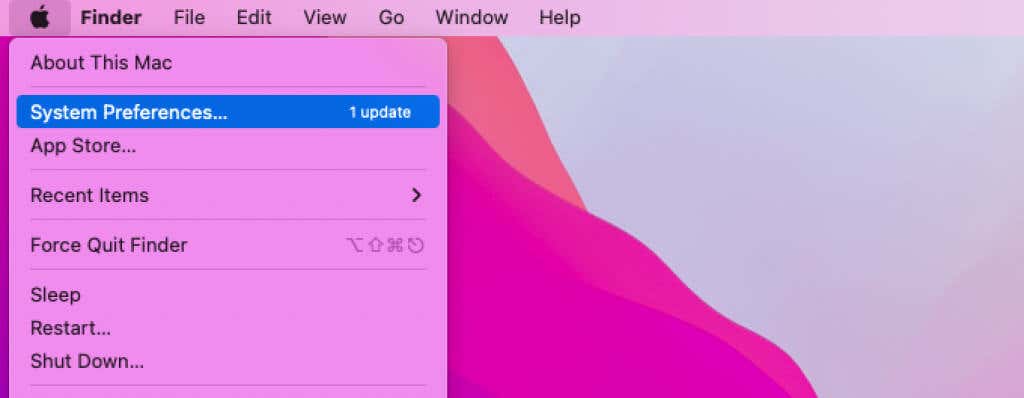
1. Open the Apple menu and select System Preferences.
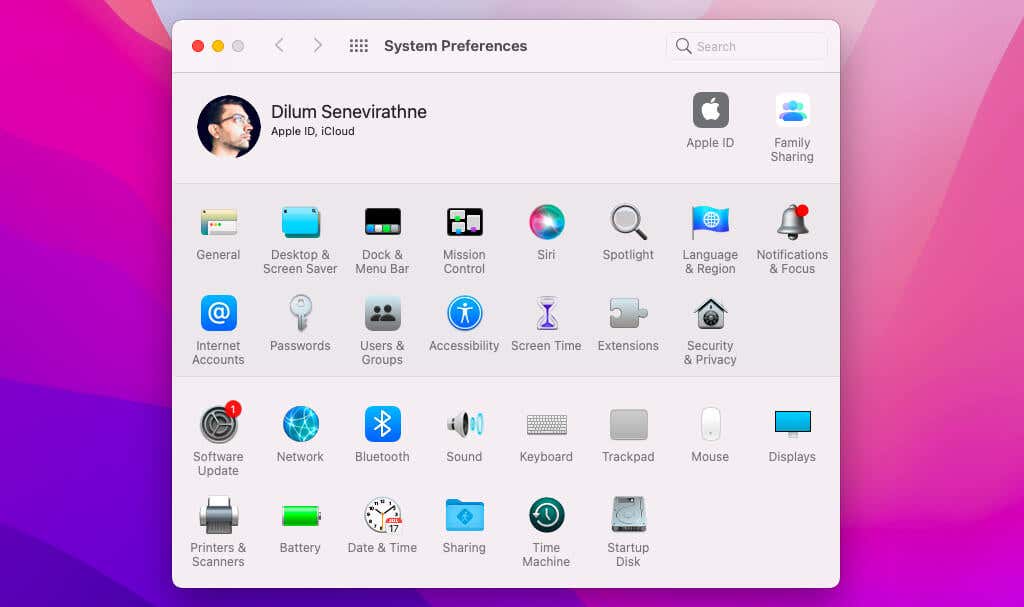
2. Select Time Machine.
3. Select the x-shaped icon next to the progress indicator to cancel the current Time Machine backup.
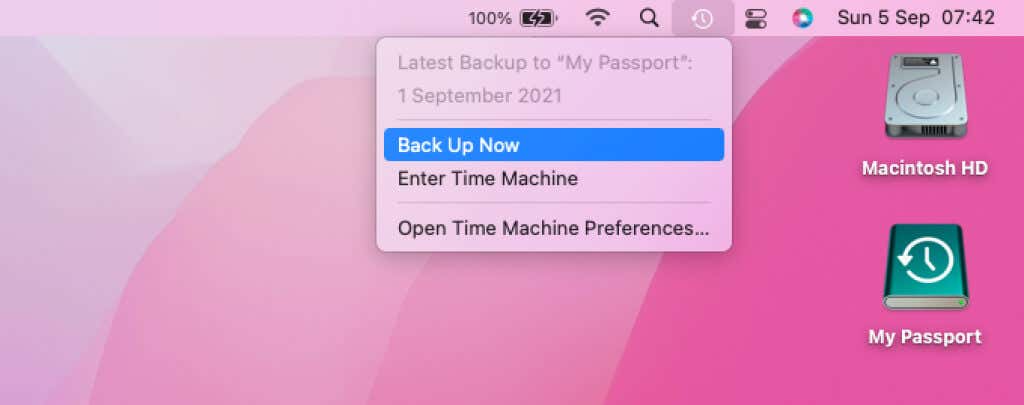
4. Select the Time Machine icon on Mac’s menu bar and pick the Back Up Now option to reinitiate a fresh backup.
Tip: If the Time Machine icon isn’t visible, check the box next to Show Time Machine in the menu bar under System Preferences > Time Machine to unhide it.
If an external Time Machine drive uses the Mac OS Extended (HFS+) file system, you can also try deleting the file that holds the information for your most recent backup attempt before retrying.
To do that, open Finder and select the Time Machine backup location on the sidebar. Then, select Backups.backupdb and pick the backup folder (it features the same name as your Mac’s). Follow that by moving the file that ends with the .inProgress extension to the Trash.
3. Exclude Large Files
Time Machine backs up your data incrementally, so subsequent backups are always faster. But newly added large files since your last backup (e.g., downloaded videos) can result in unnecessary delays. Excluding any non-essential items should speed things up.
1. Go to System Preferences > Time Machine and cancel the current backup.
2. Select the Options button.
3. Use the Plus button to pick the files and folders you want to exclude (e.g., your Mac’s Videos folder).
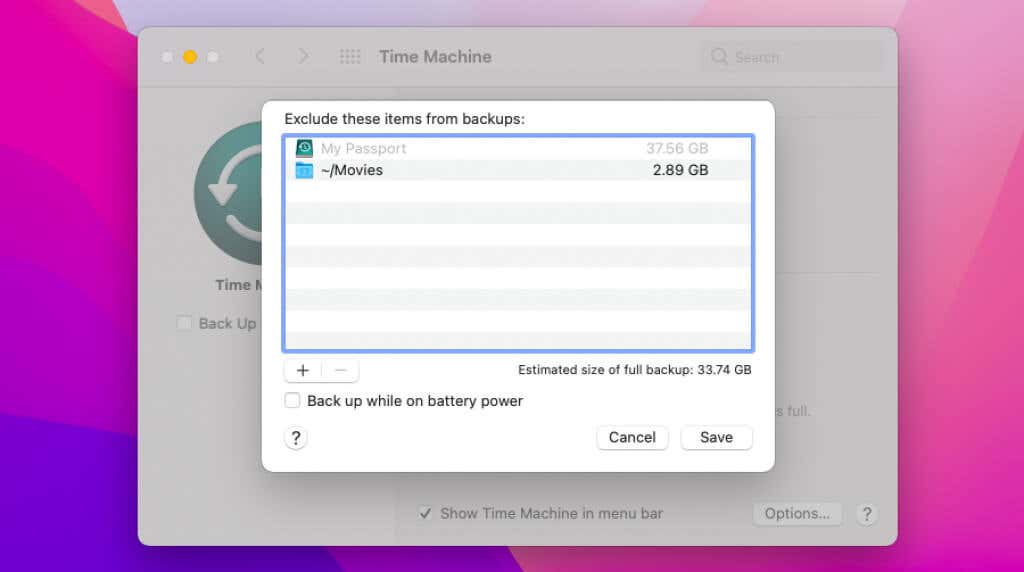
4. Select Save.
5. Initiate a fresh Time Machine backup.
4. Restart Mac and Retry
If Time Machine fails to detect your backup disk, results in errors, or continues to get stuck, try restarting your Mac. That flushes out obsolete system-related data and effectively fixes odd snags and hitches in macOS.
1. Go to System Preferences > Time Machine and cancel your current Time Machine backup.
2. Open the Apple menu and select Restart.
3. Uncheck the box next to Reopen windows when logging back in and selecting Restart.
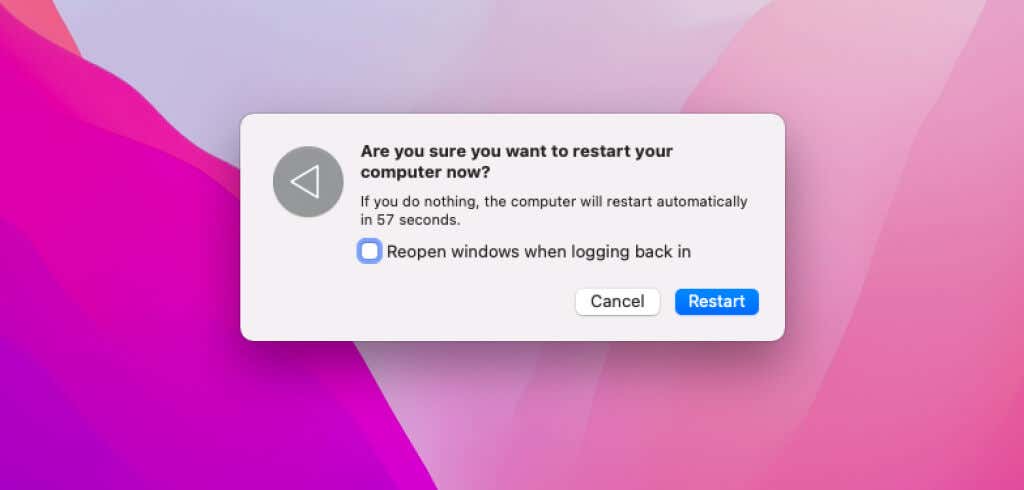
After you’ve finished rebooting, select Time Machine > Back Up Now on the menu bar to reinitiate a fresh backup. If you continue to experience issues, booting your Mac in and out of Safe Mode might also help.
5. Delete Local Snapshots and Retry
Corrupt local snapshots can create conflicts and prevent Time Machine from copying data to your backup disk. Delete them and see if that makes a difference.
1. Open Launchpad and select Other > Terminal.

2. Run the following command and press Enter to bring up a list of local snapshots:
tmutil listlocalsnapshots /
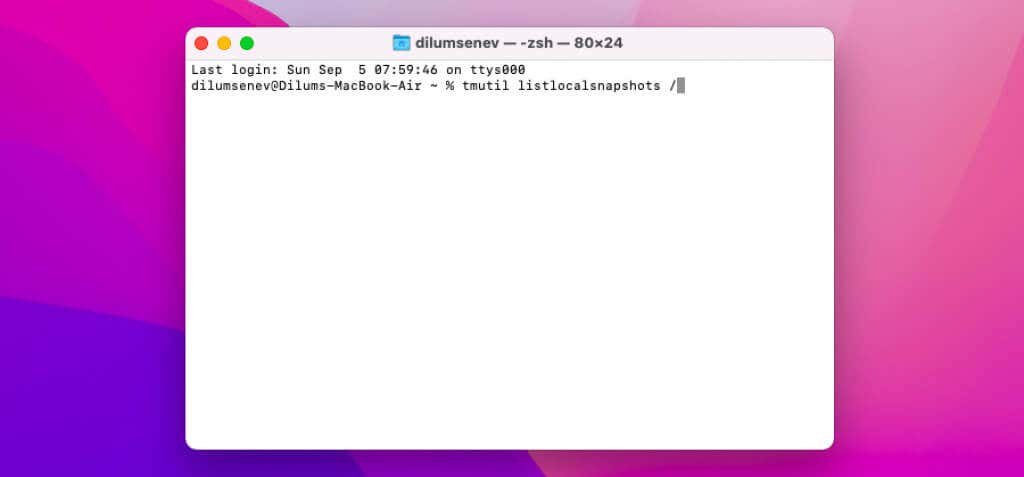
Each snapshot contains a backup date and identifier—e.g., 2021-09-05-000029.
3. Use the following command to delete each local snapshot:
sudo tmutil deletelocalsnapshots [backup date and identifier]
![09-Delete-Time-Machine-Snapshots - Switching To Mac sudo tmutil deletelocalsnapshots [backup date and identifier]](https://www.switchingtomac.com/wp-content/uploads/2021/11/09-Delete-Time-Machine-Snapshots.jpg)
After you’ve finished deleting everything, connect your backup disk and rerun Time Machine.
6. Update macOS and Retry
The built-in utility has been around for a long time, but it’s still susceptible to issues. Updating Mac’s system software should help you fix any known problems when Time Machine isn’t backing up.
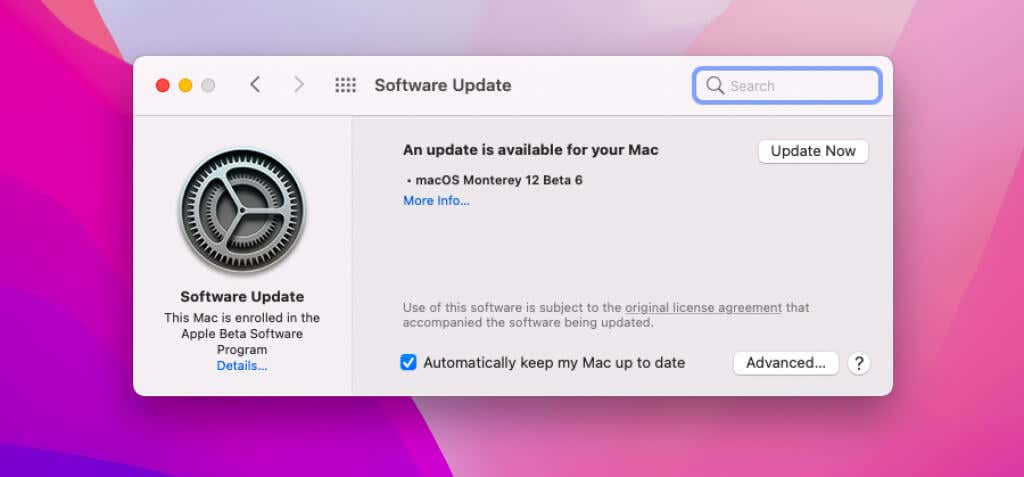
1. Go to System Preferences > Software Update.
2. Wait until your Mac finishes scanning for new updates.
3. Select Update Now to update your Mac.
7. Repair Backup Disk
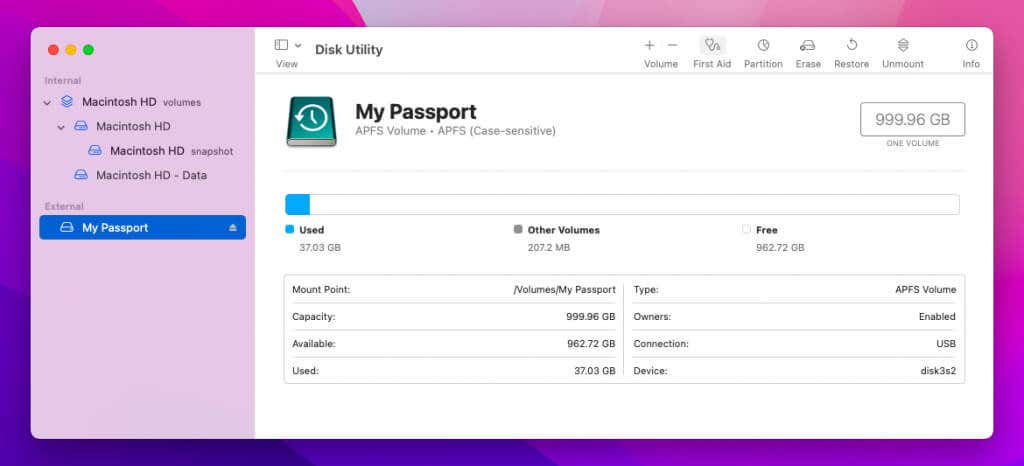
If Time Machine fails, gets stuck, or has trouble detecting an external backup drive, you should try repairing it. The Disk Utility applet in macOS should help you with that.
1. Open Launchpad and select Other > Disk Utility.
2. Select your Time Machine backup drive from the Disk Utility sidebar.
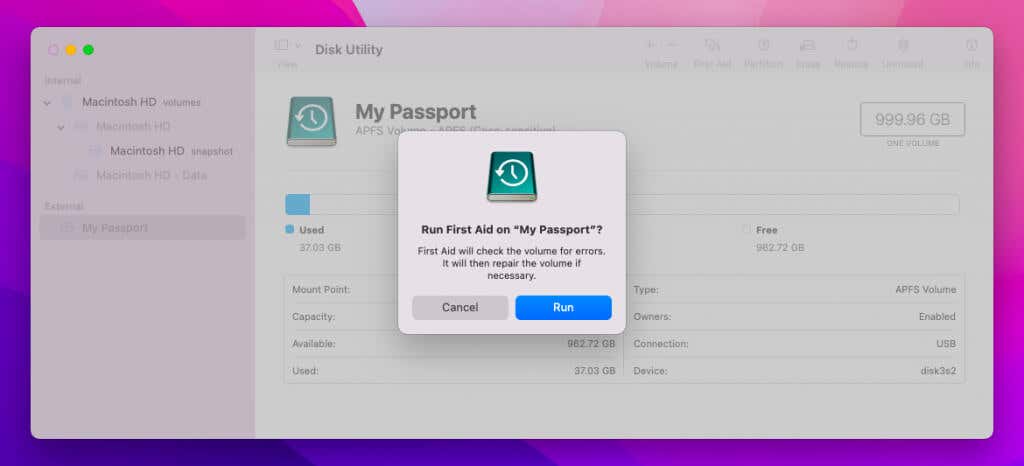
3. Select First Aid to repair the drive.
4. Select Run.
8. Verify Backup
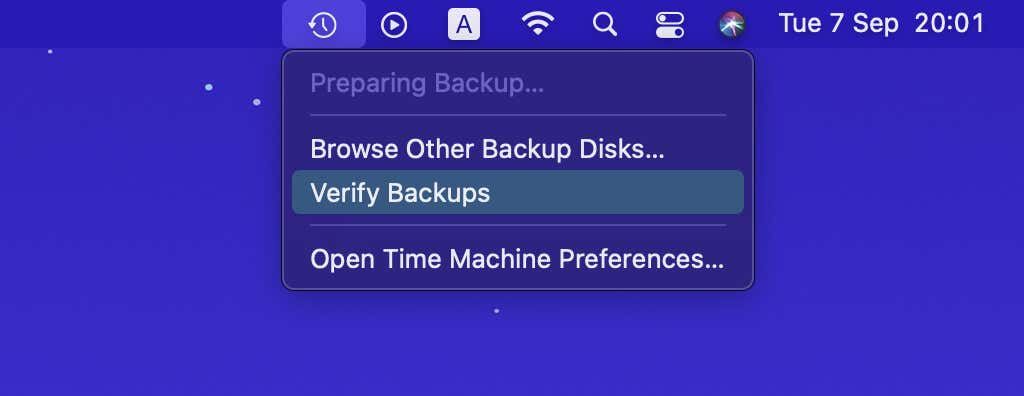
If Time Machine fails while backing up to a network disk, verifying your previous backups should help resolve issues with file corruption.
To do that, hold down the Option key and select the Time Machine icon on the menu bar. Then, select Verify Backups.
9. Connect Disk Correctly
If you use an external backup drive but Time Machine fails to recognize it, make sure that you’ve connected it to your Mac correctly. You may want to switch around USB ports and avoid connecting the drive to any USB hubs.
If you use a network disk or another Mac as a Time Machine destination, make sure that your Mac is connected to the same network as the other devices. Soft resetting the network router or renewing your Mac’s DHCP lease should help quickly deal with unexpected network-related issues.
10. Check File System
The first time you set up an external drive with Time Machine, your Mac will automatically set it up with a compatible file system. But if you’ve connected it to a different computer in the meantime, you might’ve ended up changing that unintentionally.
If Time Machine fails to detect the drive, you can quickly check its file system using Finder.
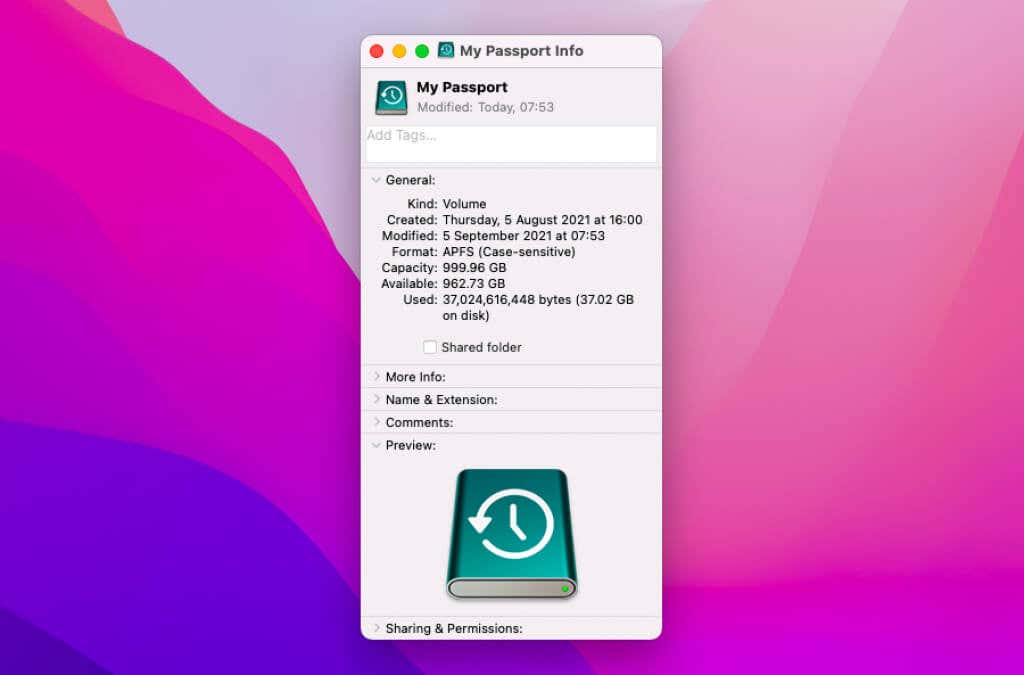
1. Control-click the backup drive on the desktop or Finder sidebar.
2. Select Get Info.
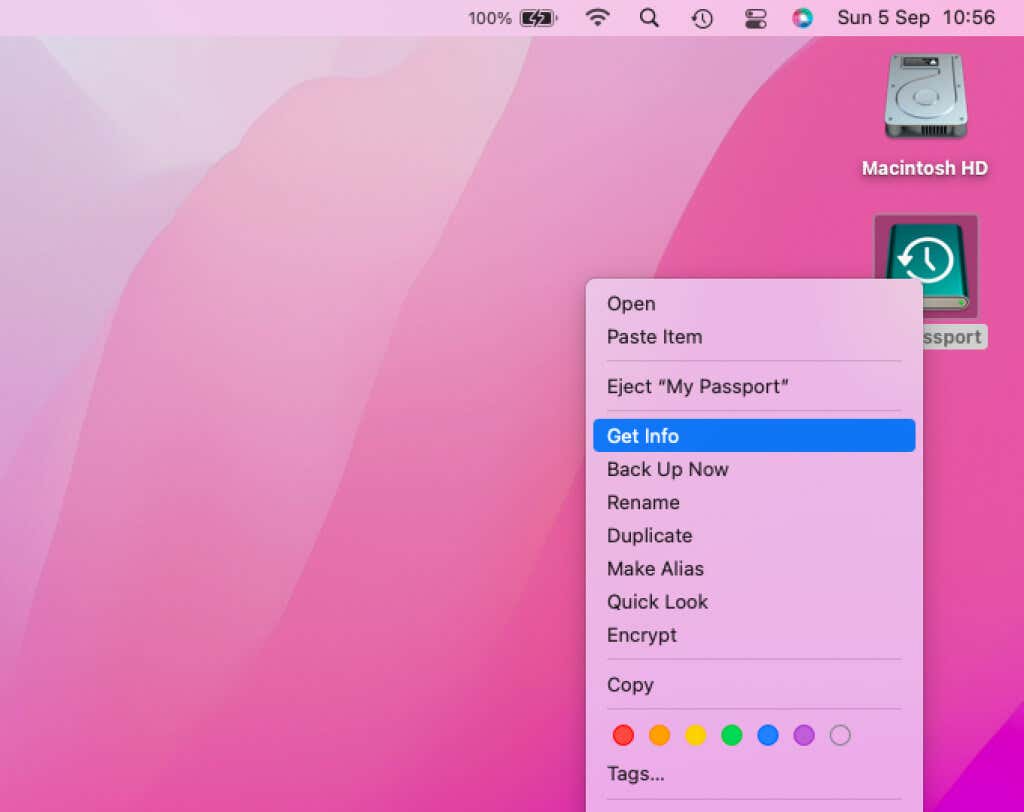
3. Check the file system next to Format. If it doesn’t show up as HFS+ (Mac OS Extended) or APFS (Apple File System), you must format the drive (more on that in the next section).
11. Format Disk and Retry
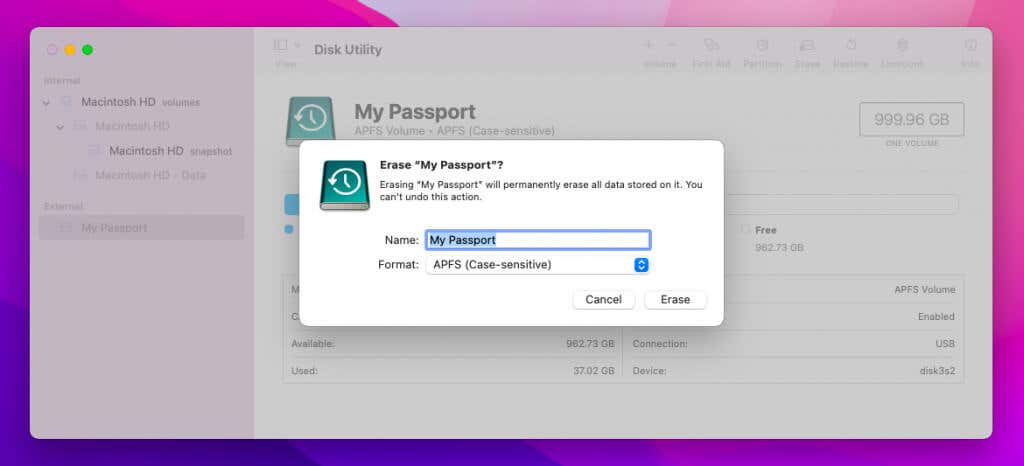
If Time Machine continues to have trouble with a specific backup disk, you must reformat and set it up from scratch. However, that will permanently delete all older Time Machine snapshots of your Mac.
1. Open Launchpad and select Other > Disk Utility.
2. Select your Time Machine backup drive.
3. Select Erase Disk and format the entire disk in the APFS format. If you use macOS 10.15 Catalina or earlier, use the Mac OS Extended format instead.
4. Go to System Preferences > Time Machine and choose the Select Disk option. Then, pick the drive that you just formatted and select Done.
5. Perform a fresh Time Machine backup.
Issues With Time Machine Backups Fixed
Most Time Machine backup-related issues are relatively easy to fix. Unless you’re dealing with a severe case of file corruption, going through some of the quick fixes (restarting your Mac, stopping and starting a backup, repairing/verifying a disk, etc.) should help you to get Time Machine to back up your Mac correctly again.


