The beats will be back in no time flat
AirPods are convenient and easy to use—until they begin to malfunction. Save for hardware faults and physical damages, AirPods’ troubles are easy to fix.
In this tutorial, we highlight eight troubleshooting steps to try if your AirPods fail to produce audio when connected to your iPhone, iPad, or Mac.
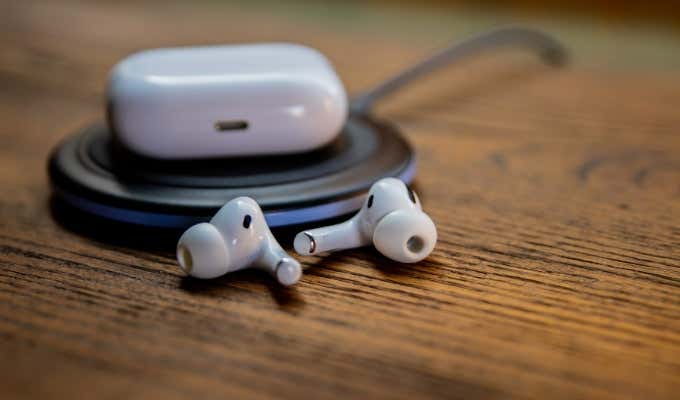
1. Increase Your Device Volume
First things first: make sure your device’s output volume isn’t low or muted. Press the volume up button on your smartphone or computer and check if your AirPods now play audio.
2. Change Your Preferred Output Device
If multiple audio devices are connected to your iPhone, iPad, or Mac, your AirPods may not produce sound if it isn’t the preferred listening device.
Switch Audio Output Device on iPhone and iPad
Connect the AirPods to your iPhone or iPad and follow the steps below.
- Open the Control Center and tap the AirPlay icon.
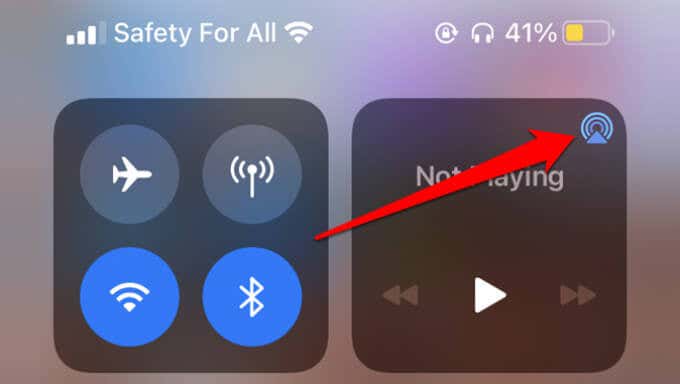
- Select your AirPods on the list of audio devices.
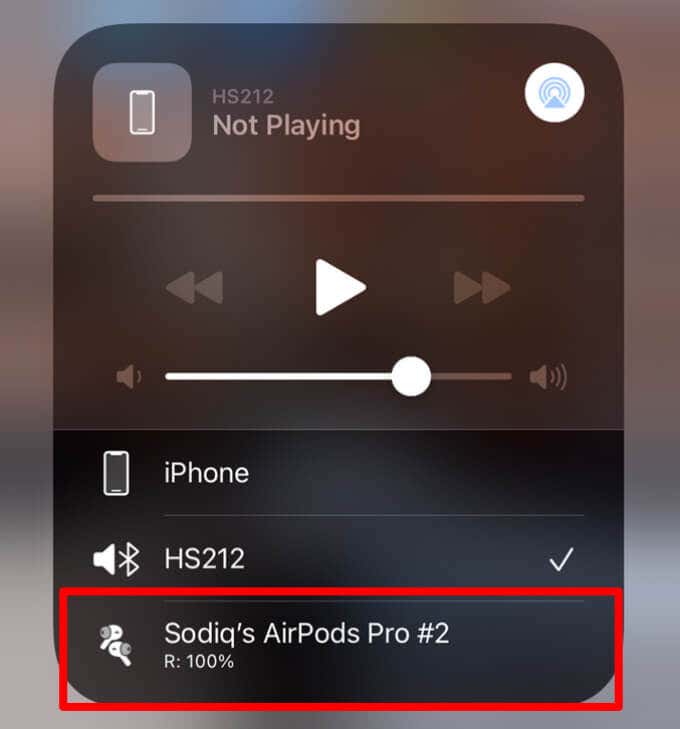
Switch Audio Output Device on iPhone and iPad
Routing your Mac’s audio to your AirPods is also super easy. Connect the AirPods to your Mac and follow the steps below.
- Tap the speaker icon on the menu bar.
- Select your AirPods as the active listening device in the “Output” section.
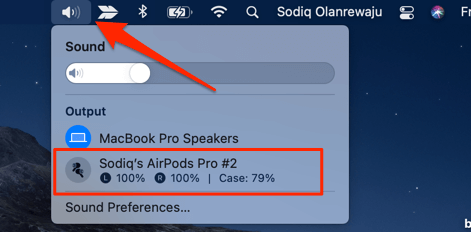
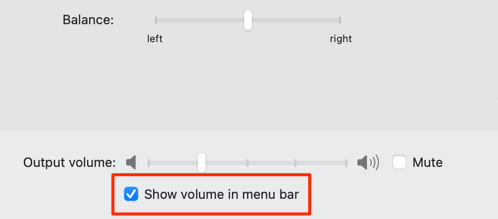
- If you don’t have the speaker icon on your Mac’s menu bar, head to System Preferences > Sound and check the Show volume in menu bar box.
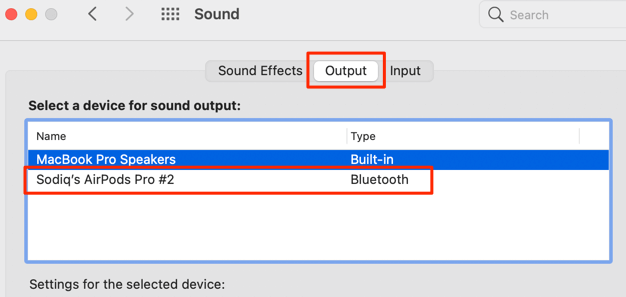
You can also change your Mac’s output device directly from the Sounds menu. Go to the Output tab and select your AirPods as the preferred output device.
3. Remove and Plug the AirPods In Your Ear
AirPods only “come alive” when you plug them in your ears, thanks to the numerous sensors built into the device. As efficient as these sensors are, they sometimes fail to detect in-ear placement. When this happens, your AirPods may not produce audio at all, even if it’s connected to your device.
If there’s no sound production on your AirPods, remove them from your ears and put them back in. You should hear a chime indicating that the AirPods are ready to be used with your device. If you don’t hear this chime, that could be because the AirPods battery is low.
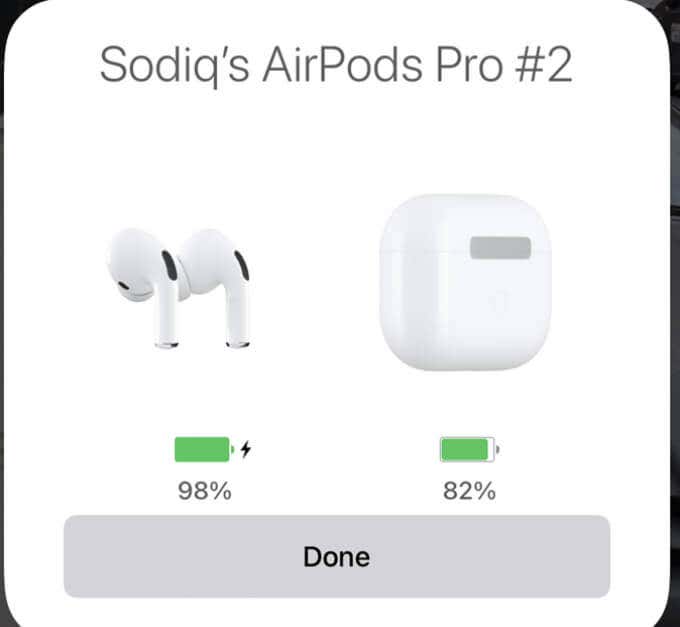
Check your AirPods battery status and make sure each AirPod holds at least 10% power. Otherwise, put the AirPods back in the charging case for a few minutes to recharge.
4. Disable Automatic Ear Detection
As mentioned above, removing both AirPods (from your ears) will also pause audio playback. AirPods manage this with the “Automatic Ear Detection” feature.
If there’s a problem with your AirPods’ sensors, audio output may take a hit. Interestingly, disabling Automatic Ear Detection is a good troubleshooting trick for fixing such issues. That’ll trigger your device to always play audio through your AirPods. That way, you don’t have to rely on the AirPods’ sensors to detect in-ear placement before playing audio.
How to Disable Automatic Ear Detection on iPhone& iPad
Insert at least one AirPod in your ear and wait until you hear a chime or tone. Then follow the instructions below to turn off the AirPods’ auto-detection.
- Open the Settings app and select Bluetooth.
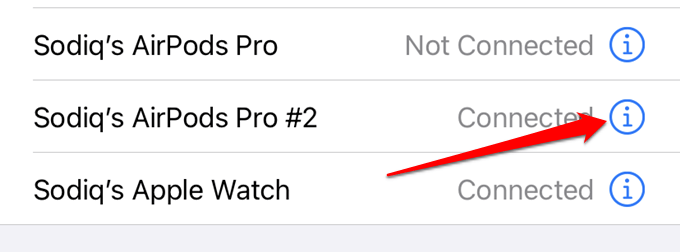
- Tap the info icon 🛈 next to your AirPods to open the AirPods settings menu.
- Toggle off Automatic Ear Detection.
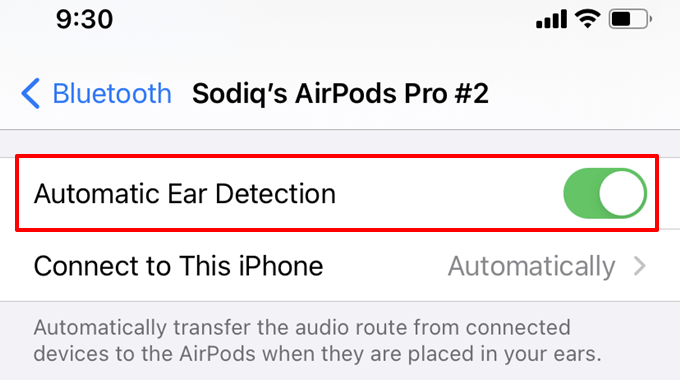
Remove and plug the AirPod back in your ears. Play a song or video (remember to crank up your device’s volume) and check if the AirPods now play audio.
How to Disable Automatic Ear Detection on Mac
Connect the affected AirPods to your Mac and follow the steps below to disable Automatic Ear Detection.
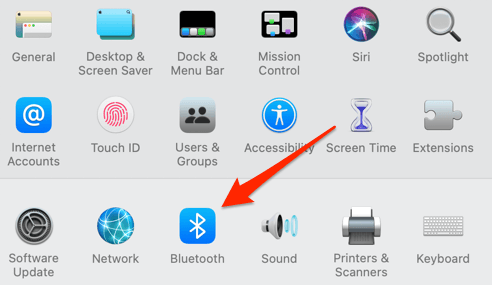
- Open System Preferences and select Bluetooth.
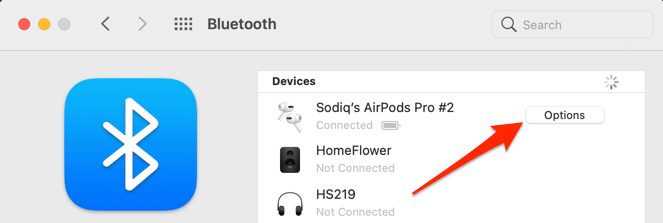
- In the Devices section, select the Options button next to your AirPods.
- Uncheck Automatic In-Ear Detection and select Done.
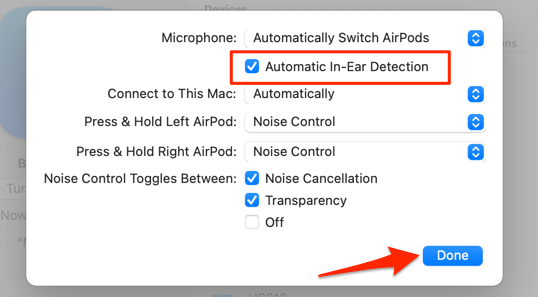
Note: Disabling Automatic Ear Detection will route your device’s audio to your AirPods, even when you aren’t wearing them.
5. Factory Reset the AirPods
Factory resetting your AirPods entails removing them from your device’s memory and reconnecting them from scratch. That could fix audio and connectivity-related issues. Resetting your AirPods can even make it louder.
Reset AirPods on iPhone and iPad
- Launch the Bluetooth Settings menu on your iPhone or iPad and click the info 🛈 icon next to the AirPods.

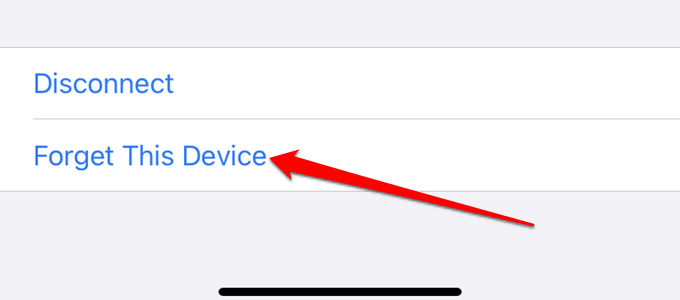
- Scroll to the bottom of the AirPods settings menu and select Forget This Device.
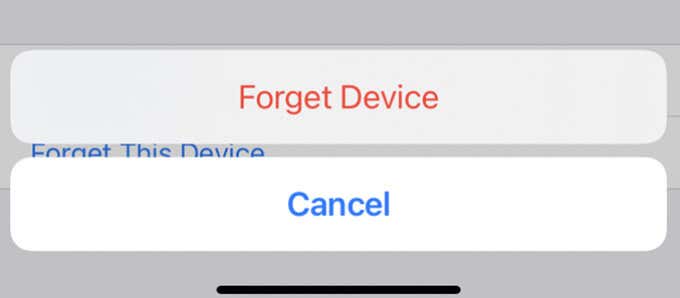
- Select Forget Device on the confirmation prompt to proceed.
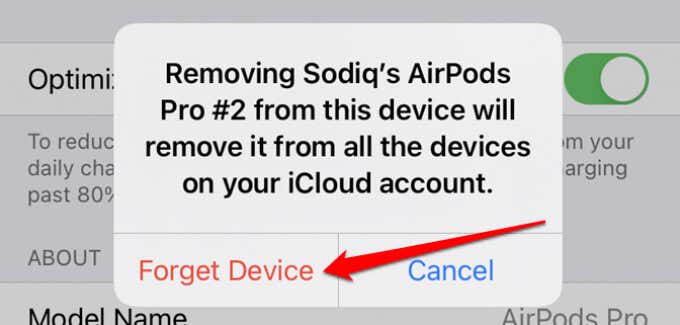
- Select Forget Device to proceed.
- Afterward, place both AirPods in the charging case and hold the setup button on the back of the case until the status light starts flashing white/amber.
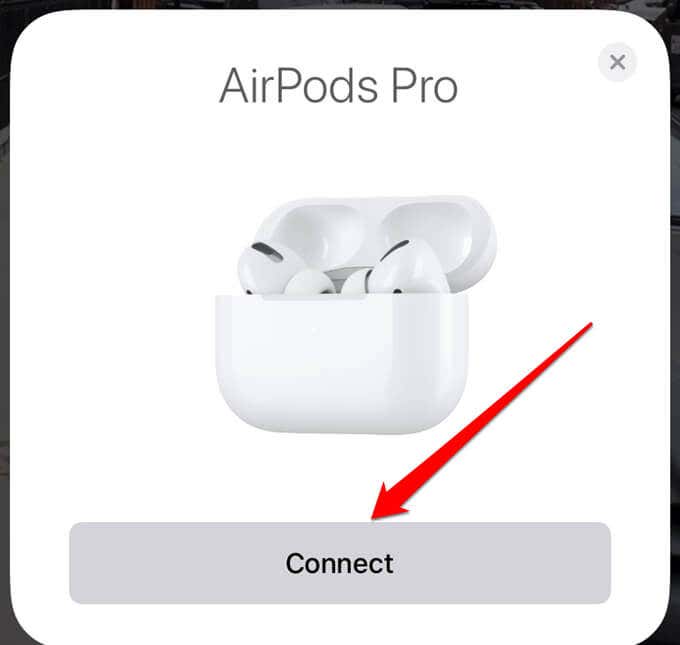
- Move the AirPods close to your iPhone or iPad, and tap Connect on the card that pops up on the screen.
Reset AirPods on Mac
Resetting AirPods on Mac also entails removing and reconnecting the device. Here’s how to get it done.
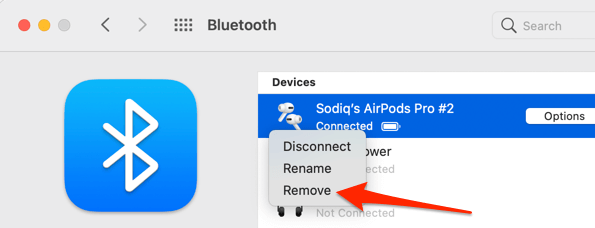
- Go to System Preferences, select Bluetooth, right-click your AirPods and select Remove.
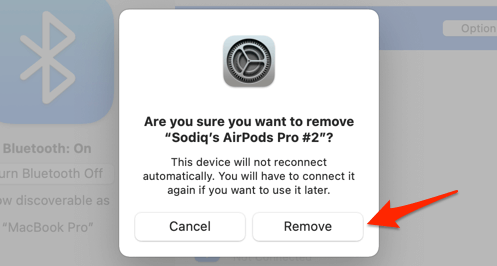
- Select Remove on the confirmation prompt.
- To reconnect the AirPods, place them in the charging case, and press and hold the setup button until the status light continuously blinks white and amber.
- You should see the AirPods in the macOS Bluetooth menu (System Preferences > Bluetooth) and select Connect.
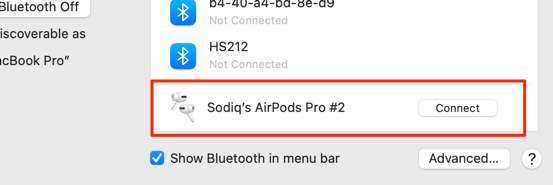
Play a song or watch a video and check if the AirPods now play audio. If the problem persists, try resetting your device’s network settings.
6. Reset Network Settings
A problem with your device’s Bluetooth configuration can mess with the audio output of connected Bluetooth devices. If that’s the root cause of the AirPods sound issues, performing a network reset should work as a fix. Here’s how to reset your iPhone’s network settings.
- Go to Settings > General > Reset and select Reset Network Settings.
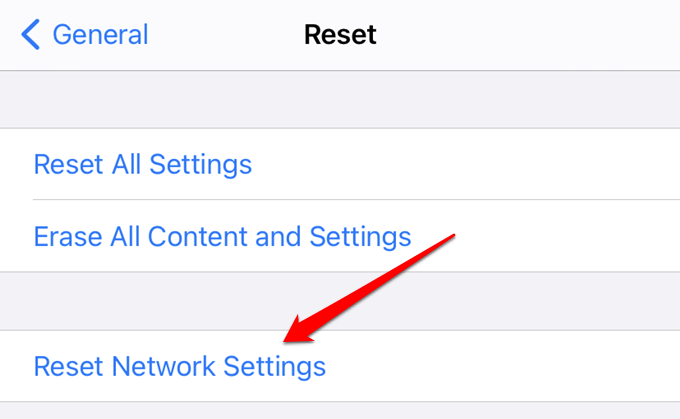
- Enter your device’s passcode and tap Reset Network Settings on the confirmation prompt.
That’ll immediately restart your iPhone or iPad and remove all previously connected Wi-Fi networks, Bluetooth devices, VPN settings, and other network-related configurations. Reconnect your AirPods to your device and check if you can now hear audio during media playback.
Reset Bluetooth Settings on Mac
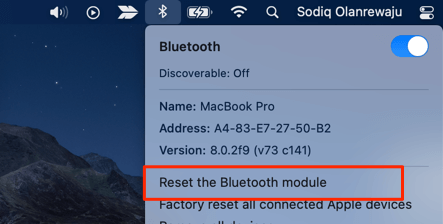
On macOS, resetting the Bluetooth module should fix glitches preventing sound production on your AirPods and other Bluetooth devices.
- Hold Shift + Option on the keyboard and click the Bluetooth icon on the menu bar.
- Select Reset the Bluetooth module.
- Select OK to continue.
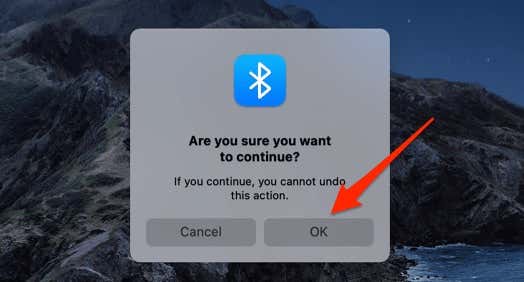
Reconnect the AirPods to your Mac and check if it now works correctly.
7. Update Your AirPods’ Firmware
You may encounter difficulties using your AirPods or connecting them to other devices if the firmware is old or outdated. To check your AirPods firmware version, open the Bluetooth settings menu, tap the info icon next to your AirPods and check the Version column in the “About” section.
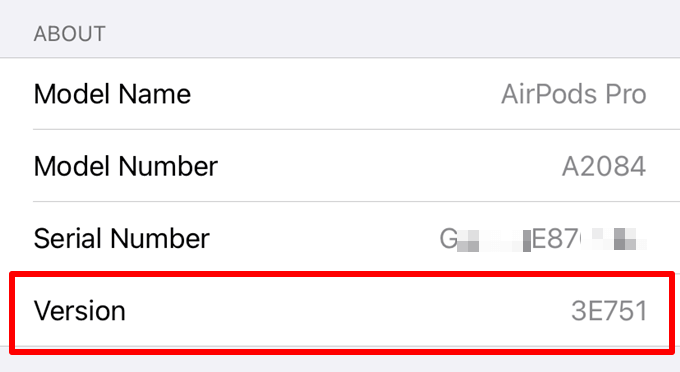
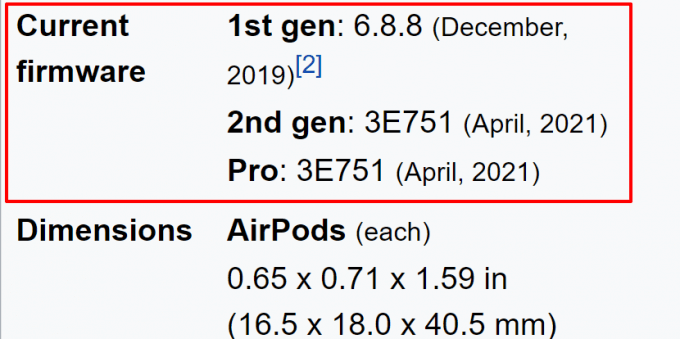
Currently, the latest firmware version for the 1st Generation AirPods is v6.8.8 (released December 2019). The 2nd Generation AirPods and the AirPods Pro use the firmware version 3E751 (release April 2021). Your AirPods should automatically update its firmware when connected to your iPhone or iPad via Bluetooth.
You can also manually trigger the update, especially if the firmware version displayed in the Settings app isn’t the latest. Connect your iPhone or iPad to a wireless network and follow the instructions below to update your AirPod’s firmware:
- Put both AirPods in the charging case and close the lid.
- Reopen the lid and connect the AirPods to your device. Go to Settings > Bluetooth and ensure the AirPods status reads “Connected.”
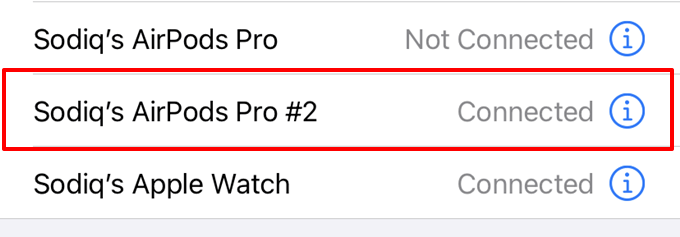
If the AirPods’ battery status is displayed on the screen, close or swipe the card downward.
- Keep your iPhone and the AirPods in close proximity (leave the AirPods case open) for about 10-15 minutes.
- Close the lid and wait for another 10-15 minutes. If there’s a new firmware for your AirPods, iOS will install the updates over the air within 30 minutes.
Head to the AirPods info page and check if the firmware was updated. If nothing changes, restart your iPhone or iPad and check again.
Unlike iOS, macOS, and watchOS, Apple doesn’t publish any official release notes for AirPods firmware updates. That makes it a bit difficult to keep abreast of new firmware updates. Not to worry though, there are other interesting ways to keep track of AirPods updates. For example, you can just head to the AirPods page on Wikipedia and check the “Current firmware” section.
The AirBuddy app (cost $5, available for macOS only) is another fantastic utility that notifies you of new AirPod firmware updates. The app can also fix connectivity-related failures between your Mac and AirPods.
8. Update Your Devices
Installing the latest updates on your device can also fix your AirPods audio problems, especially if your device is running a new or buggy operating system.
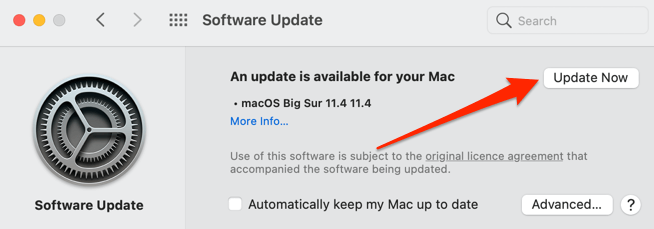
To update your iPhone or iPad, head to Settings > General > Software Update and tap Download and Install. For Mac, go to System Preferences > Software Update and click the Update Now button.
Explore AirPods Repair Options
If the problem persists despite trying these troubleshooting fixes, visit a nearby Apple Store or an authorized Apple Service Provider to have your AirPods examined for possible hardware damages.
You could also explore other AirPods service options like Mail-in repair. Note that you may be required to provide your AirPods’ serial number as well as proof of purchase—a sales receipt or the reseller’s contact information.


