So grandma will be able to see you again
This tutorial embodies eight troubleshooting steps to follow if your device’s (iPhone, iPad, and Mac) camera doesn’t work for FaceTime calls. If you’re having trouble with your Mac’s webcam (also called the “FaceTime HD camera”), refer to this article instead.
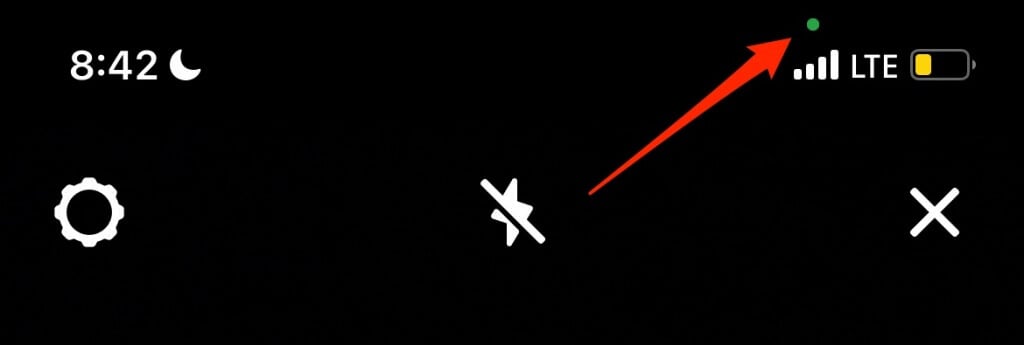
Before trying the recommendations below, make sure no other app is using your device’s camera. There’s a green indicator that sits next to your Mac’s FaceTime HD camera. It lights up when an app is using the camera. On iPhone and iPad, check for the green indicator in the status bar—right above the network signal bars.

If the green indicator is on, close apps that could be using your device’s camera and check if your device’s camera now works in FaceTime. Think video-calling apps (Zoom, Skype, Teams), instant messengers (WhatsApp, Telegram), social media apps (Facebook, Snapchat, Instagram), video recording apps, or even your browser. Restarting your device might also fix the issue with your FaceTime camera not working.
1. Check Internet Connection
Video calling apps may not transmit images during video calls if the internet connection is slow or unstable. If your device’s camera doesn’t work during FaceTime calls, make sure your cellular data or Wi-Fi connection is working correctly. Visit a webpage on your browser or use other internet-dependent apps and check if they work.
Contact your internet service provider if you’re using cellular data. For wireless (Wi-Fi) connections, move your device closer to your router, or reboot the router. Enabling and disabling airplane mode can also refresh your device’s connection and get the FaceTime camera working correctly again.

2. Turn on FaceTime Camera
If your video tile is showing a black screen during FaceTime calls on your iPhone, iPad, or Mac, you probably turned off the FaceTime camera by accident.
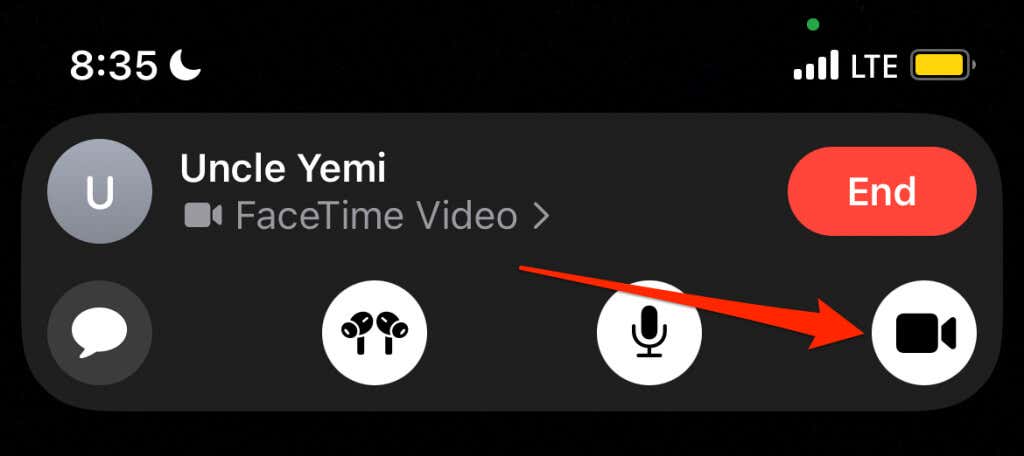
In iOS 15 and iPadOS 15, tap the screen during the call and select the camcorder icon until the FaceTime camera works.
On older iOS and iPadOS versions, tap the screen during the call, swipe up the card at the bottom of the screen, and tap Camera Off to activate the FaceTime camera.
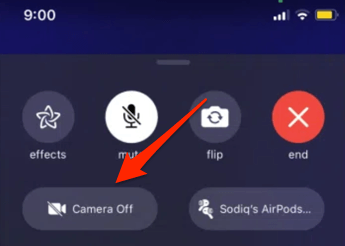
If the camera is on but your tile in the FaceTime call is showing a black screen, enable the Camera Off option and turn it back off.
The FaceTime client on Mac also comes with a camera switch. If the crossed-out camcorder icon is highlighted, the FaceTime HD camera is disabled for that call.
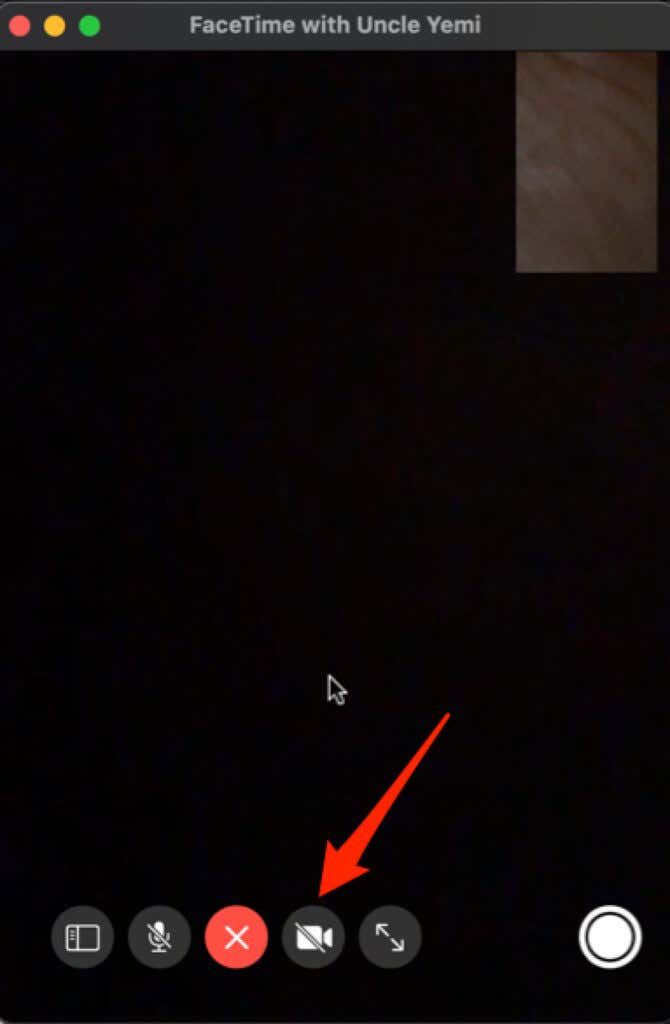
Select the icon to re-enable the camera, or tap Camera Off on the Touch Bar if your Mac has one.

3. Restart the FaceTime Call
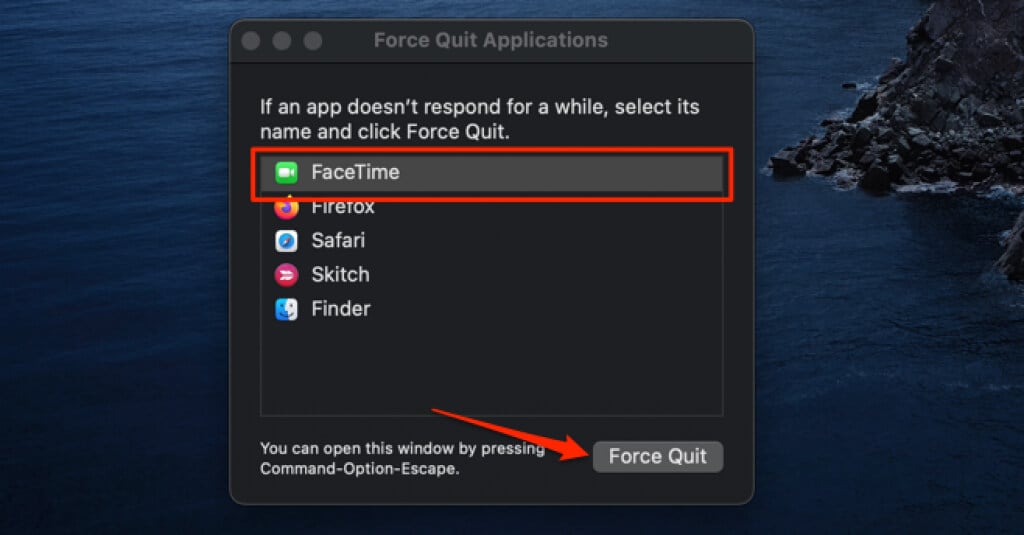
If FaceTime’s camera is enabled but other parties still can’t see you, end the call, close and reopen FaceTime, and restart the call. On Mac, force quit FaceTime, rejoin the call and check if your FaceTime camera now works.
Press Command + Option + Escape on your Mac’s keyboard, select FaceTime in the “Force Quit Applications” window, and select Force Quit.
4. Try Another App
Open apps that use your device’s camera and check if they work. Launch the Camera app or third-party video-calling apps like Zoom and Skype. If your camera works on these apps, then FaceTime is the problem. Restarting your device or reinstalling FaceTime might fix the problem.
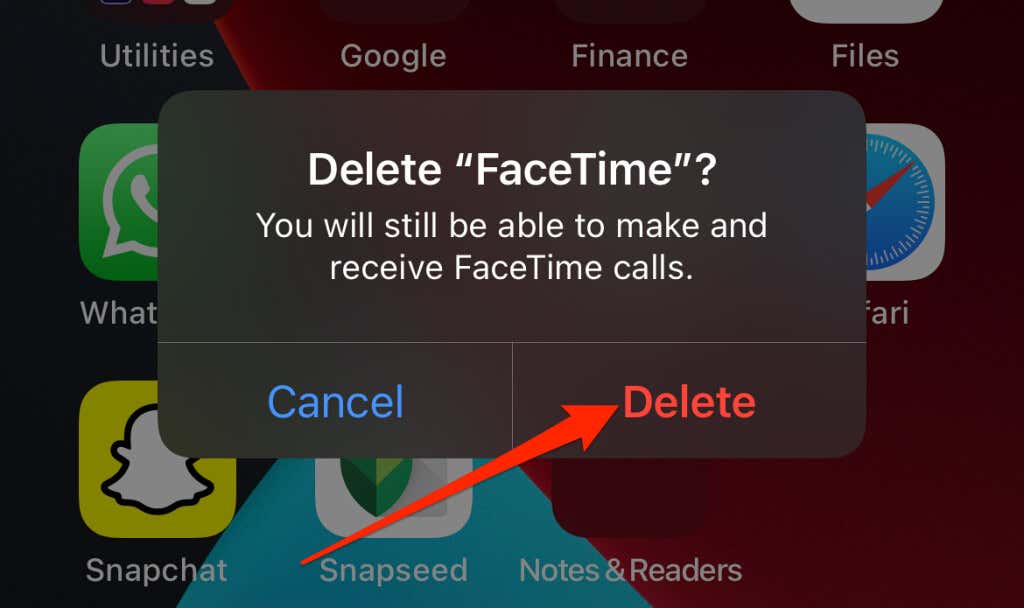
Note that you’ll still be able to make and receive FaceTime calls even after deleting the FaceTime app.
- Press and hold the FaceTime app icon and select Remove App.
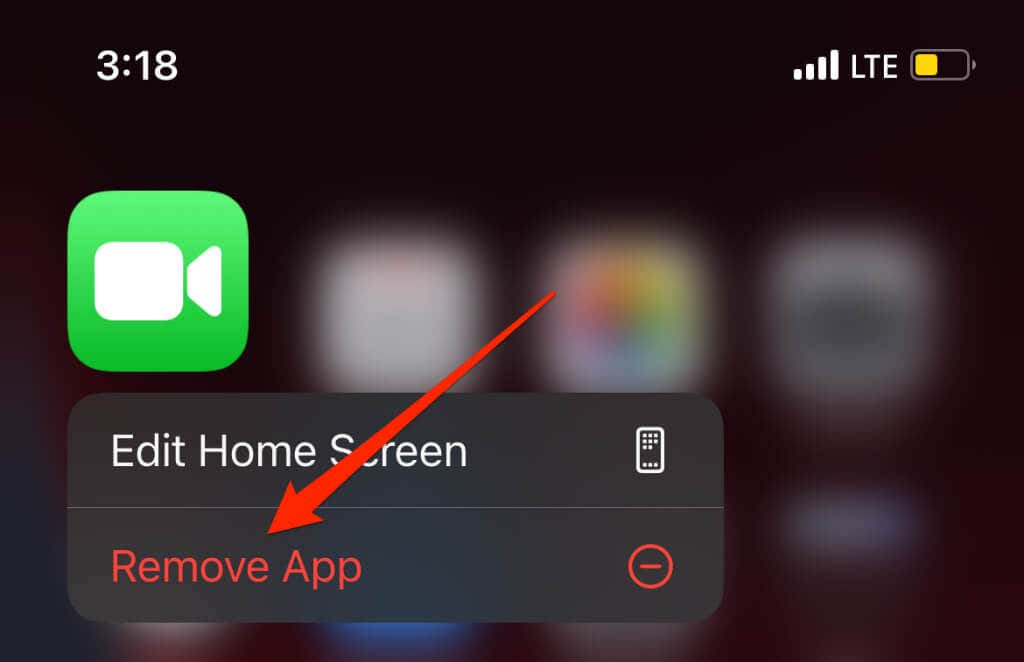
- Select Delete App on the app removal menu.
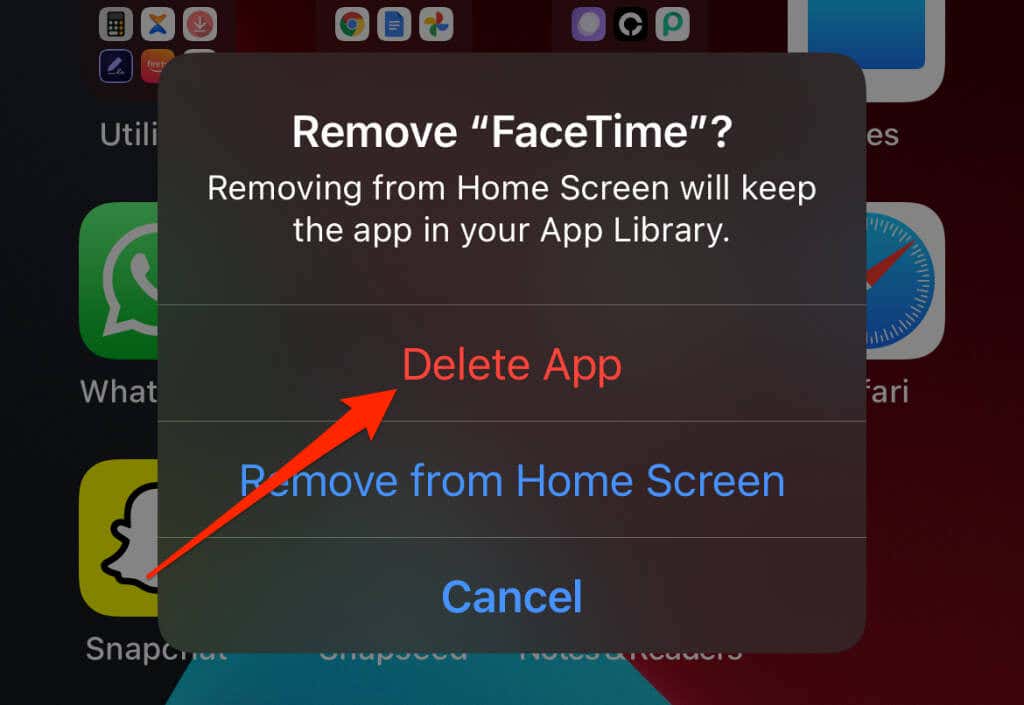
- Finally, select Delete.
Head to the FaceTime page on the App Store and reinstall the app on your device. Restart your iPhone or iPad if the problem persists.
5. Allow Camera in Screen Time Settings
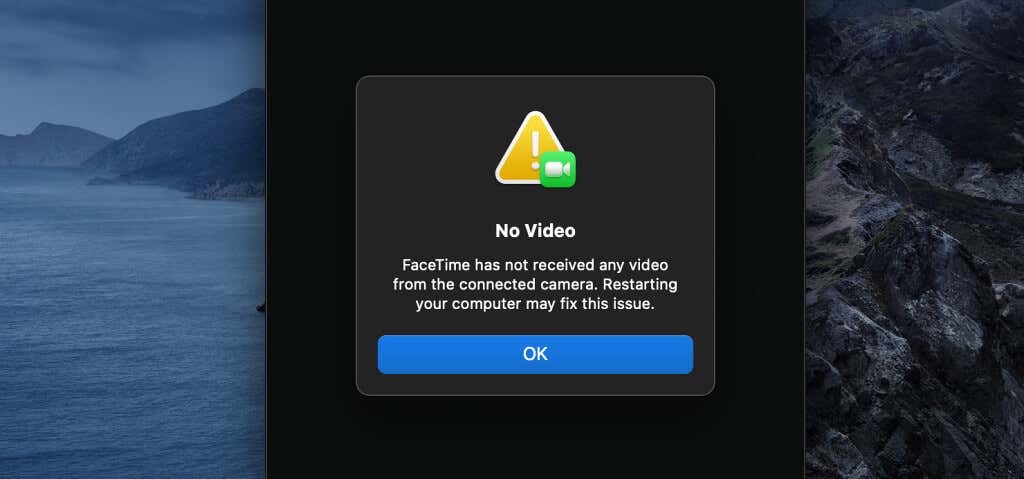
FaceTime (and other apps) won’t receive video signals from your Mac if there’s a camera restriction in the Screen Time settings. Head to the Screen Time privacy section and make sure your apps are allowed to use your Mac’s camera.
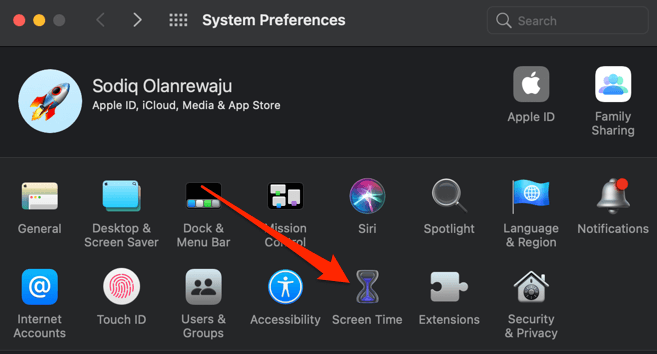
- Open the System Preferences and select Screen Time.
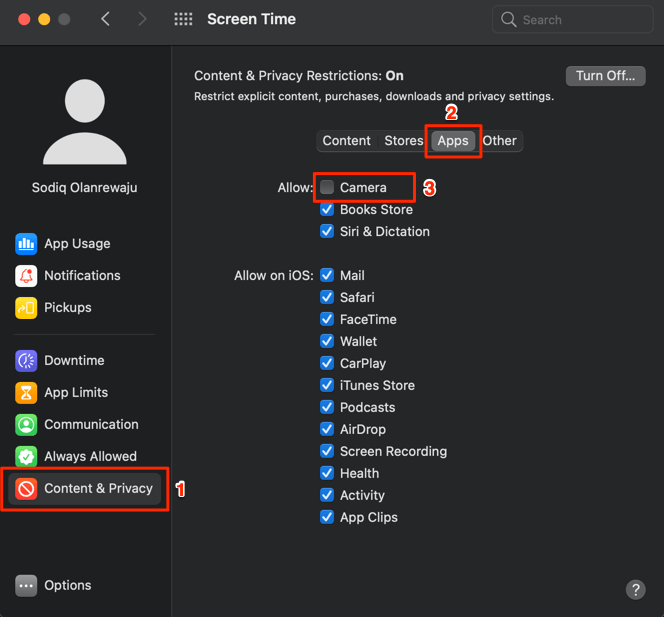
- Select Content & Privacy in the sidebar, head to the Apps tab, and make sure the Camera option is checked. Otherwise, the FaceTime camera won’t work.
6. Force Quit Background Camera Processes
“VDCAssistant” and “AppleCameraAssistant” are two essential system processes that run in the background when your Mac’s camera is in use. You may encounter difficulties using your Mac’s camera if there’s a problem with either of these services. Force-quit VDCAssistant and AppleCameraAssistant using Terminal or Activity Monitor and check if that restores the FaceTime camera.
Force Quit VDCAssistant Using Activity Monitor
- Go to Finder > Applications > Utilities and open Activity Monitor.
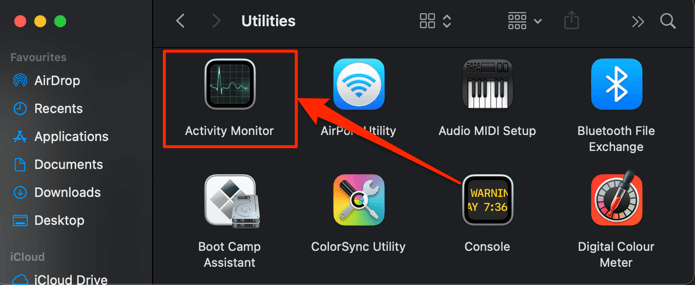
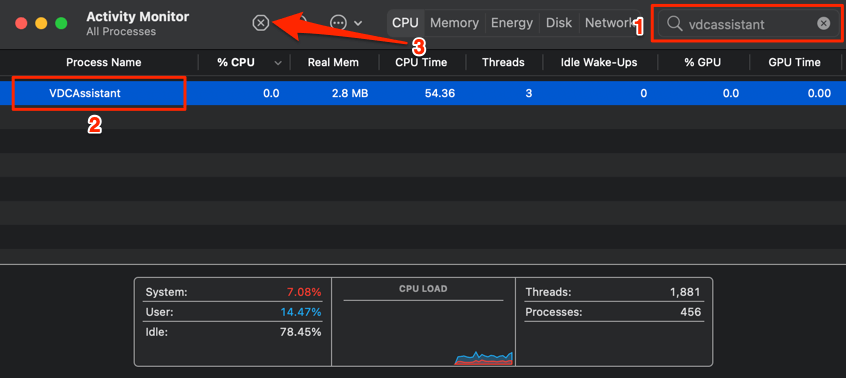
- Type vdcassistant in the search box, select VDCAssistant and select the X icon in the toolbar.
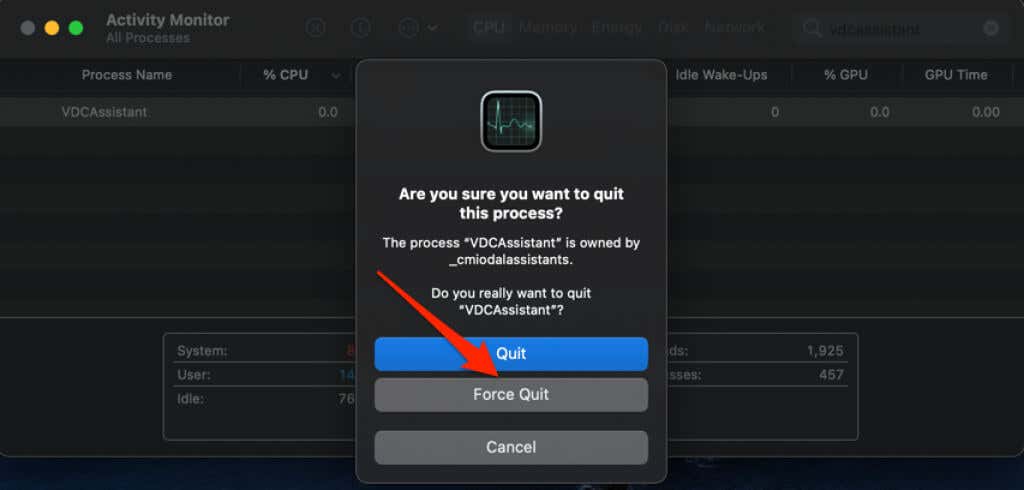
- Select Force Quit to continue.
Force Quit VDCAssistant and AppleCameraAssistant Using Activity Monitor
The macOS Terminal is another useful tool for killing background processes. Here’s how to use it to force close VDCAssistant on your Mac.
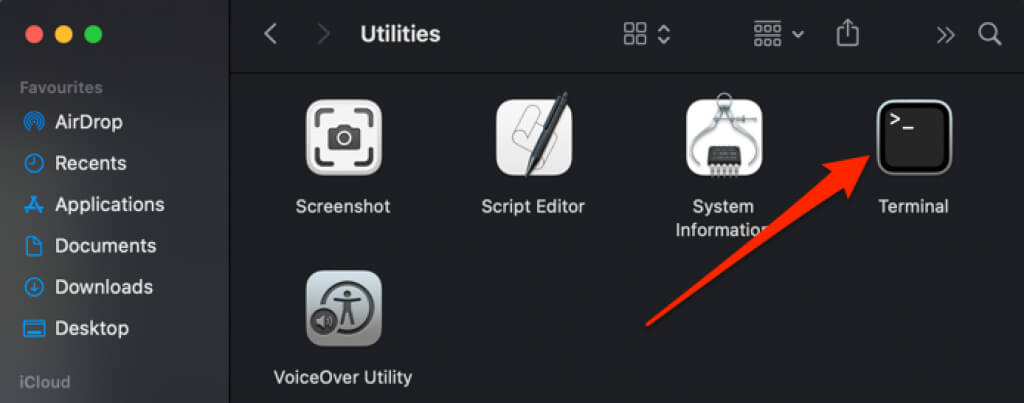
- Go to Finder > Applications > Utilities and open Terminal.
- Type or paste sudo killall VDCAssistant in the console and press Return.

- Enter your Mac’s password and press Return.

If your Mac is running macOS Mojave or older, you’ll also need to force quit the AppleCameraAssist process (see step #4). Otherwise, jump to step #6 if you have macOS Catalina or newer installed on your Mac.
- Paste sudo killall AppleCameraAssistant in the Terminal console and press Enter.

- Enter your Mac’s password again and press Enter.
Open FaceTime or other video-calling apps and check if your Mac’s camera now works.
7. Update Your Device
iOS, iPadOS, and macOS updates often ship with bug fixes for issues affecting FaceTime and other system apps. Check your device’s settings menu and install any available update on the page.
On iPhone and iPad, go to Settings > General > Software Update and tap Download and Install.
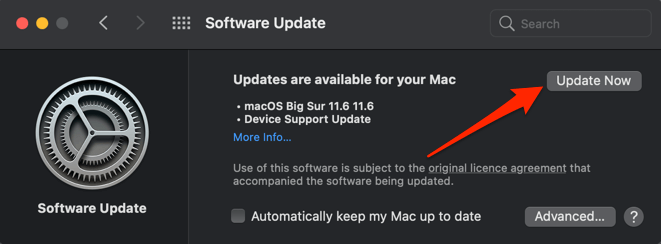
To update your Mac, open System Preferences, select Software Update, and select the Update Now (or Upgrade Now) button.
8. Use an External Camera
If your Mac’s built-in FaceTime camera isn’t working, use an external webcam if you have one. Afterward, configure the webcam as the primary camera when making calls in FaceTime and other apps.
Open FaceTime, select Video in the menu bar, and select the external webcam in the “Camera” section.

Contact Apple Support or visit a nearby Genius Bar if your device’s camera still isn’t working in FaceTime or other apps.


