Cut down the number of hours doomscrolling
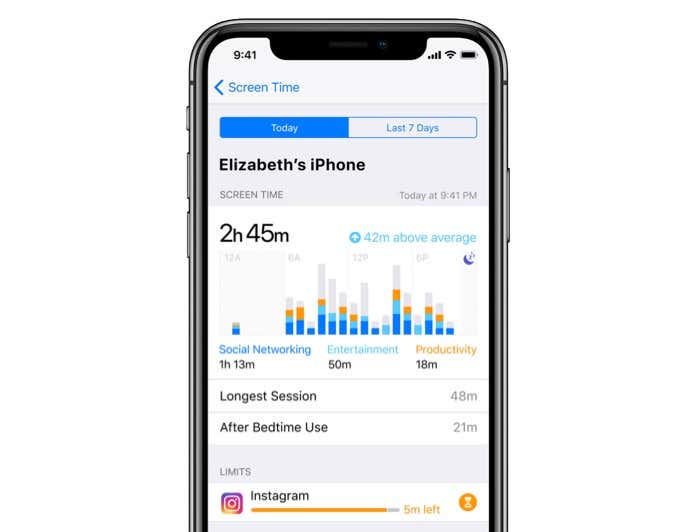
With the release of macOS Catalina, Apple introduced Screen Time on the Mac. It works similar to Screen Time on the iPhone and iPad and allows you to keep close tabs on—and even manage—your Mac usage habits. To make things better, it also doubles up as a powerful parental management tool.
Below, you will learn everything you need to know about setting up Screen Time and using it on your Mac.
How to Enable Screen Time on Mac
Provided that your Mac has macOS 10.15 Catalina or later installed, you can enable Screen Time by heading over to the System Preferences pane.
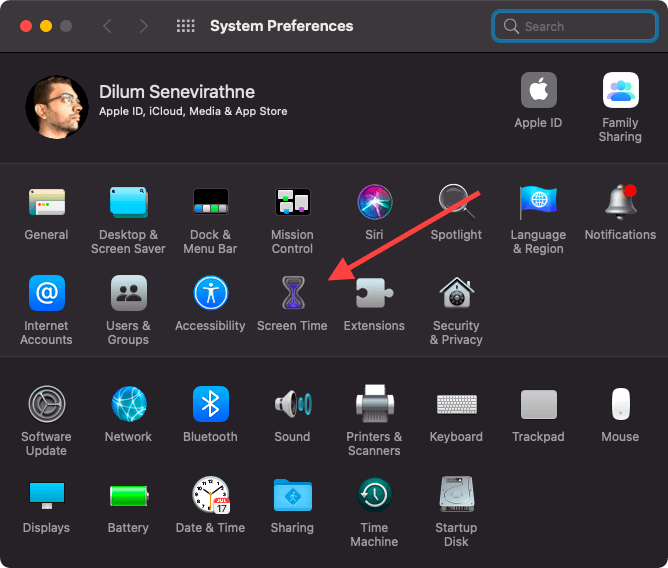
1. Open the Apple menu and select System Preferences.
2. Select Screen Time.
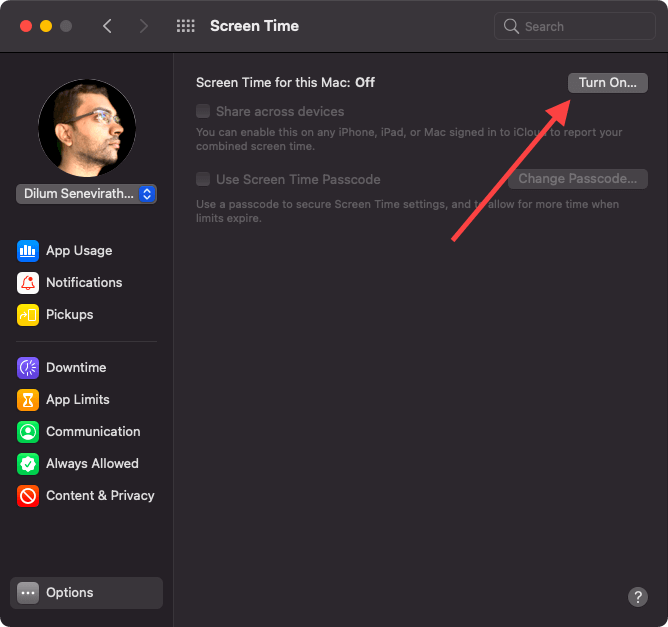
3. Select Options to the lower-left of the Screen Time pane. Then, select the button labeled Turn On to activate Screen Time on your Mac.
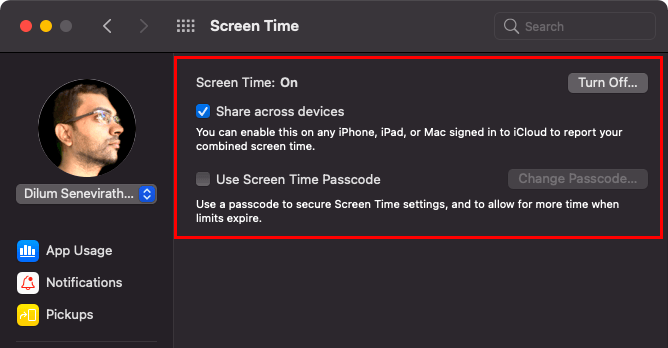
You can also check the box next to Share across devices if you want to share your Screen Time stats across other iOS, iPadOS, and macOS devices tied to your Apple ID.
Additionally, you can set up a Screen Time passcode. If you’re a parent, that should come in useful when enforcing app limits or a downtime schedule (more on that later). But, it’s best used on standard accounts since administrator user accounts can bypass passcode restrictions.
If you choose to add a Screen Time passcode on an administrator account, select Don’t allow this user to administer this account to convert it to a standard user account.
How to Monitor App Usage
After enabling Screen Time, you can start checking your app usage stats in bar chart form by selecting the App Usage side tab. Each bar represents a day, and you can use the arrow buttons to the top-right of the screen to move through your Screen Time history.
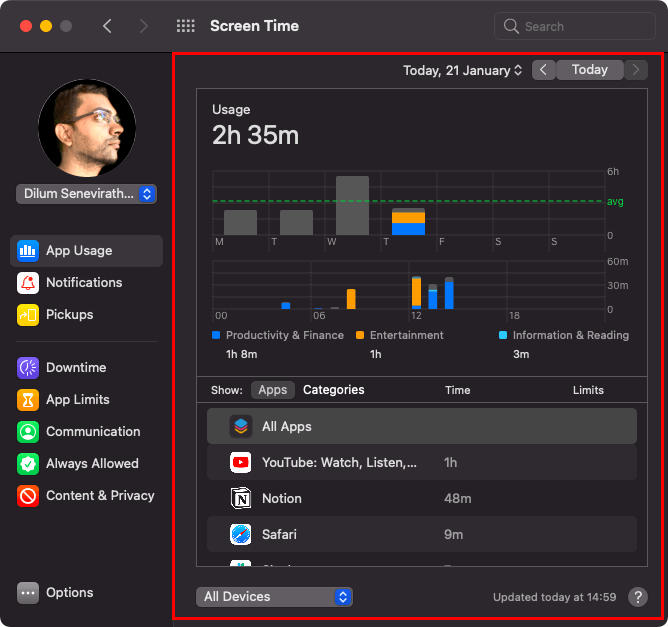
You can also select a bar to view a breakdown of usage stats by category (Social, Games, Productivity & Finance, etc.). Furthermore, you can switch between the Apps and the Categories tabs in the lower portion of the window to check usage time by app or category.
If you selected the Share across devices option earlier, the app usage stats would include your activity on other Apple devices as well. Use the pull-down menu to the bottom of the screen to check for usage stats by device instead.
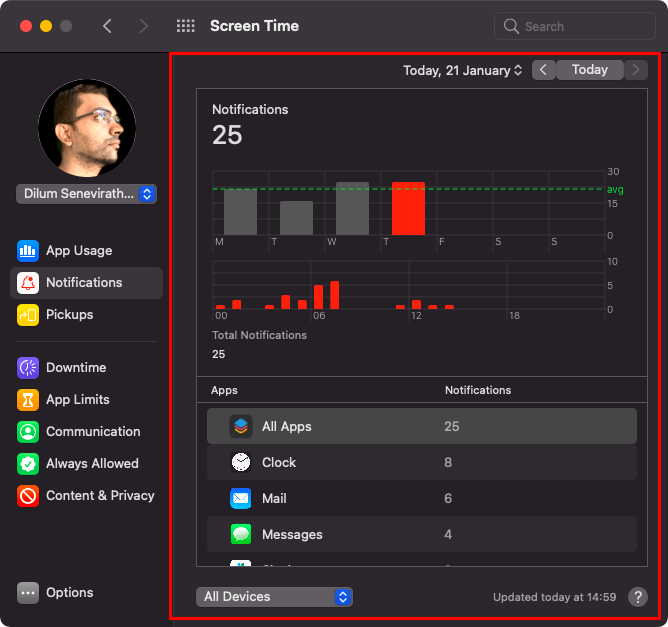
Aside from the App Usage section, you can switch to the Notifications side tab to check out the number of notifications that you’ve received by app. Again, use the device selection menu if you want to filter stats by device.
On a lesser note, select the Pickups side tab if you want to figure the number of times that you’ve interacted with the various apps on your Apple devices.
How to Impose App Limits
If your Screen Time usage stats indicate that you’re spending too much time unproductively with your Mac, you can start applying time limits to app categories or individual apps. You can also create custom groups that consist of multiple categories and apps.
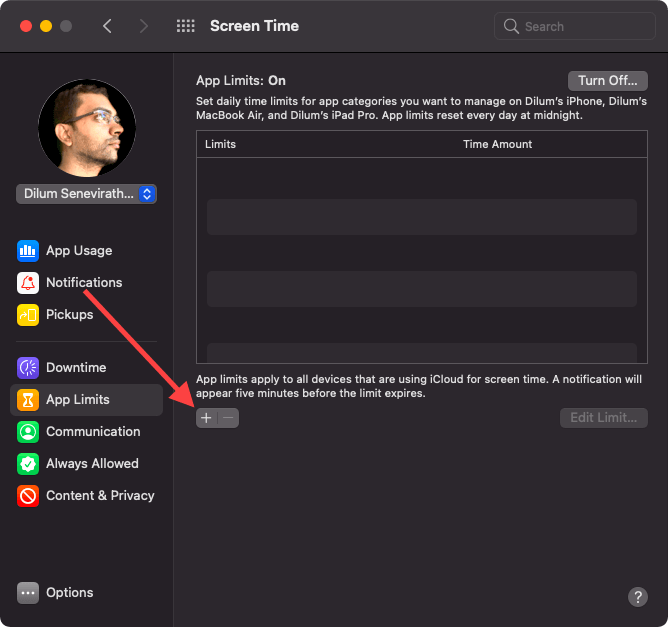
1. Switch to the App Limits side tab in Screen Time.
2. Select the + icon to start adding a new app limit.
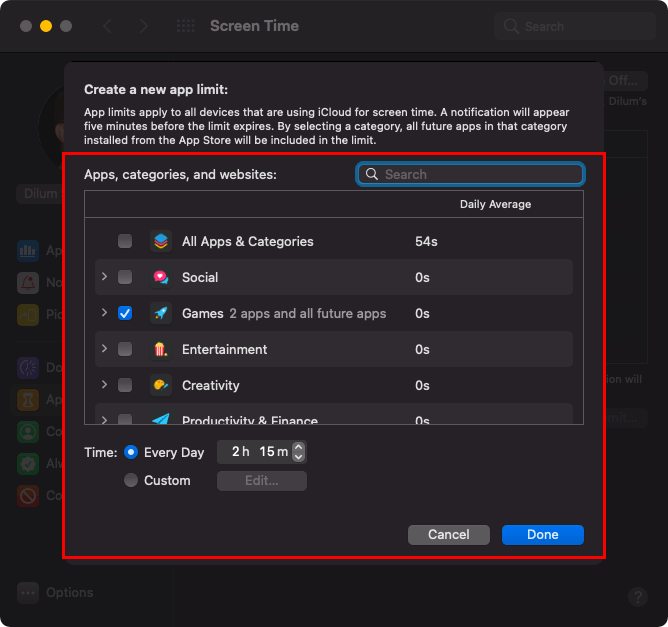
3. Select an app category. If you want to impose time limits on specific apps, expand the categories and check the boxes next to the apps you wish to include.
4. Specify a time limit; by default, it should apply to every day of the week. Select the radio button next to Custom instead if you want to create a custom schedule.
Note: If you’re a parent, you should select the Block at end of limit option (visible only if you’ve set up a Screen Time passcode) to prevent your child from bypassing the time limit.
5. Select Done to save your settings. Repeat steps 2–4 for any other app limits that you want to apply.
Your Mac will then automatically block you from using apps within a category or custom group once you’ve exceeded the set time limit. You can choose to ignore the limit, so self-discipline does play a factor.
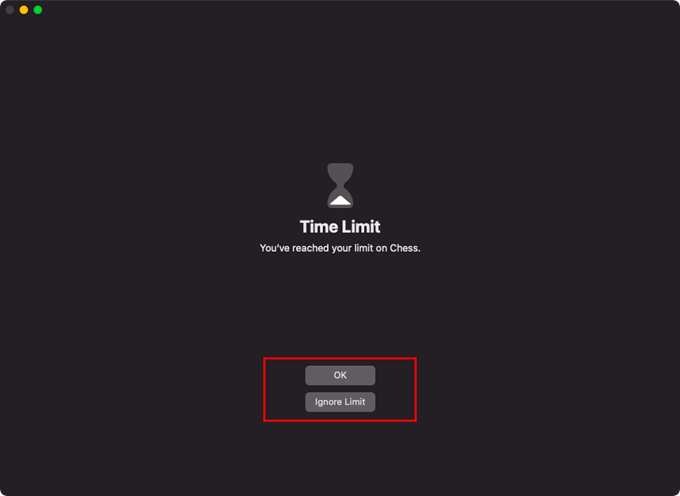
If you set up app limits for a child, the Time Limit overlay will feature an Ask For More Time option that he or she can select to ask you for more time. You’ll receive a notification on your iPhone, iPad, or Mac, where you can then approve or decline the request.
Additionally, you can edit, disable, or delete app limits anytime you want by heading over to the App Limits section in Screen Time.
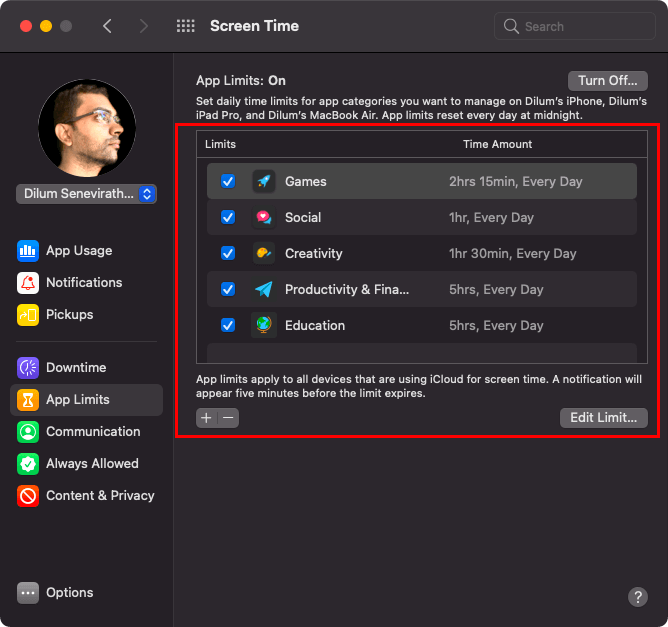
Note: App limits apply to all of your Apple devices. If you applied a time limit on Safari, using the app on the iPhone will count against the time you can spend using it on the Mac.
How to Set Downtime
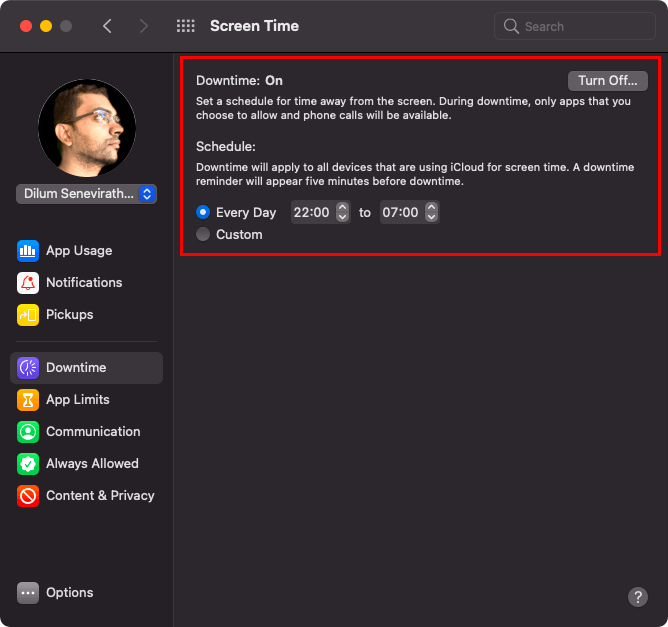
In addition to app limits, you can force yourself to stop using your Mac (and other Apple devices) at a particular time of the day with a downtime schedule. During that period, you’ll be restricted to allowed apps only (more on that next).
Switch to the Downtime side tab and select Turn On, and you can choose to set up Downtime every day of the week or as a custom schedule.
How to Always Allow Apps
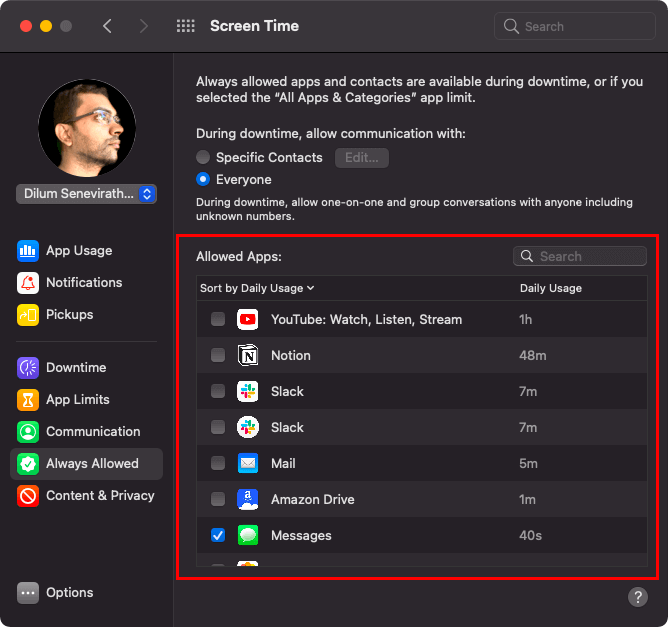
Regardless of app limits or a downtime schedule, you will need unrestricted access to at least a few essential apps. For example, you may want to keep using an app such as Messages at any time of the day.
To sort that out, select the Always Allowed tab and check the boxes next to each app that you want to exclude from Screen Time restrictions.
How to Set Communication Limits
Screen Time on Mac also allows you to impose communication limits on apps such as FaceTime and Messages via the Communication side tab.
Under the During screen time section, select Contacts Only or Contacts & Groups with at Least One Contact to limit one-on-one and group conversations as needed.
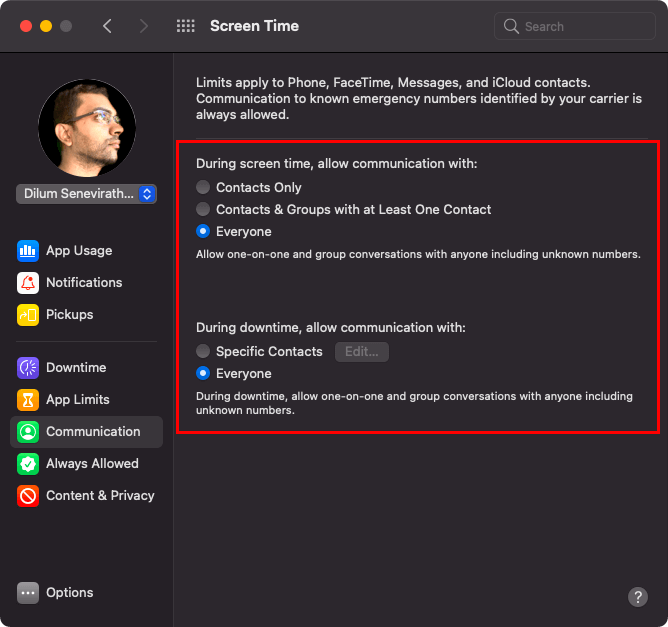
Additionally, you can restrict conversations during downtime to specific contacts only. Under the During downtime section, select Specific Contacts and use the Edit button to select them.
How to Manage Content & Privacy
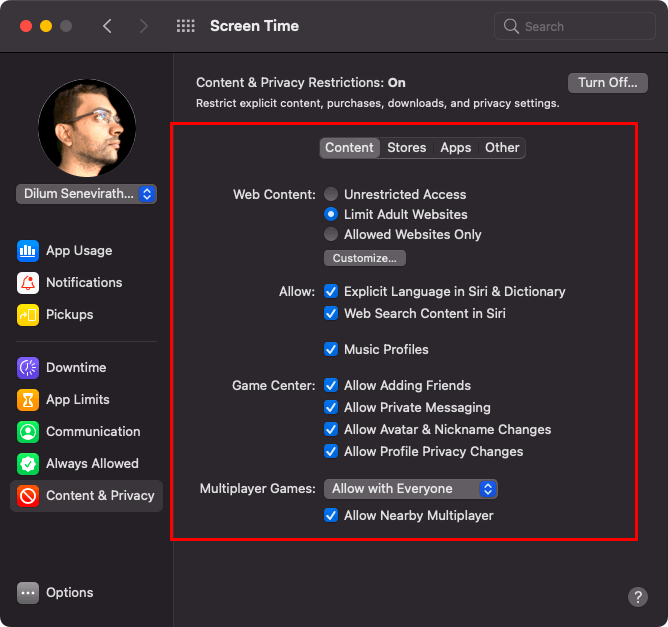
Screen Time provides a host of content management options geared toward parents. Switch to the Content & Privacy side tab and move between the Content, Stores, Apps, and Other sections to access them. You can choose to block adult websites, explicit books and music, private messaging in the Game Center, and more. Some of the available restrictions, however, will only affect iOS and iPadOS devices.
Set Up Screen Time Remotely
If you’ve set up iCloud Family Sharing for your Apple ID, you can impose time limits on child accounts remotely. Select the account from the menu underneath your profile portrait.
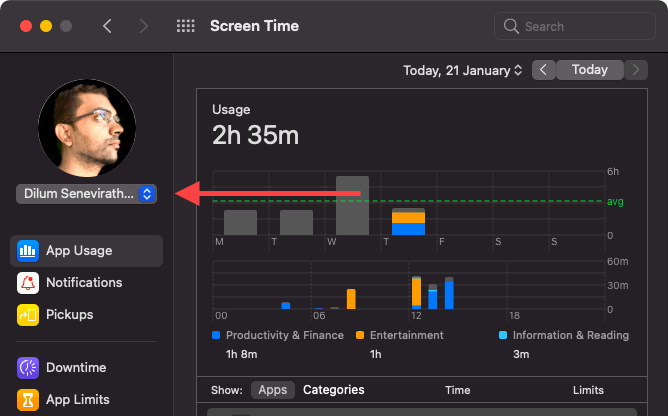
You can then review the child’s app usage statistics and go about applying app limits and downtime schedules. The restrictions will then affect all Apple devices related to the child’s account.
Keep Tabs on Your Screen Time
Screen Time on Mac is an indispensable tool if you want to keep yourself—or others—in check on the Mac. Reviewing app usage statistics is key to getting the best out of it. Make sure to do that regularly and re-adjust app limits and downtime schedules accordingly.


