Creating a bootable USB installer for the latest macOS Catalina helps in many ways. One of the reasons why you may want to do it is because it lets you do a clean installation of the update on your Mac. The other reason is you can use a macOS bootable installer is when you have multiple Macs and you wish to install the same update on all of them.
By having a single USB installer, you won’t have to download the update on each of your Macs. The same USB drive can be used to upgrade all of your Macs to the latest version available on the drive.

All it requires you to have is a USB drive with at least 8GB of memory space available on it. You can then either use an application or a few commands in the Terminal app on your Mac to turn your drive into a macOS installer. We show you how to do both below.
Download The macOS Catalina Update On Your Mac
The first thing you’ll want to do is download the entire update on your Mac. You’ll then put this downloaded file as an installer on your USB drive.
- Launch the Mac App Store and search for and click on macOS Catalina.
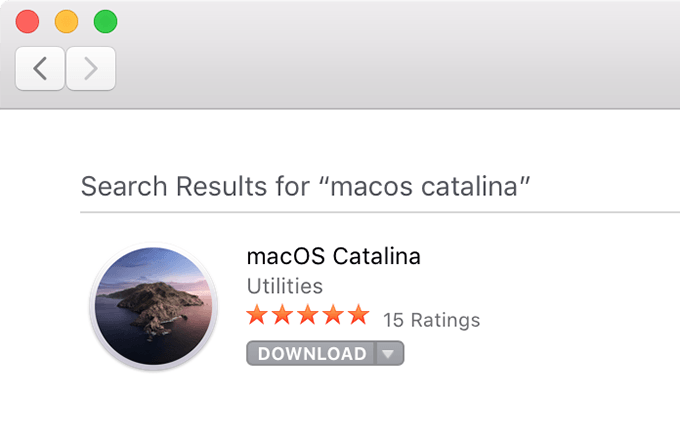
- Click on Download on the following screen to download the update.

- Sit back, relax, and wait for the update to finish downloading on your Mac.
It’s quite a large update and will probably take an hour or so to fully download on your machine. The download time also depends on how fast your Internet speed is.
Make sure not to proceed with the installer that opens after the update is downloaded.
Create a macOS Catalina USB Installer Using Disk Creator
One of the easiest ways to create a bootable installer for any macOS update, including Catalina, is to use the Disk Creator app. It’s a simple program that allows you to load your update and then create an installer based on that update.
It has a graphical user interface so you don’t need to play around with any commands. Also, keep in mind that the app will erase all the existing data stored on the USB drive. Make sure you’ve backed up your important files before you do the procedure.
- Head over to the Disk Creator website and download the package to your Mac. Extract files from the downloaded archive and launch the main application file.
- There are only a handful of options on the main app interface. The first thing you’ll want to configure is the destination for the installer. Click on the dropdown at the top and select your USB drive.
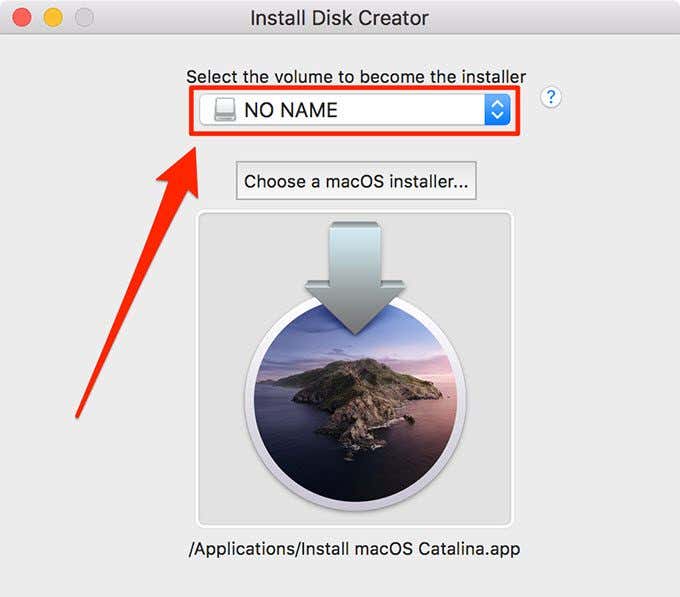
- Next up, click on the Choose a macOS installer button to choose the macOS Catalina update you’ve downloaded to your Mac.
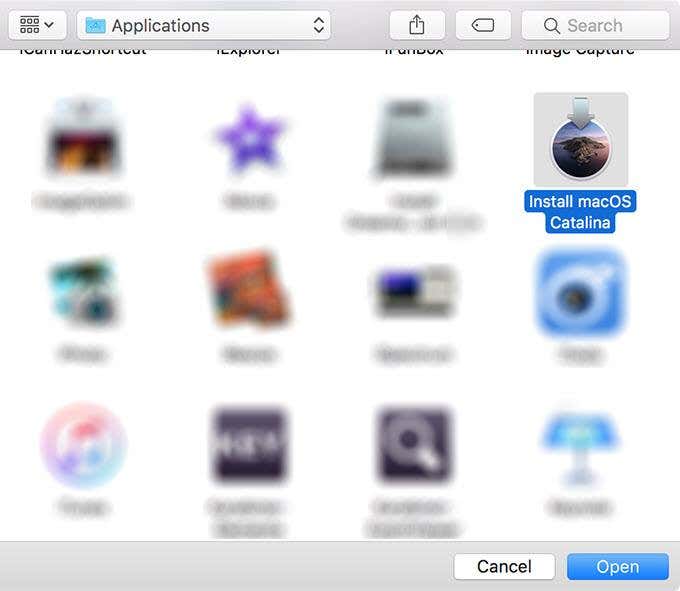
- Once you’ve given the app both your USB drive and your Catalina file, click on the Create Installer button at the bottom of the app to begin the process.
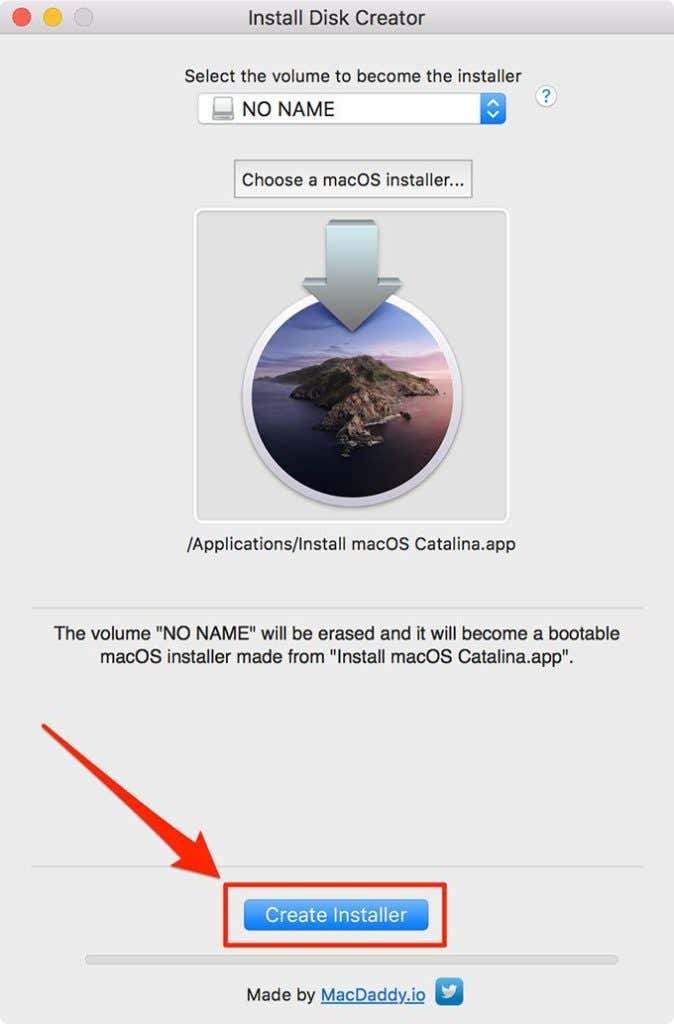
- Wait for a few minutes for the USB installer to be created. When it’s done, you’ll see a success message on your screen.
Your USB installer to install macOS Catalina is now ready. Plug it into any of your Macs that need an upgrade to this version of the macOS.
Use Terminal To Make A macOS USB Installer
If you’re the kind of user who doesn’t trust third-party apps, especially when installing entire operating systems, you don’t necessarily have to use Disk Creator to create the installer.
You can use the Terminal app on your Mac to create the USB installer and that too with just a few commands. Again, all that you’re going to need is an 8GB or larger USB drive and the macOS Catalina update file.
- Open the Terminal app on your Mac, type in sudo, press Space, but don’t hit Enter just yet.
- Launch a Finder window, open the Applications folder, find the macOS Catalina update, right-click on the file, and select the option that says Show Package Contents.
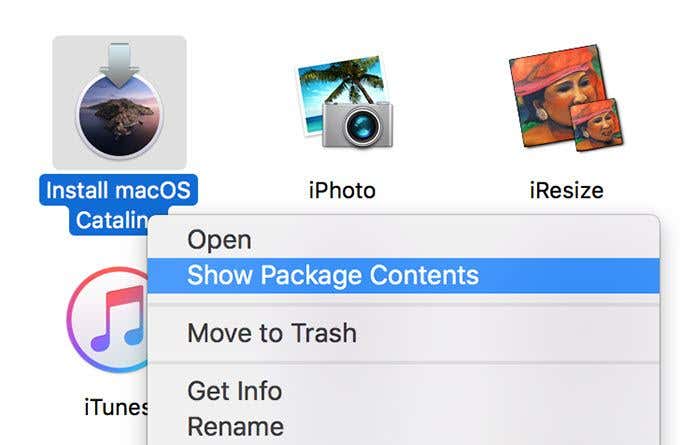
- Open the Contents folder followed by Resources. Find the file named createinstallmedia and drag and drop it onto your Terminal window. It’ll fill in the update path.

- In the Terminal window, press Space, type in –volume, press Space, and drag and drop your USB device from the Finder onto the Terminal window. It’ll enter the full path of your USB drive.

- Hit Enter and since it’s a sudo command, you’ll be asked to enter your password. Enter the password and proceed.

- Press the y key on your keyboard and hit Enter to erase the drive and put your Catalina installer on it.

It’ll start erasing your USB drive to then turn it into a bootable installer. Allow it a good amount of time to finish. Just keep an eye on your Terminal window and you’ll know when it finishes creating the installer.
How To Use The macOS Catalina USB Installer
Once a USB installer is created and you’ve got as much excitement to install the update as we do, you’ll just need to follow a few steps so your Mac boots from your installer.
There are two ways you can use your newly created installer.
Use System Preferences To Boot From USB Installer
The first method is to change a startup option so your Mac boots from the USB installer instead of your current boot disk.
- Click on the Apple logo and select System Preferences.
- Select Startup Disk, choose your USB drive and hit Restart.
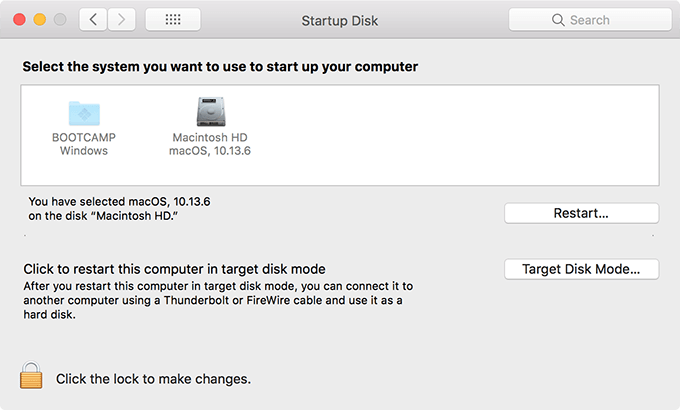
Your Mac will reboot and it’ll boot up from your Catalina installer letting you perform a full clean installation of the operating system.
Boot Directly From The USB Installer
This method doesn’t require you to change any startup settings to use the installer.
- Power off your Mac.
- Turn your Mac on and hold down the Option key.
- Select your USB installer from the list and proceed with the installation.
You’ll then follow the standard macOS installation steps to upgrade your Macs to this newer version of the operating system.