Transfers like magic in seconds
One of the most underappreciated and underused features on iOS has to be the Airdrop feature. It is quite simply fantastic for seamlessly moving files from one device to another. In the past, you needed to move the file either by Dropbox, iCloud, email, or PushBullet. But now you can simply tap the Airdrop button and let it work its magic in seconds.
Before we go into how to Airdrop from iPhone to Mac (and vice-versa), let’s take a quick look at what Airdrop is, if you’re one of the uninitiated.

What Is Airdrop?
Provided your Bluetooth is switched on, on both the sending and receiving devices, Airdrop is a wireless file transfer method baked into the macOS and iOS operating systems.
You simply choose your file on the sending device, look on the Airdrop screen for your receiving device (which must be within range of the sending device) and tap on it. Within seconds, the file will pop up on your receiving device.
Sounds complicated? Well, it isn’t. Let’s look at how to send a file from the iPhone to the Mac, and it will all quickly become clearer.
How To Airdrop a File From iPhone To Mac
Let’s say I took a photo of my dog with my iPhone camera, and I want to transfer it to my Mac? First, I would make sure that Bluetooth was enabled on both the iPhone and the Mac (otherwise Airdrop won’t work).
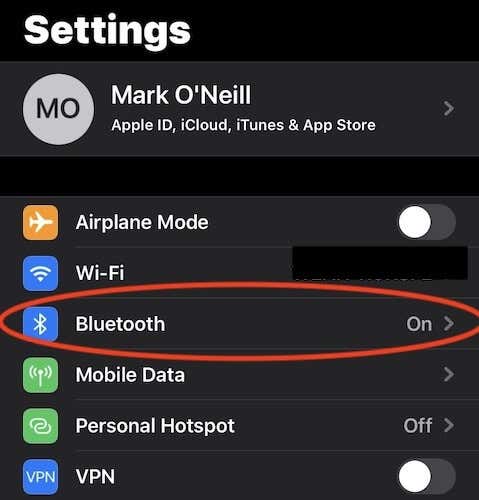
To turn on Bluetooth on the iPhone, go to your Settings and tap on Bluetooth. If Bluetooth is not already on, tap the toggle to the green position.
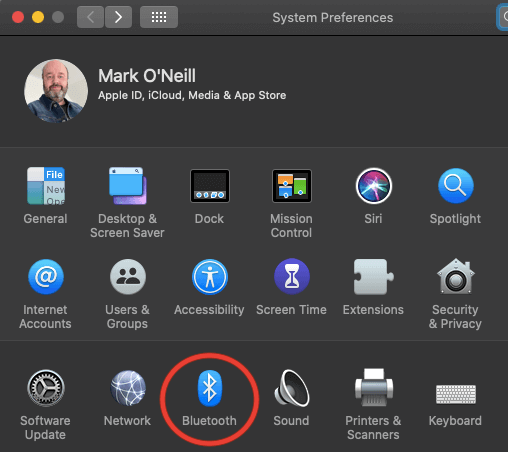
To turn on Bluetooth on the Mac, go to System Preferences and then Bluetooth. If it is not already on, you can switch Bluetooth on by clicking the button on the left-hand side.
Now that Bluetooth is enabled on both devices, let’s Airdrop that photo.
iPhone To Mac
- Bring up the file you want to send. In this case, it is a photo. Tap the share button in the bottom left-hand corner.

- When the share menu pops up, you will see the Airdrop logo immediately on the far left. But because the receiving device has Bluetooth enabled, and is within range, you will see it above the Airdrop logo.

- If the device you are looking for is not there, then tap on the Airdrop logo and it will search for all Bluetooth-enabled Airdrop devices within range. If there are any, they will then appear underneath the photo.
- As soon as you tap on the device you want to send to, it will say Sending underneath. The whole process only takes seconds.
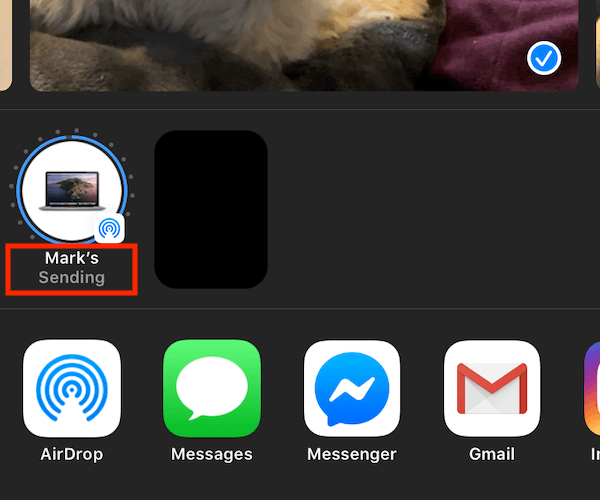
- On the receiving device (in this case, the macOS), you will hear a quick two-beep sound. Finder will then automatically open to your default downloads folder and you will see your file waiting for you.

- You can then, if you want, delete the original file from your sending device. It’s entirely up to you.
Mac To iPhone
If you want to do it the other way, then that’s just as easy.
- Go into Finder and then Airdrop in your sidebar. You will now see any Bluetooth-enabled Airdrop devices that are within range. As you can see, my Mac has picked up my iPhone.
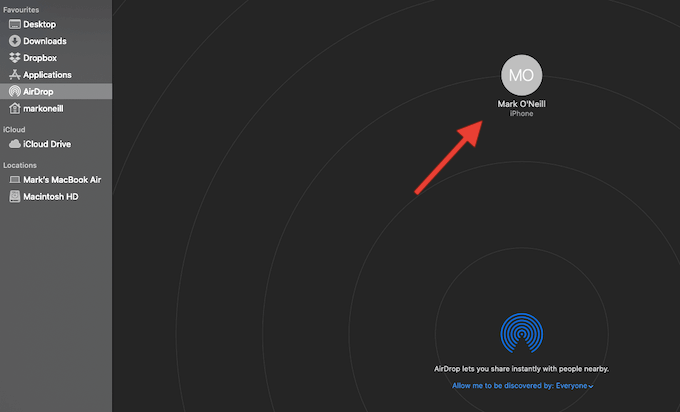
- Let’s say we want to send that photo back to the iPhone. Simply right-click on it, choose the Share option, and then Airdrop.
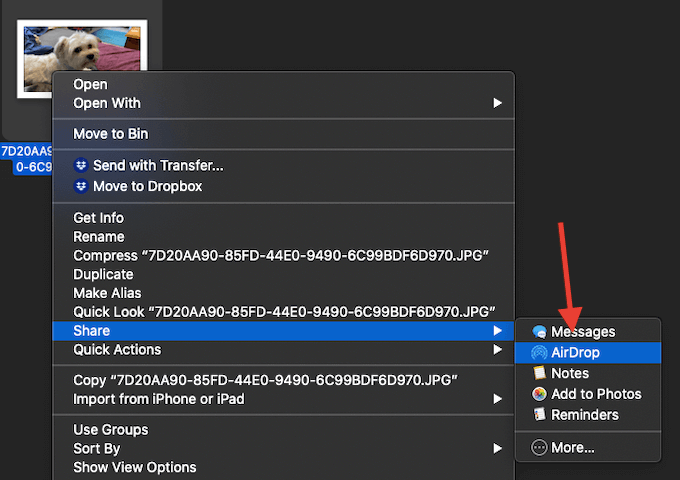
- Within seconds, the photo will appear again on your iPhone.
Airdrop is an absolute game-changer as we become more and more accustomed to carrying multiple devices around with us. The need to make our files as portable as possible is as important as ever.
Do you use Airdrop? Let us know what you think about it in the comments below.


