More than just a pretty face icon
Mac has a wonderful file explorer called Finder that provides you with a lot of options to manage and organize your files. Most of the features in the app are enabled by default. However, there are a few that aren’t and you can enable them to use them in Finder.
Learning to use these new features will let you make the most of the Finder app on your Mac.
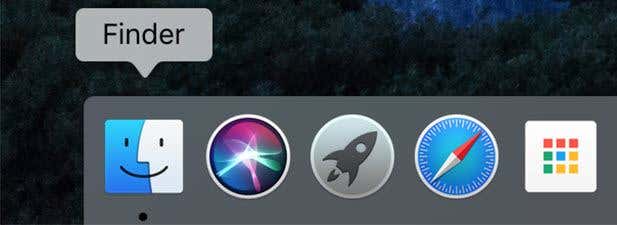
Set a Default Finder Folder
When you launch the Finder utility, it opens the folder that has been set as the default one. More often than not, it’s not the folder you’re trying to open. Well, you can change that with a few clicks.
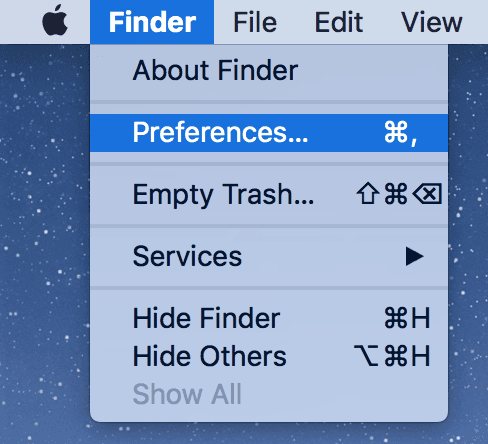
While you’re inside a Finder window, click on the Finder menu at the top and select Preferences.
Click on the General tab if you aren’t already there. Select your new default Finder folder from the New Finder windows show dropdown menu.
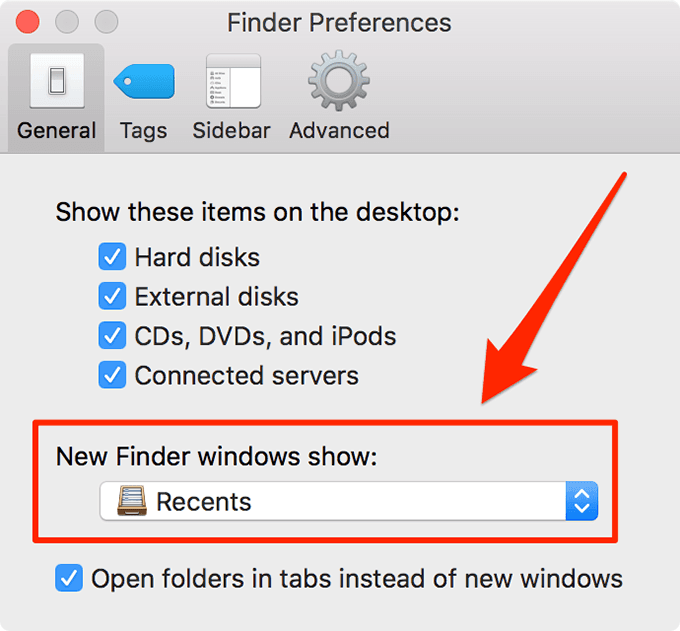
Your chosen folder will now launch each time you open Finder.
Show File Paths
Finder makes it easy to find paths of any of the files on your Mac. It can be done using two ways.
Click on the title bar of a Finder window while holding down the Control key.

Click on the View menu at the top and select Show Path Bar. It’ll add a bar at the bottom showing the full path of the current directory.
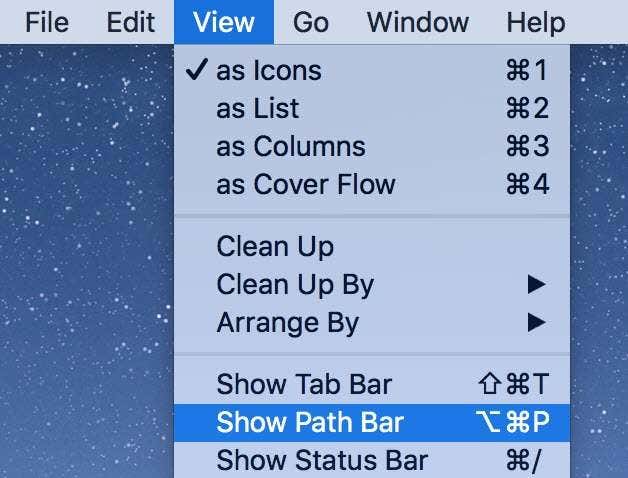
There are also many more ways to reveal file paths on your Mac.
Access The Library Folder
Your Mac doesn’t let you easily access the Library folder but there’s a workaround to do it in Finder.
Hold down the Option key and click on the Go menu at the top. It’ll enable the Library option for you.
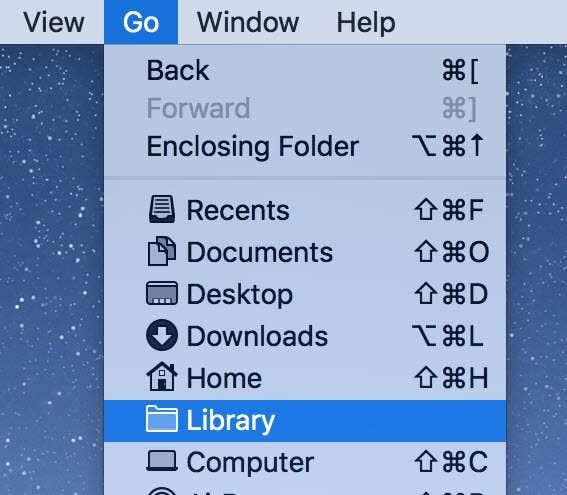
Clicking on the option will open the Library folder on your Mac.
Make Quick Look Full Screen
Quick Look, by default, doesn’t open in full-screen. However, there’s a trick to make it go all over your screen.
Click on the file you want to Quick Look, hold down the Option key, and press the Spacebar.
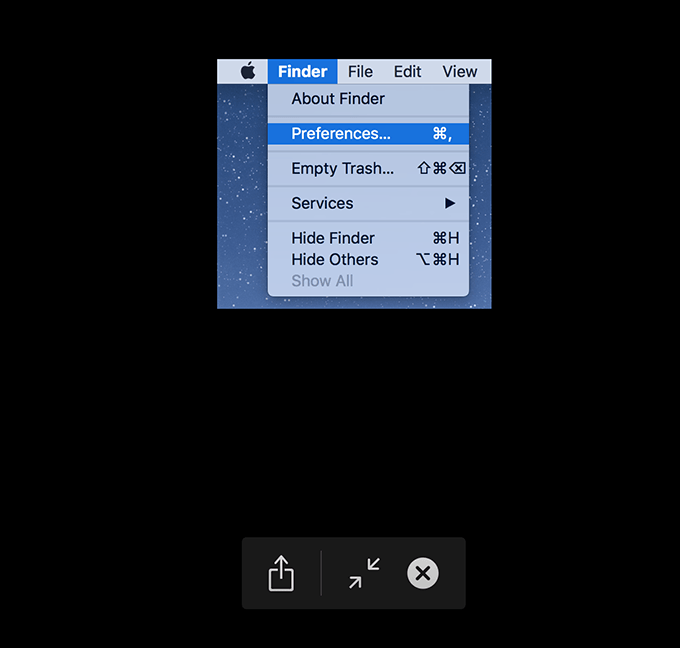
Quick Look will open in full-screen.
Change Search Options
By default, when you perform a search, the Finder searches your entire Mac. You can change that with an option, though.
Click on the Finder menu and select Preferences.
Head to the Advanced tab and select an appropriate option from the When performing a search dropdown menu.
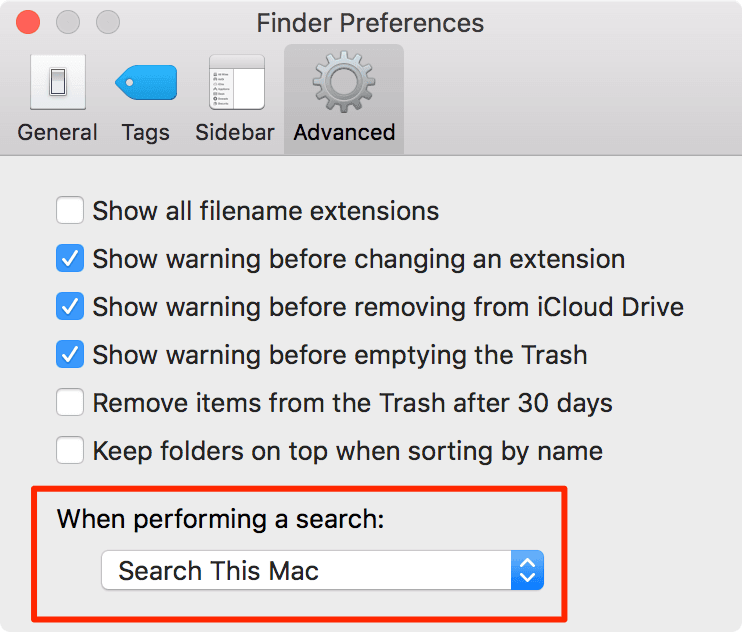
The Finder will then only search the location you have specified by default.
Customize The Toolbar
You can add more items to the toolbar in Finder so you can perform various operations on your files and folders.
Right-click on the Finder toolbar and select Customize Toolbar.
Choose the items you’d like to add to the toolbar on the following screen.
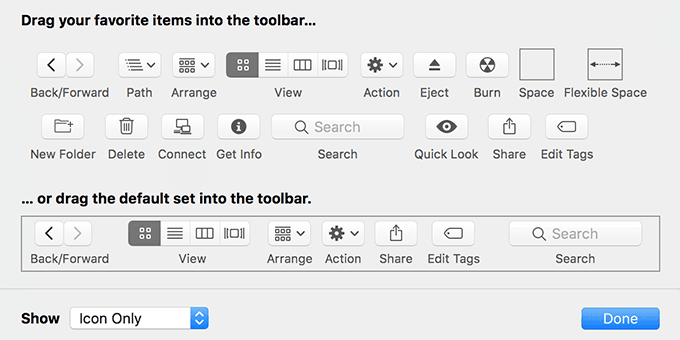
Your toolbar will now have your chosen items added to it.
Merge Finder Windows
If you want to merge multiple Finder windows that are open on your screen, you can do it pretty easily.
Click on the Window menu and select Merge All Windows.
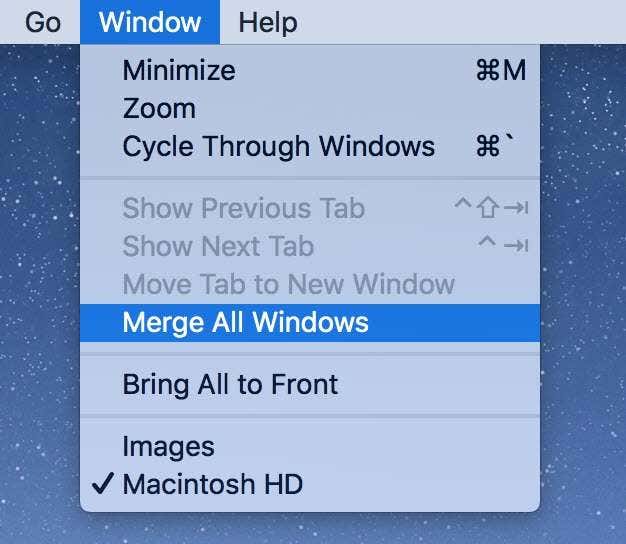
Your multiple windows will be merged into tabs in a single Finder window.
Show The Status Bar
Status Bar shows the number of files in a directory and the total available storage on your Mac.
Click on the View menu and select Show Status Bar.
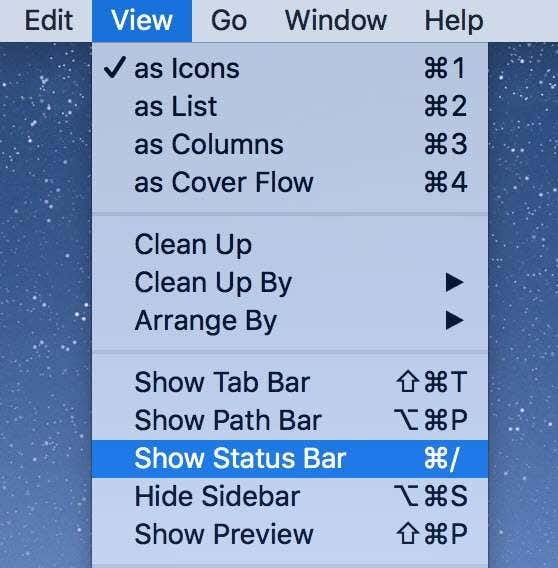
The bar will appear at the bottom of your Finder windows.

Customize Finder Tags
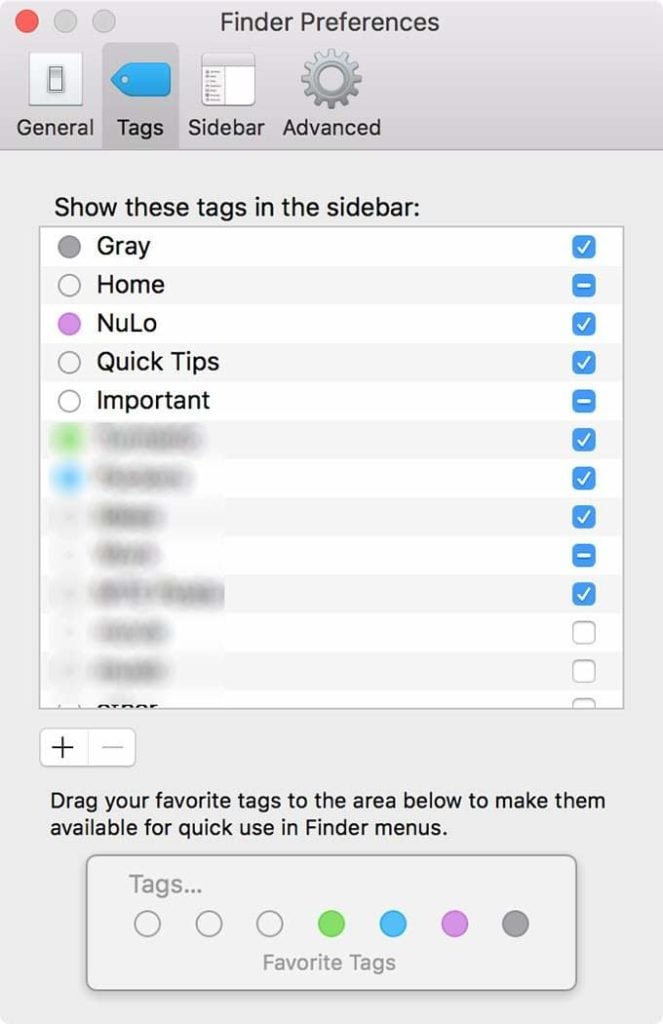
Tags help you find relevant files on your Mac and you can customize these as well.
Click on the Finder menu and select Preferences.
Head to the Tags tab and add, remove, customize your tags the way you want.
Enable File Extensions
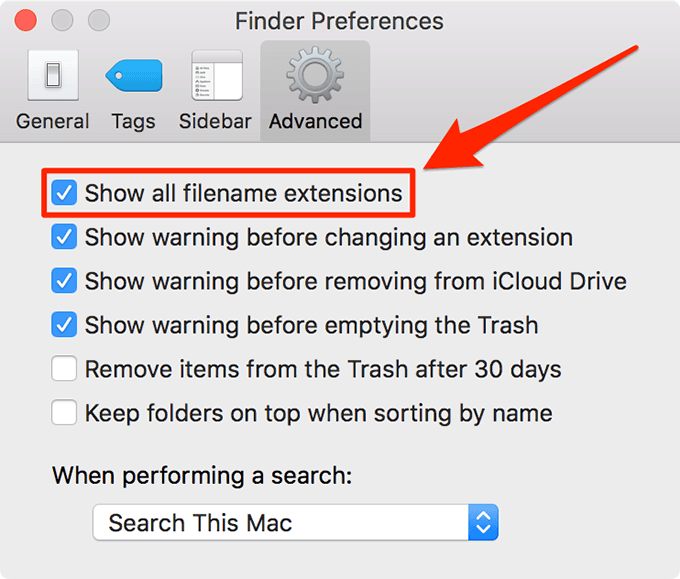
If you want to view file extensions in the Finder, here’s how to enable it.
Click on the Finder menu and choose Preferences.
Go to the Advanced tab and enable the Show all filename extensions option.
View Hidden Files
Hidden files aren’t shown by default in Finder but you can enable an option to show them.
Open the Terminal app and run the following command.

defaults write com.apple.finder AppleShowAllFiles YES; killall Finder
The Finder will start to show the hidden files.

Create A Folder Out Of Selection
If you want to put multiple files into a folder, Finder lets you do it with ease.
Select all the files you want to put inside a folder, right-click on any one file, and select New Folder with Selection.
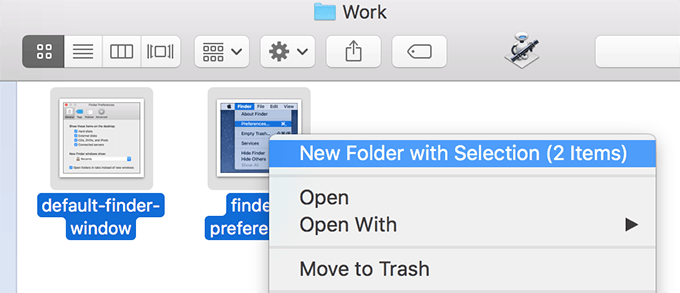
It’ll let you create a new folder with all of your selected files in it.
Quickly Share Files
You don’t need to open any app to share files from the Finder. Finder has a built-in share option.
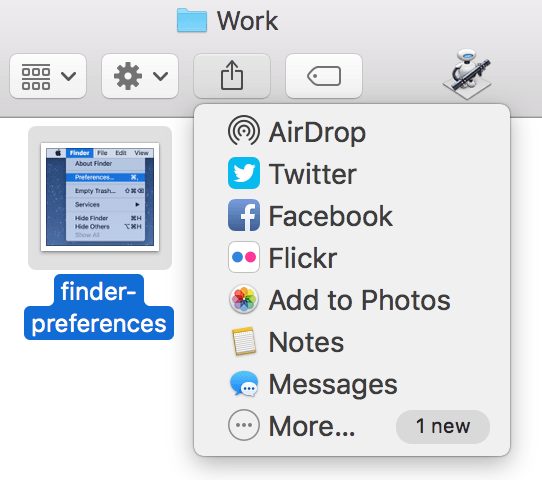
Select the files you want to share and click on the share icon at the top.
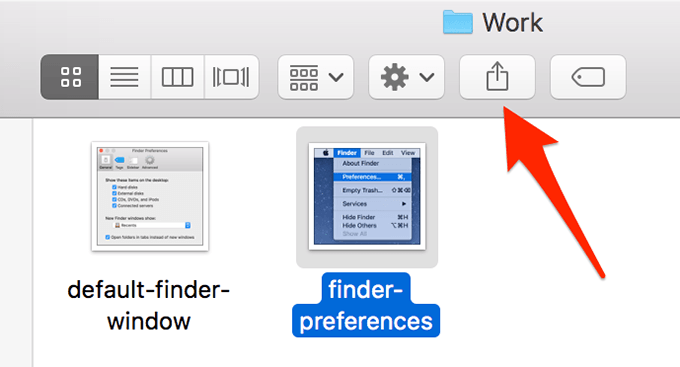
Choose the service you’d like to share your files with.
Save Text As a File
Has it ever happened to you that you had to create a completely new text file just because you wanted to save some text from a webpage? You no longer need to do it thanks to the Finder.
Select the text on any webpage and drag and drop it onto your desktop.
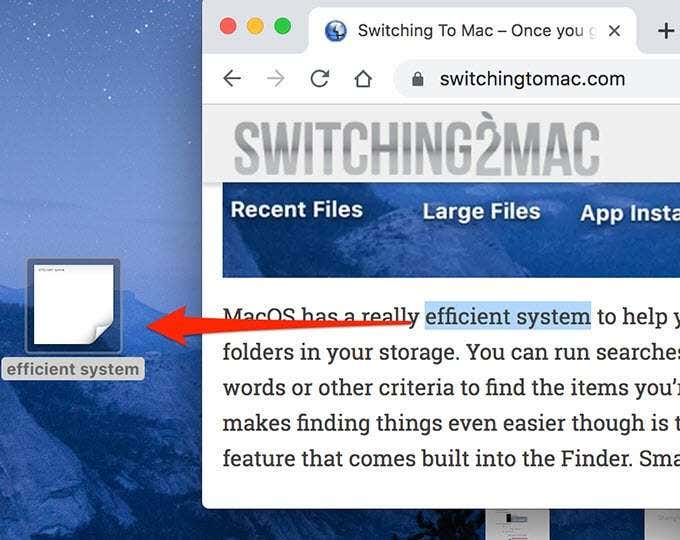
The Finder will automatically create a text file with your selected text in it.
Lock a File Or Folder
Locking a file or folder ensures the item doesn’t get automatically moved or deleted.
Right-click on a file or folder and select Get Info.
Checkmark the Locked option on the following screen.
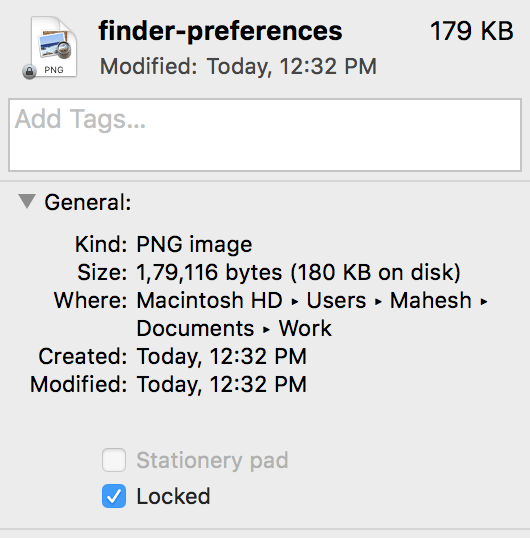
You’ll get a prompt when you perform a move or deletion operation on your file or folder.
Create Smart Folders
Smart Folders save you a lot of time by finding and listing out all the files you want.
Click on the File menu and select New Smart Folder.
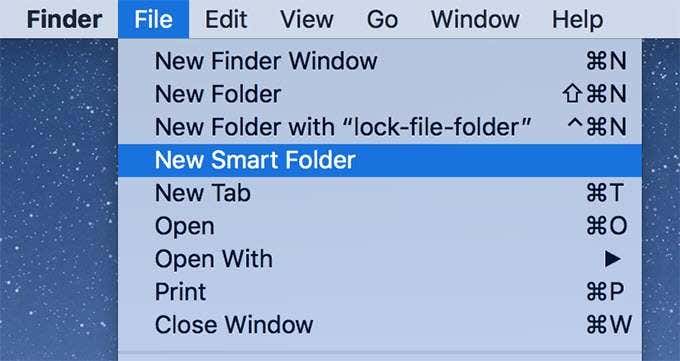
Specify the criteria for your folder and save the folder.

There are various uses of Smart Folders on a Mac.
Rename Multiple Files
Giving a new name to multiple files at once isn’t hard with the Finder.
Select your files, right-click on any one of them, and choose Rename X Items. X is the number of files you’ve selected.
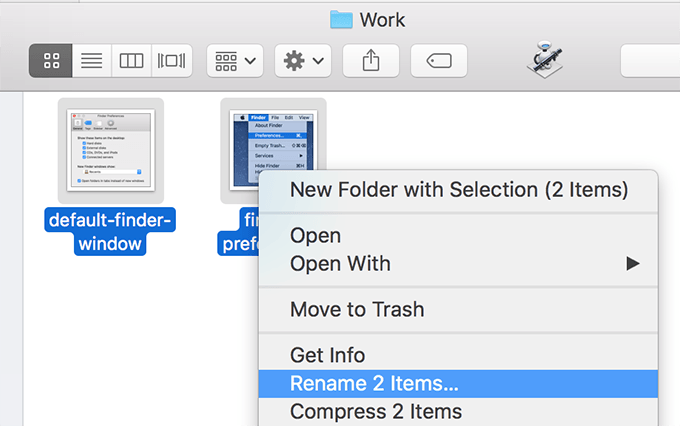
Choose how you’d like to rename your files.

Switch Between Open Apps
You don’t have to access the Dock to switch between open apps on your Mac. Finder lets you do it with a key combination.
Press the Command + Tab buttons at the same time. You’ll be able to navigate between open apps.

Keep Folders On Top When Sorting
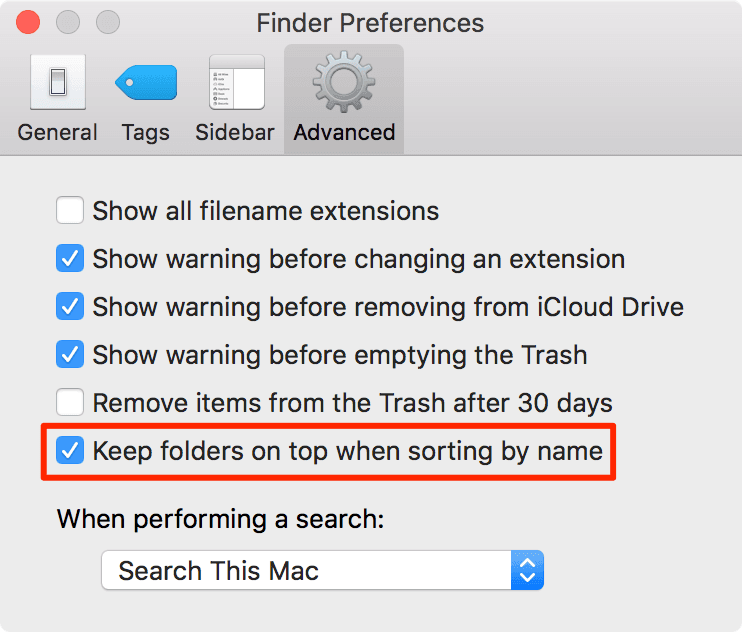
When you sort files by name, your folders don’t necessarily appear at the top. You can change this behavior with an option.
Click on the Finder menu and select Preferences.
Open the Advanced tab and enable the Keep folders on top when sorting by name option.
Relaunch Finder To Fix Issues
If you ever encounter any issues with the Finder, relaunching the Finder will most likely fix the issue for you.
Open the Terminal app and execute the following command.
killall Finder

It’ll close and then relaunch the Finder app on your Mac.


