Staying organized is a skill that MacOS users can effortlessly master with a built-in gem called “tags.” Much like flags in an email application that highlight crucial messages, tags in MacOS add a touch of color and a wealth of organization to your files.
Let’s learn how to add tags to files on your Mac and why you should give it a try.
What Are Tags and Why Use Them on Your Mac
The macOS file manager software Finder, often overlooked in its simplicity, becomes a labyrinth as your collection of files grows. MacOS Finder is an awesome organizational tool, but navigating through a multitude of files without some assistance can be challenging. This is where the tags feature steps in.
Tags serve as your digital labeling system, allowing you to categorize files and folders. By tagging items, you give them a sort of identity that stands out in the file hierarchy. The power of tags lies in their ability to make items easily identifiable, and customized to your preferences. Customize default tags to align with your workflow, remove tags from items that aren’t important, and effortlessly locate files based on their assigned tags.
Let’s explore how this handy feature can revolutionize your approach to file management on your Mac.
How to Add a Tag to a File or Folder
Adding tags to files and folders on your Mac is a breeze. Whether it’s a text document, a ZIP file, an image, or a folder, tags can be applied to any file type, offering a flexible system for the categorization of your data.
To add a tag to a file or folder on your Mac, follow the steps below.
- Open Finder and choose the file or folder you wish to tag.
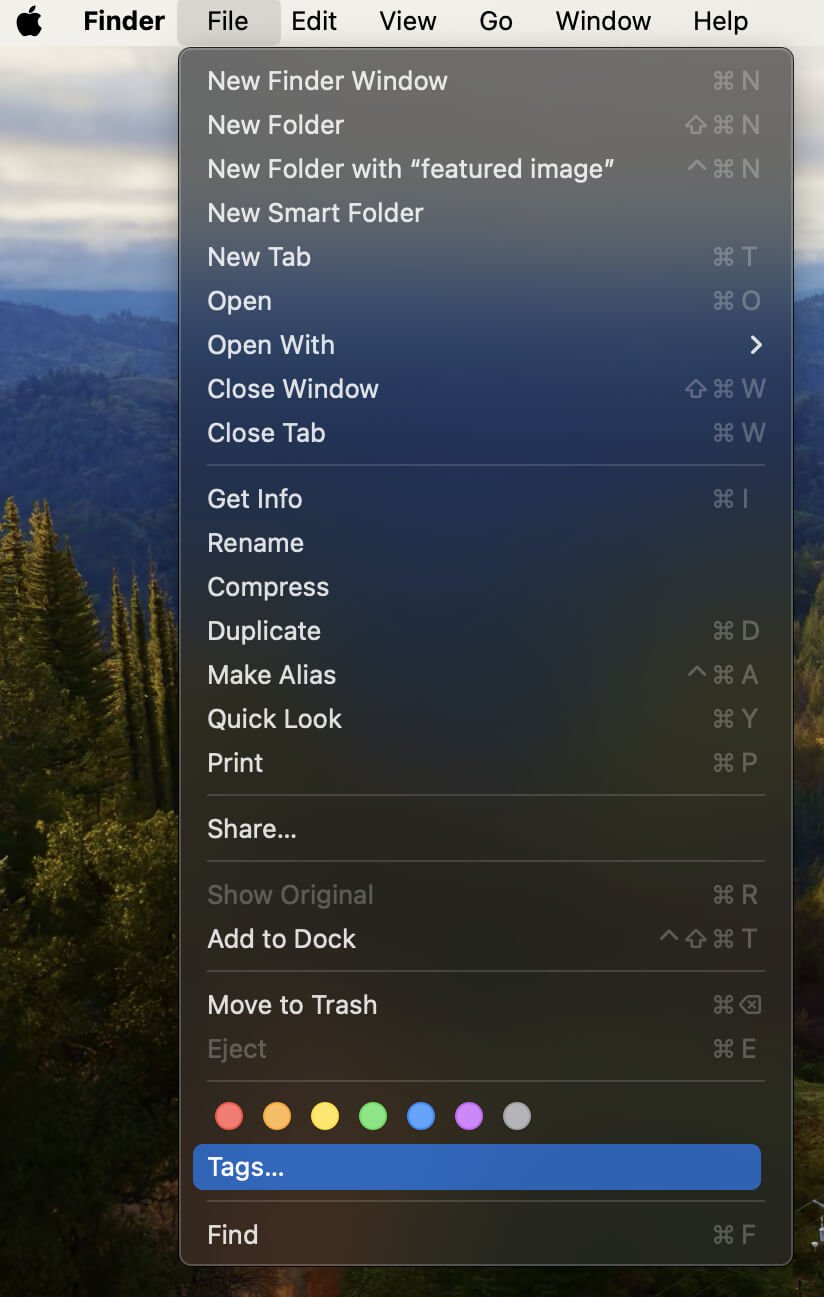
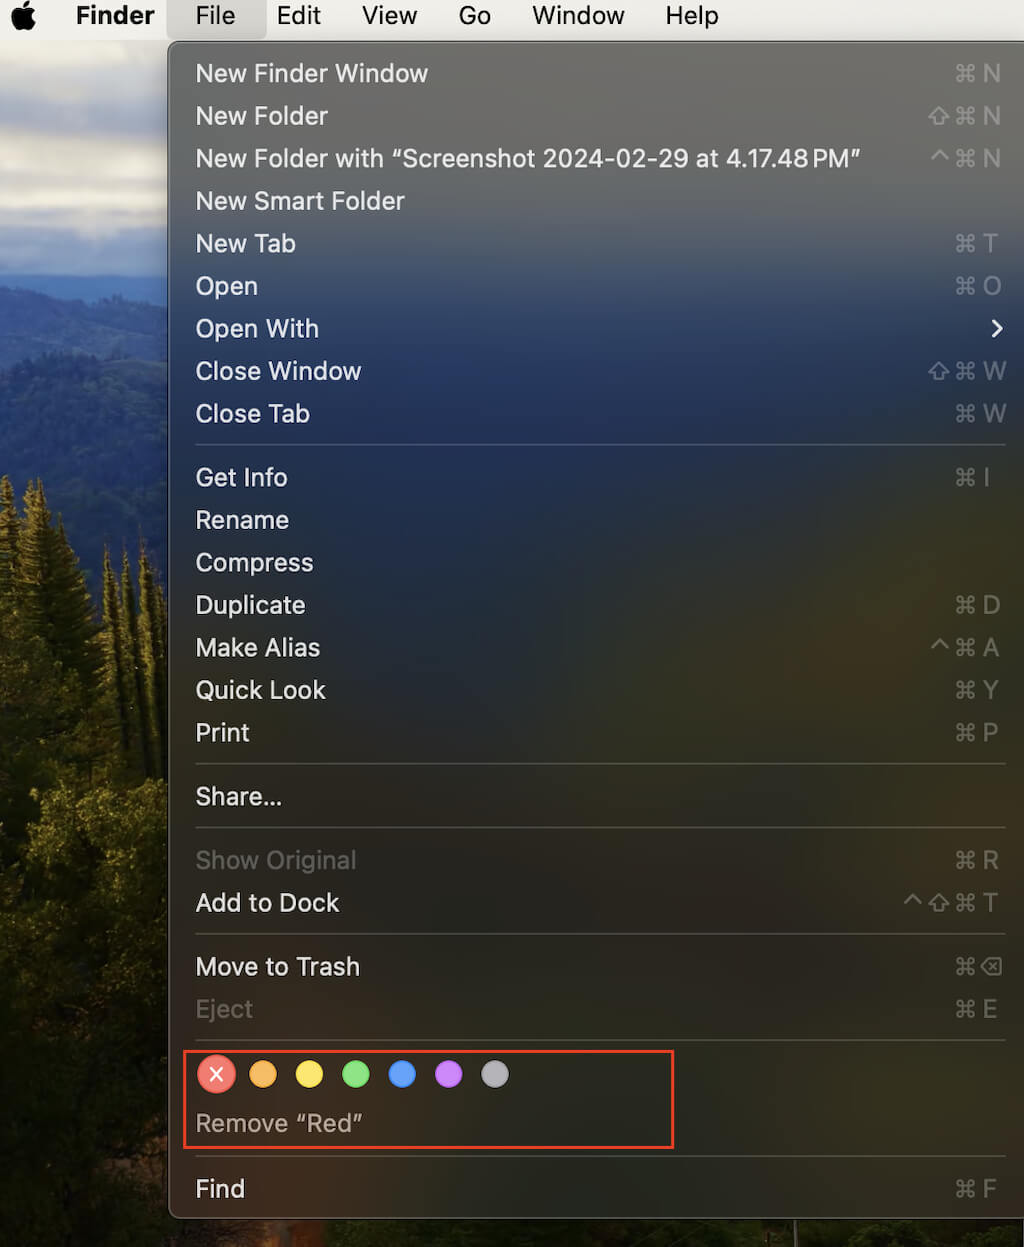
- To access the tagging options, navigate to the menu bar on top of the screen and select File.
- In the Tags section, choose the color that represents your desired tag.
That’s one way to tag a file on Mac through the Finder toolbar, but there are several ways to tag an item on macOS.
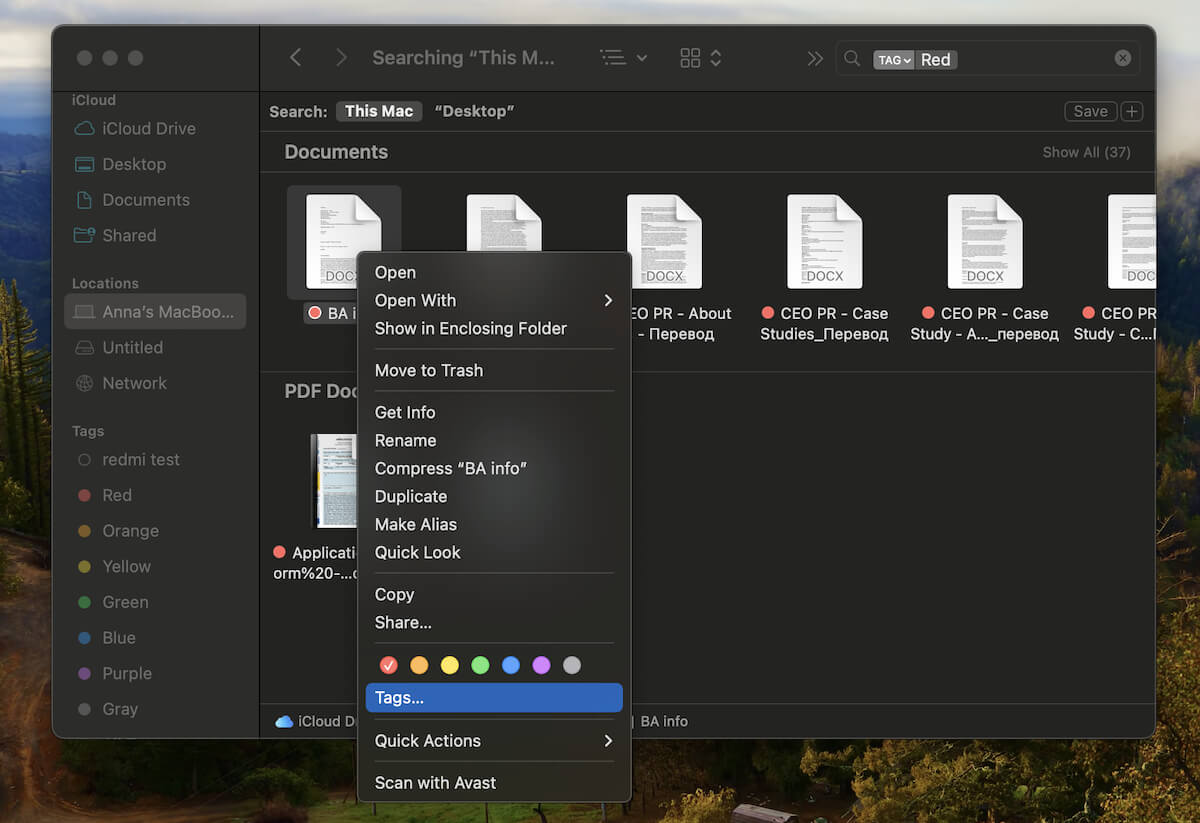
- Right-click: Simply right-click (or Control + click) on the file or folder, and choose the desired color under Tags.
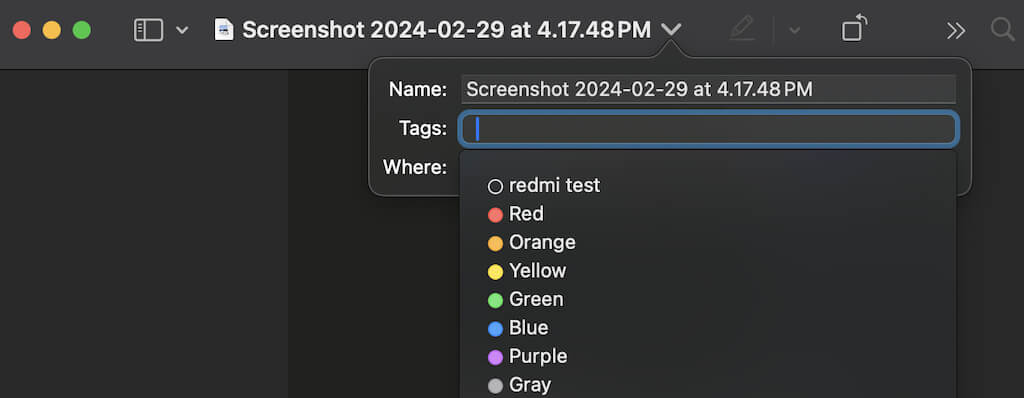
- Open File in Finder: If it’s an open file you want to add the tag to, click the name of the file on the right side of the title, select the down arrow icon, and add a tag next to Tags.
- When Saving a New File: If it’s a new file that you want to tag, select File > Save, then in the Save dialog window select the Tags field and choose one of the colors from the list.
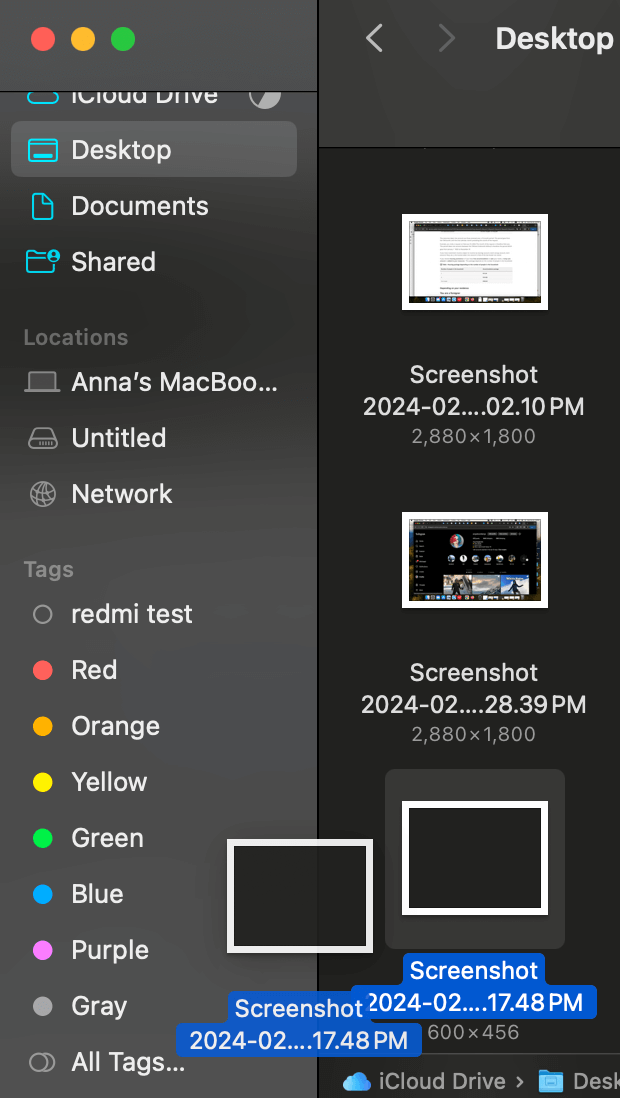
- Drag and Drop in Finder: You can drag and drop the file you want to tag into the Tags section on the left sidebar of Finder to add a specific tag to it.
- Keyboard Shortcut: Finally, you can use a keyboard shortcut for swift tagging. Select your file, then use Control + 1 through Control + 7 to add or remove tags. Control + 0 removes all tags from a file.
All of these methods support batch tagging, allowing you to tag multiple files or folders simultaneously.
How to Remove a Tag From a File or Folder
Removing a tag from a file or folder on your Mac is also a straightforward process. If a tag is no longer relevant or was added temporarily, follow these steps to quickly remove or replace it.
- Open Finder and select the file or folder from which you want to remove the tag.
- Navigate to the Menu bar and select File. In the drop-down menu, find the Tags section, and choose Remove for the current tag color.
- You can also use a different tag removal method. Simply right-click on the file or folder, select the tag color, and choose Remove.
If an item has multiple tags, you can selectively remove the ones you no longer need without affecting the others.
How to Edit Tags on Mac
Editing tags on your Mac is a useful feature that allows you to customize your organizational system based on your preferences and requirements. Whether you want to change the color or rename a tag, macOS makes it a straightforward process.
To edit your tags on Mac, follow the steps below.
- Open Finder and expand the Tags section located in the sidebar on the left. This section displays a list of your existing tags.
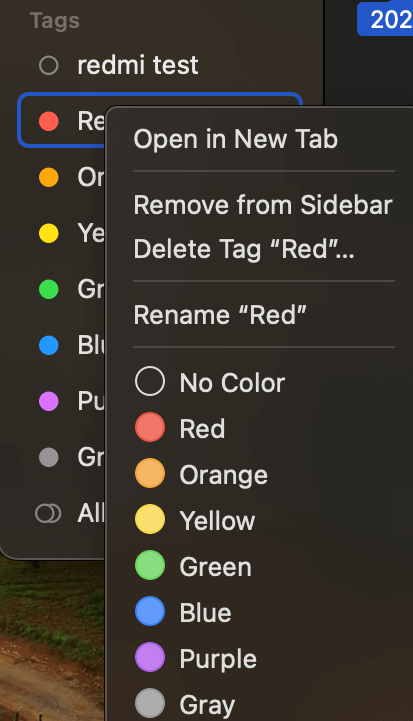
- Identify the tag you wish to modify and right-click it to reveal a contextual menu.
- In the contextual menu, you have several options for editing the tag:
- Choose a New Color: If you want to alter the color of the tag, simply select a new color from the available options.
- Rename: Opt for this option to give the tag a new name. This is particularly helpful if you want to add more specificity to the tag’s identification.
- Delete: If a tag is no longer relevant or needed, you can choose to delete it. Confirm the action and the tag will be removed from your list.
By following these steps, you can easily customize and refine your tags on Mac, ensuring that your workflow aligns perfectly with your preferences.
How to Manage Tags on Mac
MacOS gives you a few different options for managing your tags to make sure your files are organized the way you like. If you want to manage all of your tags at once and not just one specific tag, here’s how you can do this efficiently.
- Open Finder and go to the menu bar to select Finder > Settings (or Preferences).
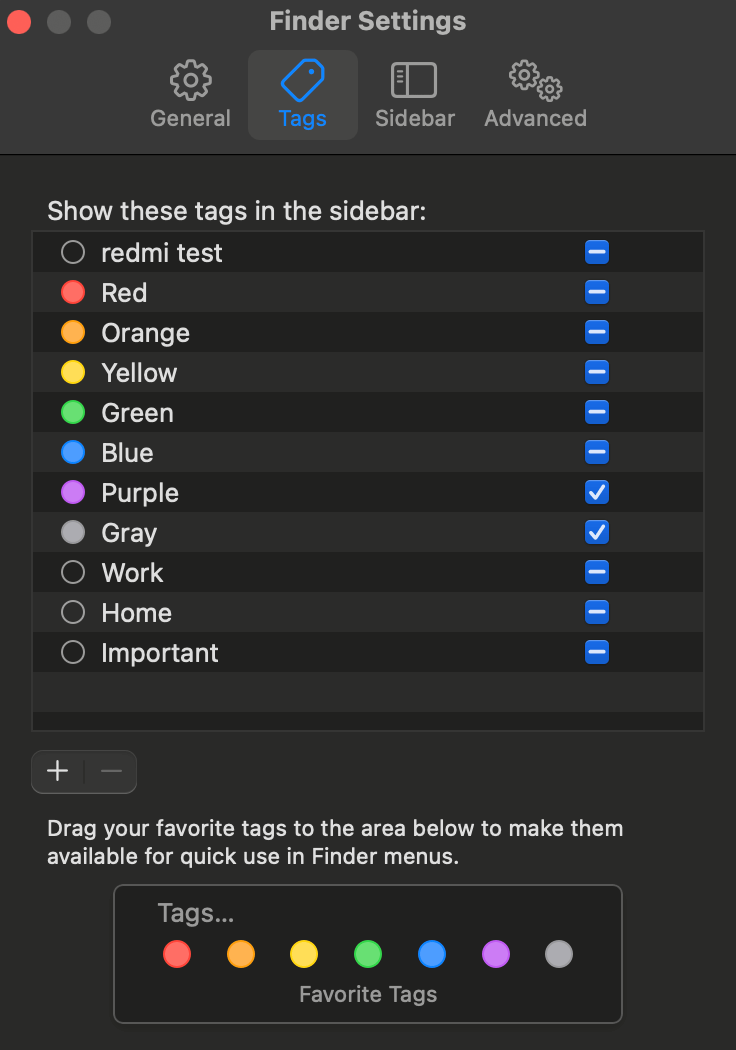
- In the small window that appears, select the Tags tab located at the top. Here, you’ll find a list of all your current tags.
- From there, you have various options for managing your tags:
- Rename a Tag: Select the tag’s name twice (not a double-click) or right-click and choose Rename.
- Delete a Tag: Highlight the tag you want to remove and click the Minus icon (-) at the bottom of the list. Then select Delete Tag to confirm.
- Add a Tag: Click the Plus icon (-) at the bottom of the list, and you can create a new tag by giving it a name.
- Change a Tag’s Color: Right-click on the tag you want to modify and select the new color.
- Rearrange Tags: Enhance organization by dragging a tag to a different position in the list.
- Show or Hide Tags: Use the checkboxes to control which tags appear in the Finder sidebar.
You can also prioritize certain tags for quick access if you want to be able to quickly find the most important documents and files on your computer. The Favorite tags section allows you to do just that. Here’s how you can manage your favorite tags.
- Add a Favorite Tag: Drag a tag from the list to the Favorite Tags section at the bottom of the window to include it in your quick access.
- Remove a Favorite Tag: Delete a tag from your favorites by dragging it out of the Favorite Tags section.
- Rearrange Favorite Tags: Customize the order of your favorite tags by dragging them to their desired positions.
How to Search for Tagged Items on Your Mac
Once you’ve adorned your files and folders with tags, the next step is to master the art of finding them swiftly. Here’s how you can effortlessly search for tagged items on your Mac.
Observing Tags in Action
When a tag is attached to a file or folder, you’ll immediately spot it next to the item’s name, be it on your desktop or within Finder.
Grouping by Tag
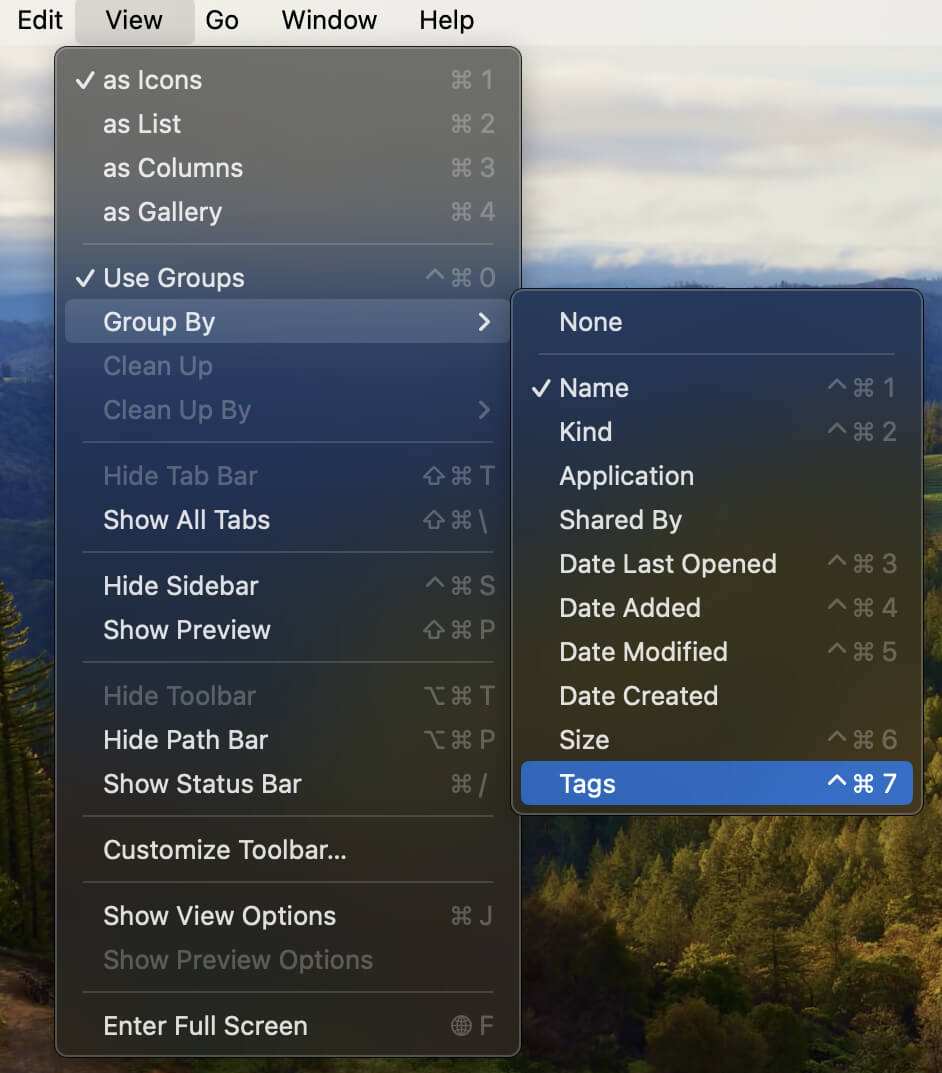
Take advantage of grouping and adding tag columns to enhance your visual experience if you are a frequent user of multiple tags.
To do that, navigate to the Finder toolbar and follow the path View > Group by > Tags. You can also do the same using the grouping feature within the Finder window.
Searching for Tagged Items
The true power of tags is unveiled when you need to locate items swiftly. Here are two quick methods.
1. Finder Sidebar Selection
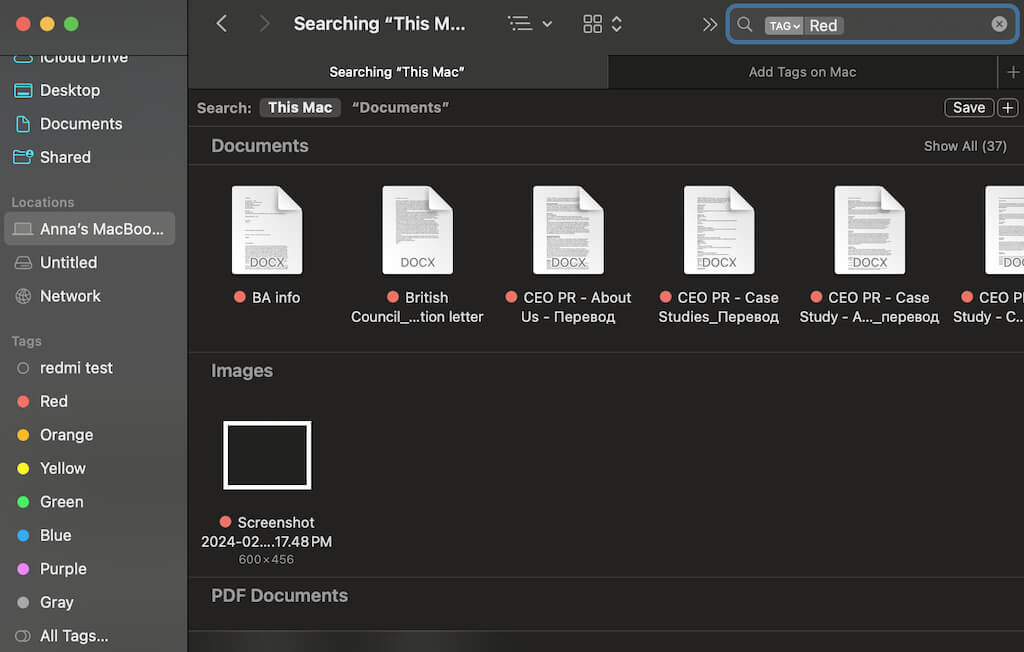
The fastest way to locate all items with a specific tag is to select that tag directly from the Finder sidebar. You’ll then see all of your files with this tag on the right side of the window. This approach ensures visibility, irrespective of where the item is located on your Mac.
2. Using the Search Bar
For a more personalized search experience, use the Search bar in Finder.
Type the name or color of the tag, and suggestions will appear, including the named tag. Select it to view all associated items.
Time to Refine Your File Organizing Skills
If you’re in search of a new or improved method to organize files and folders on your Mac, delve into the potential of tags.
Whether you’re streamlining your workflow, managing projects, or simply aiming for a clutter-free digital space, using tags in Finder offers an intuitive and efficient solution. Try incorporating this built-in tool, and witness a transformative shift in your Mac organization game.

