A convenient way to share with your spouse
AirDrop is a convenient tool to share files and transfer photos between Apple devices. If you want to start using this handy feature, we’ll show you how to turn on AirDrop on iPhone, iPad, and Mac.
Turn on AirDrop on iPhone and iPad
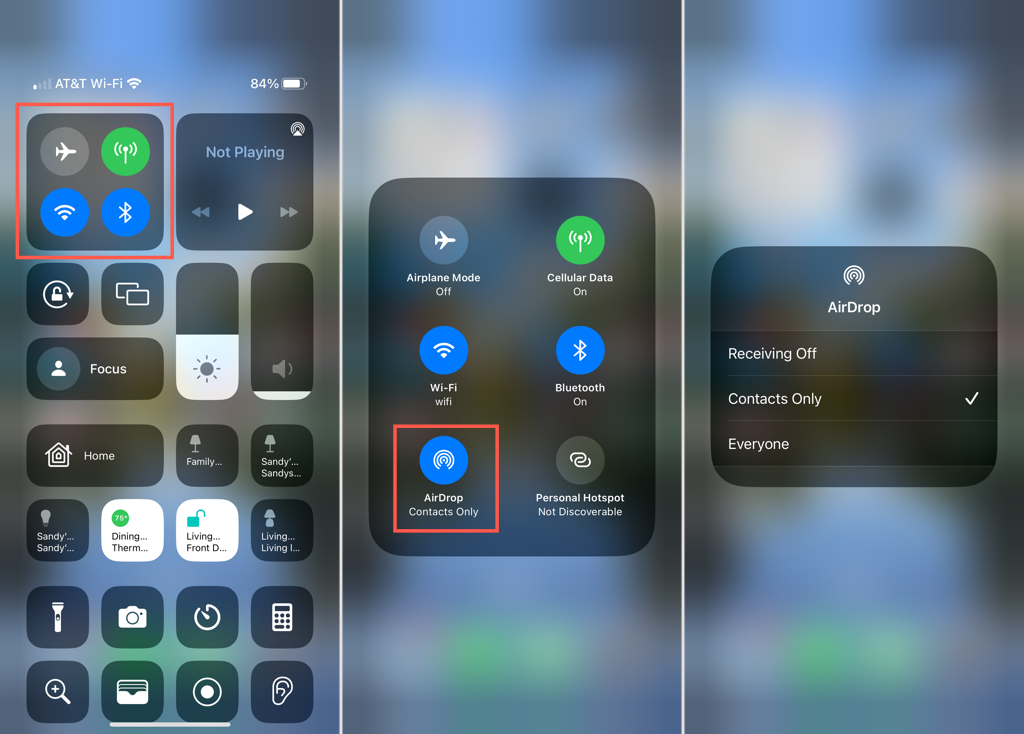
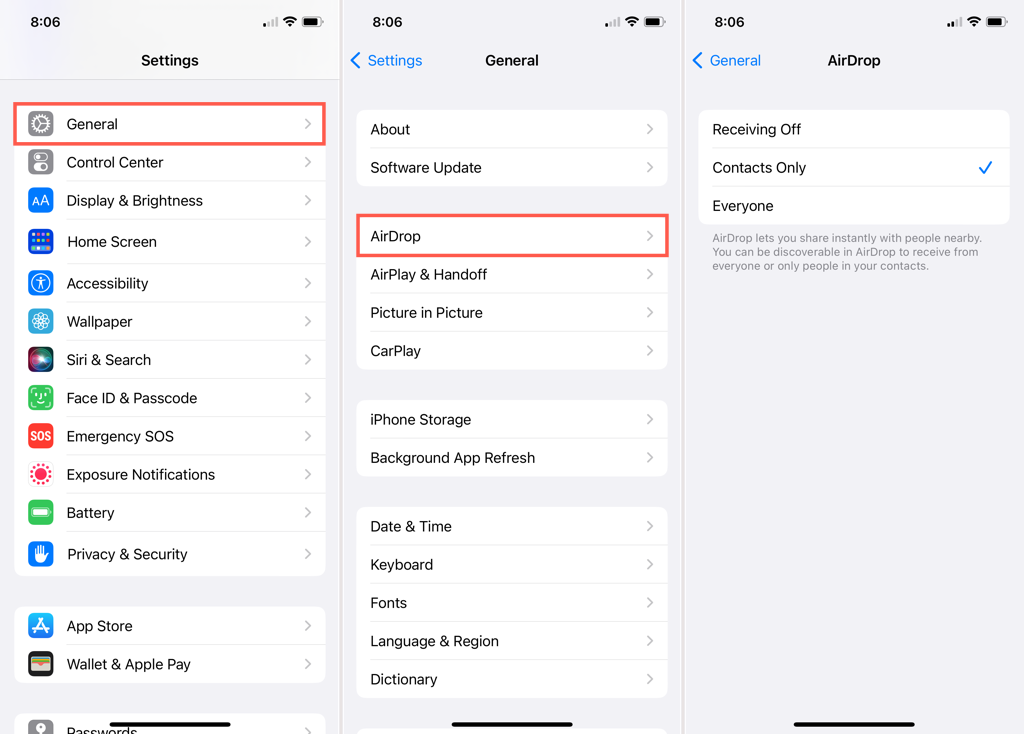
You can use AirDrop to receive items from everyone or your contacts only. On both iPhone and iPad, you can adjust this in your Control Center or the Settings app.
Before you begin, make sure you have Wi-Fi and Bluetooth turned on and your Personal Hotspot turned off.
In the Control Center
- Open the Control Center as you normally would.
- Press and hold the network settings card on the upper left side.
- Then in the pop-up window, press and hold the AirDrop icon.
- Choose either Contacts Only or Everyone.
To turn AirDrop off later, return to this spot and pick Receiving Off.
In the Settings
- Open the Settings app and select General.
- Tap AirDrop.
- Choose either Contacts Only or Everyone.
You can then use the arrow on the top left to exit and return to the main Settings screen.
Again, you can turn AirDrop off by selecting Receiving Off.
Turn on AirDrop on Mac
You have the same options for receiving files via AirDrop on Mac. You can choose just your contacts or everybody. You also have a few spots to turn on AirDrop.
Like on your iOS devices, make sure you have Wi-Fi and Bluetooth turned on.
In the Control Center
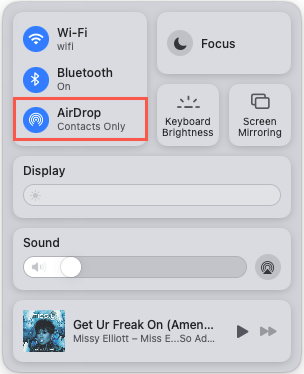
By default, you’ll see AirDrop in your Mac’s Control Center and can turn it on or off and choose who can send you files.
- Open the Control Center on the right side of your menu bar.
- Select AirDrop.
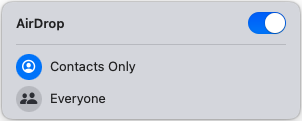
- Use the toggle to turn AirDrop on (blue). To turn it off later, simply use the toggle.
- Then, pick Contacts Only or Everyone.
In the Menu Bar
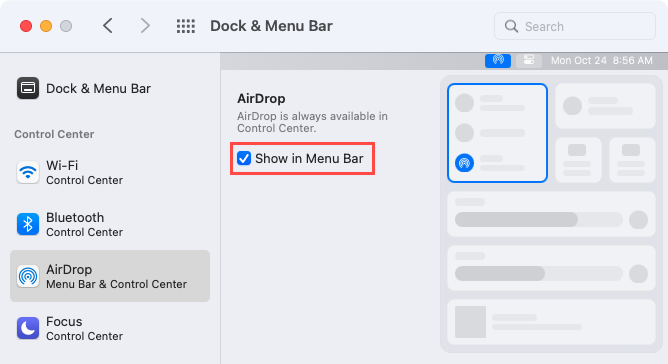
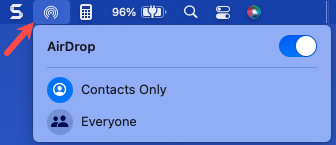
You can also place the AirDrop button in your menu bar and control it from there.
- Open System Preferences using the icon in your Dock or the Apple icon in the menu bar.
- Pick Dock & Menu Bar.
- Select AirDrop on the left and check the box for Show in Menu Bar on the right.
- Just like accessing it from the Control Center, use the toggle to turn it on and choose who you want to receive files from beneath.
Again, to turn off AirDrop later, simply use the toggle.
In Finder
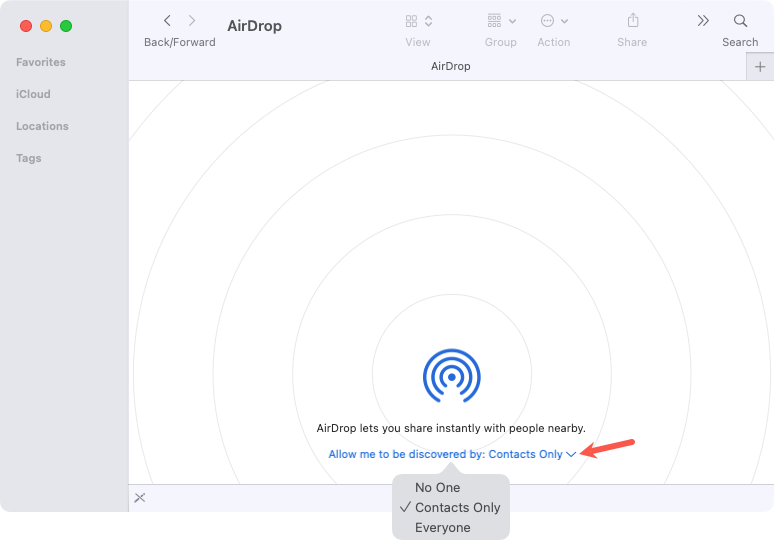
You can use Finder to adjust the AirDrop settings on Mac from either the sidebar or menu bar too.
- Open Finder using the icon in your Dock.
- If you have AirDrop in the sidebar, select it. Otherwise, pick Go > AirDrop from the menu bar.
- On the right side of the Finder window, use the drop-down menu at the bottom to choose from Contacts Only or Everyone.
To turn AirDrop off, return to this location and pick No One in the drop-down list.
Whether you want to send files to your spouse in the other room or even to yourself, AirDrop is a convenient way to do so. If you’re having trouble, take a look at how to fix AirDrop not working on your devices.

