Plus Smart DNS as an alternative
You’ve bought a shiny new Apple TV and want to install and set up your VPN service on it. The only problem is that you can’t find any VPN apps or a VPN settings page!
While using a VPN with your Apple TV, it’s not straightforward. But that’s why we’re here to help with this easy tutorial!
Why Choose a VPN for Your Apple TV
Virtual Private Network (VPN) technology creates a secure and encrypted connection over the internet. VPN technology is beneficial for enhancing privacy since it adds an extra layer of protection against online threats, such as hackers and internet service providers (ISPs) monitoring what you do online.
Apart from increasing privacy, a VPN also hides your IP address. A VPN can also help you bypass geo-restrictions and access content that may not be available in your region. Although most people using an Apple TV want to use VPN to access region-restricted content, there are some instances where you may not want your ISP to know what you are watching too.
Requirements for Using VPN on Apple TV
Before you can use an Apple TV VPN, here’s what you’ll need:
- Sign up for a VPN service compatible with Apple TV.
- An Apple TV (Obviously)
- A Wi-Fi connection with internet access.
- A VPN Router.
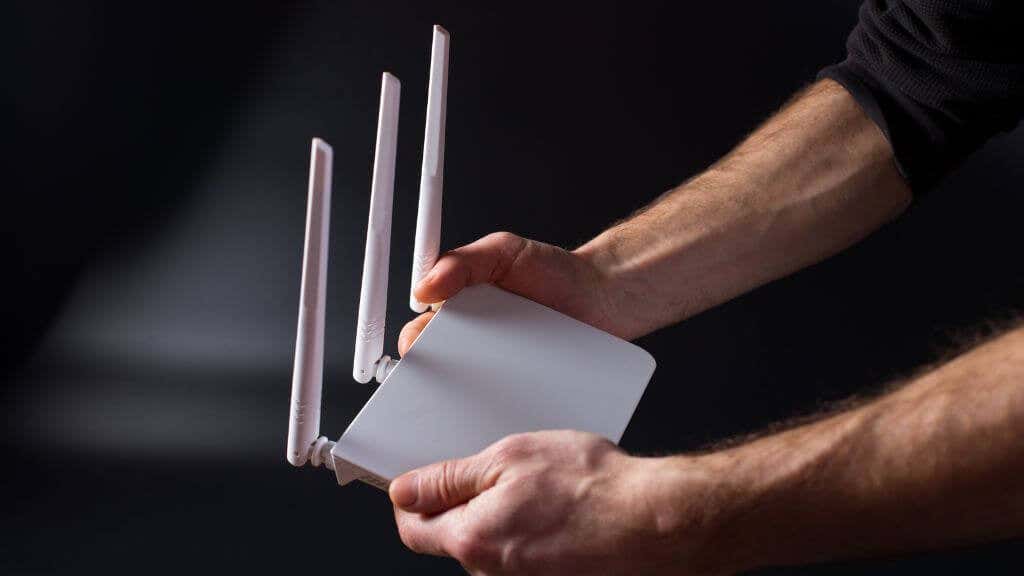
A “VPN router” has a VPN service built into it. Instead of configuring a VPN service on each device, you can use this router to provide a secure connection for all your devices. This means you can use the VPN on all your devices, including your Apple TV, with just one configuration.
If you aren’t sure about which VPN service to choose, check out our selection of the best VPNs for streaming movies and TV shows.
Setting Up a VPN on Your Apple TV
Unlike a Mac, iPad, or iPhone, Apple TVs don’t-natively support a VPN connection. This means you can’t install a VPN app or manually enter your VPN’s connection settings.
To get around this, here’s how it works::
- Buy a VPN router: Ensure it works with your chosen VPN service.
- Perform the router setup: Connect it to your internet service provider (ISP) and configure the VPN settings. This process can vary depending on the router, so follow the instructions provided by the router’s manufacturer and/or your VPN to complete the setup process.
- Connect your Apple TV to the VPN router: Once the VPN router is set up, you’ll need to connect your Apple TV to its Wi-Fi network.
- Verify the VPN connection: You can verify the connection on your Apple TV by checking your IP address or visiting a website showing your IP address. Make sure it matches the IP address provided by your VPN service. You should also run a VPN leak test on a web browser through the VPN router to check that it’s as secure as advertised.
Some VPN providers sell pre-configured routers, so if you aren’t confident about your ability to follow the setup instructions provided for these routers (and you need a new router anyway), this is a good option.
In some cases, although your router may not officially support a VPN, you can use custom third-party firmware such as Tomato or DD-WRT to add this functionality to your existing router.
Using a Virtual Router
If you don’t want to spend money on a VPN router, you can repurpose some devices to act as a “virtual” router. This will work with any device that allows you to access the VPN’s “TAP adapter” and offers a Wi-Fi hotspot feature.
A TAP network adapter is a virtual network adapter used in a VPN connection. It allows VPN software to pass all network packets transparently through the network connection. In other words, the TAP adapter acts as an interface between the VPN software and the physical network, allowing all network traffic to be transmitted and received through the VPN connection.
Depending on your hardware, Windows version, and VPN service, you may use a TUN adapter instead of a TAP adapter. The difference between these two virtual adapters isn’t relevant here, and it also changes nothing about the actual steps when setting up a virtual router.
You can turn your Windows PC into a virtual router and share your VPN connection using the Internet Connection Sharing (ICS) feature built into Windows. The exact steps may vary depending on the version of Windows you’re using:
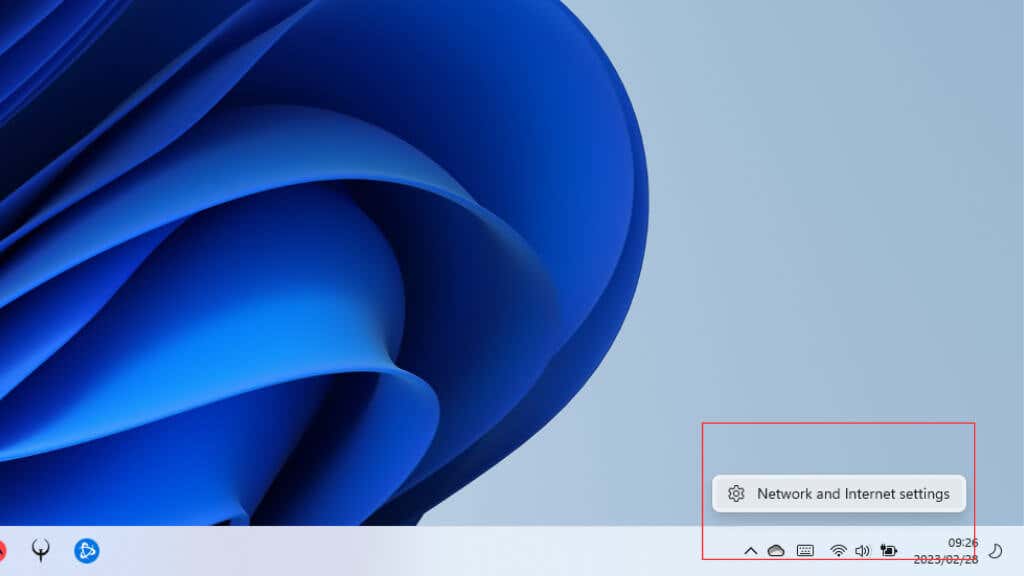
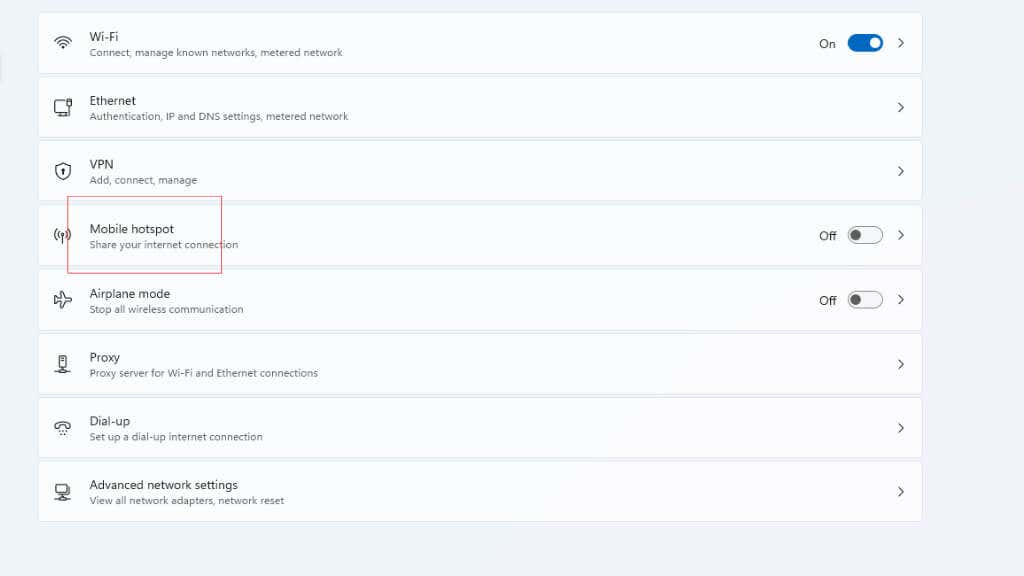
- Right-click on your network icon in the notification area. This will look like Wi-Fi bars or a little computer screen, depending on whether you use Wi-Fi or Ethernet. Select Network and Internet Settings from the menu that pops up.
- Select Mobile hotspot.
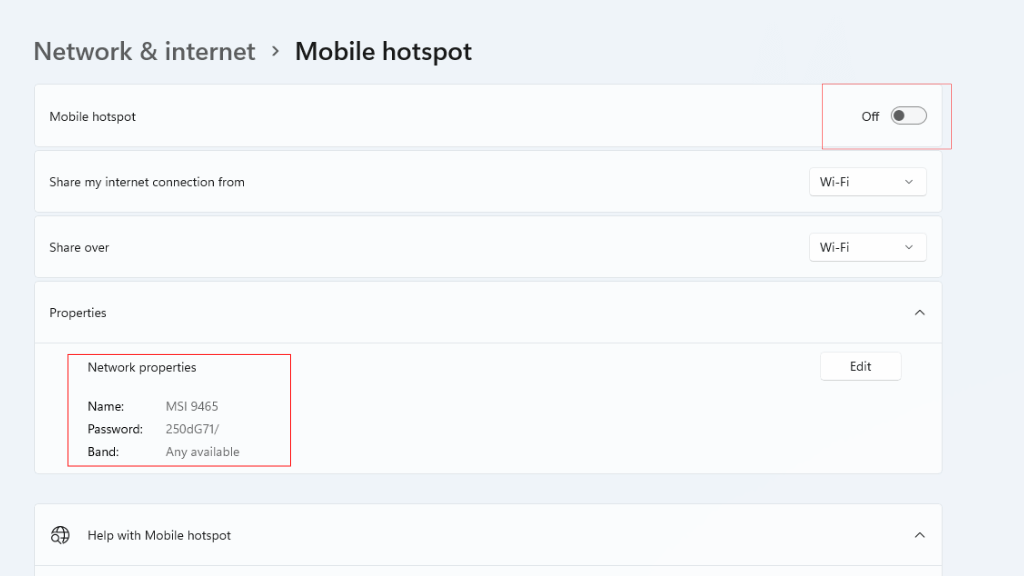
- Write down or make a note of the network name and password. You’ll need this later. Then toggle your mobile hotspot on.
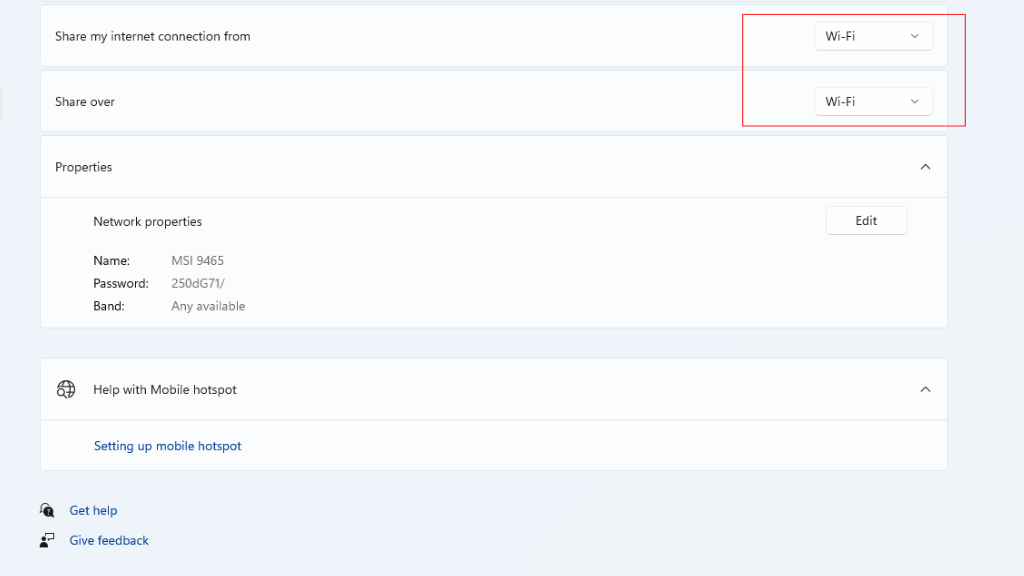
- Check that Share my internet connection from and Share over correctly reflect your setup. For example, if your computer is connected to the internet via Ethernet, the first option should be “Ethernet.”
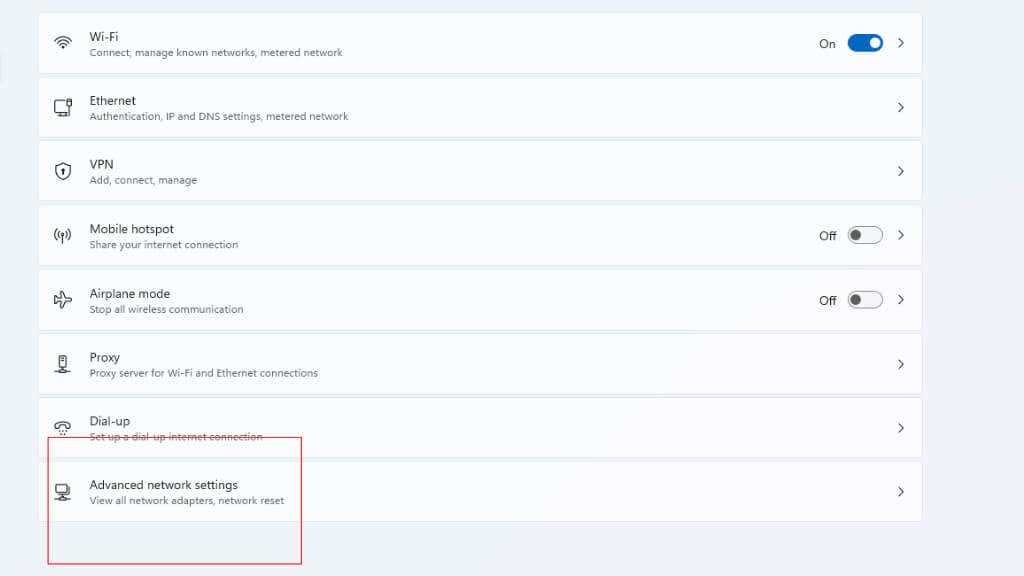
- Go back to Network & Internet and select Advanced Network Settings.
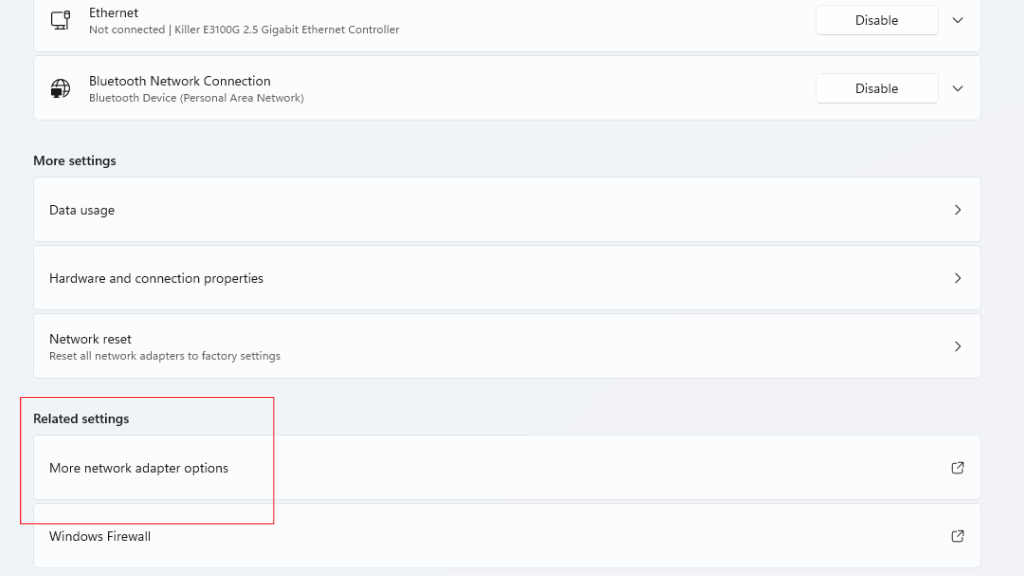
- Select More network adapter options under Related settings.
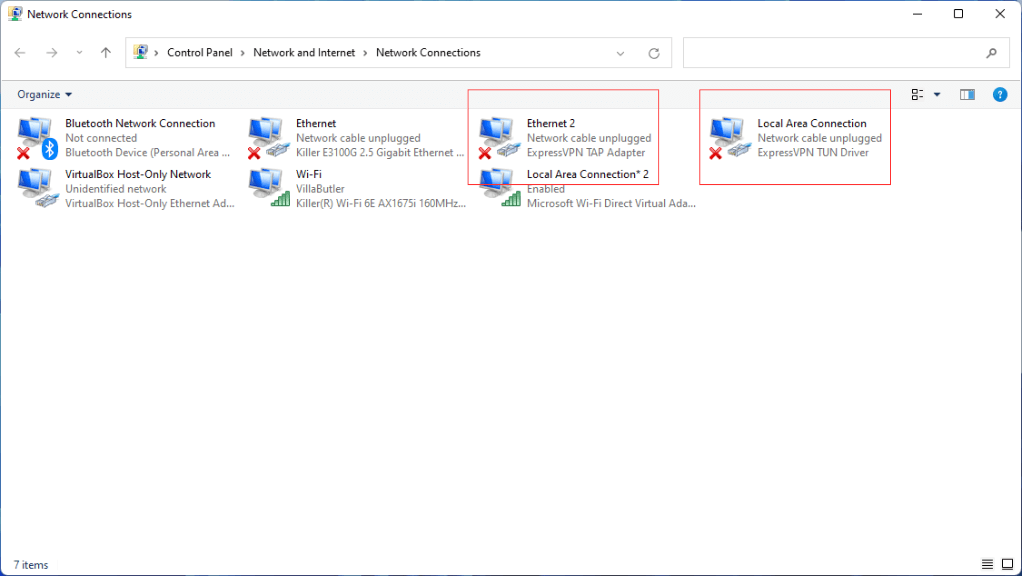
- In this Window, you can see all physical and virtual network adapters. Note the Microsoft Wi-Fi Direct Virtual Adapter marked here. This was created when you toggled the mobile hotspot on.
- You’ll notice we have both a TAP and TUN VPN connection here. If you don’t know which one your VPN is using, activate your VPN with this Window open. The red “X” will disappear from the active connection.
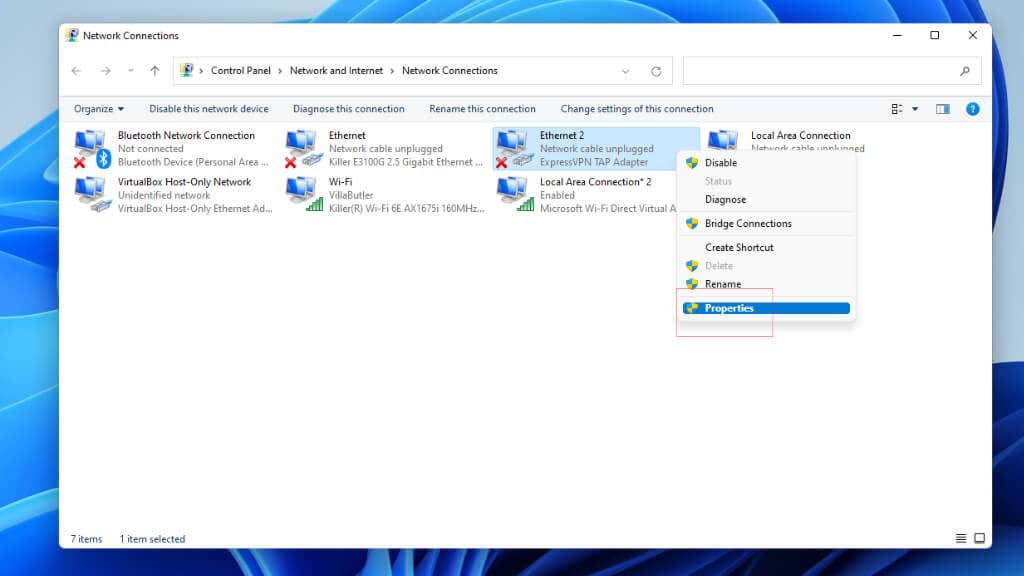
- Right-click on whichever one you’ve determined your VPN currently uses, and select Properties.
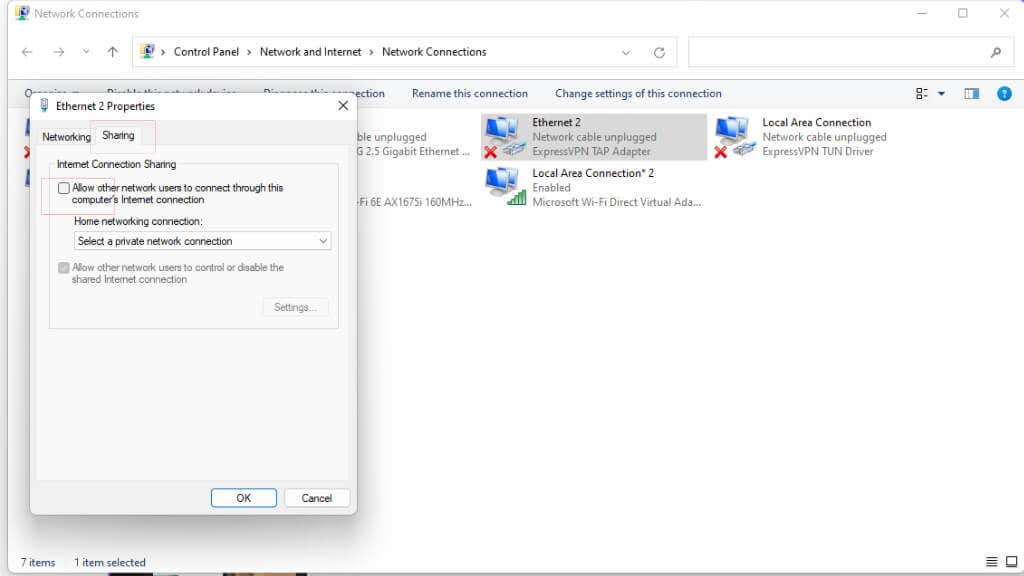
- Switch to the Sharing tab of the properties window that opens. Then check the box next to Allow other network users to connect through this computer’s internet connection.
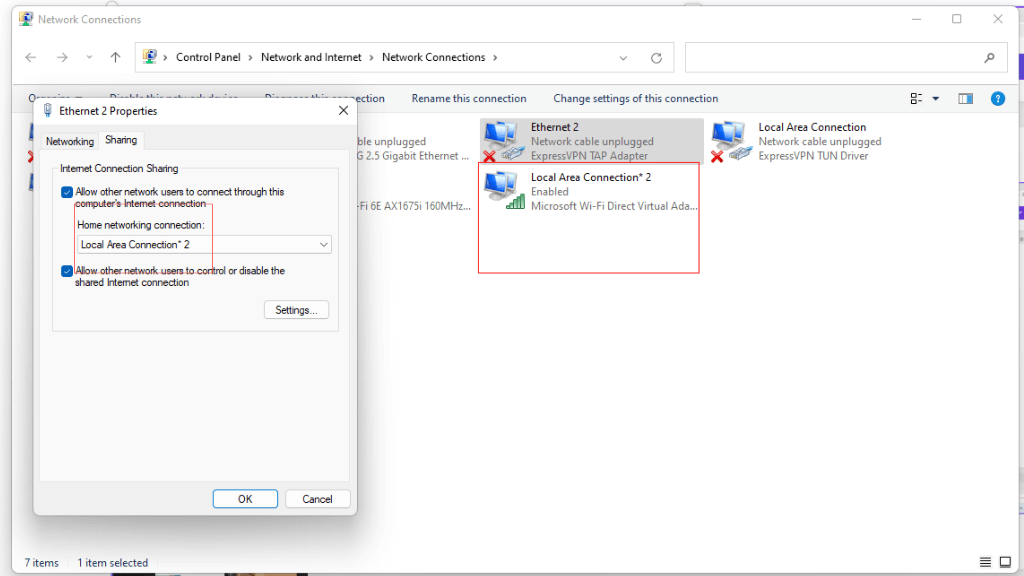
- Under Home networking connection, select the mobile hotspot virtual adapter.
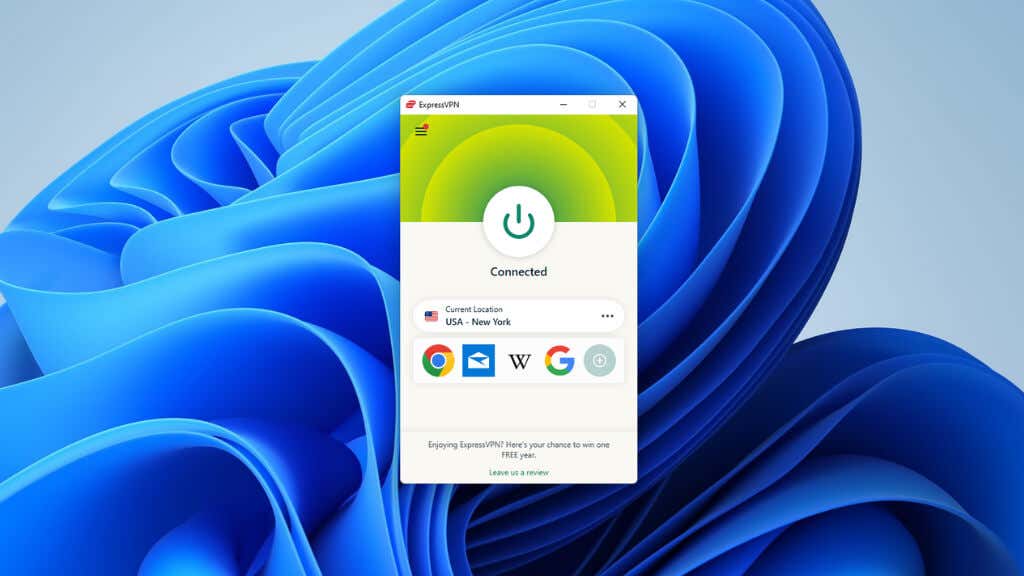
- Now, use your VPN’s Windows app to connect to the VPN server of your choice.
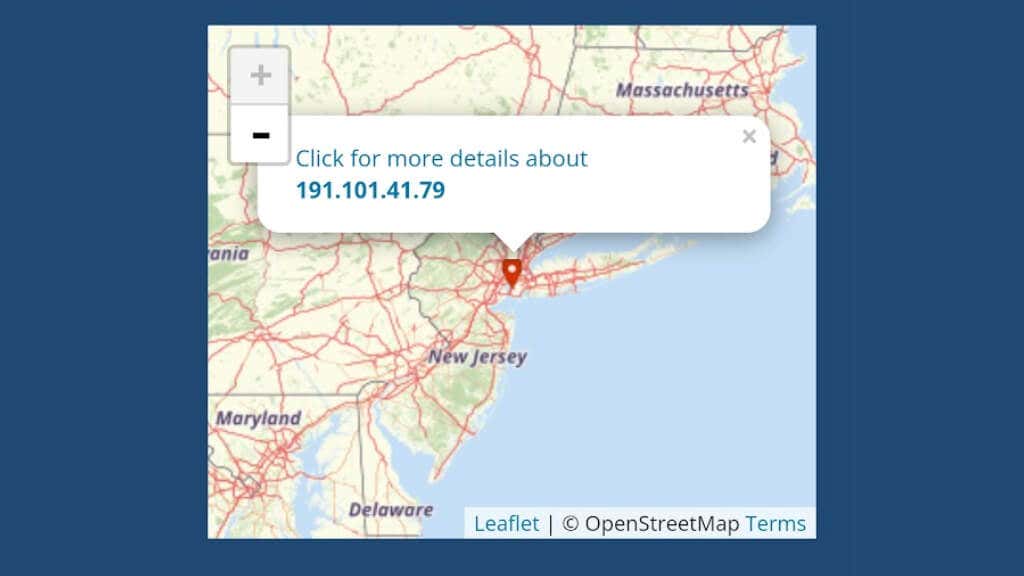
- To test the VPN connection, connect to the hotspot using another device, such as your smartphone. Then visit any website that shows your public IP. Here we used whatismyipaddress.com. As you can see, the location is correct for the VPN server we’ve connected to.
- Connect to the hotspot using your Apple TV, and now streaming services should run through the VPN connection.
Remember that some streaming services, such as Netflix, keep a blocklist of VPN server addresses, so you won’t be able to unblock US Netflix (for example) with just any VPN. Instead, you’ll have to sign up for a service that offers you a personal IP address, which a streaming service can’t distinguish from any other regular user’s IP address.
In this case, we’re both accessing the internet and sharing it over Wi-Fi. Not all computers are capable of this; even if your computer is capable of this, it’s not the most efficient option and can lead to buffering issues. For most people, the best solution is to connect your Windows computer to your physical router using an Ethernet cable and then share its connection over Wi-Fi.
If you’re lucky enough to have two Ethernet network ports on your computer, you can connect your physical router to one and your Apple TV to the second if you have an Apple TV model with Ethernet.
It’s also possible to create a virtual router like this on macOS, and most VPN providers will have instructions on how to do it on their websites.
SmartDNS as an Alternative for Media Streaming
If you don’t want to buy or modify a router to run a VPN, and you’re mainly interested in getting access to restricted content rather than improving your privacy, a SmartDNS is the better choice for an Apple TV. Some VPN services even include a Smart DNS service in the package, such as ExpressVPN’s MediaStreamer service.
That’s because you can easily change the DNS server settings on an Apple TV easily without needing special tricks or methods. A smart DNS service intercepts requests for certain websites and redirects them to make the service think you’re in a different region.
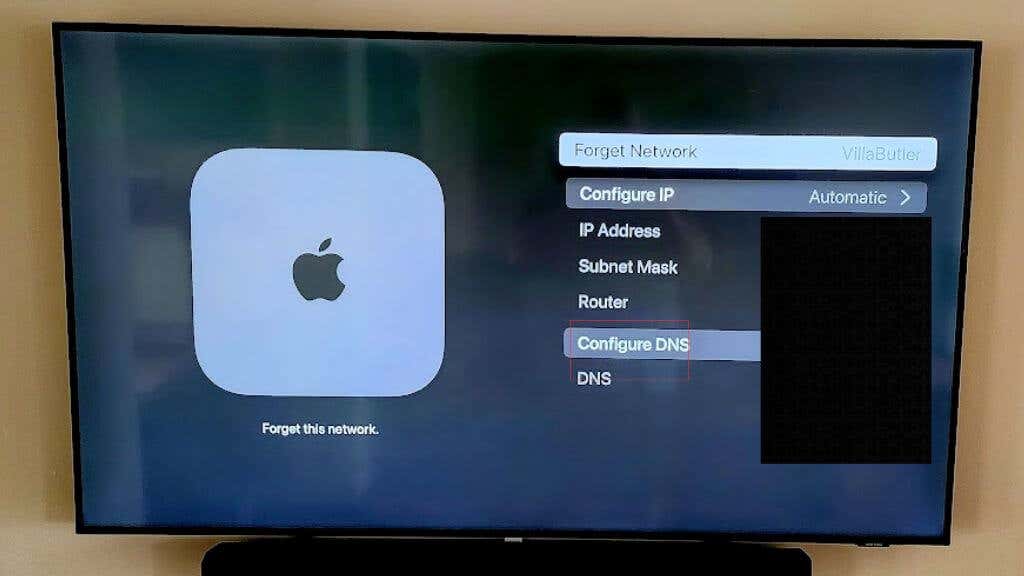
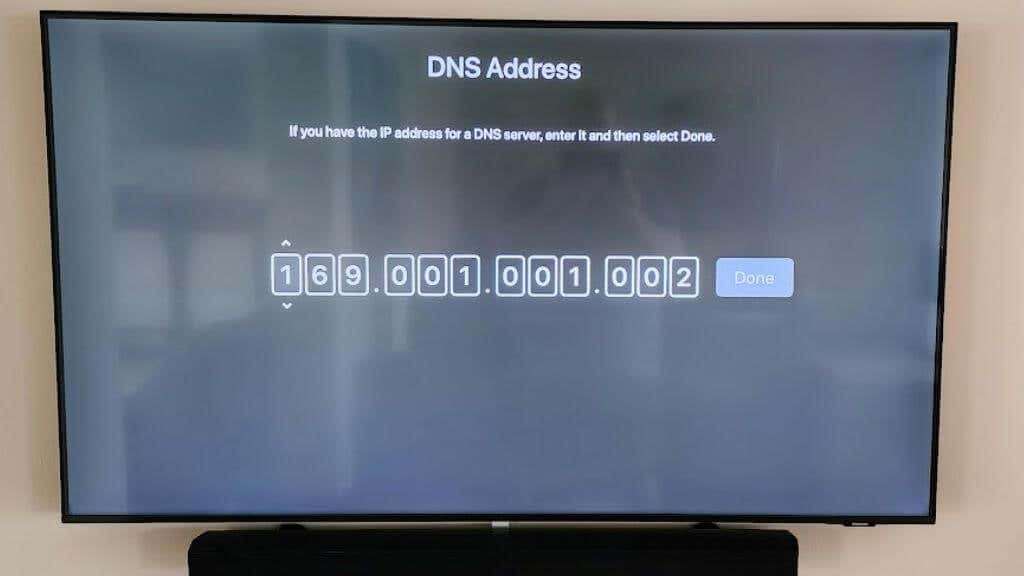
To change the DNS settings on an Apple TV for smart DNS features, you need to follow these steps:
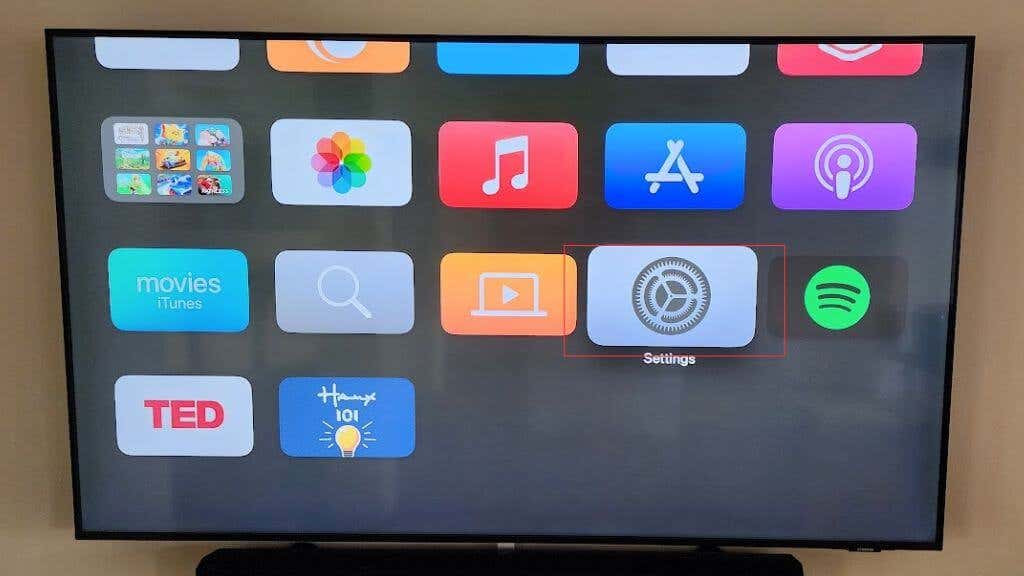
- Go to the Settings on your Apple TV.
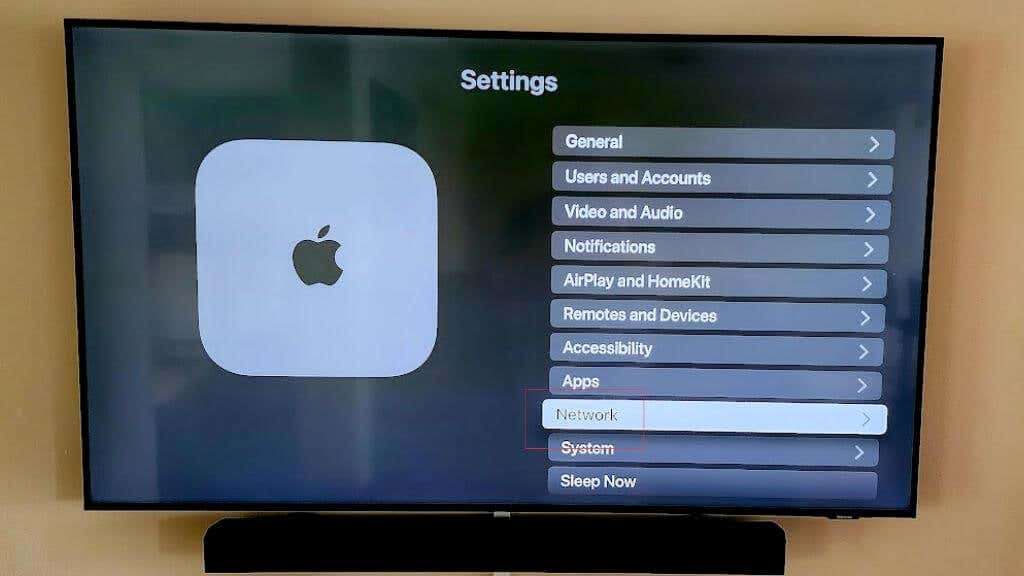
- Select Network.
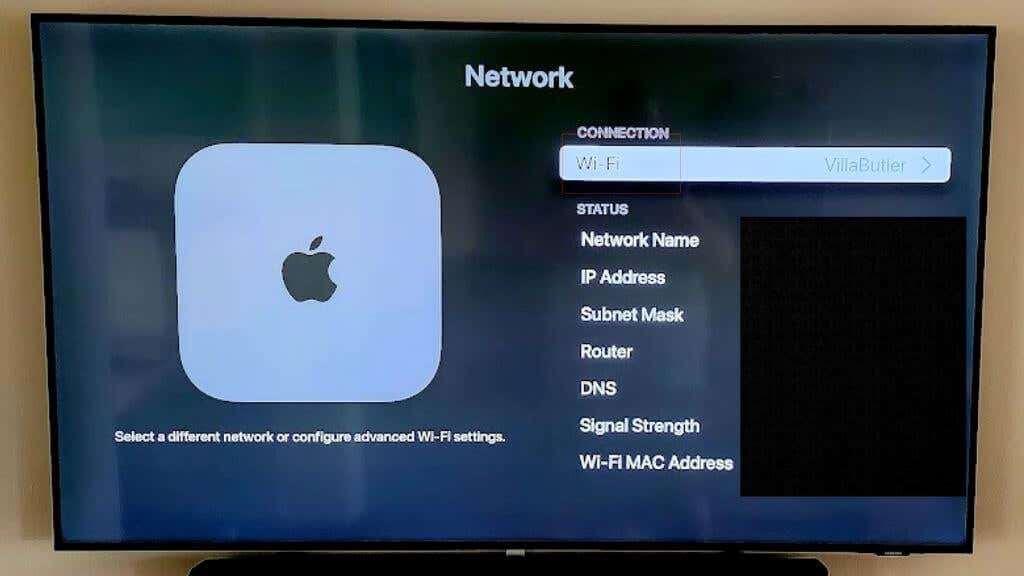
- Select your Wi-Fi.
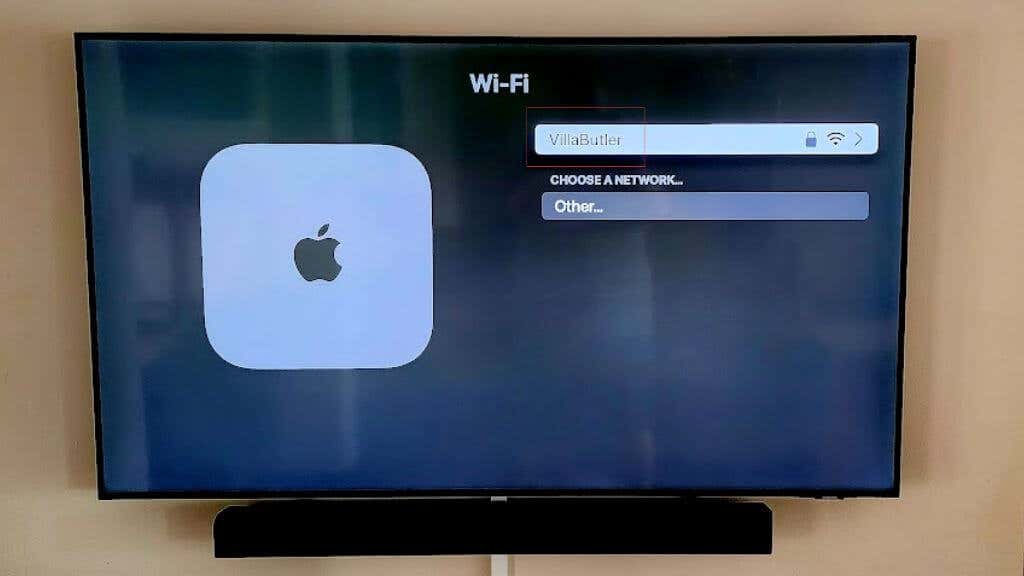
- Select your Wi-Fi network.
- Scroll down and select Configure DNS.
- Change the settings to Manual.
- Enter the DNS address provided by the Smart DNS service.
- Select Done.
It’s important to note that the exact steps may vary depending on the model and operating system version of your Apple TV.
Smart DNS services require an additional step. The Smart DNS needs to know what your public IP address is. So you’ll have to open a specific web page and then (usually) select a button to refresh your current IP address.
You only need to do this once if you have a static IP address through your ISP. However, if you have a dynamic IP address (as most people do), you’ll have to periodically refresh the IP address on record with your Smart DNS service.
Use an Android TV Instead
If you specifically want to use a VPN with your Apple TV to access content from other regions, you may be better off purchasing an Android TV device instead. Unlike tvOS, Android lets you sideload any applications you want, and there are also many great VPN apps on the Google Play Store.
For example, we’ve used ExpressVPN with great success on our Android TV devices, and the app even features split tunnelling that allows you to exclude certain apps from the VPN. So, for example, you may want your local Netflix selection, but Hulu runs through the VPN or vice versa. Most VPN services offer a 30-day money-back guarantee, so you can experiment with different services to see which works best for you.
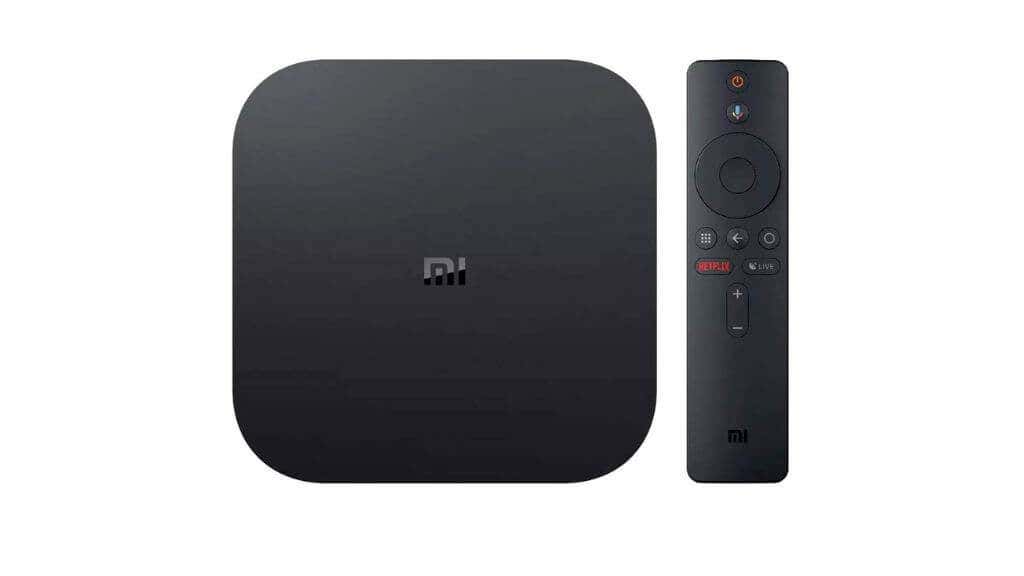
You can run an Android TV device alongside your Apple TV, and there are many inexpensive Android TV options available on sites like Amazon. We recommend the Xiaomi Mi Box S 4K as a high-quality alternative or supplement to the Apple TV at a fraction of the price.

