Plus how to remove voice data from Apple's servers
Apple’s virtual assistant Siri, can be helpful, funny, and sometimes irritating.
You can ask it to do almost anything for you from translation to getting information on the weather or news, schedule calls and sending text messages, finding a bedtime story or movie times, or checking your emails if you’re too lazy to do it yourself.
Before Siri, iOS users had voice control though it has fewer features and only allows you to control your Phone, Music, and FaceTime apps by speaking into your iPhone’s mic.
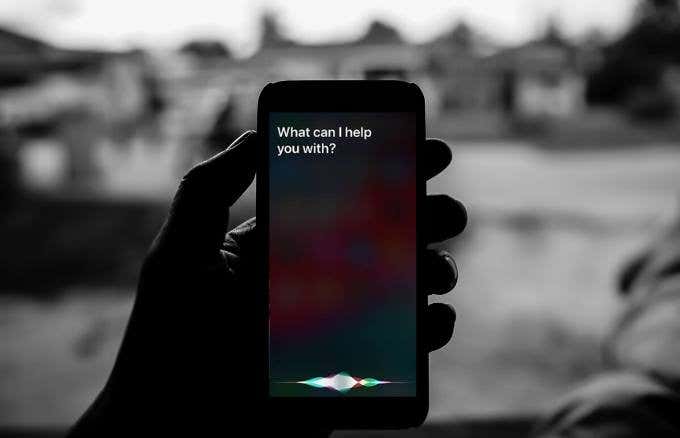
Siri replaced Voice Control to make it a lot easier for you to get stuff done, but it also has its fair share of mistakes. Plus, if you’re overly concerned about your privacy, you wouldn’t want Siri listening in every time you’re talking.
If you don’t use Siri, or you hate it so much you want a “Kill Siri” button added to your Mac or iOS device, we’re going to show you how to disable it from your Apple device. You should know though that disabling Siri means you can’t use any kind of voice control, whether that’s Voice Dial or Dictation too.
How To Disable Siri On Your iOS Device
There are two ways to disable Siri on your iOS device: partially, by disabling just a few features that you don’t want, or turn it off fully from your device’s Lock Screen.
Both these settings can be switched on or off from the Settings app by going to the Siri & Search menu.
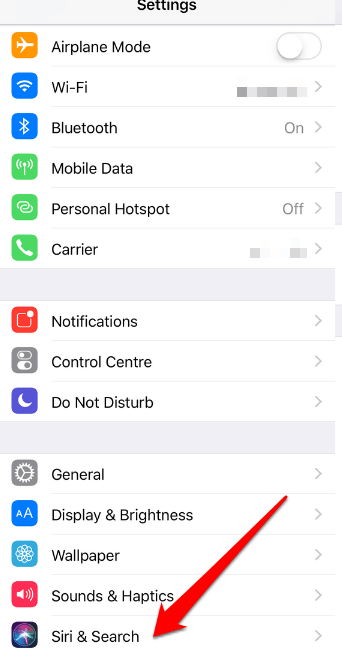
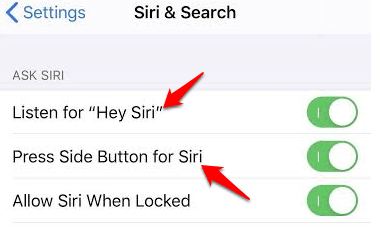
For example, if you choose to turn off the feature that allows Siri to actively listen for the “Hey Siri” command, it toggles that setting off and Siri won’t be activated accidentally.
If you just want to disable or turn off Siri altogether, you can completely disable it by going to Settings>Siri & Search and toggle off the Listen for Hey Siri, and Press Side Button for Siri settings.
A warning will appear on your iOS device to disable Siri, so tap Turn Off Siri to completely disable it and turn it off on your device.
Once you disable Siri on iOS, the next step is usually to remove all the voice data from whatever you said to it, which is transmitted to Apple servers and stays there for up to two years.
You can only remove such voice data from the servers by disabling Siri, and also disabling Dictation so that everything is removed.
How To Disable Dictation On iOS Devices
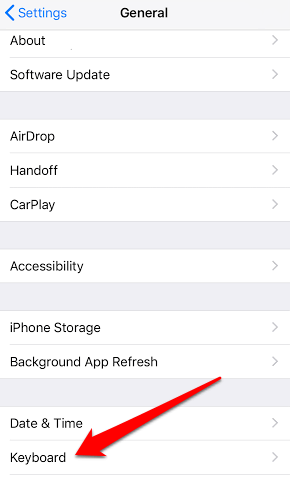
- To do this on your iOS device, go to Settings and tap General.
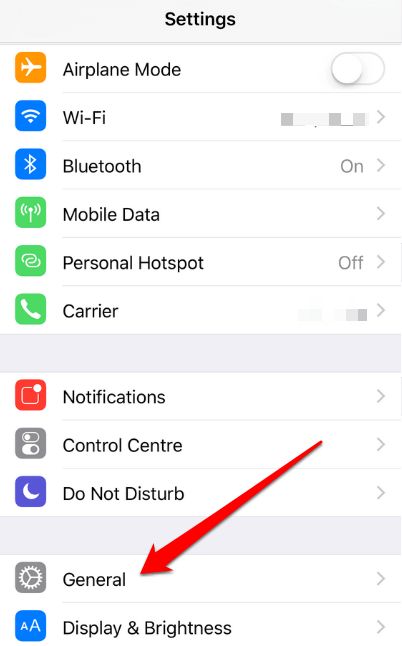
- Tap Keyboard.
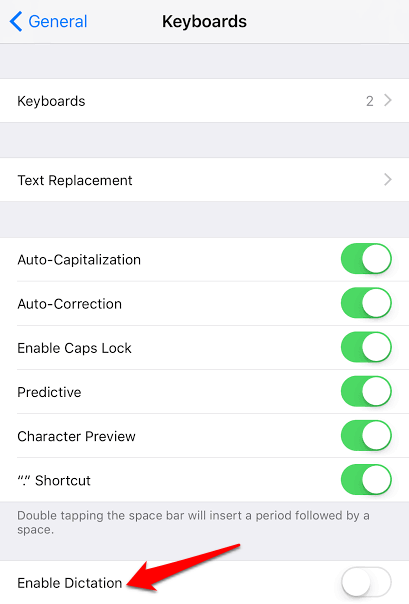
- Find the Enable Dictation option and disable it. This will completely turn off voice commands for your iOS device.
How To Disable Siri On a Mac
Disabling Siri on a Mac is just as easy as it is on an iOS device.
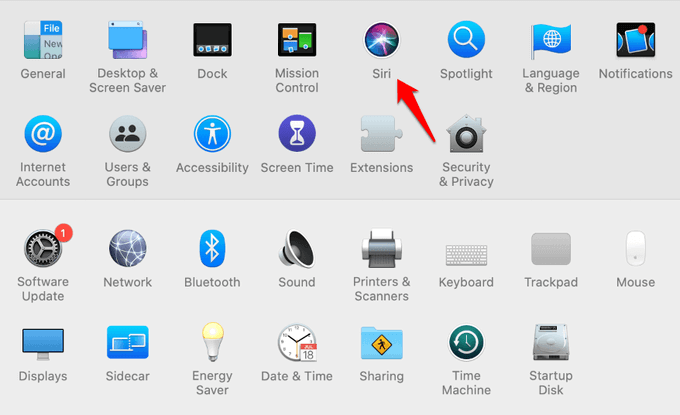
- Click on the Apple Menu, select System Preferences, and click Siri.
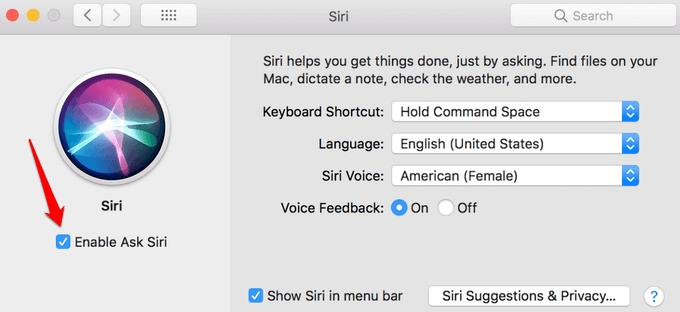
- Uncheck Enable Ask Siri option, to turn off Siri completely on your Mac.
If you want to remove any of your voice data saved through Siri to Apple servers, you’ll do the same thing as with iOS devices: disable or turn off Dictation.
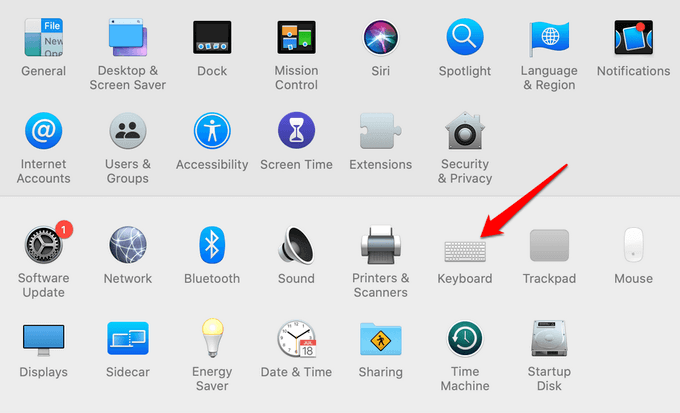
- To disable or turn off Dictation, click Menu > System Preferences and select Keyboard.
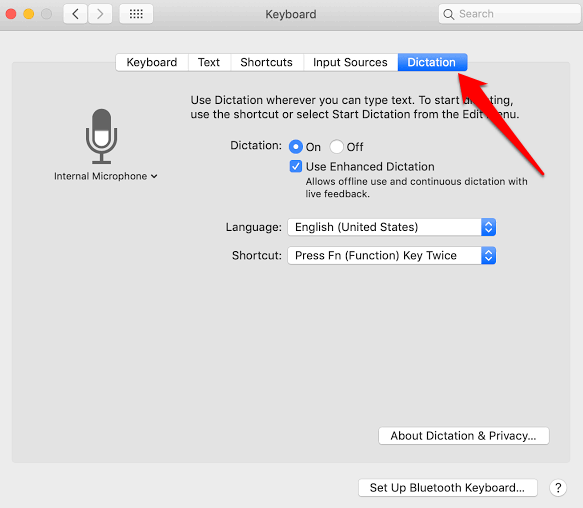
- Click Dictation.
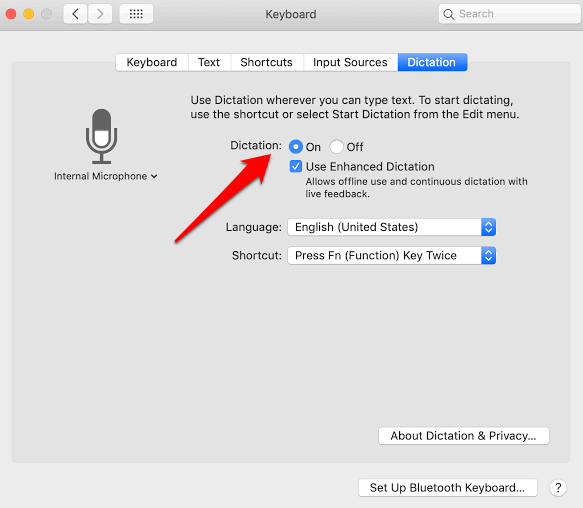
- Turn off Dictation. This not only removes all your voice data from Apple Servers but also turns off voice commands on your Mac.
Why You Should Remove Your Voice Data from Siri and Apple Servers
It’s easy to delete or remove your data from Siri and ultimately on Apple servers. For privacy-conscious people though, this is important especially if you’re concerned about the kind of digital recordings Apple may be holding of your conversations with the virtual assistant.
Apple uses such data for purposes of testing and grading to improve the service. Initially, human contractors listened to the Siri commands iOS or Mac users gave the virtual assistant as part of the grading program, but this has since been suspended.
That said, you may still want to rethink how you use Siri, but at least you now know how to turn it off on your Mac or iOS devices, and how to completely remove any trace of the voice data from Siri on Apple servers.
- If you want to disable the Siri History collection, go to Settings > Privacy and click Analytics & Improvements at the bottom of the Privacy screen.
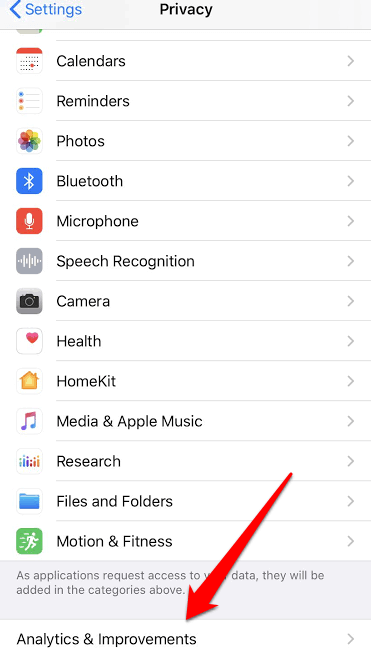
- Toggle off the Improve Siri & Dictation option if it’s on, as this means your iOS device can share voice clips with Apple.
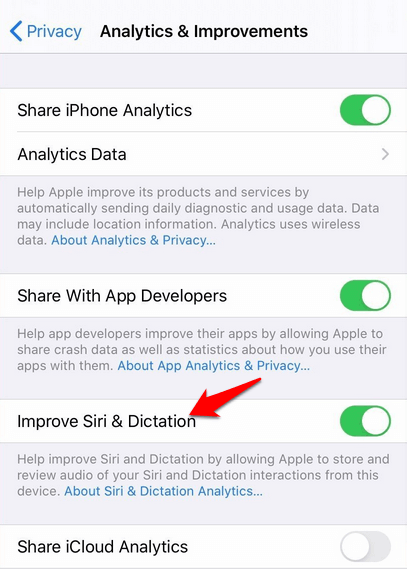
As long as you’ve disabled that option, you can rest assured that Apple can’t review or store the audio of your future interactions from your device.
Note: For users with multiple iOS devices, disabling Improve Siri & Dictation setting on either device doesn’t disable it across all your devices. You have to toggle it off separately on each of the iOS devices you use.


