Plus, why you must do this
Time Machine is the best way to safeguard the data on your Mac. It is capable of completely automating backups and makes restoring files and folders easy. As you use Time Machine, you might need to free up space sometimes by deleting specific backup files and snapshots.
Read on to learn how to delete Time Machine backups from external and internal storage media on a Mac.

Why You Must Delete Time Machine Backups
When you set up Time Machine on an external drive, it builds up a steady archive of backups—or snapshots—of your Mac’s data. That allows you to restore specific versions of files and folders, sometimes dating back years, possible. Time Machine is smart enough to delete the oldest snapshots to create space, making manual storage space management unnecessary.
However, if you also use the backup drive as a personal storage medium (only possible if it’s HFS+ or Mac OS Extended-formatted), you can delete all previous backups of any file or folder to make room. Or, you can choose to delete specific snapshots.
Additionally, Time Machine keeps hourly snapshots of your data locally if you do not have the Time Machine drive connected. If you run out of space on your Mac’s internal storage, you can delete individual or all local snapshots via Terminal.
Delete File and Folder Backups via Time Machine
Time Machine makes it possible to delete all backups of any file or folder on an external hard drive or SSD. The following steps do not apply to APFS (Apple File System) Time Machine drives.
1. Connect the Time Machine drive to your Mac.
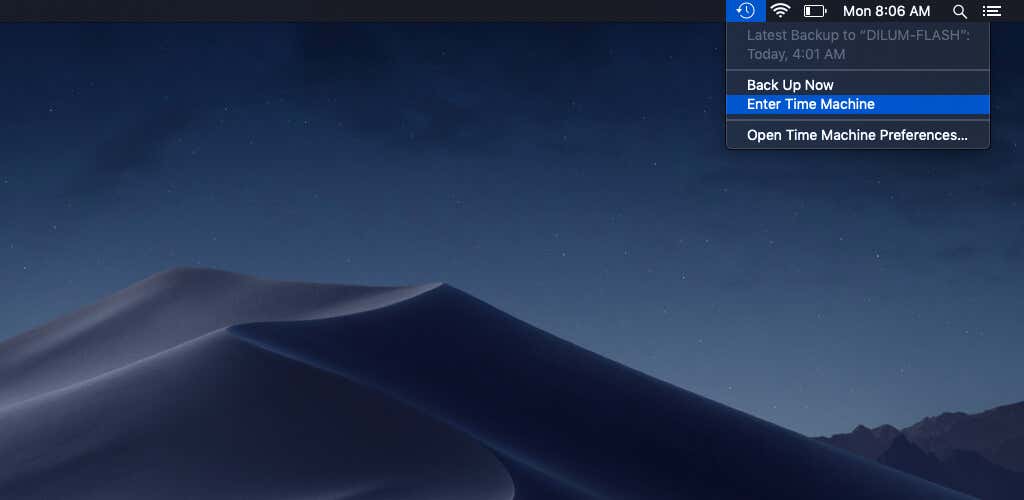
2. Select the Time Machine icon on the menu bar and choose Enter Time Machine. Or, open the Launchpad and select Other > Time Machine.
3. Navigate to the location of the file or folder and select it. If it’s an item you’ve already deleted, use the timeline to the right of the Time Machine app until you locate it on a previous snapshot.
4. Select the Gear-icon at the top of the Finder window and select Delete All Backups of [File/Folder Name].
![02-Delete-All-Backups - Switching To Mac Delete All Backups of [File/Folder Name].](https://www.switchingtomac.com/wp-content/uploads/2022/06/02-Delete-All-Backups.jpg)
5. Select OK on the confirmation pop-up.
6. Enter your Mac’s administrator password and select OK to authenticate the action.
Time Machine will continue to include the file or folder in new backups. If you want to stop that, you must add it to Time Machine’s exclusions list (more on that further below).
Delete Time Machine Snapshots Using Finder
Time Machine stores incremental backups of your files and folders as separate snapshots. You can delete them directly by accessing your Time Machine drive via Finder. That is possible on both HFS+ and APFS Time Machine drives.
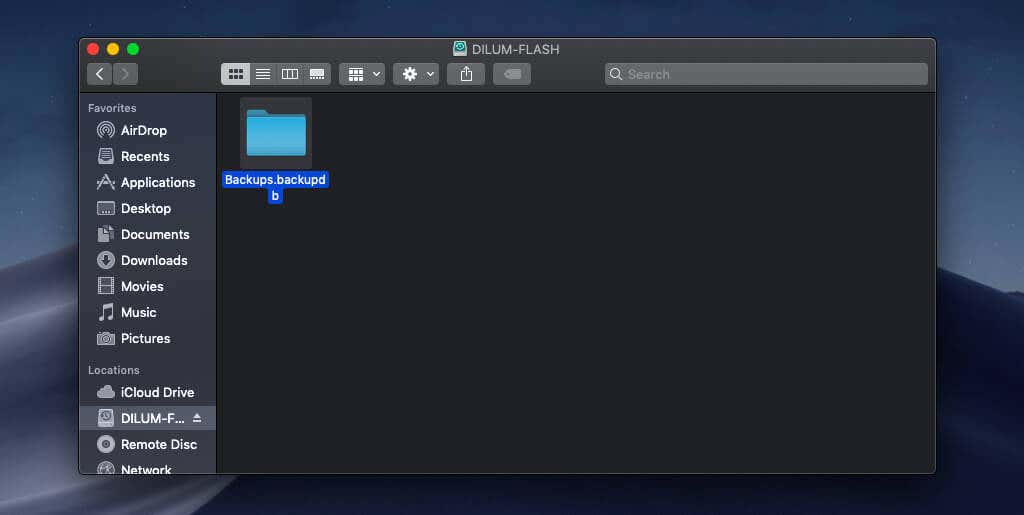
1. Launch Finder and select the Time Machine backup disk on the sidebar.
2. Open the Backups.backupdb folder, and then the [Name of Your Mac] subfolder to access your Time Machine backups. If the drive uses the APFS format, all snapshots will be present in the root directory.
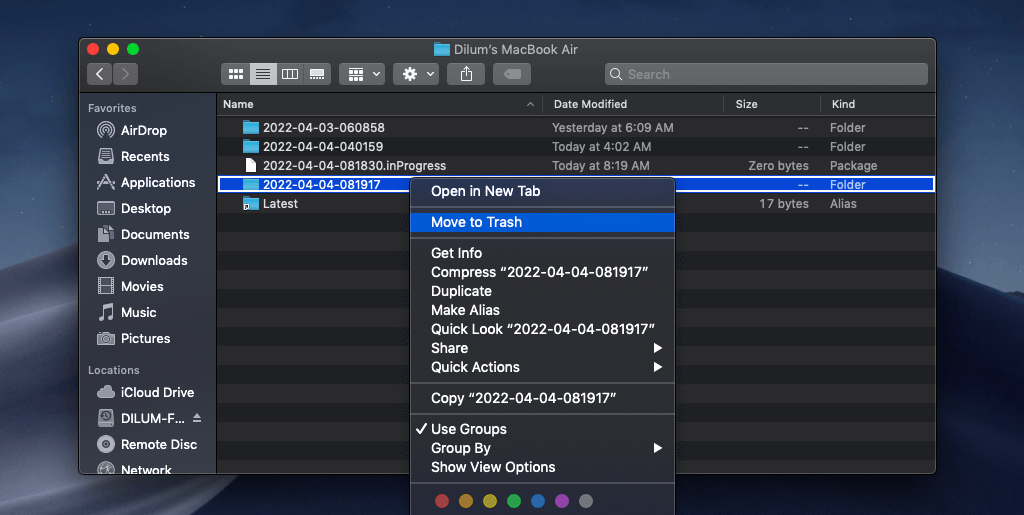
3. Locate the Time Machine snapshot you want to delete. Since snapshot file names appear in the YYYY-MM-DD-HHMMSS format, try sorting them using the Name column to make it easier to find the specific snapshot you want to delete.
4. Control-click or right-click the snapshot you want to delete and select Move to Trash.
5. Select Continue to confirm.
6. Enter your Mac’s administrator password and select OK.
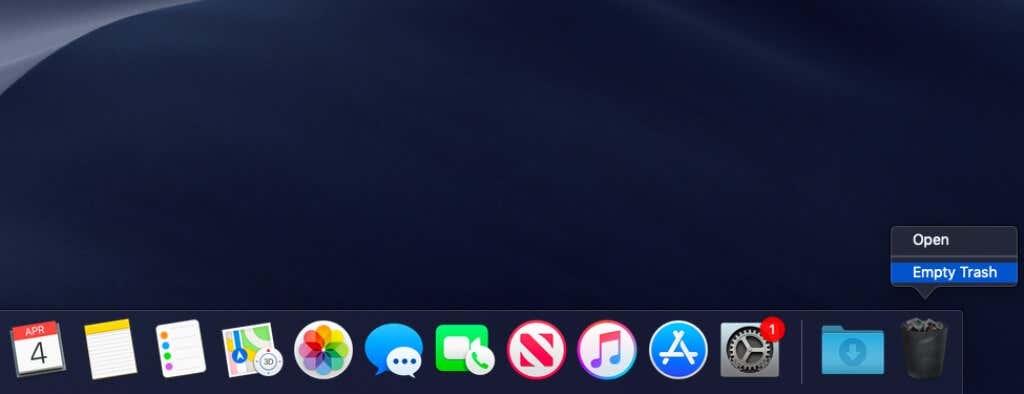
7. Control-click or right-click the Trash icon on the Mac’s Dock and select Empty Trash.
Note: If you can’t empty the Trash, you must disable System Integrity Protection on your Mac. To do that, access Terminal via macOS Recovery and run the csrutil disable command.
Delete Time Machine Snapshots Using Terminal
An alternative way to delete Time Machine snapshots involves using the Terminal in macOS. You start by listing all snapshot path names in a Terminal window. Then, you repeatedly run a command to delete the snapshots you want.
1. Connect the Time Machine drive to your Mac.
2. Open the Launchpad and select Other > Terminal.

3. Run the following Terminal command to view a list of Time Machine snapshots:
tmutil listbackups
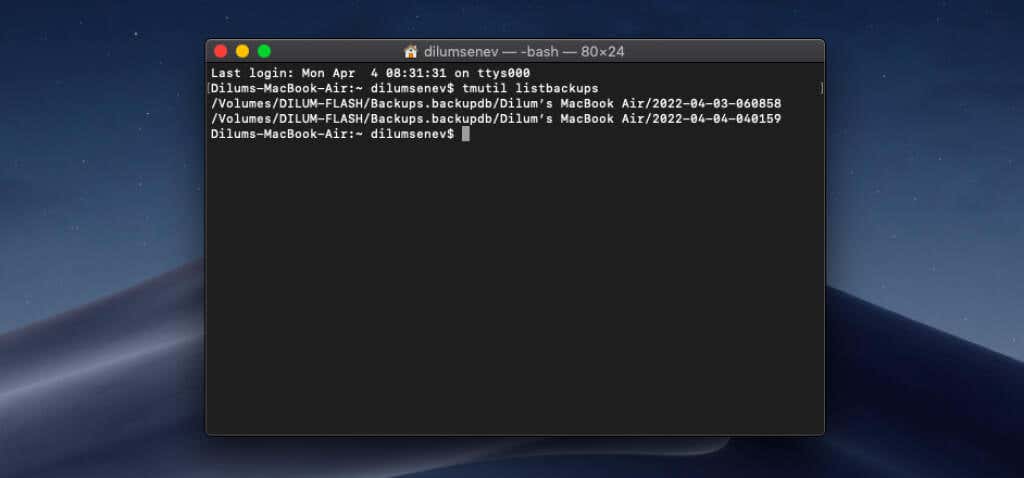
On HFS+ Time Machines drives, you will see the full file path to each snapshot. If the drive is APFS-formatted, you will only see a list of file names.
4. Run the following command to delete a snapshot, replacing snapshot-path/name with the path (HFS+) or name (APFS) to the backup while enclosing it in double-quotes:
sudo tmutil delete “snapshot-path/name”
5. Type your Mac’s administrator password to authenticate the action and press Enter.
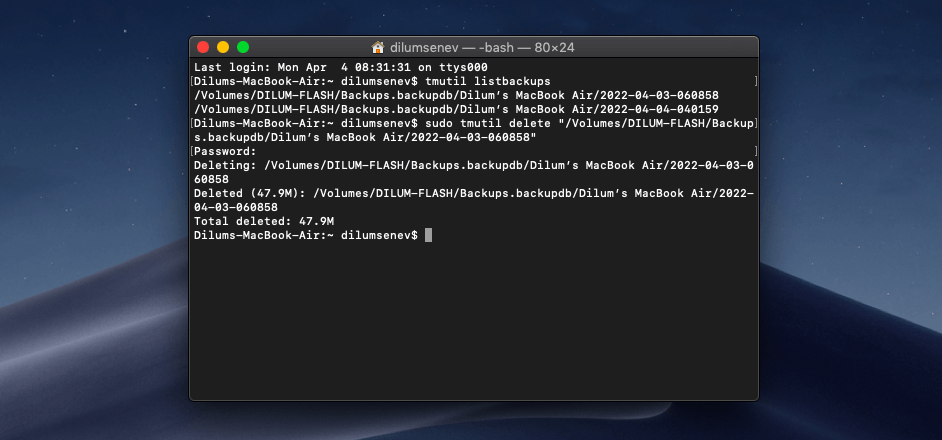
6. Repeat for any other snapshots you want to delete.
Delete Local Snapshots Using Terminal
Time Machine creates automatic hourly snapshots on your Mac’s local storage, giving you the option of restoring a limited amount of data even if you don’t have your backup drive with you. However, if you are close to running out of free space, you can delete them via Terminal.
1. Open Launchpad and select Other > Terminal.

2. Run the following command to reveal a list of local snapshots:
tmutil listlocalsnapshots /
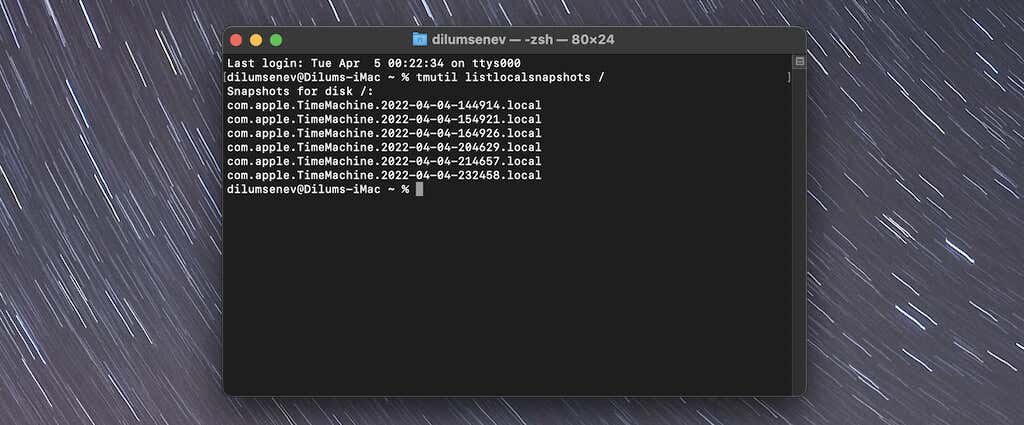
3. Delete the Time Machine snapshot using the command below, replacing [snapshot-name] with the name of the snapshot (YYYY-MM-DD-HHMMSS portion only):
sudo tmutil deletelocalsnapshots [snapshot-name]
4. Type your Mac’s administrator password to authenticate the action and press Enter.
![11-Delete-Local-Snapshot - Switching To Mac sudo tmutil deletelocalsnapshots [snapshot-name]](https://www.switchingtomac.com/wp-content/uploads/2022/06/11-Delete-Local-Snapshot.jpg)
5. Repeat for any other snapshots you want to delete.
Disable Local Snapshots (macOS Sierra and Earlier Only)
If you’re a Mac user running the macOS 10.12 Sierra operating system or earlier, you can stop Time Machine from creating local snapshots. The action also forcibly deletes all local snapshots. You can choose to re-enable local snapshots afterward if you want.
To do that, open Terminal and run the following command line:
sudo tmutil disablelocal
Execute the command below if you want to reactivate local Time Machine snapshots:
sudo tmutil enablelocal
Exclude Files and Folders in Time Machine
You can prevent Time Machine from including specific files and folders in its backups. That’s ideal if you want to stop particular items from consuming storage on the Time Machine drive—e.g., temporary files such as Safari or Apple TV downloads.
1. Control-click or right-click the System Preferences icon on the Mac’s Dock and select Time Machine.
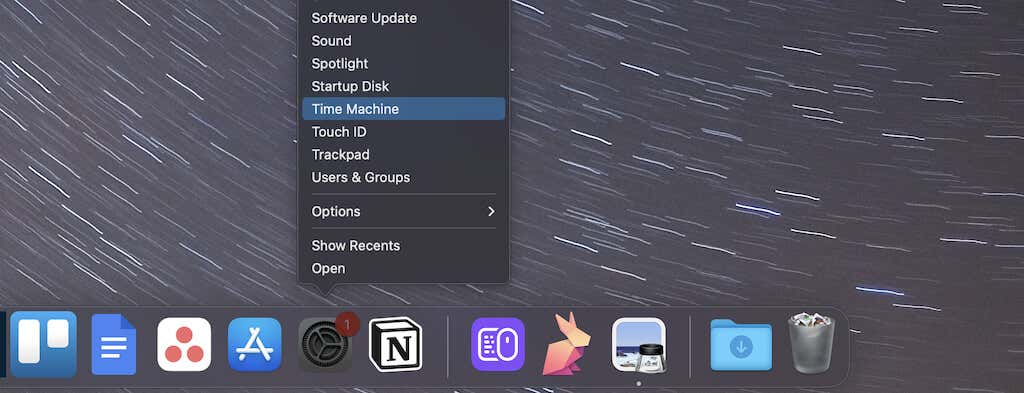
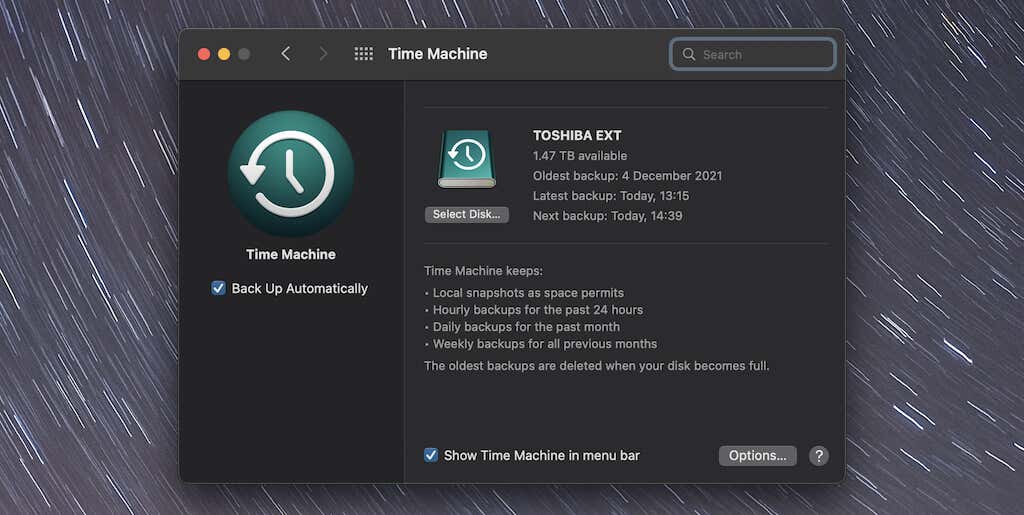
2. Select the Options button on the lower-right corner of the Time Machine window.
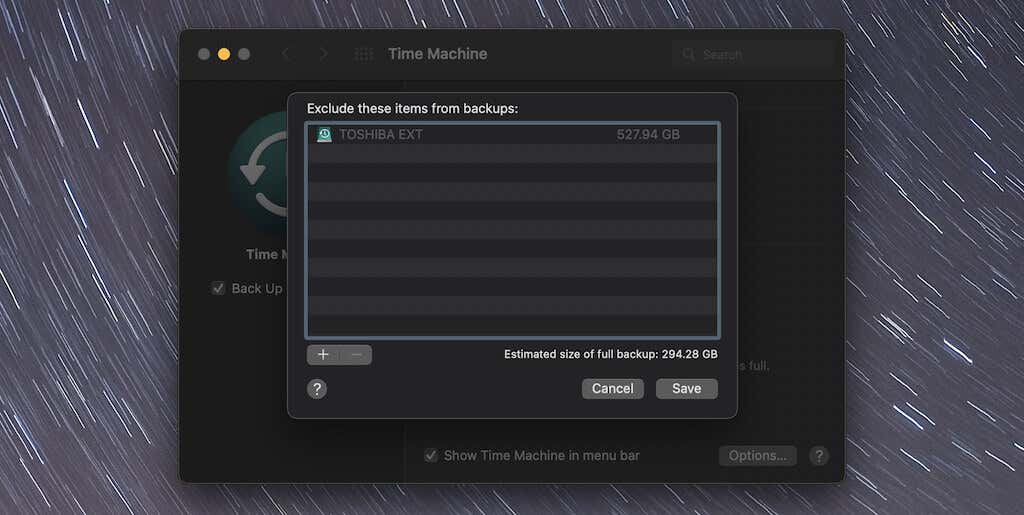
3. Select Add (plus-shaped icon).
4. Pick the file or folder you want to exclude and select Exclude.
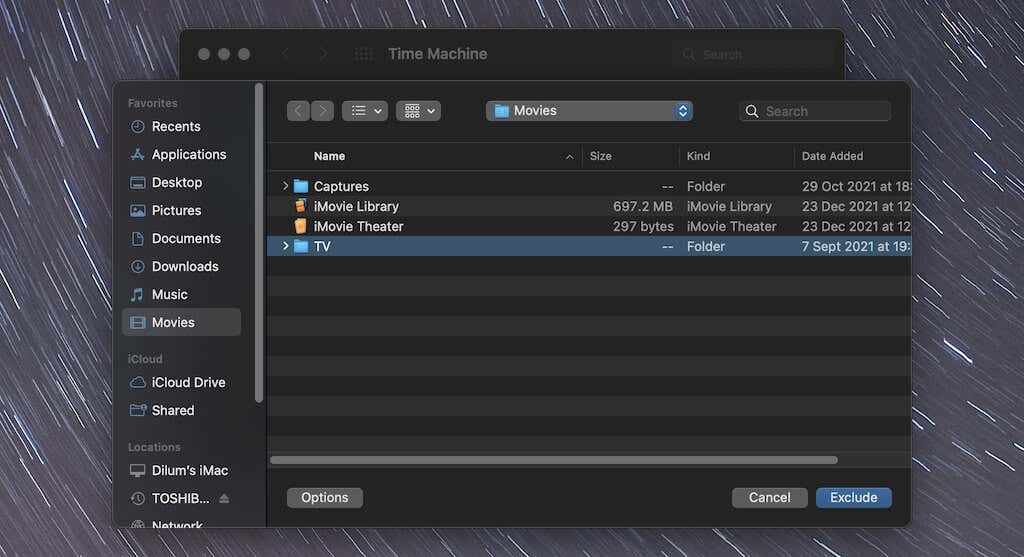
5. Repeat for any other files or folders you want to exclude.
Cleanup Complete
Deleting old Time Machine backups can help you free up space, but it’s best to let Time Machine do its thing and only intervene if available storage starts running low. Also, don’t forget that you can choose to exclude items from your backups and prevent your Time Machine drive from filling up faster.


