H.G. Wells would be very proud
Did you modify or delete files on your Mac by accident? Or do you plan on reinstalling macOS due to issues with data corruption?
If you’ve already taken the time to set up Time Machine on Mac, you shouldn’t have to worry about that. Not only can you use Mac’s built-in local backup solution to retrieve lost data, but you also get to roll back changes to files and documents.

What Can You Do with Time Machine?
Time Machine is an incremental backup solution that automatically keeps up-to-date copies of your Mac’s data on an external storage drive or NAS (Network Attached Storage) drive. Furthermore, it holds multiple snapshots of files and folders as follows:
- Hourly backups for the last 24 hours.
- Daily backups for the last month.
- Weekly backups for all previous months.
So if you made changes to a file or folder, you can quickly sift through your Time Machine backups and restore a pre-modified copy without hassle. The same applies to items that you’ve permanently deleted and want to get back.
Time Machine does delete older snapshots when the backup drive starts running out of space. But if it’s a proportionately larger volume compared to your Mac’s internal storage, you can likely retrieve data from way back when you first activated Time Machine.

Aside from recovering individual files and folders, Time Machine also lets you restore all data on your Mac if you had to reinstall the operating system. You can even use Time Machine while setting up a new Mac from scratch.
So below, you’ll figure out what exactly you must do to restore a Mac from Time Machine backups.
Restore Files and Folders on Mac Using Time Machine
If you want to restore a previous copy of a file or folder that you mistakenly modified or deleted, Time Machine should help you retrieve it. You can also restore multiple items within the same directory simultaneously.
1. Open the Finder app and navigate to the location of the file or folder that you want to roll back or retrieve.
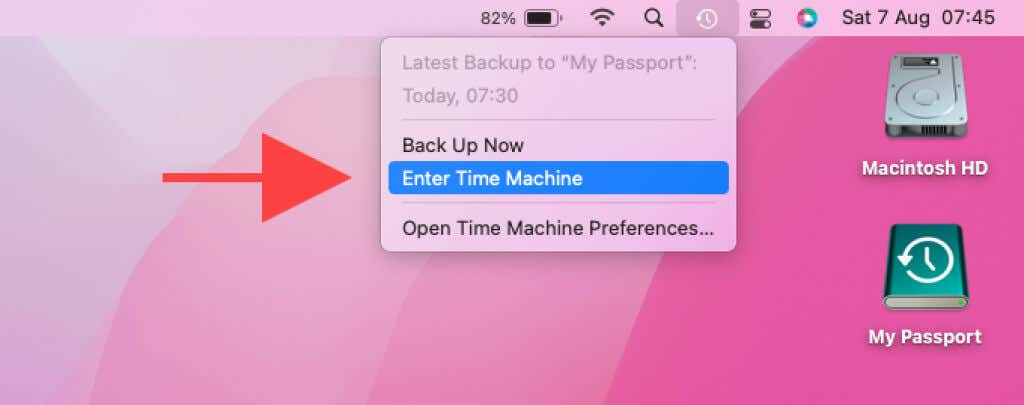
2. Select the Time Machine icon on Mac’s menu bar and pick the Enter Time Machine option. If you don’t see it, open the Launchpad and select Other > Time Machine.

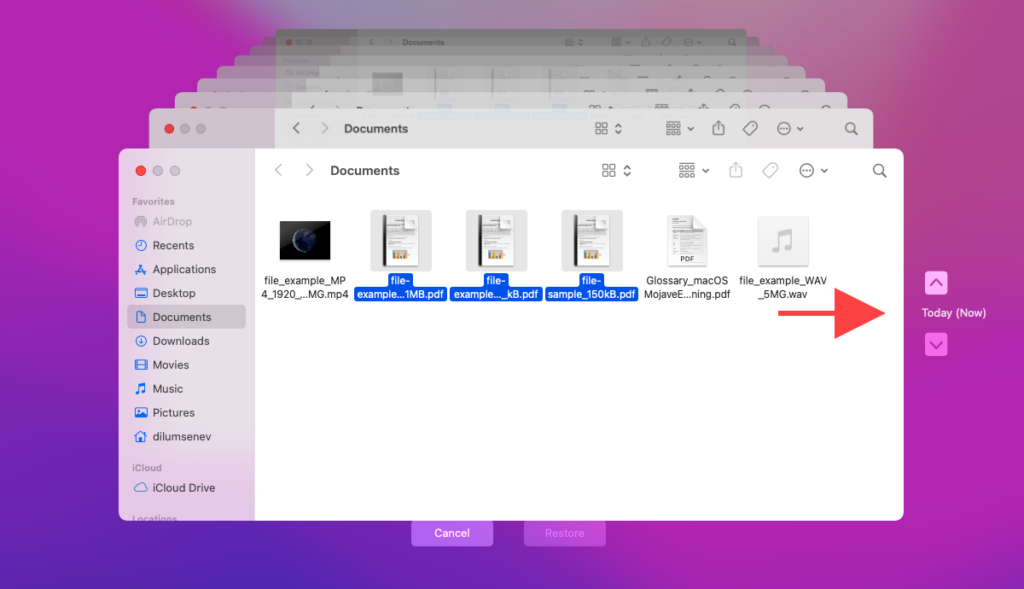
3. Use the Up and Down buttons to the right of the stack of Finder windows to navigate through previous snapshots of the folder. Alternatively, you can use the timeline to the right edge of the screen to switch between available backups.

4. Select the file or folder you want to restore. If you wish to restore several items from the same snapshot, hold down the Command key as you select them.
Tip: You can preview most file formats in Time Machine by using Quick Look (select the item and press Space).
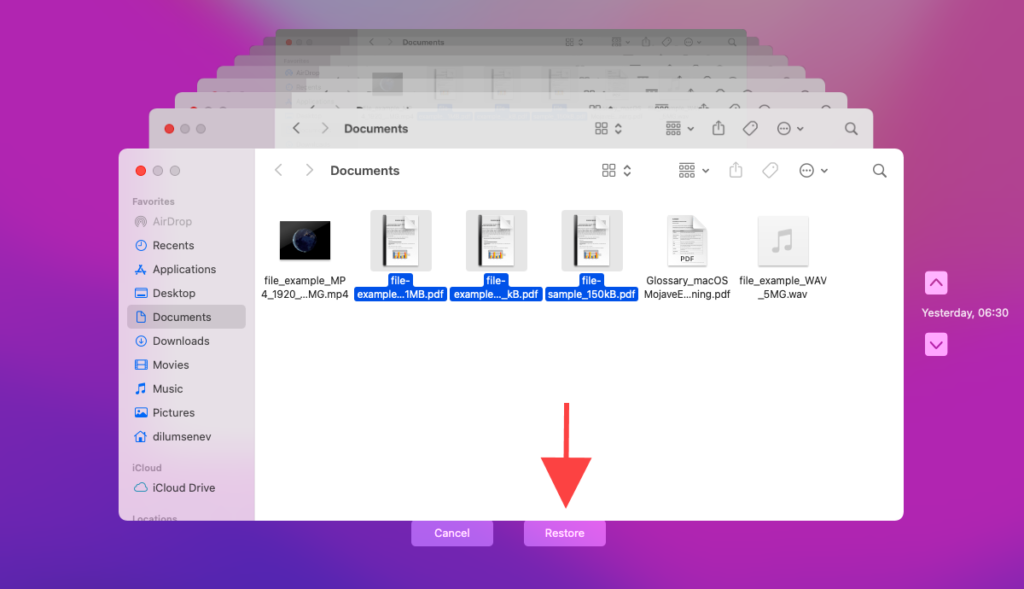
5. Select the Restore button.

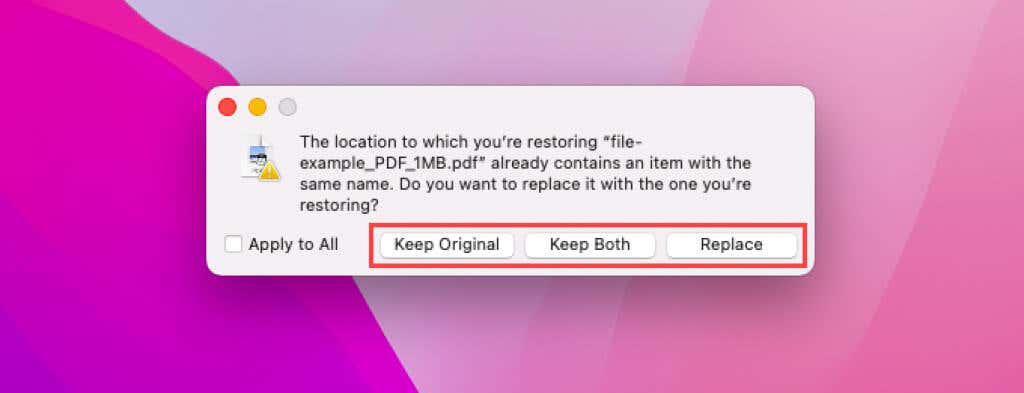
6. If you’re restoring a modified item, Time Machine should present you with three options as follows:
Keep Original: Skip restoring the file or folder.
Keep Both: Keep copies of both the current and the restored item.
Replace: Replace the current item.
If you’re restoring a deleted file or folder, Time Machine shall copy it over without prompting you for anything.

You’ve finished restoring the items using Time Machine. Repeat the steps above for any other files or folders you want to recover.
Restore All Data on Mac Using Time Machine
If you run into an issue requiring you to reinstall Mac’s system software or get yourself a new Mac, you can use Time Machine to restore your data.
To do that, you need to access a piece of software called the Migration Assistant. You’ll come across it while setting up macOS. However, if you’ve already finished doing that, you can invoke it by opening Launchpad and selecting Other > Migration Assistant.
Once you see the Migration Assistant on the screen, go through the steps that follow:
1. Select the From a Mac, Time Machine backup, or Startup disk option in Migration Assistant and select Continue.

2. Select your Time Machine backup drive and select Continue. If you don’t see it, make sure that it’s physically connected to your Mac. In the case of a NAS drive, confirm that your Mac is hooked up to the same network.

3. By default, Migration Assistant automatically selects the most recent snapshot from your Time Machine backup drive. However, you can expand it to pick a different snapshot. Select Continue after you’ve made your choice.

4. Pick the types of data you want to transfer from the backup, such as the Applications folder, user account folder, system, and network-related information, etc.
You can also expand your user account and select individual folders—for example, Documents and Pictures. Then, select Continue.

5. If you choose to import a user account, Migration Assistant shall prompt you to create a password that you can use to sign into it.
Note: If you launched Migration Assistant after setting up your Mac, you must choose between replacing your current user account and setting it up as a separate account.
6. Wait until Time Machine finishes backing up your data. You’ll come across a Migration Completed screen once the Migration Assistant has completed copying over your data—select Done to exit Migration Assistant.

If you only made a partial transfer of your files and folders, you can always access the Migration Assistant and restore additional data at a later time.
Back to the Future
As you just saw, Time Machine makes it incredibly convenient to restore files and documents on a Mac. But it’s always best to create additional backups of your macOS device just so that you have more options going forward.
For example, using Disk Utility to create disk images or setting up and storing files in iCloud Drive can help further safeguard your data.


