Some details can trip you up
Mac users who do serious work or just like to keep an eye on emails, or social media, while on the job need a second display or even multiple monitors.
It’s easy to set up multiple monitors in macOS, but some details can trip you up. Here’s what you need to know and how to get your Mac “battle station” up and running.
Requirements For Multiple Displays in macOS
Before you can set up multiple monitors with your Mac, you must have a few things ready. Here’s the checklist:
- You will need at least two monitors to set up a multiple monitor configuration. Your Mac should have at least one HDMI, DisplayPort, mini DisplayPort, Thunderbolt, or DVI port to connect an additional monitor.
- Depending on the connectors available on your Mac and your monitors, you may need adapters or cables to connect the monitors to your Mac. For example, if your Mac has a Thunderbolt port and your monitor has an HDMI port, you will need a Thunderbolt to HDMI cable or adapter.
- You will need to run at least macOS Mavericks (10.9) to use multiple monitors with your Mac. Updating macOS to the latest version supported by your computer is a good idea.
- You will need enough space on your desk to accommodate all of your monitors. Make sure you have enough room to place the monitors side by side or in a configuration that works for you.
Most monitors have VESA mounts, so you can get creative with monitor mounts. Monitor mounts are affordable and upgrade mainstream monitors with swivel, tilt, and rotation. Not to mention, they’re a great way to keep your desk clear for a spacious workspace.
My Mac Only Has Thunderbolt Ports!
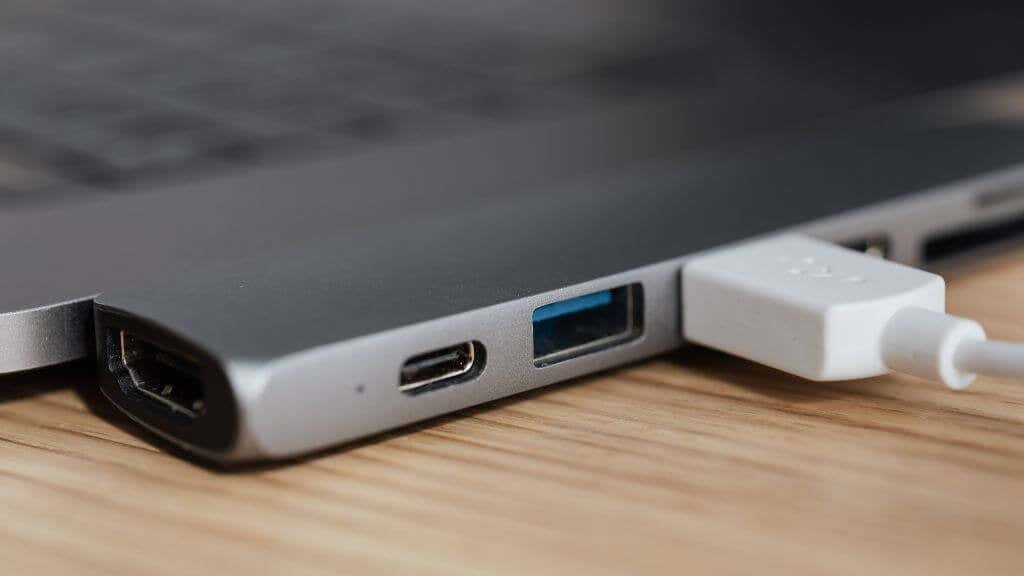
If your Mac has only Thunderbolt 3 or Thunderbolt 4 ports and you want to connect an additional monitor, you will need to use a Thunderbolt (or USB-C) to HDMI or DisplayPort adapter or cable. Most people in this situation opt to use a Thunderbolt or USB-C docking port, which comes with display connections and multiple connections for other peripherals.
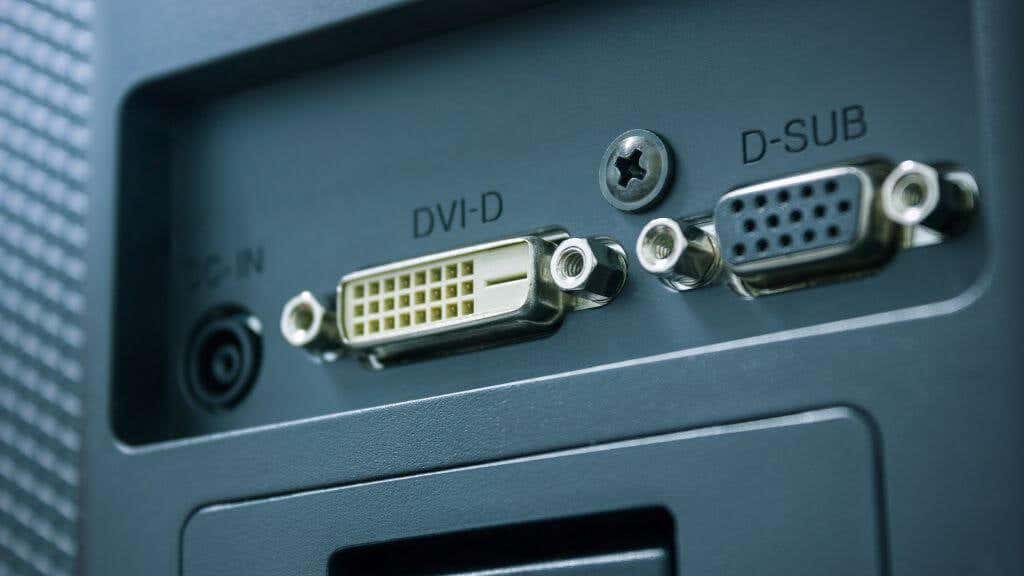
If your Mac is an older Intel model with no Thunderbolt 3 ports, it may have HDMI, DisplayPort, DVI, or VGA ports instead. You can use a cable or adapter compatible with your Mac’s and your monitor’s ports to connect the additional monitor.
For example, if your Mac has a DVI port and your monitor has an HDMI port, you can use a DVI to HDMI adapter or cable to connect the monitor to your Mac.
How to Connect Additional Monitors to Your Mac
Now that we’re confident you have everything needed to make a multi-monitor Mac setup work, here’s how to connect additional monitors to your Mac:
- Check the back of your Mac or sides of your MacBook to find out which ports are available. Your Mac may have HDMI, DisplayPort, Thunderbolt, DVI, or VGA ports.
- Check the back of your monitors to find out which ports are available. Your monitors may have HDMI, DisplayPort, DVI, or VGA ports.
- Based on the ports available on your Mac and your monitors, choose the appropriate cables or adapters to connect the monitors to your Mac. For example, if your Mac has a Thunderbolt port and your monitor has an HDMI port, you will need a Thunderbolt to HDMI adapter or cable.
- Using the cables or adapters you have chosen, connect the monitors to your Mac. Make sure to connect the cables to the appropriate ports on your Mac and your monitors.
Once the monitors are connected to your Mac, turn on the monitors. In most cases, your Mac will automatically detect the screens and try to configure them in the best way. If that happens, you’re good to go!
If your monitor doesn’t start working immediately, we can try forcing macOS to detect it:
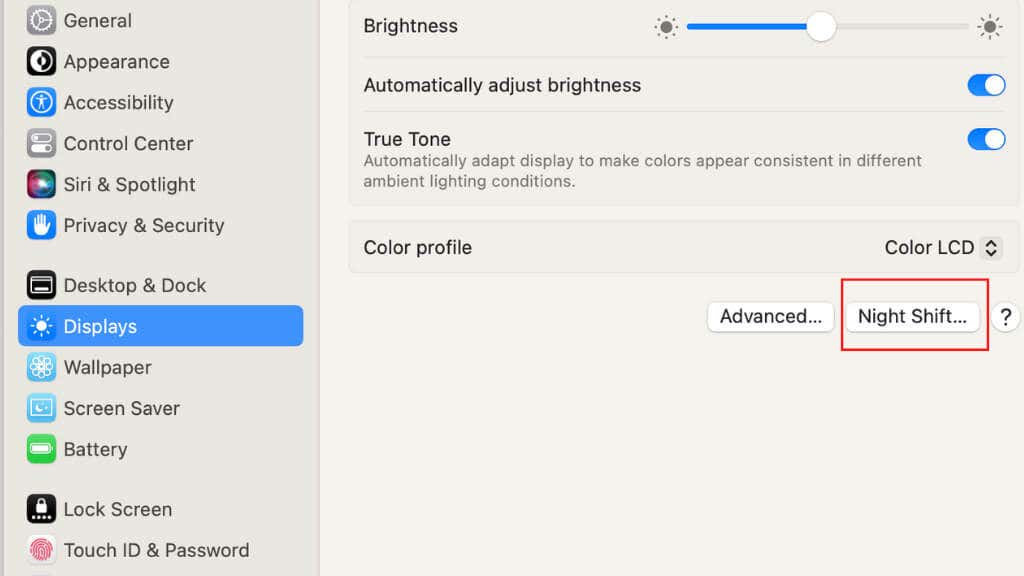
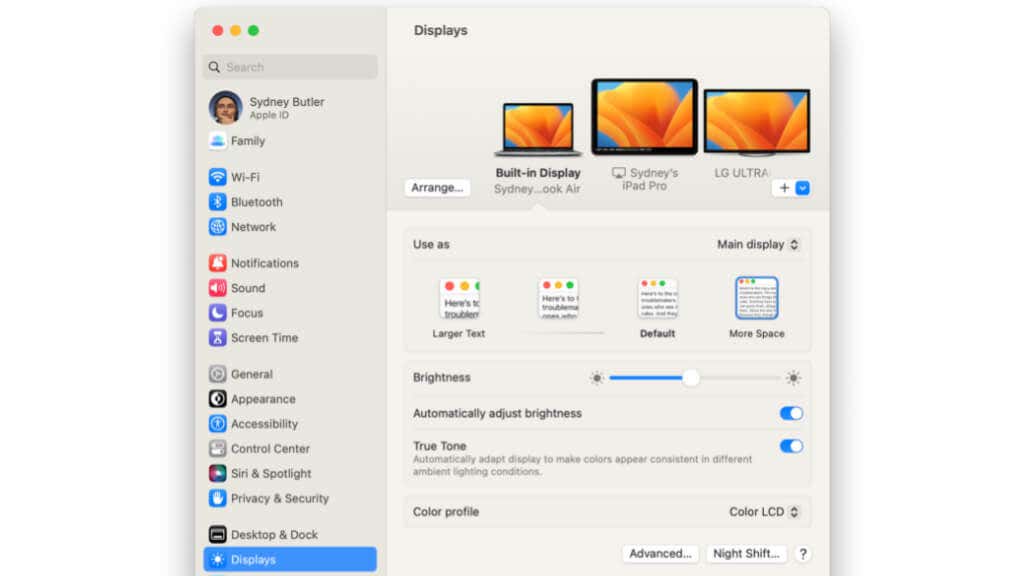
- At the top of the screen, In the system Menu Bar, go to Apple button > System Settings > Displays. This may be “System Preferences” on older versions of macOS.
- Hold the Option button, and Detect Displays should appear in place of Night Shift. Unfortunately, we can’t screenshot this because of how the Option toggle works, but it appears in this location.
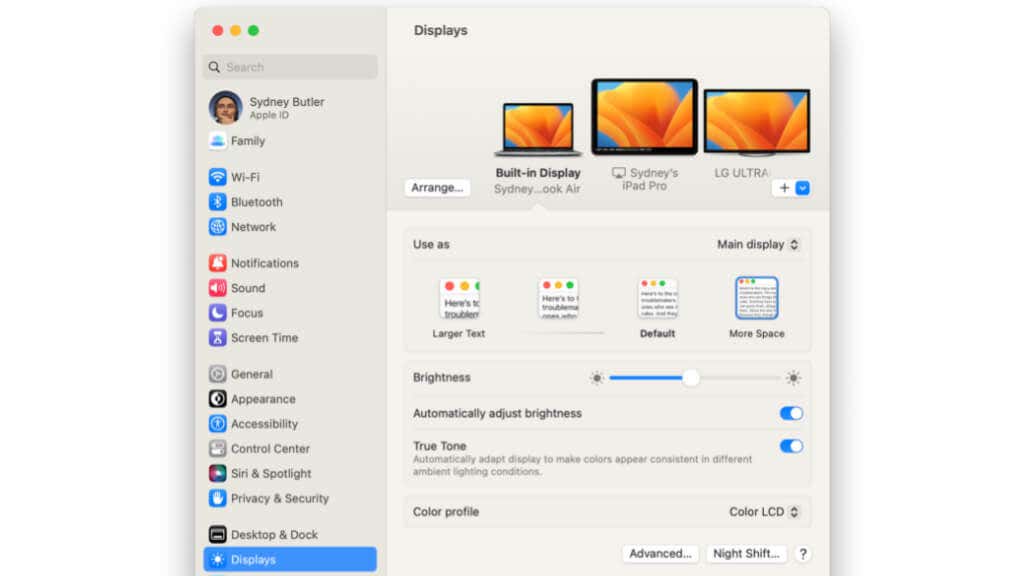
- Use the Detect Displays button and then see whether your display is recognized. It should appear in the display diagram at the top of the window.
If your monitor still isn’t detected, try restarting your Mac with everything connected, or try connecting everything after a reboot.
Adjusting Display Settings in macOS for Multiple Monitors
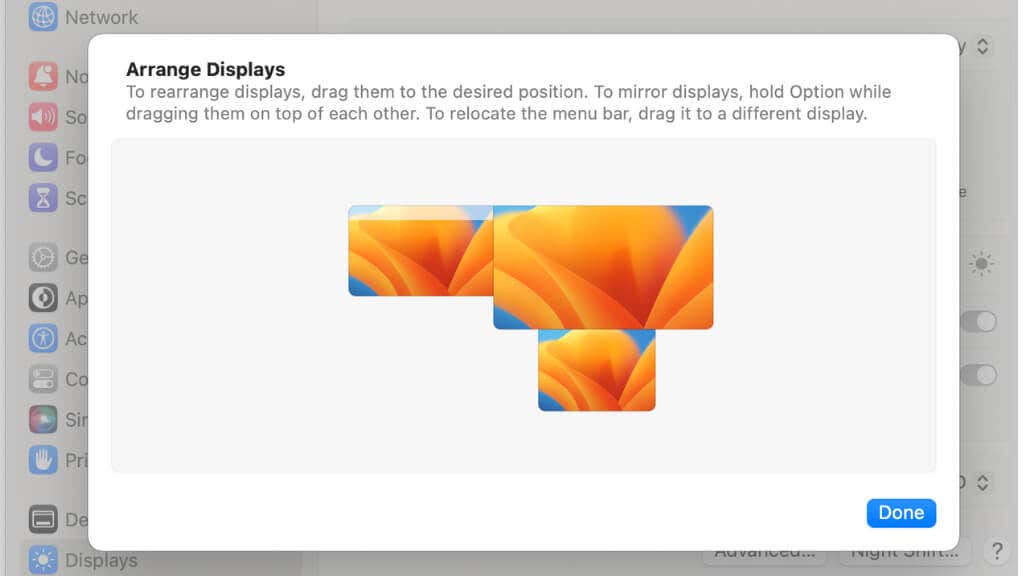
Once your displays are detected and active, macOS will try and arrange them in a sensible order, but you’ll probably want to arrange them to match their physical configuration exactly:
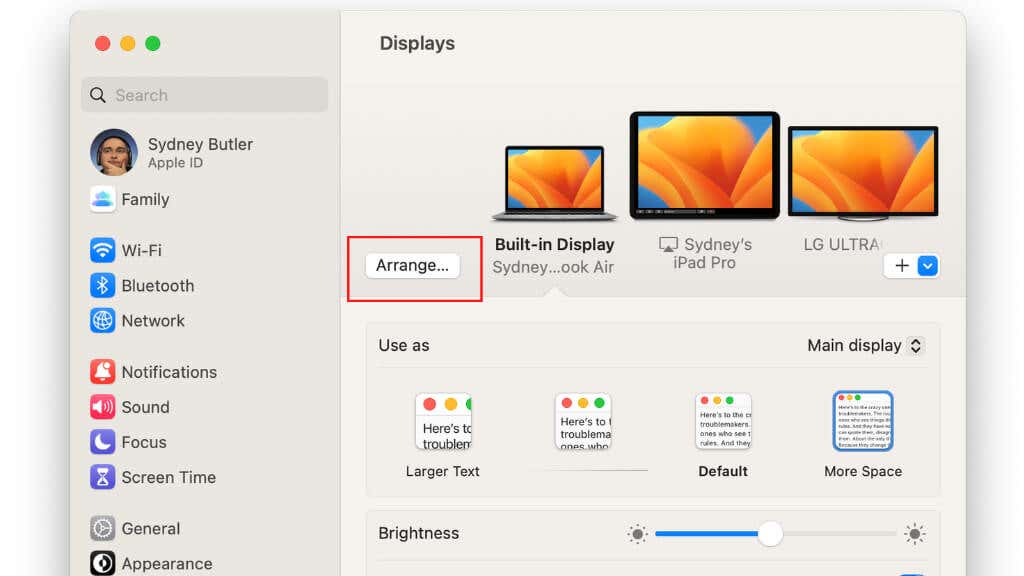
- Go to Apple button > System Settings > Displays.
- Select Arrange.
- Use the mouse pointer to drag the pictures representing your monitors into the correct arrangement.
The final step is to adjust each monitor to have the correct resolution, color profile, and refresh rate. Note that the settings for the built-in display on a MacBook Air or MacBook Pro look different from those of external displays. You can’t adjust the resolution or refresh rate of the built-in display, but you can adjust desktop scaling to give you the full advantage of the high-resolution screen.
To adjust the display settings for external monitors in macOS, follow these steps:
- Go to Apple Button > System Settings > Displays.
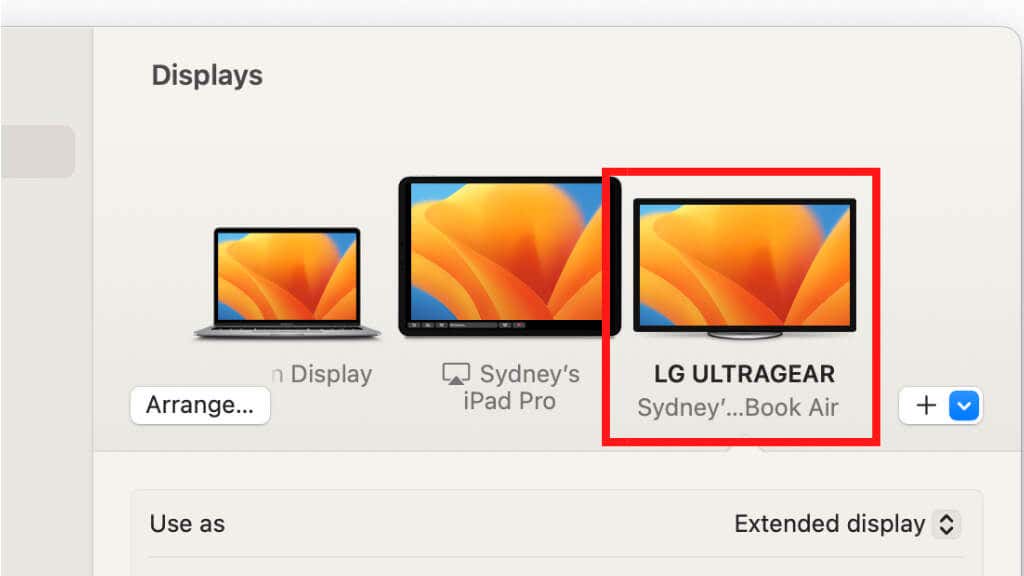
- Select the display you want to modify.
Now that the display is selected, we can change different display options for that monitor.
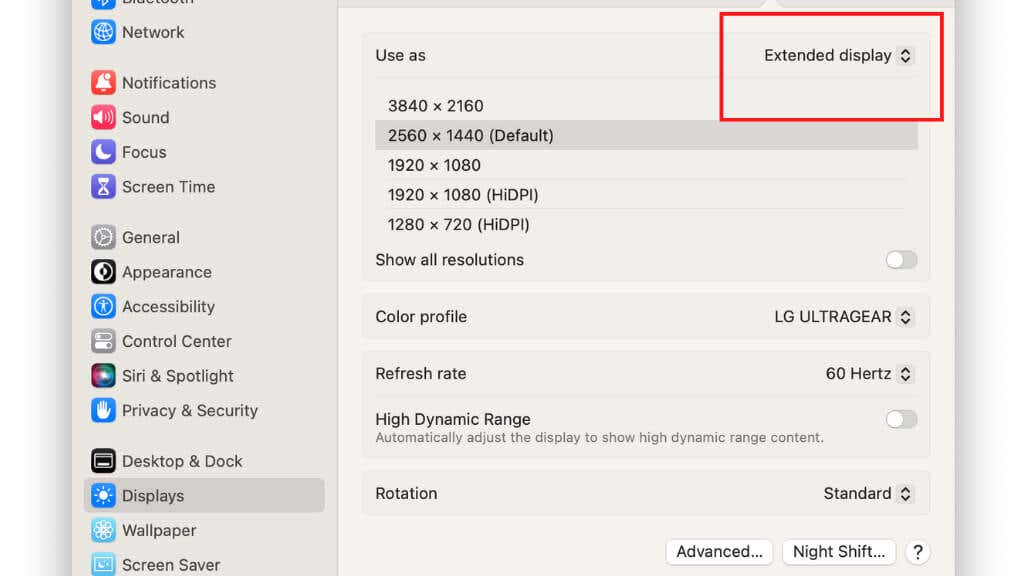
Under Use As, you can set whether a given monitor is the primary display or an extended monitor. This is useful when you have an external monitor connected to a MacBook and want the external monitor to be the primary screen while it’s connected.
In this section, you can also mirror displays. Remember that if the two monitors have different resolutions or aspect ratios, you’ll likely end up with ugly scaling or black bars on one of the screens.
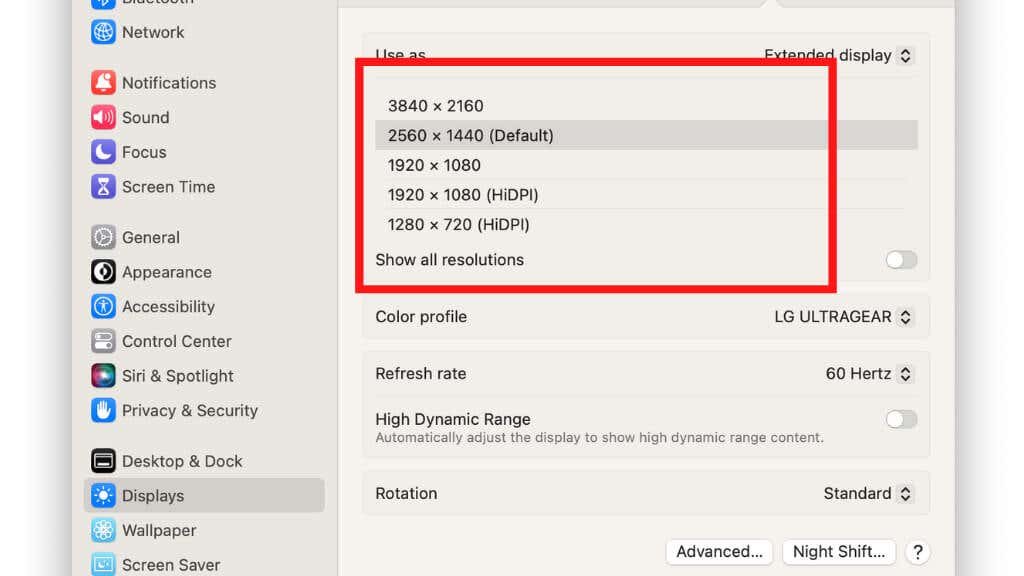
Below Use As, you’ll see a list of resolutions. It’s generally best to select the resolution that matches the native resolution of your screen.
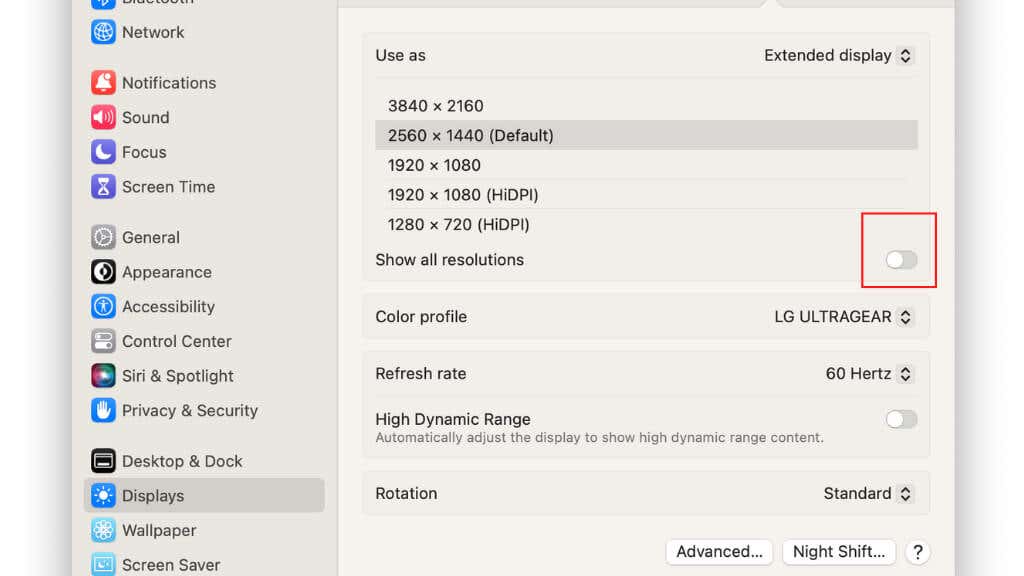
If you use the Show all resolutions toggle, you’ll see more options, but some may not work with your monitor resulting in a black screen until the confirmation period runs out.
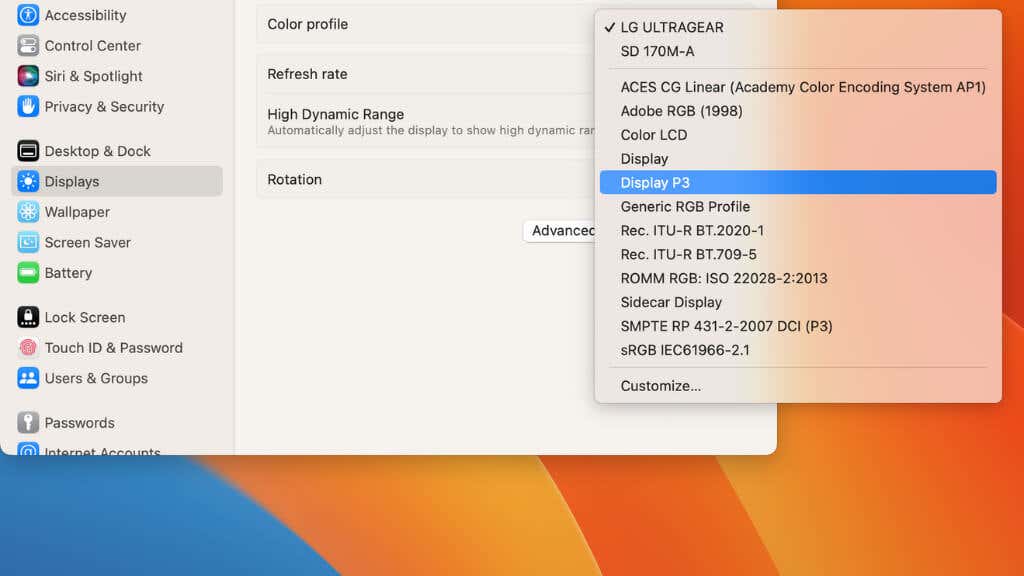
The Color profile section lets you select a color profile for your monitor. Usually, this defaults to the color tuning for that specific screen model. However, you can also pick another standard depending on the work you want to do. For example, many professionals working with image editing will choose the Adobe color space to get consistent color results.
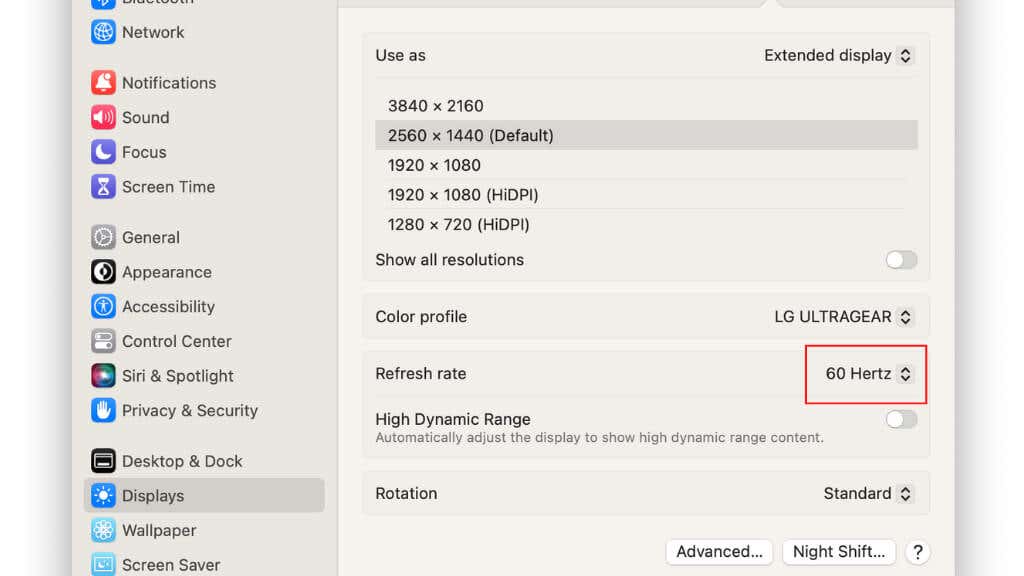
The refresh rate lets you adjust how many times per second the monitor refreshes the image. In general, it’s a good idea to pick the highest available number, assuming that your monitor has correctly reported which refresh rates it accepts.
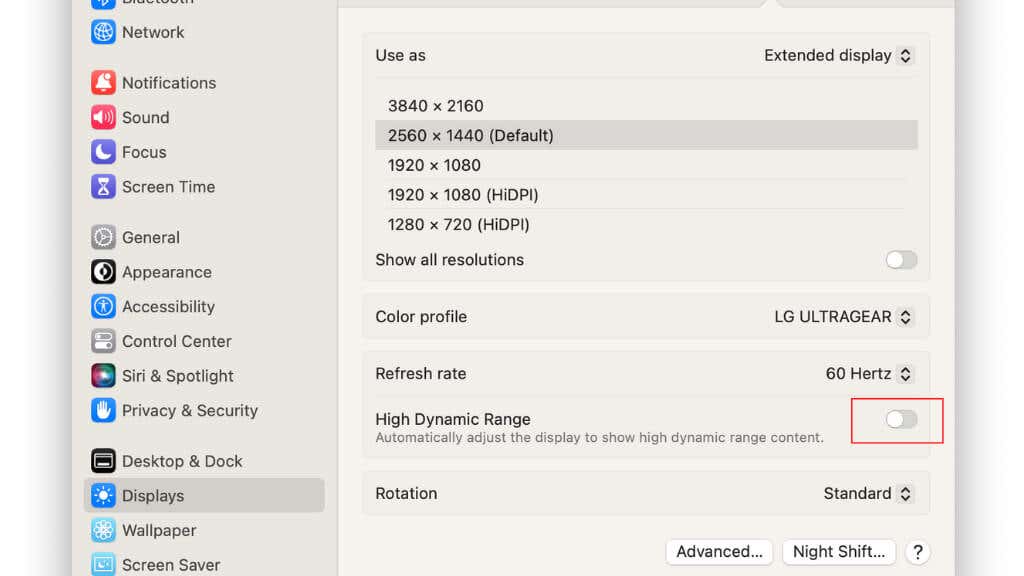
High Dynamic Range lets you activate HDR on monitors that support it. If you have HDR content that you want to play or edit, you should toggle this on for that display. However, SDR content tends to look unpleasant with HDR on, so only turn this on when you’re actually using HDR content.
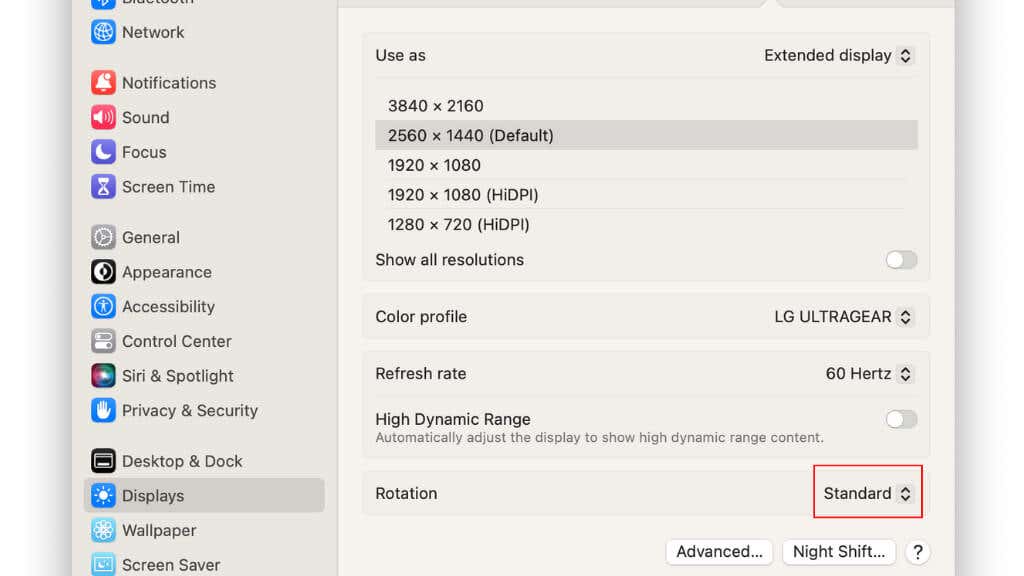
Finally, you can adjust the rotation of the screen. If you have a screen that can rotate, this is useful if you want to turn it upside down or use it in portrait mode.
Once you’ve adjusted the settings for each screen to your liking, you can close the window. Settings will remain the same each time you connect these displays until you change something.
How Many External Displays Can You Attach?
While most people are happy to have a dual-monitor setup, plenty of folks are embracing the “battle station” approach and setting up numerous monitors to make their workflow easier. Before you go out and buy a pile of monitors, you should know there’s a limit to how many external displays you can connect to your Mac.
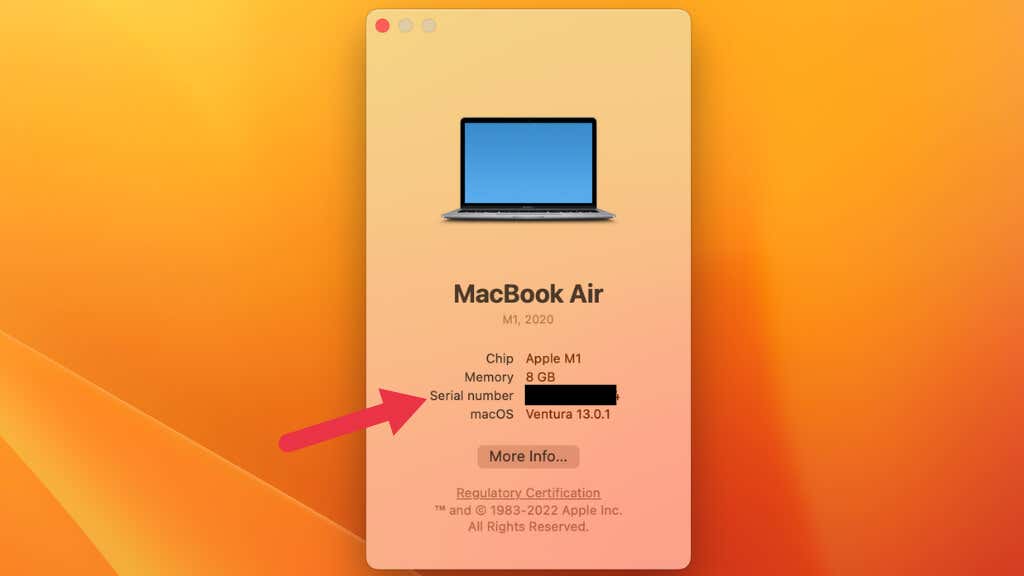
- If you want to know how many monitors your Mac supports, go to Apple Menu > About This Mac, then copy your serial number to the clipboard.
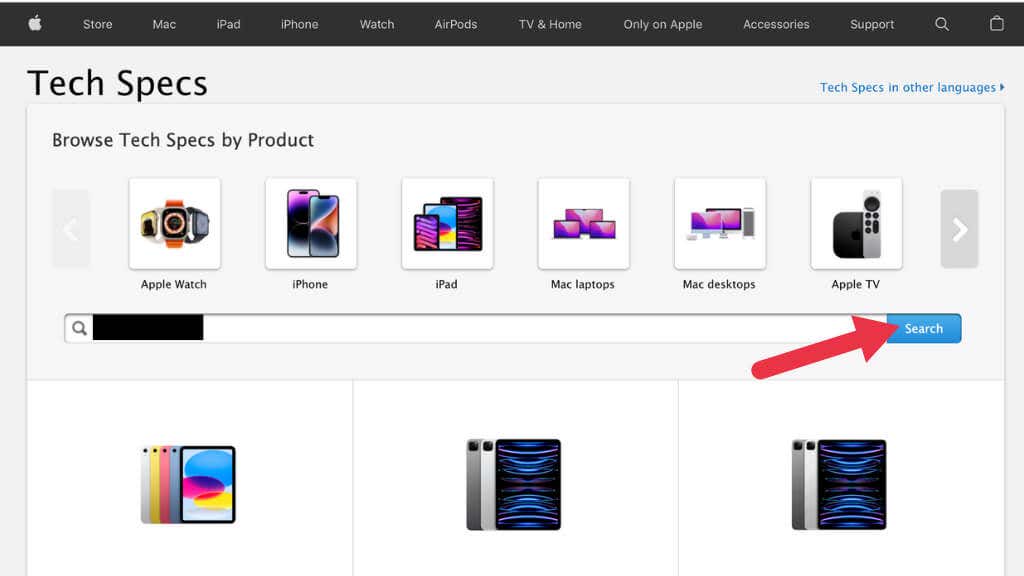
- Head to Apple’s Tech Specs website, select the Search Tech Specs bar, and paste your Mac’s serial number into the provided space. Then select Search.
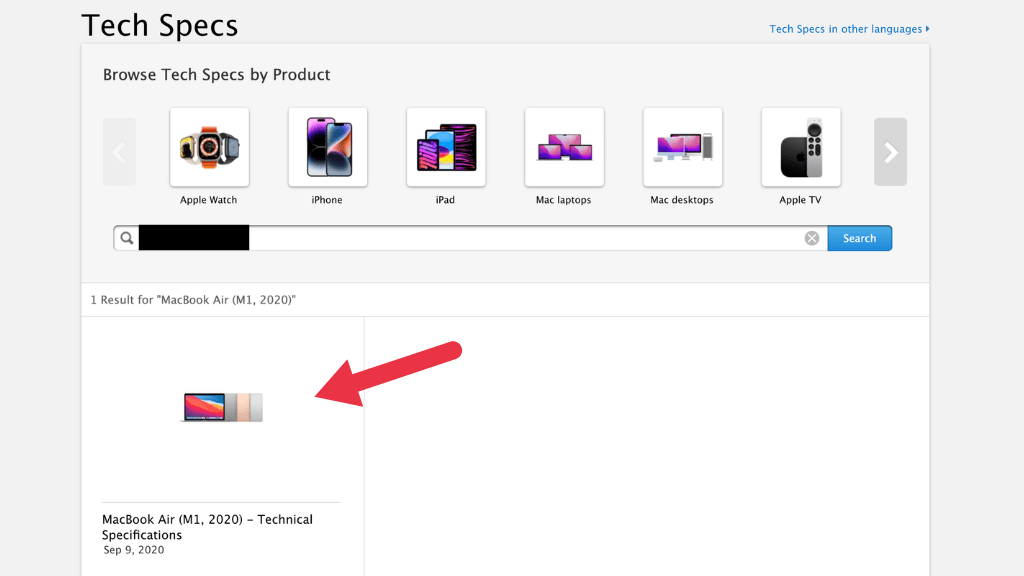
- Select your model of Mac in the results.
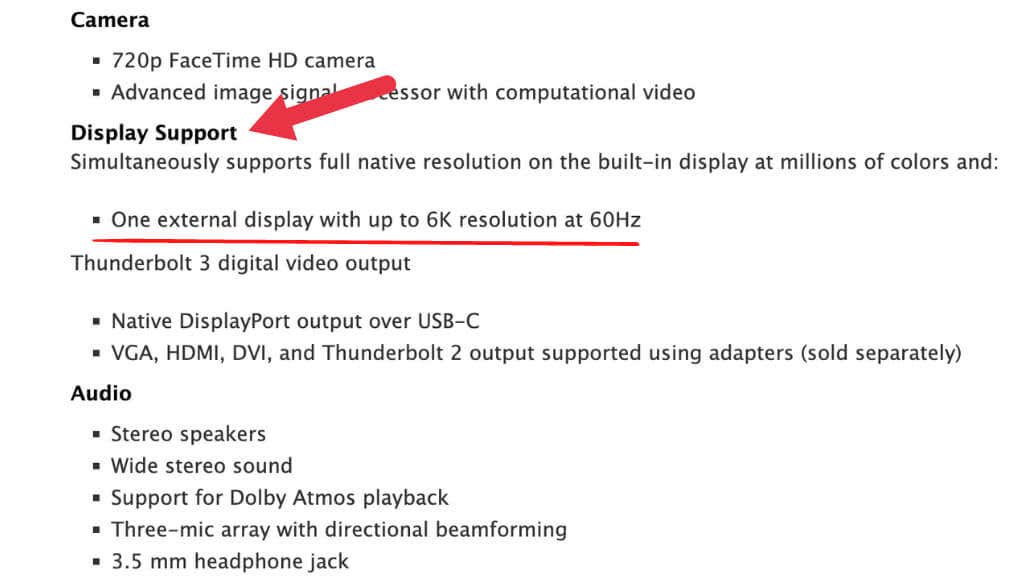
- Under the specs for your Mac you’ll find the maximum number of supported displays for that model.
Some older Macs may not even support dual displays, so it’s important to check before you spend any money!
Using Your iPad As An External Display
While (excluding the Mac Mini) M1 and M2 Macs officially only support one external display, there is one way to get a third display. The latest versions of macOS and iPadOS support SideCar, allowing your iPad to work as an extended display and not count toward the display limit.
There are a few requirements:
- A compatible Mac and iPad.
- At least macOS Catalina and iPadOS 13.
- An (optional) cable to connect your Mac and iPad.
- Both devices must have Bluetooth turned on.
- Both devices must be signed in to the same Apple ID.
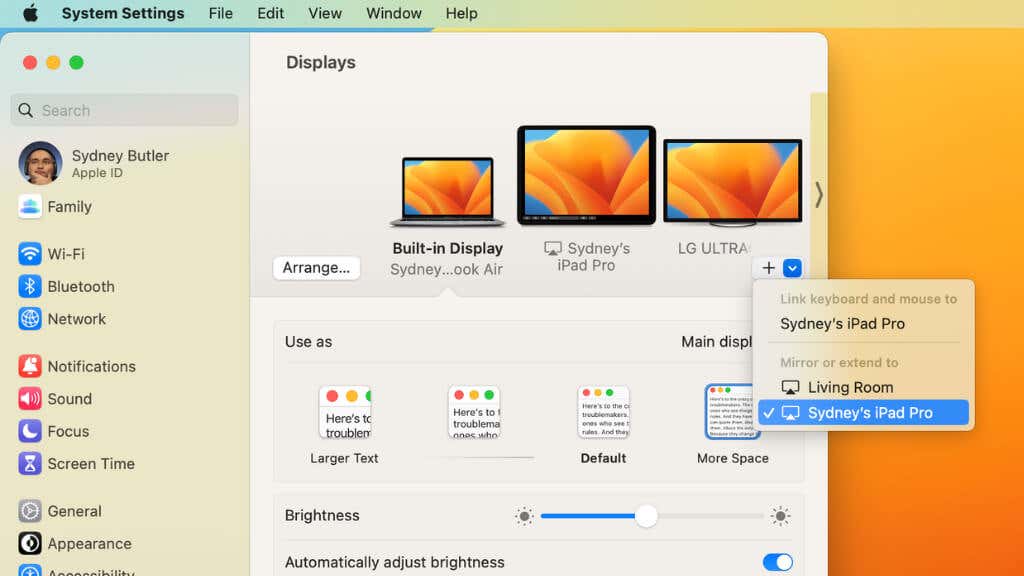
As long as the requirements are met, you should see your iPad as an option under Displays when you select the + dropdown menu.
Just choose to Extend or mirror to the iPad, and after a few seconds, the iPad should show your macOS desktop. By and large, you can now treat the iPad the same as any other external display.
Need Even More Monitors? Try DisplayLink!

DisplayLink is a technology that allows you to connect additional monitors to your Mac using a USB or Thunderbolt connection. If you want to use DisplayLink with your M1 chip-based Mac to exceed the monitor limit, you will need to use a DisplayLink-powered docking station or adapter.
To use the additional monitors with your M1 chip-based Mac, you will need to install the DisplayLink software on your Mac. You can download the software from the DisplayLink website.


