There are a number of reasons to do this
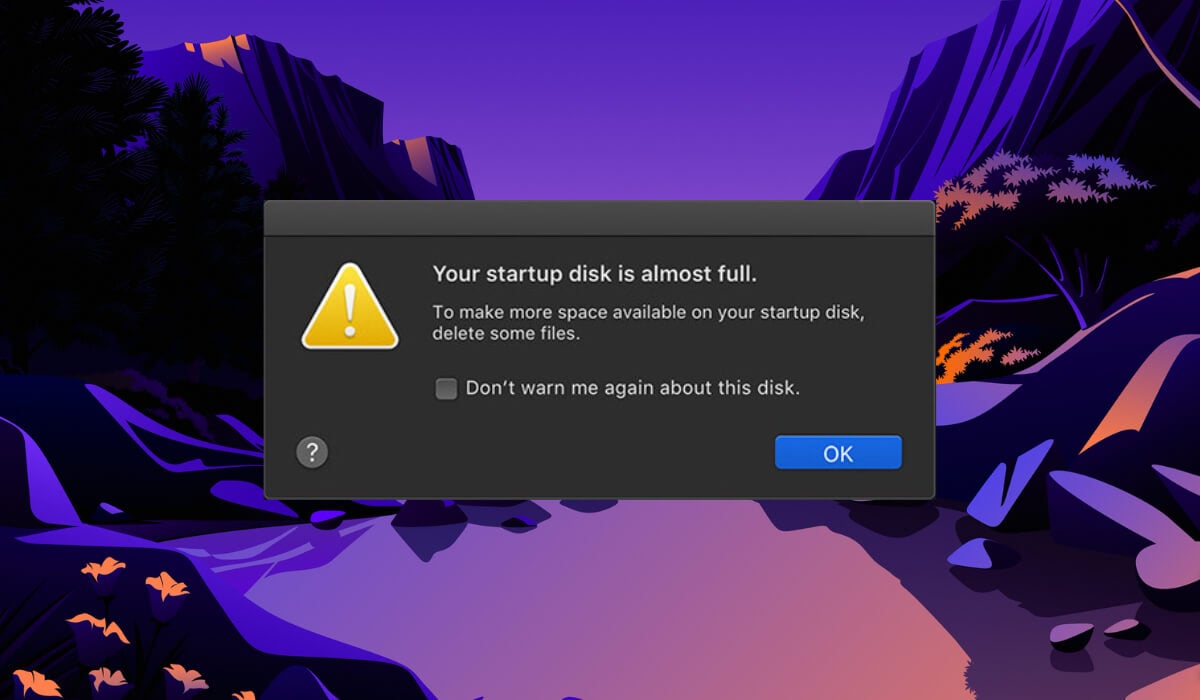
Wondering why your Mac is running slower than it used to? Maybe, you ran out of space on your device, and that’s affecting your Mac’s performance. Even if you haven’t seen the “Your disk is almost full” error message, it may be worth checking how much free space you have left on your hard drive.
This article will show you how to find out how much storage space you have left and how to manage your Apple MacBook storage.
What Managing Your Mac Storage Means and Why Do It
These days, it’s a common situation when your new iPhone comes with more storage space than your MacBook. However, even a large hard drive can fill up if you never do maintenance.
Unorganized files can quickly clutter your Mac. You need to know where you’re keeping specific files to avoid downloading them repeatedly and creating duplicate files you don’t use. Various apps can also slow down your operating system and cause odd errors.
Managing your Mac storage is about storage cleaning and optimizing. Storage cleaning is when you delete files and remove items that you don’t use. Another way to free up space on your hard drive is to optimize Mac storage. That includes relocating documents and large files you don’t frequently use to your iCloud Drive and using Mac’s automated tools to reduce clutter and duplicate files.
How to View How Much Storage Space You Have Left
Before freeing up gigabytes of space on your Mac, check exactly how much space you have left on your Mac computer. To find out your available storage, follow the steps below.
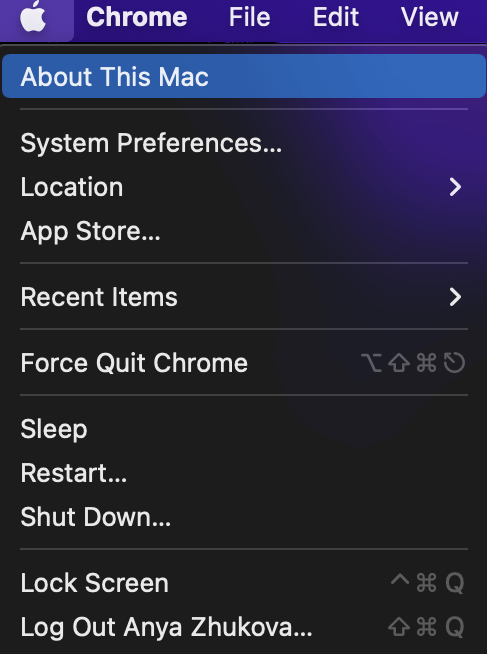
- On your Mac, in the top left corner of the screen, select the Apple icon to open the Apple Menu.
- Select About This Mac.
- From the menu bar, select the Storage tab.
- Wait until your Mac calculates how much storage you have left.
Once this information loads, you can move your cursor to see how much space each category of files uses. Light gray represents the free disk space you have left on your Mac.
How to Optimize Storage Space on Mac the Easy Way
A great way to free up a lot of space on your hard drive is to use the Optimized Storage features on Mac. Mac users running macOS Sierra or higher can make more room on their computer by keeping large files, photos, videos, Apple TV movies and TV shows, and big email attachments in iCloud. The files will still be available any time you want, but they won’t take up space on your Mac.
The optimized versions of your photos and recent files stay on your Mac, and you can download the original files at any moment if you ever need them.
To optimize storage space on your Mac, follow the steps below.
- On your Mac, open the Apple Menu and select About This Mac.
- Navigate to the Storage tab.
- Next to the Storage graph, select Manage.
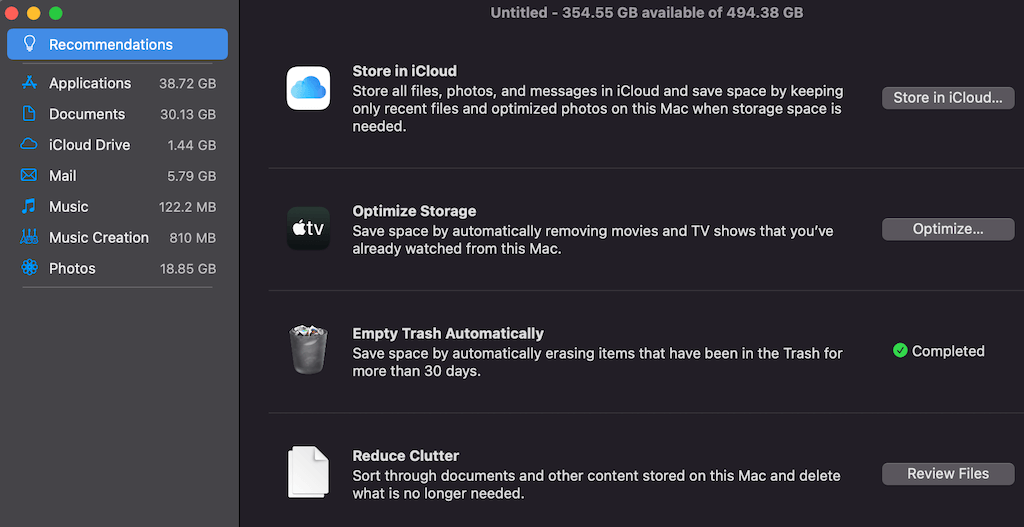
This will open a Recommendations window with options for optimizing your storage space.
- Store in iCloud
If you have too many files in your Desktop and Documents folders, you can choose this option to store them in iCloud Drive. For instance, you can store large photo and video files in iCloud Photos, and messages with big attachments in iCloud.
This tool uploads files in specific folders of iCloud and deletes the files you rarely use from Mac’s storage. Later, when you open a file that isn’t stored locally on your Mac, the system retrieves it from iCloud and then opens it. You can modify these settings at any point in the iCloud pane of Apple ID settings, Photos settings, or Messages settings.
- Optimize Storage
This option automatically removes movies and TV shows you’ve already watched from your Mac. Instead of using iCloud Drive, this option relies on Apple TV+. You can download them again and change this setting later in TV preferences.
- Empty Trash Automatically
If you enable this setting, your Mac will automatically erase items in the Trash for longer than 30 days. This way, you won’t have to empty the bin manually again. You can modify or disable this setting at any time in Finder Preferences.
- Reduce Clutter
Reduce Clutter is the only Optimized Storage feature requiring you to remove files from your Mac manually. When you select the Review Files button next to this feature, macOS will open the Finder window with the Documents section on the left. Your files are sorted by categories: Large Files, Downloads, Unsupported Apps, Containers, and File Browser. If you recognize files you don’t need, select Delete to remove them.
How to Manually Free Up Storage Space on Mac
Aside from automatic storage tools, there are more ways you can use to manage storage on macOS. The following methods will help you free up space on your computer.
1. Clear Cache on Your Mac
Your web browser, native macOS apps, third-party programs, and system services all create caches of files on your Mac. They speed up processes on your computer, but they also consume storage. Over time, corrupted and bloated caches will pile up in your system and result in crashes and slowdowns. To avoid that, you need to clear the cache on your Mac regularly.
There are many types of cache that macOS stores, including browser cache, application cache, system cache, and more. Follow our ultimate guide on clearing your Mac’s cache to optimize your computer storage.
2. Clean Up iTunes Backups
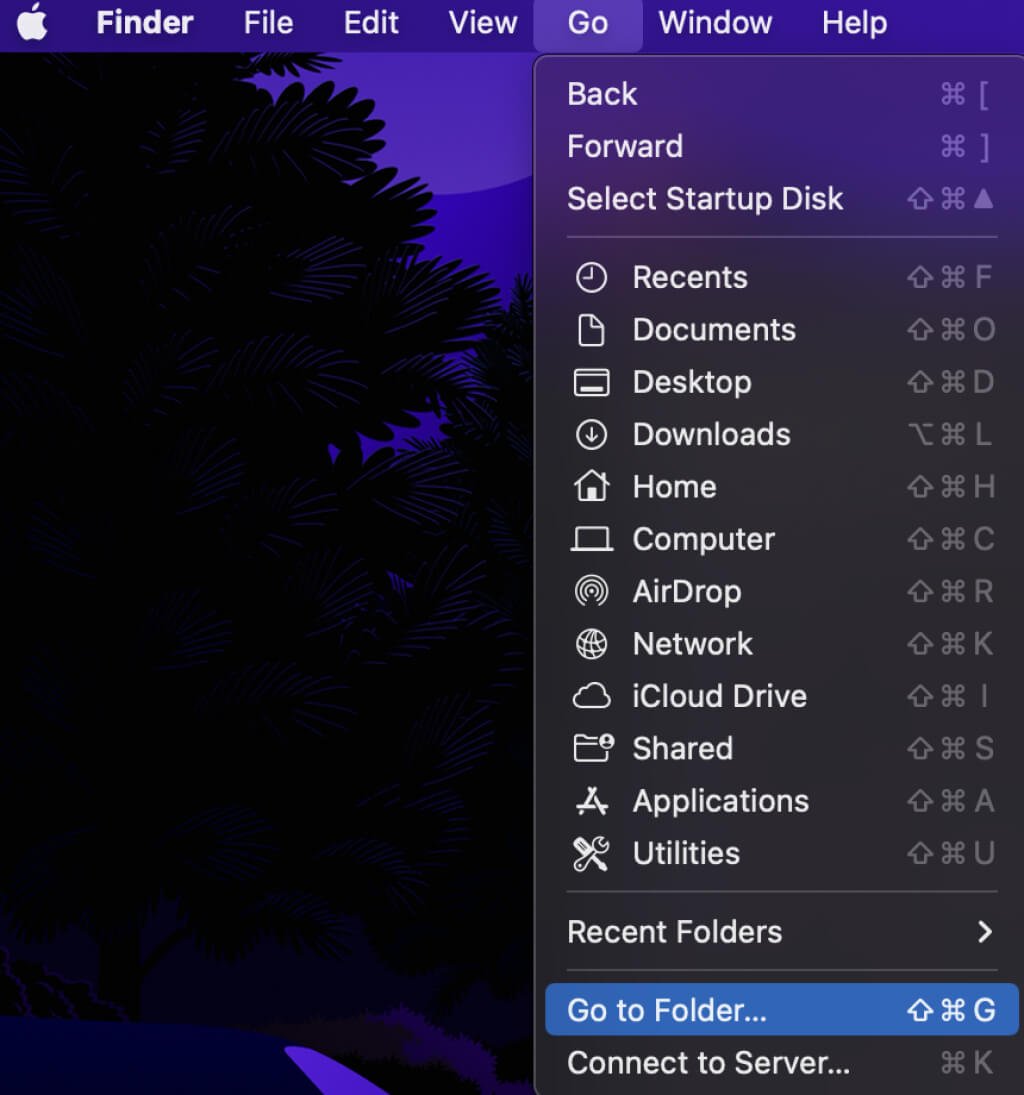
If you’ve used iTunes to back up your iPhone or iPad to your Mac, chances are you have a lot of backup files taking up a large amount of space on your computer. To remove old iTunes and iOS backups manually, close iTunes first. Then open Finder and select Go > Go to Folder from the drop-down Finder menu.
Then follow the path:
~/Library/Application Support/MobileSync/Backup
You’ll see the backup folder with random names and files. Delete the folders found inside to remove the backups.
3. Uninstall Apps You Don’t Use
The applications you install on your Mac also take up a big chunk of your hard drive space. If you’ve owned your Mac for a few years now, you probably have some apps you don’t use anymore. Uninstalling them will free up space for more useful tools and files.
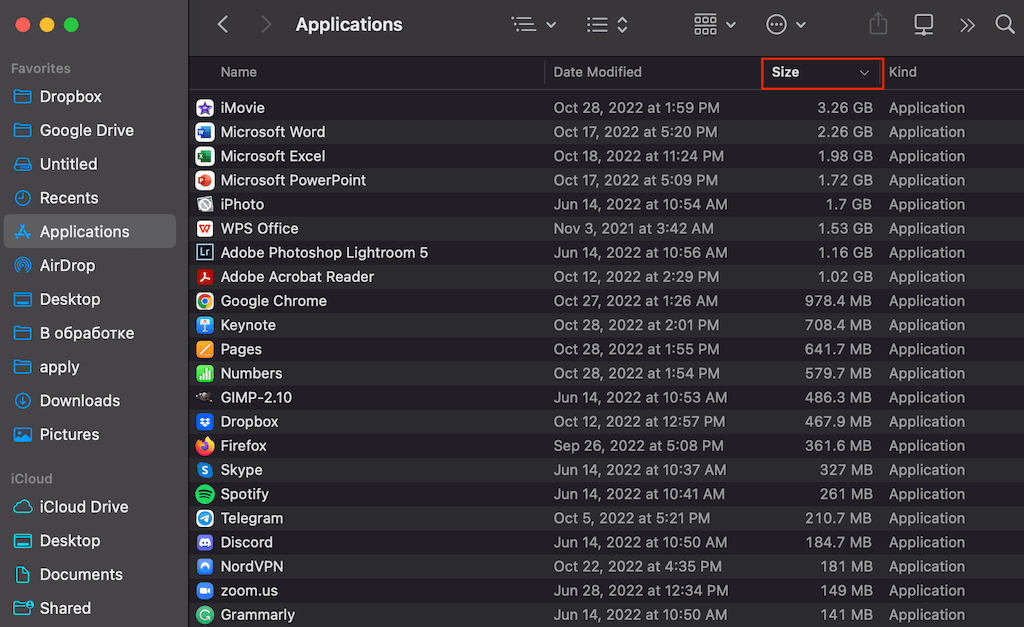
Before getting rid of an app, check how much of your Mac’s storage space it takes up. To do that, open Finder > Applications. In the toolbar, select Show items in a list. Then select Size to sort your applications by size. You’ll find the apps that take up more space on top of this list.
Uninstalling an app is simple. Open a Finder window and select Applications in the sidebar on the left. Then, drag and drop the app’s icon to the trash can on your dock or right-click the app and select Move to Trash.
4. Remove Language Files
Have you noticed that switching your Mac’s system language immediately changes the language in all your apps? That’s because Mac applications come with language files for every language they support. However, if you only use a single language on your computer, those files take up your storage space for no reason. This extra space can be useful if you don’t have a large hard drive, especially since it won’t affect your Mac’s functioning.
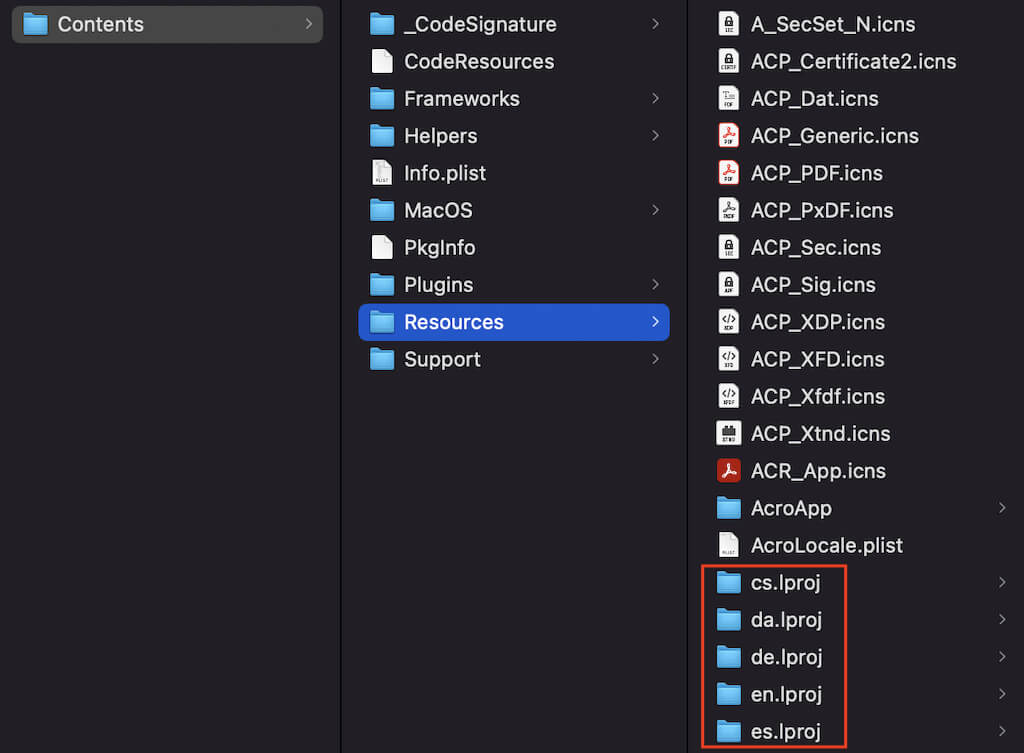
Removing language files manually is a daunting process, but it’s possible. You’ll have to go through all your applications one by one, right-click them and follow the path Show Package Contents > Contents > Resources.
Each language file will have a subfolder with a name ending with .lproj. The two letters at the beginning of the folders indicate which language they stand for. You can delete all the languages except one or a few that you want to keep.
If you don’t want to waste time and effort deleting these files one app at a time, you can use a tool like Monolingual that can automatically delete these files for you.
5. Delete Big Attachments in Mail
If you’re using the built-in Mail application on your Mac, one of the things taking up a lot of space on your computer might be large email attachments. If you’ve always had the same account, these attachments could be worth many gigabytes and are worth clearing up. Remember that attachments aren’t just documents or PDFs sent as attachments but also company logos and other images in email signatures.
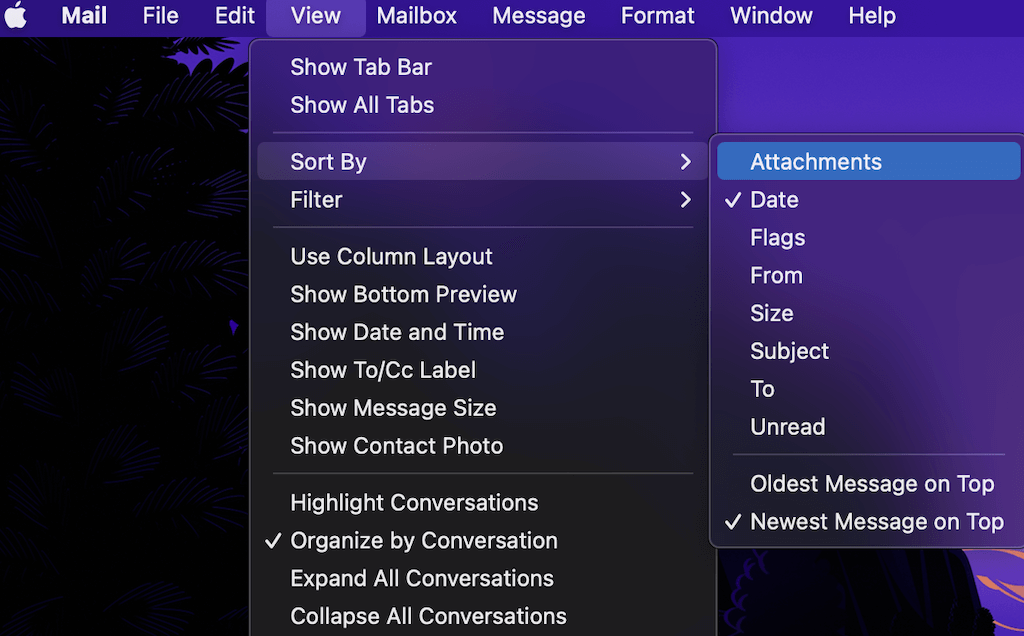
To delete these attachments, open Mail on your Mac. Then, from the menu bar, select View > Sort by > Attachments.
To delete the attachments from multiple messages, hold Shift and select all of the messages.
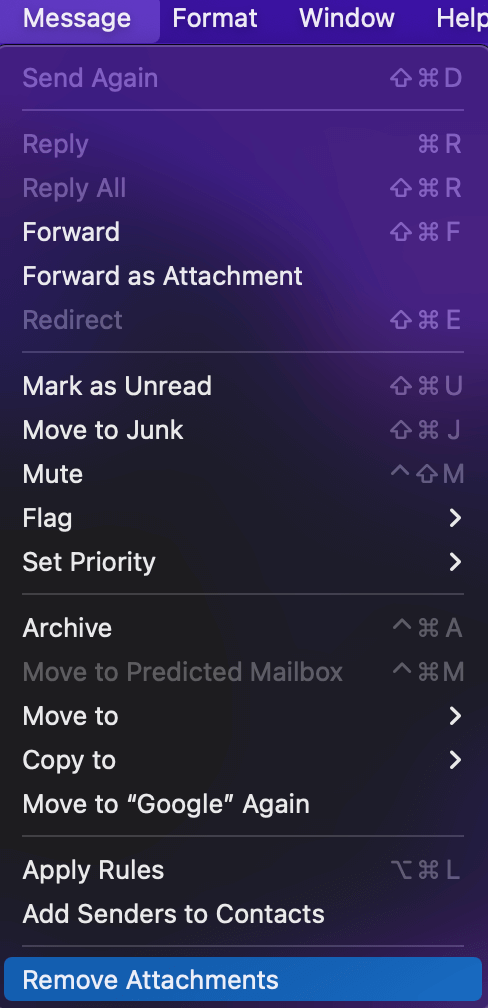
From the menu bar, select Message > Remove attachments.
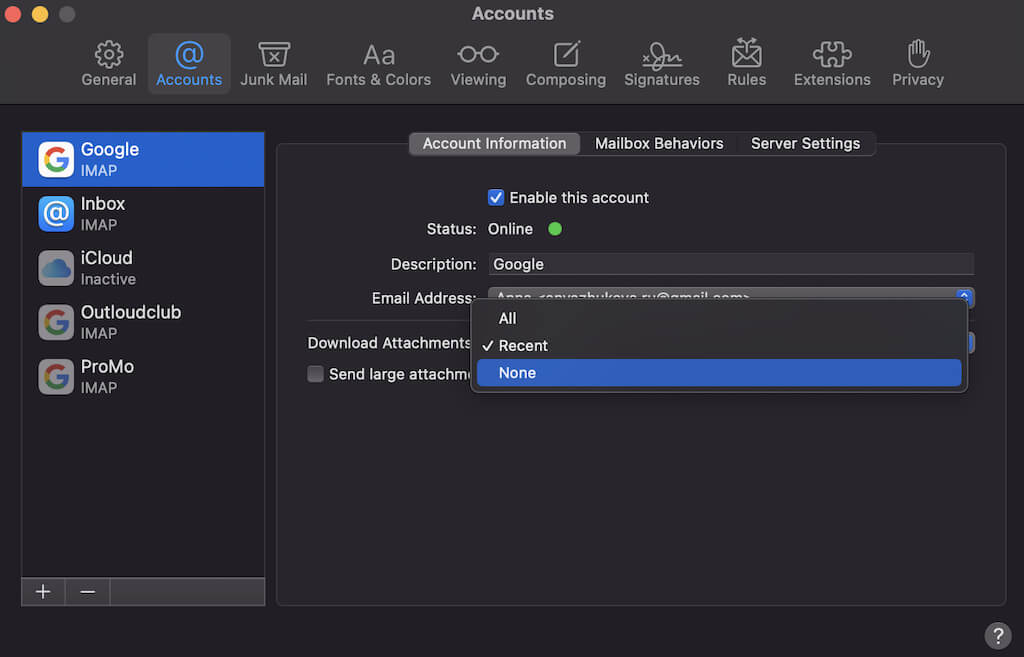
You can also change the Mail settings to not download attachments in the future and save space. To do that, open Mail on your Mac and follow the path Preferences > Accounts > Account Information. Then under Download attachments, select None.
6. Clean Up the Downloads Folder
This one might seem obvious, but the Downloads folder is one place that people often forget to clean up. However, it’s usually full of files you don’t need, like something you downloaded a while ago and forgot about.
Open Finder and head to your Downloads folder. Sort your files by size to see which ones take up the most space. Then delete all files that you don’t need.
7. Empty Trash Cans
Deleting files from within Finder on Mac doesn’t mean they’re gone for good. Instead, they go to your Trash, so you can restore them later if you change your mind. To free up space on your Mac, you must empty your Trash and completely remove these files from your computer. However, emptying your main trash can isn’t enough.
Your Mac has multiple trash cans. iPhoto, iMovie, and Mail all have their trash bins. If you’ve used these applications and deleted files from them, you’ll need to empty all of the trash cans on your Mac. Go through these apps one by one and empty the trash in all of them.
Other Ways to Free Up Your Mac’s Storage
Just as there are many ways to fill up your Mac’s storage, there are many ways to free up space on your computer. If you’ve already tried all of the techniques from above and still don’t have enough space on your Mac, follow our comprehensive guides to reduce system storage on Mac, clean up other storage, and free up iCloud storage.
Finally, if nothing else works, you can use an external drive as another storage device to move and keep some of your files there.

