Make it move to your preferences
Maybe your pointer zips across the screen too fast, the cursor color makes it hard to find, or you accidentally zoom in on apps. You can customize the Mac cursor and mouse gestures to look and behave as you like.
If you’re interested in trackpad gestures instead, look at how you can customize the trackpad on macOS.
Note: Some of the customizations assume you’re using a Magic Mouse.

Change the Mouse Speed
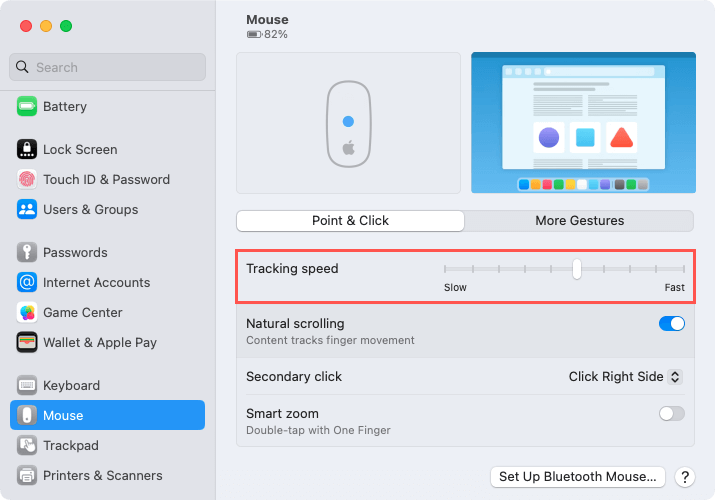
When you move your mouse, does the pointer move so fast it’s just a blur? On the other hand, maybe it moves so slow that you tap your fingers waiting for it to catch up. You can change the tracking speed of the cursor when using your mouse.
- Open System Settings using the icon in your Dock or Apple icon in the menu bar. Choose Mouse on the left. On older operating system versions before macOS Ventura, you’ll find your mouse settings in System Preferences.
- To the right, select Point & Click.
- Use the Tracking speed slider to adjust how fast or slow the cursor moves.
Try moving the slider one click at a time and then checking the speed by moving your mouse.
Switch the Right and Left Mouse Buttons
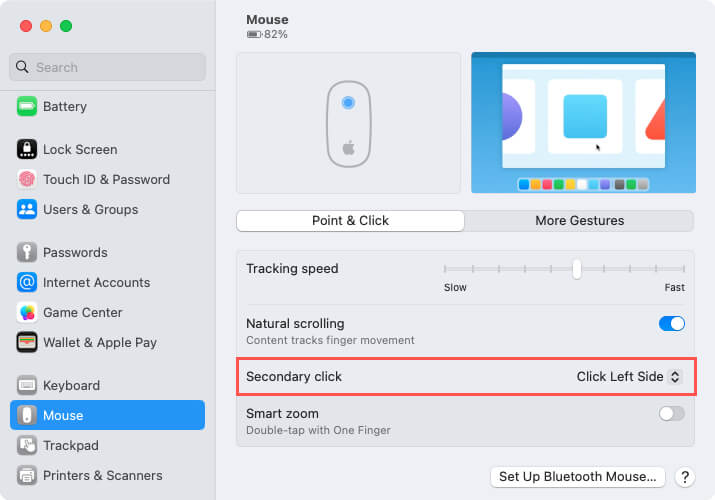
One of the most common reasons to swap the mouse buttons is for left-handed use. This places the primary (right) button in easy reach of your index finger with the secondary button to the left. This is a simple change on macOS.
- Open the System Settings and choose Mouse.
- Select Point & Click.
- Next to Secondary click, use the drop-down menu to pick Click Left Side.
Then, give your mouse buttons a try. You should have the right mouse button as the primary and the left as the secondary.
Wondering how to use the center of your mouse? Check out how to middle-click using your Mac mouse or trackpad.
Change the Pointer Color
While there’s nothing wrong with basic black for your cursor color, maybe you want something more prominent or even your favorite color. Yes, you can change the pointer color on macOS to almost anything you want.
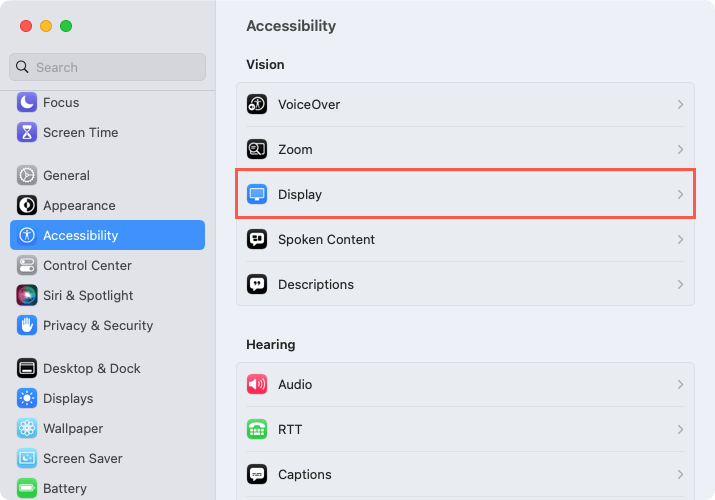
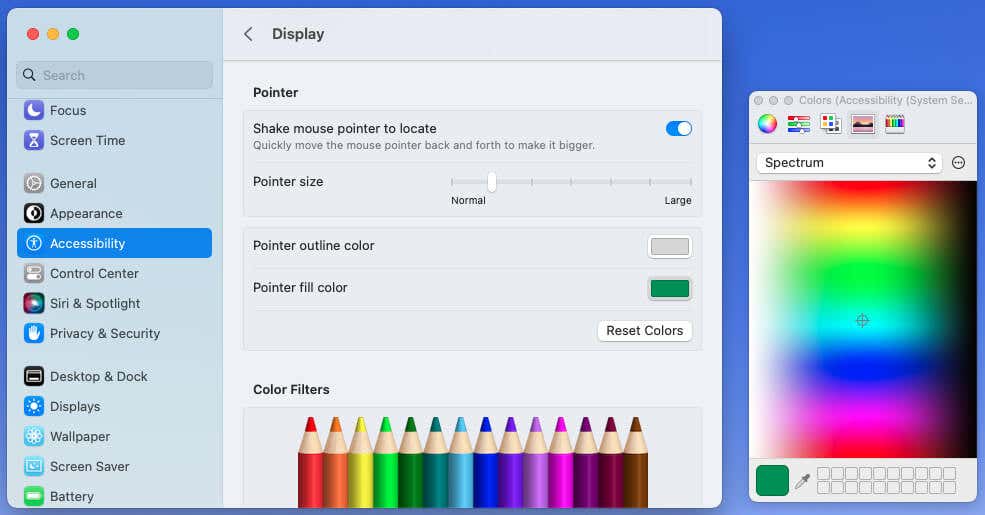
- Open the System Settings and choose Accessibility.
- Below Vision, select Display.
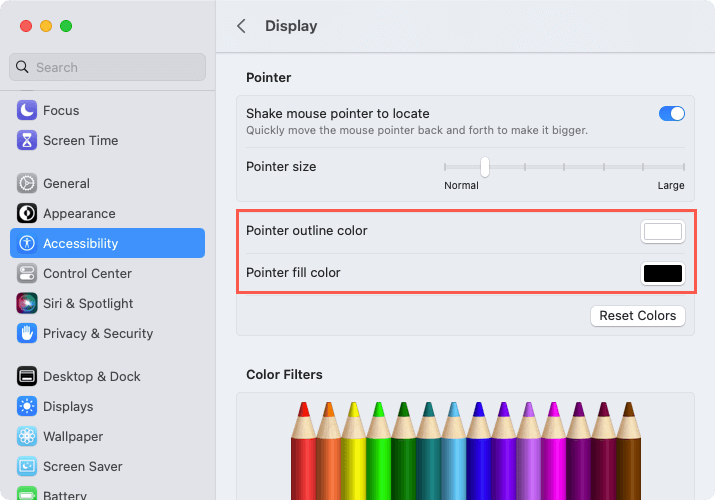
- Move toward the bottom to the Pointer section.
- Pick the color button to the right of Pointer outline color and/or Pointer fill color to change one or both.
- When the Colors box opens, you can use the tabs at the top to pick from a basic color, the spectrum, or shades of colored pencils.
Use a Custom Cursor Color
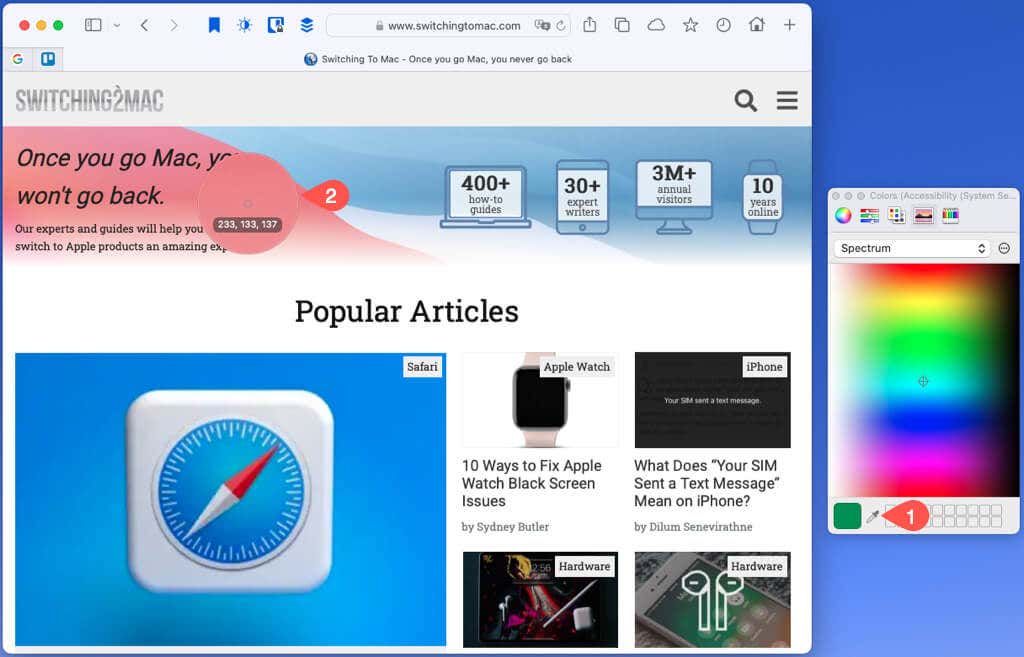
You can also pick a custom color using a color on your screen, whether in an app or on a web page.
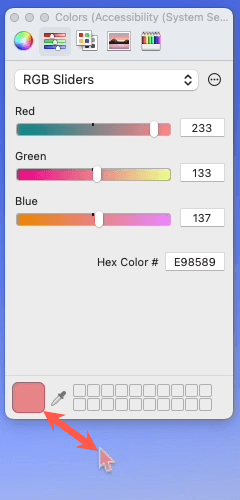
- Select the eyedropper at the bottom of the Colors window to choose a color on your screen. Then, move the cursor to the color and click.
- The new cursor color appears in the palette at the bottom and on your pointer.
- When you finish, close the Colors box using the X on the top left.
Tip: If you want to return to the default settings using a black fill and white outline, return to Settings > Accessibility > Display and select Reset Colors in the Pointer section.
Adjust the Pointer Size
To make the cursor easier to see, you can change not only the color but the size as well. This is also helpful if you’re setting up a Mac for an elderly friend or family member because you can make the pointer larger and simpler.
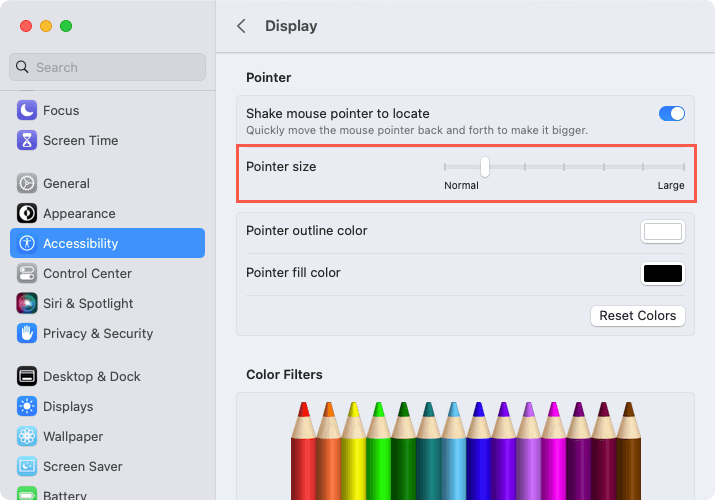
- Open the System Settings and choose Accessibility.
- Beneath Vision, select Display.
- Go toward the bottom of the Pointer section.
- Use the slider next to Pointer size to choose how large or small to make the cursor.
Like changing the pointer speed, you can move the slider one click at a time to see how well the cursor size works for you before you close the Settings.
Turn on Shake to Locate the Pointer
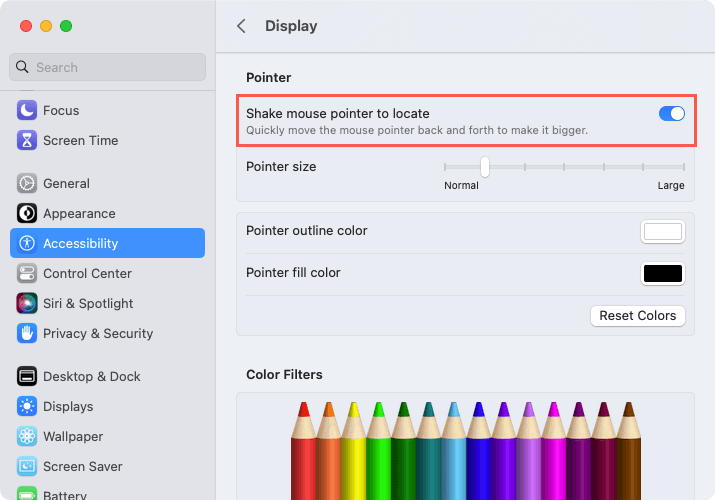
Another way to quickly spot your pointer is using the Shake to Locate feature. This is handy if you step away from your computer and aren’t sure where you left your cursor when you return.
You can shake your mouse from side to side to make the cursor appear large for a brief moment, making it easy to find.
- Open the System Settings and select Accessibility.
- Below Vision, choose Display.
- Head to the Pointer section.
- Turn on the toggle for Shake mouse pointer to locate.
Then, give it a try — shake your mouse from side to side quickly and you should spot your pointer.
Enable or Disable Smart Zoom
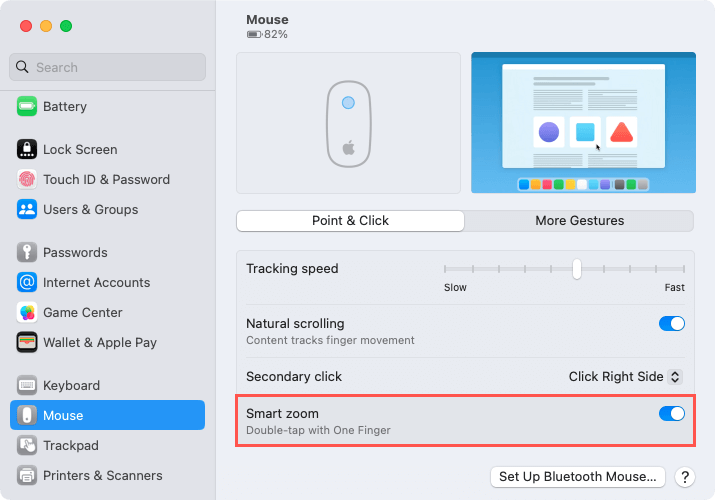
If you have a Magic Mouse for your Mac, there is a convenient feature for zooming in on an app called Smart Zoom. With this feature turned on, you can double-tap your mouse with one finger to zoom in.
While convenient for some, it can be annoying to others. Here’s how to enable or disable Smart Zoom.
- Open the System Settings and choose Mouse.
- Select Point & Click.
- Next to Smart zoom, use the toggle to turn the feature on or off. Blue (or another accent color) means on and gray means off.
Whether you turn it on or off, give your mouse a nice double-tap on the top and see how you like using or not using Smart Zoom.
Customize Other Mouse Gestures
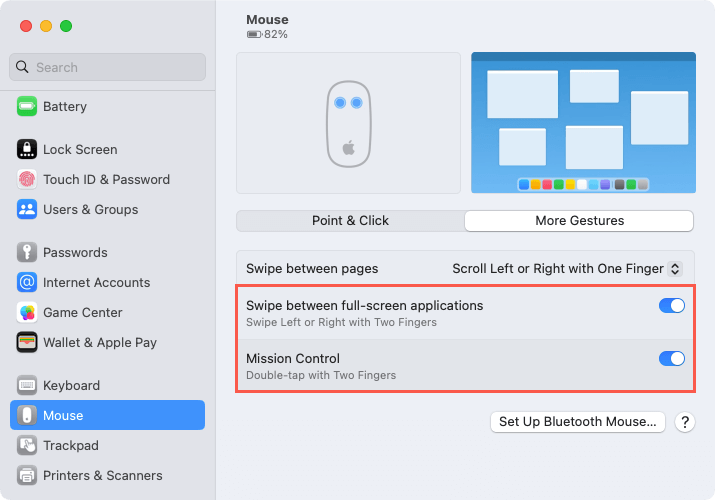
Along with the above, there are more customization options for your cursor and mouse. Go to System Settings > Mouse and use the following options to change how your mouse behaves.
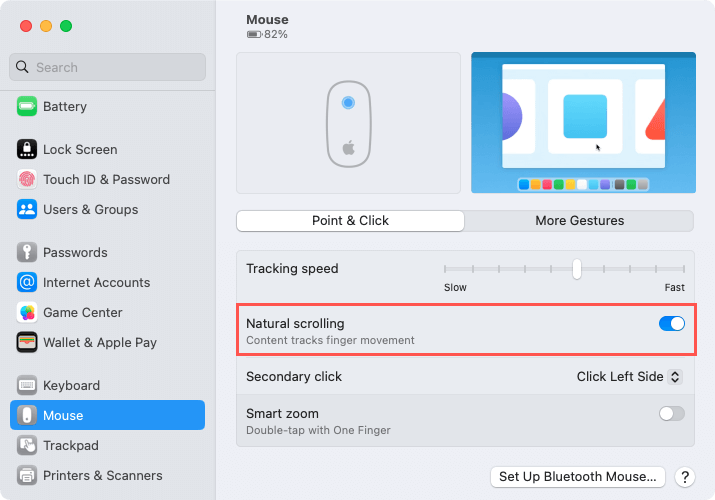
Natural scrolling: Enable this setting to have your mouse track your finger movement when scrolling and then move in the same direction.
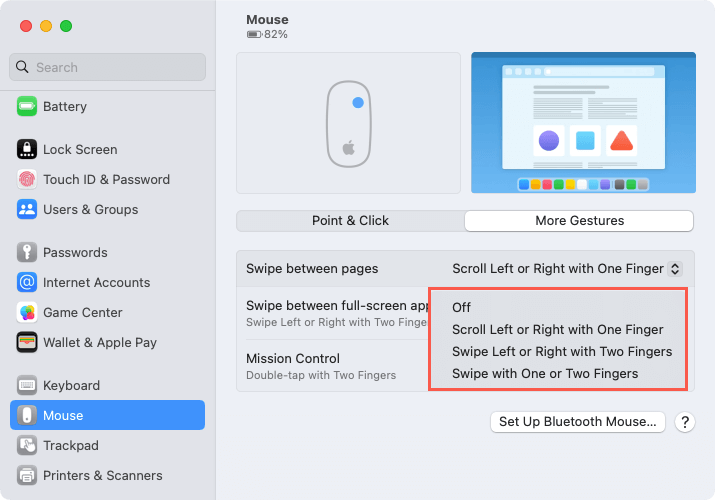
Swipe between pages: Choose a setting for how to move through pages in a document. You can scroll left and right with one finger, swipe left and right with two fingers, swipe with one or two fingers, or turn the setting off.
Swipe between full-screen applications: Enable this setting to swipe left and right with two fingers to switch between apps in full-screen mode.
Mission Control: Enable this setting to open Mission Control by double-tapping with two fingers.
Simple Changes Can Make All the Difference
You can improve how your mouse or pointer works with a few simple changes. Even tiny tweaks can enhance your experience. Whether it’s a basic color change or an easy swipe between pages, you can customize your Mac mouse and cursor in just a few steps.
For more, look at using a mouse versus a trackpad for better productivity on your computer.

