Works differently than a regular shortcut
A symbolic link, often shortened to symlink, is a type of link that is stored at one location on your machine and points to another location on the same machine. You can think of it as a shortcut to an app. Even though the actual app file is located deep inside your folders, you can simply double-click on the app shortcut on your desktop to launch the app.
A symlink is a type of shortcut, but it works differently than regular shortcuts. It’s less of a shortcut and more of the actual file it’s pointing to. Any app that you provide with your symlinks will think of these links as the actual files rather than normal shortcut files.

These are extremely useful as you don’t have to be stuck to a particular folder for an app to work. You can have your data stored in other folders and you can create a symlink in the original folder pointing to the new folder you’ve created. Your system and your apps will think you haven’t really made any changes and they’ll work normally, although things are otherwise.
Creating a Symlink Using The Terminal
Making a symlink on a Mac is extremely easy. The built-in Terminal app has a command that lets you easily create as many symlinks as you want on your Mac.
All that you need to know is the location where you want to create the symlink and the path where the symlink should point to. Once you have this information, here’s how you create a symlink in Terminal.
Launch the Terminal app using your preferred way on your Mac.
Type in the following command into the Terminal window and hit Enter. Make sure to replace destination with the folder you want the link to point to and location with the path where you want to save the link.
ln -s destination location

To create a symlink on your desktop that points to your Documents folder, you’d use the following command:
ln -s /Users/Mahesh/Documents /Users/Mahesh/Desktop

A symlink will be created and saved on your desktop. Double-click on it and it’ll open the Documents folder (if that’s what you specified above) in the Finder.
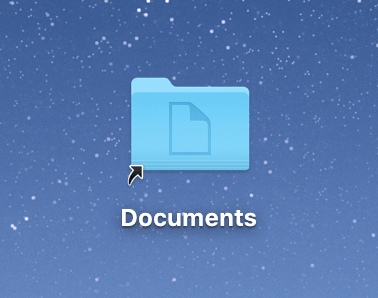
If the directory you want to create a symlink for has spaces in its names, make sure to enclose the path names with double quotes to avoid any errors.
You can now use this symlink in any of your commands and apps and it’ll be considered as the actual version of your folder or file.
Use An App To Create a Symlink
The terminal isn’t the only way to create symlinks on your Mac. If you don’t happen to be a Terminal guy, you have an app available to let you create symlinks on your machine.
What this app does is it adds an option to your context menu so you can create symlinks by just right-clicking on your files and folders.
Head over to the SymbolicLinker page on GitHub and download and open the package on your Mac.
Copy the SymbolicLinker.service.app file from the package, hold down the Option key, click on the Go menu in the Finder, select Library, open the Services folder, and paste the file you copied.
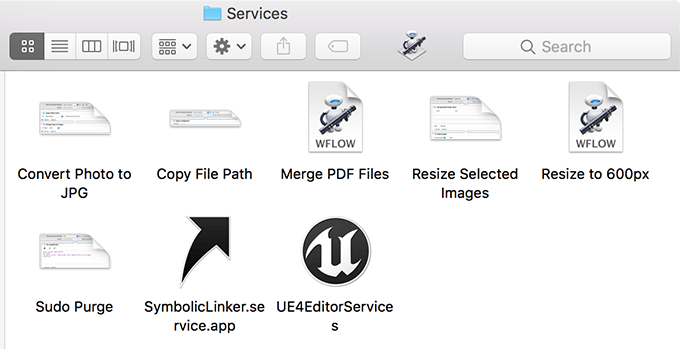
Double-click on the app to open it. It won’t show anything but it has secretly added an option to your context menu.
Find the file or folder you want to create a symlink for, right-click on it, and select Services followed by Make Symbolic Link.
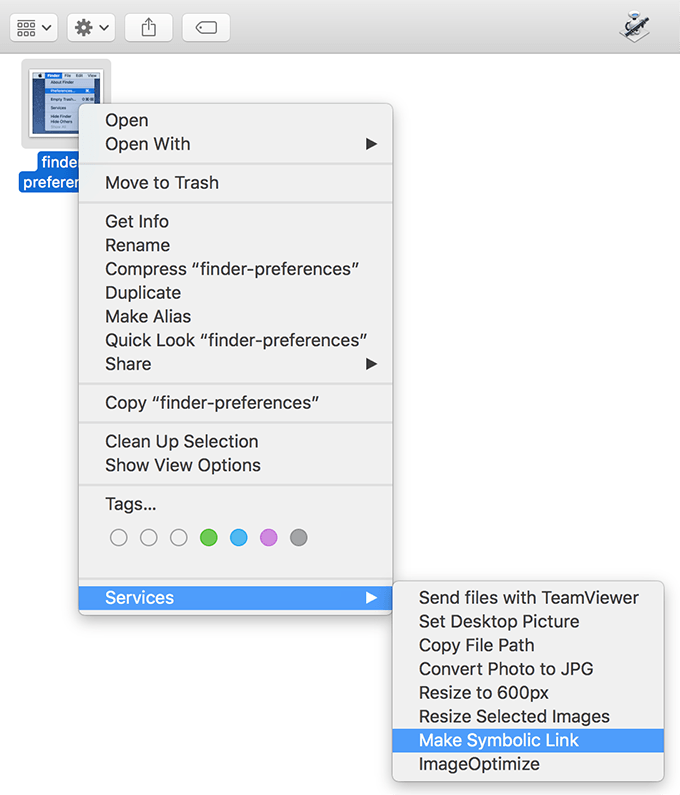
It’ll create the symlink in the same folder as the original file/folder. You can move it around though if you want.
Create Symlinks Using An Automator Service
The Automator method to create symlinks works pretty much the same way as the above method. But this one will suit those of you who don’t trust any random apps on the Internet, and you’d rather create something by yourself so you know exactly what it contains.
Launch the Automator app on your Mac.
Select Service followed by Choose to create a new Automator service on your Mac.
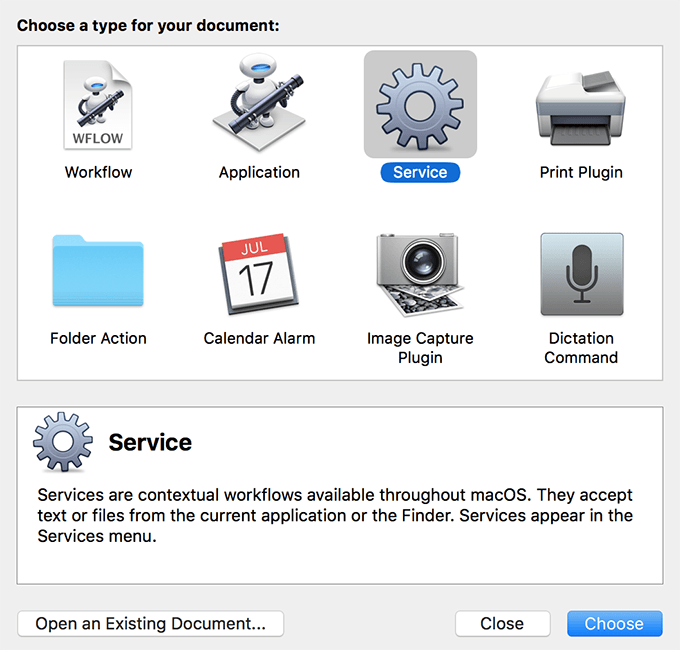
Set the options at the top as the following:
Service receives selected – files or folders
in – any application

In the actions list, search for the action named Run Shell Script and drag it over to the right panel.
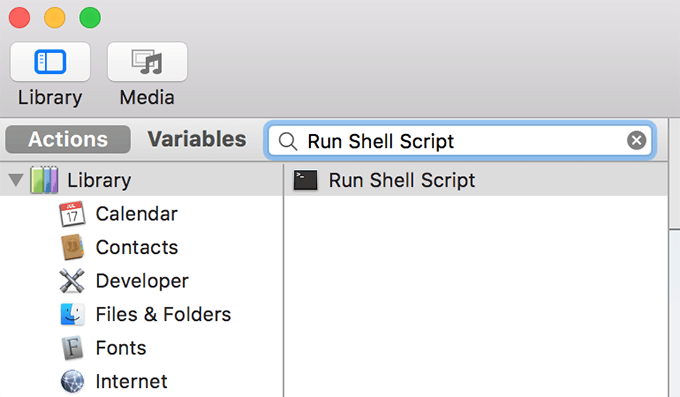
Configure the action and the commands as the following:
Shell – /bin/bash
Pass input – as arguments
while [ $# -ne 0 ]; do
ln -s “$1” “$1 symlink”
shift
done

Save the service by clicking on the File menu at the top and selecting Save. Enter a meaningful name for the service and hit Save.

To create a symlink with the newly created Automator service, right-click on your file or folder and select Services followed by your service name.
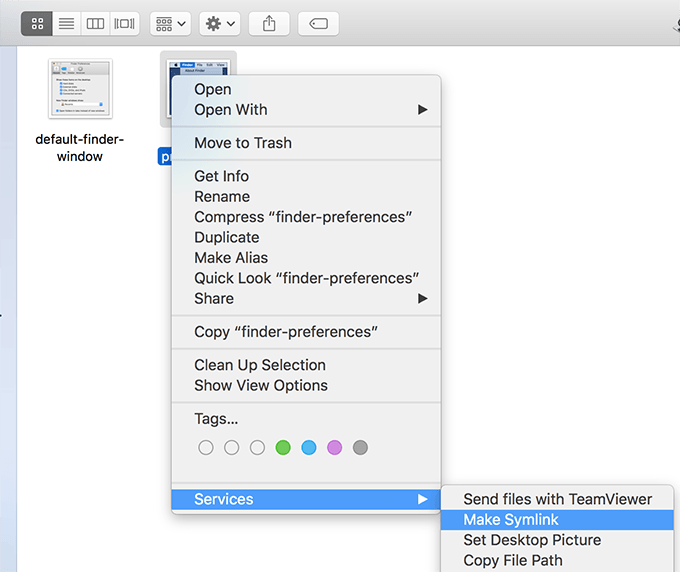
You can also create a keyboard shortcut for the service to make creating symlinks even easier on your machine.
Deleting a Symlink On Mac
Symlinks don’t occupy much memory space as they’re just shortcuts to the files and folders on your machine. However, if you want to remove one or a few of these from your machine, you have two ways to do it.
Launch the Terminal app, type in the following command, and hit Enter. Make sure to replace symlink with the path of the symlink on your Mac.
rm symlink

Another way to delete a symlink is to use the context menu option. Right-click on your symlink and select Move to Trash. It’ll remove the symlink from your Mac.
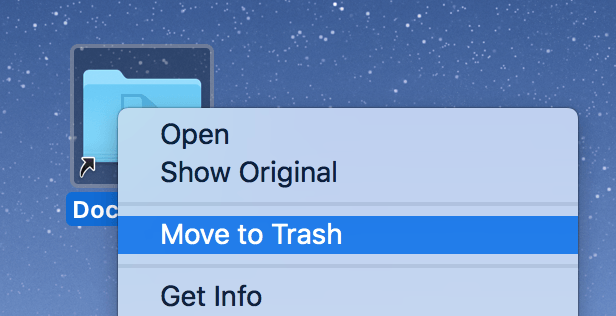
Make sure to empty the Trash after you’re removed the symlink to ensure it’s gone for good from your Mac.
Conclusion
Symlinks are much more powerful than regular aliases as these work in all the apps and commands as if these were the real files.


