
You’ve got an Apple Watch strapped to your wrist collecting steps, heart rate, calories burned, and none of it is showing up in the fitness app you actually use to track your goals. Frustrating, especially when it should work automatically.
Here’s the good news: in 2026, Apple Watch fitness syncing is more capable than ever. The Health and Fitness apps now serve as the central hub for all your data, and third-party apps like MyFitnessPal and Lose It plug into that hub via HealthKit. Get the permissions right once, and everything flows automatically.
This guide covers how to set it all up, plus what to do when it breaks, because it does sometimes break.
How Apple Watch Fitness Syncing Works in 2026
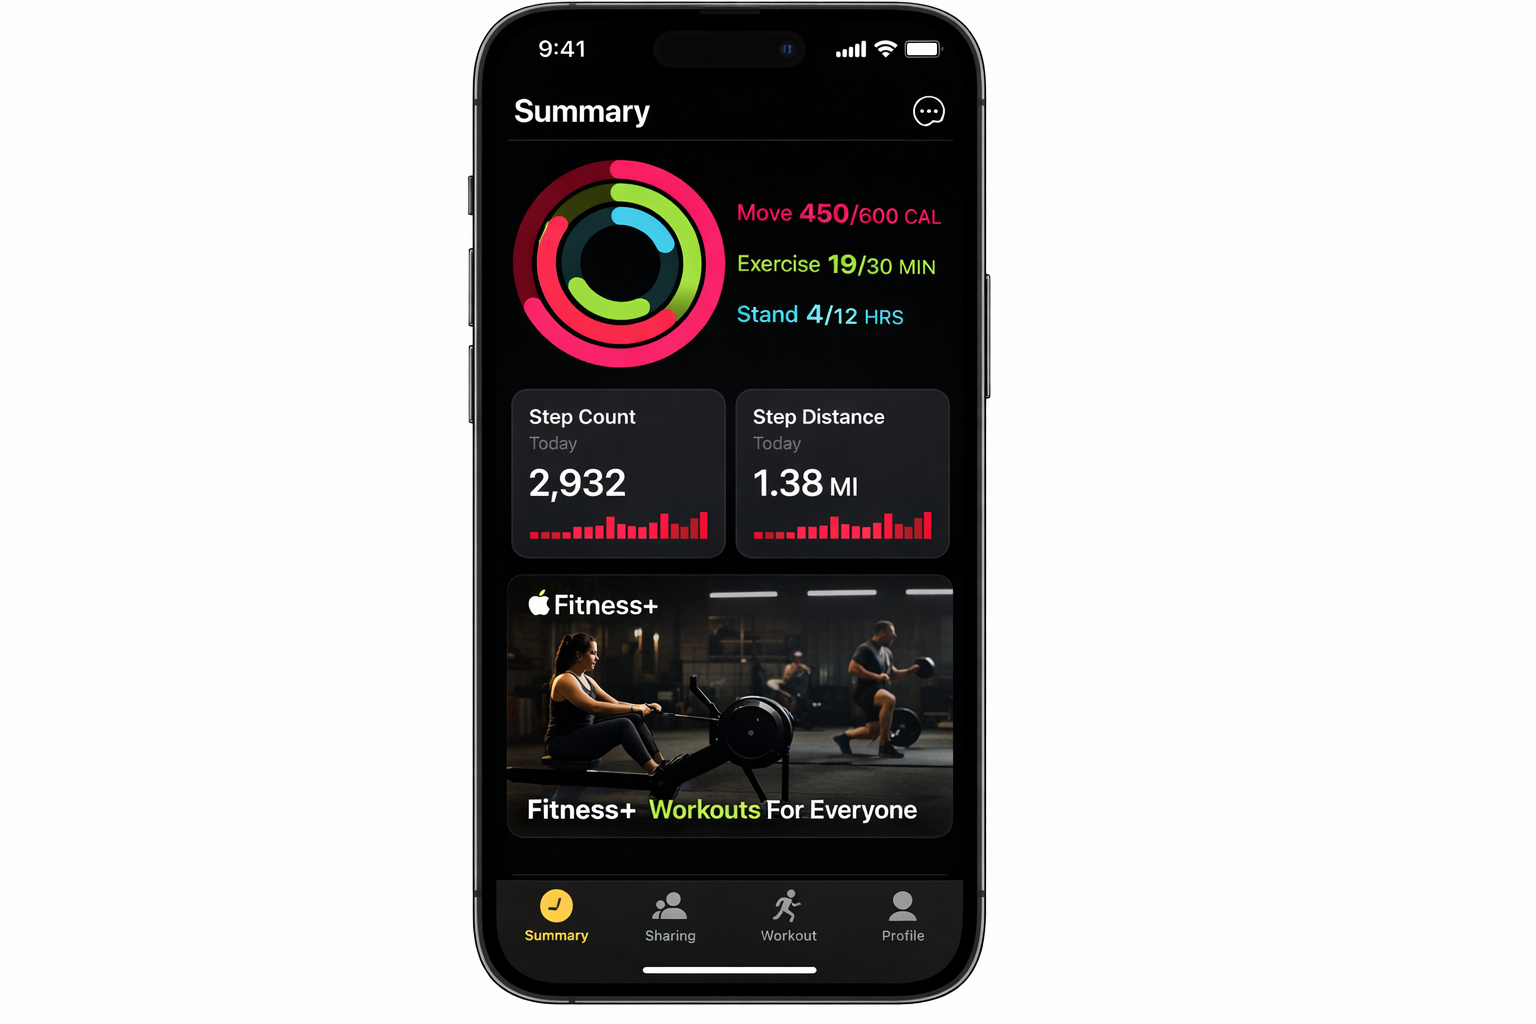
Your Apple Watch doesn’t sync directly to MyFitnessPal or Lose It. It syncs to Apple’s Health app on your iPhone (via Bluetooth and iCloud), and third-party apps read from Health using HealthKit permissions you grant them.
That means the setup process is the same regardless of which fitness app you use: install the app, connect it to Health, grant permissions. Apple Watch data flows automatically from there, with no separate Watch app install required for basic syncing.
Make sure these prerequisites are in place before you start:
- Your iPhone is running iOS 26 or later
- Your Apple Watch is running watchOS 26 or later
- Bluetooth and Wi-Fi are on, Airplane Mode is off on both devices
- iCloud Health sync is enabled (more on this below)
Enable iCloud Health Sync First
If Health data isn’t syncing between your Watch and iPhone, this is the first thing to check. Go to Settings > [Your Name] > iCloud > See All and make sure both Health and Fitness are toggled on.
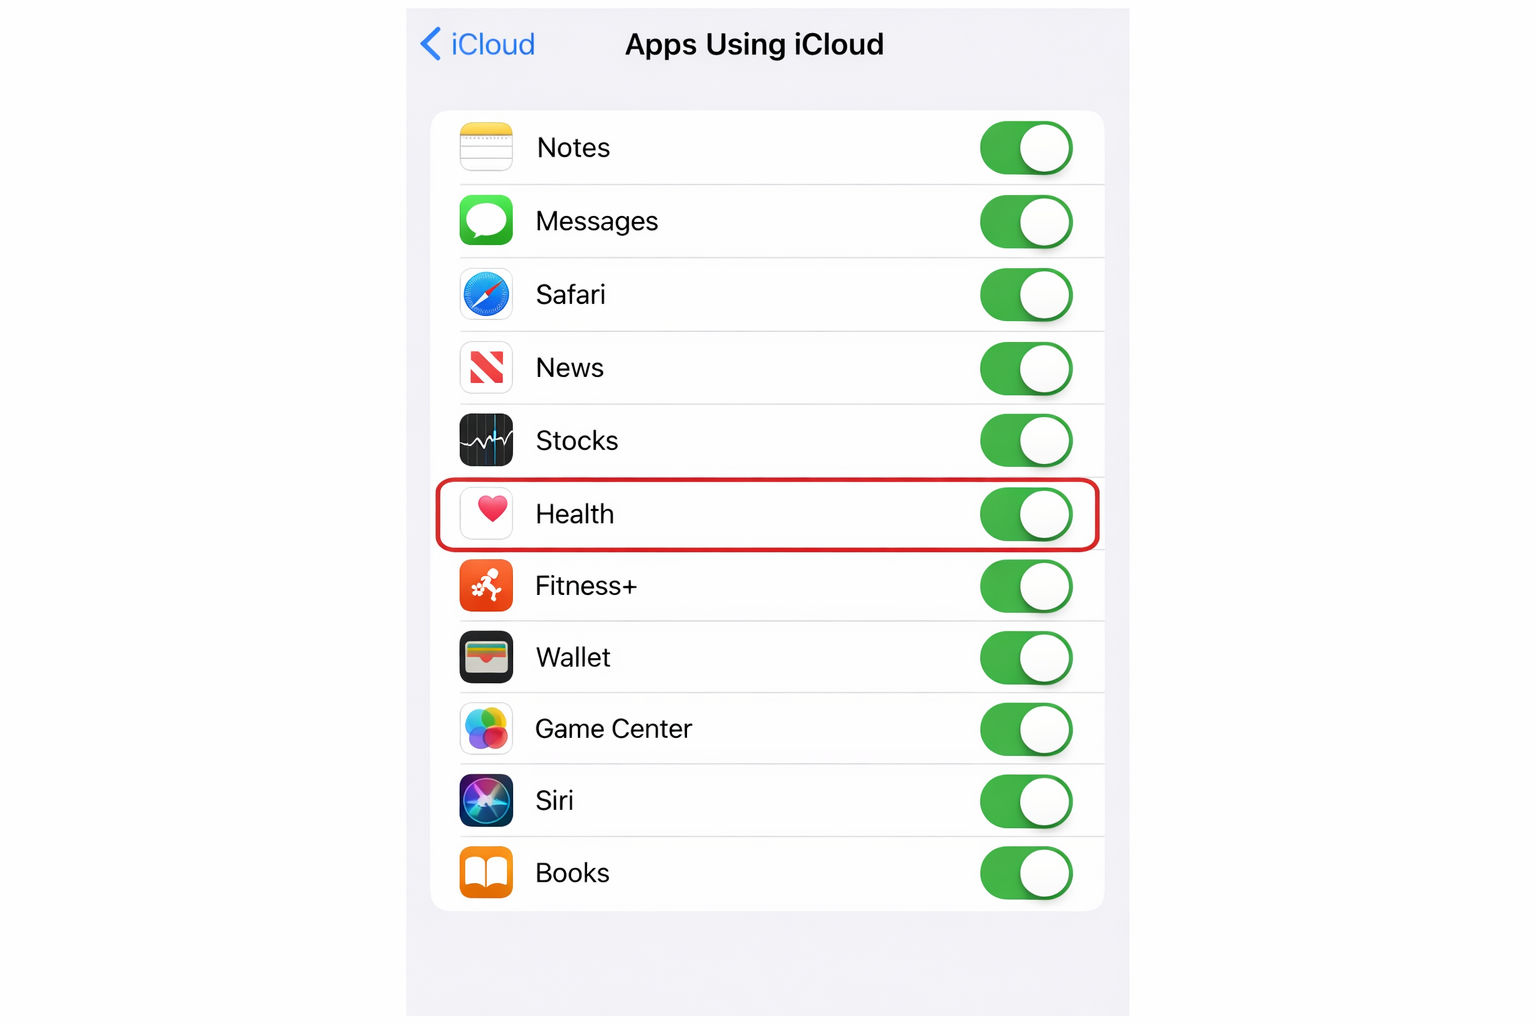
(If either toggle is off, turn it on. Back up your Health data first via the Health app’s profile icon > Export All Health Data just to be safe.)
Sync Apple Watch to MyFitnessPal
MyFitnessPal still pulls its Watch data through Apple Health, so the setup lives inside the MyFitnessPal app rather than the Watch app.
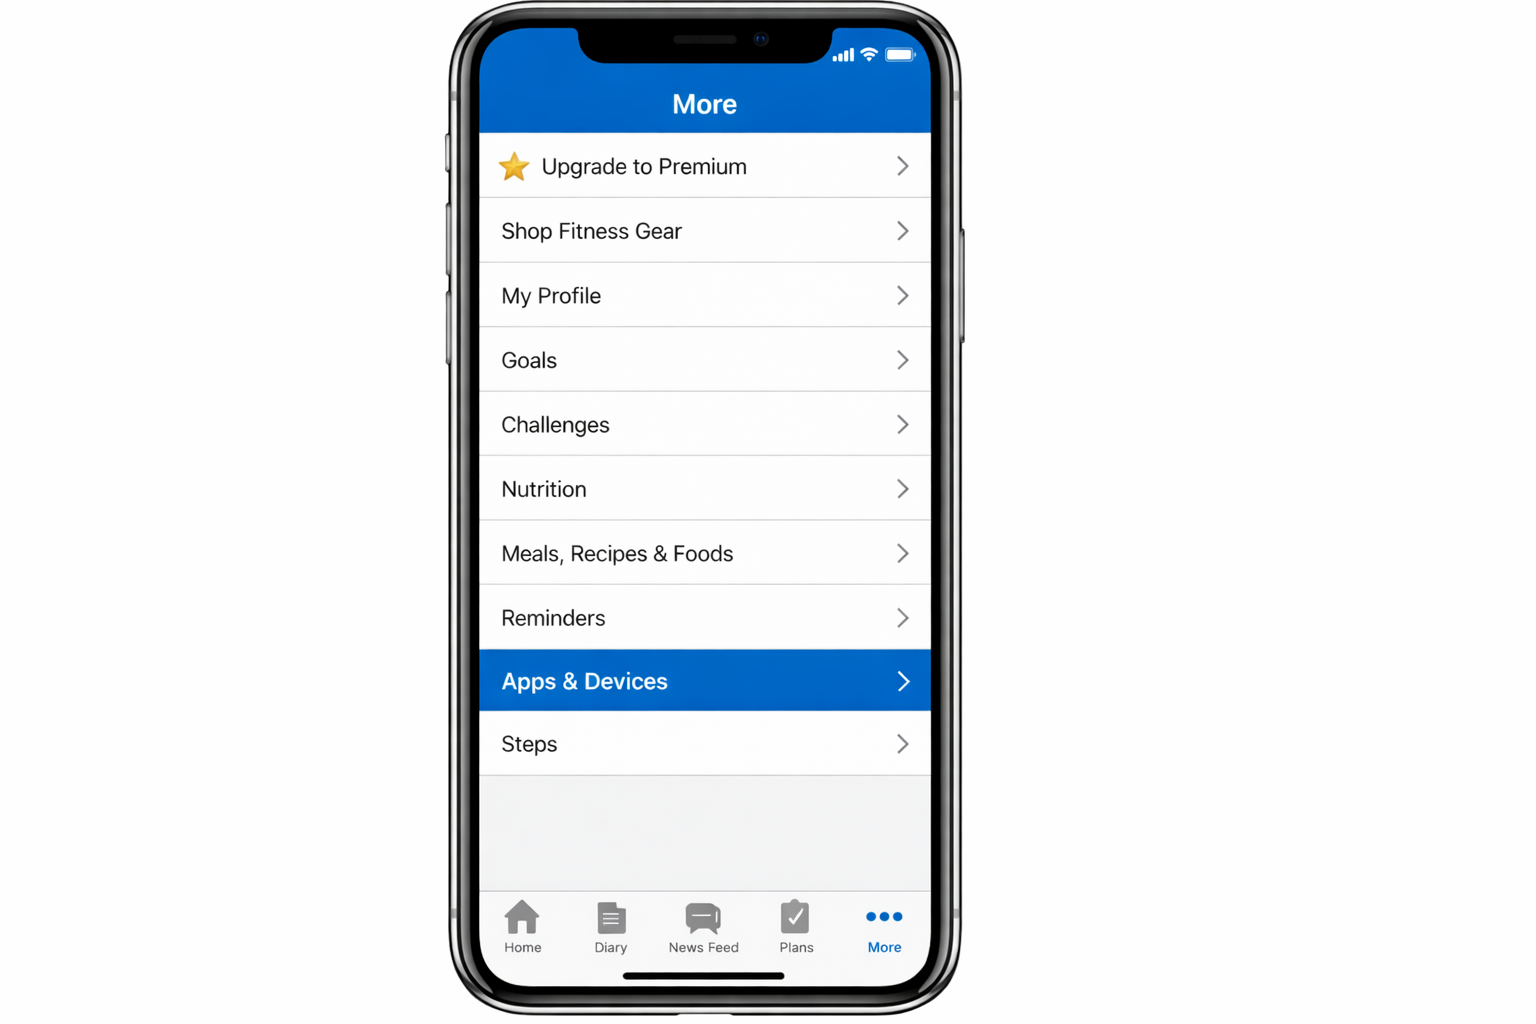
- Open MyFitnessPal on your iPhone and tap the More tab (bottom right).
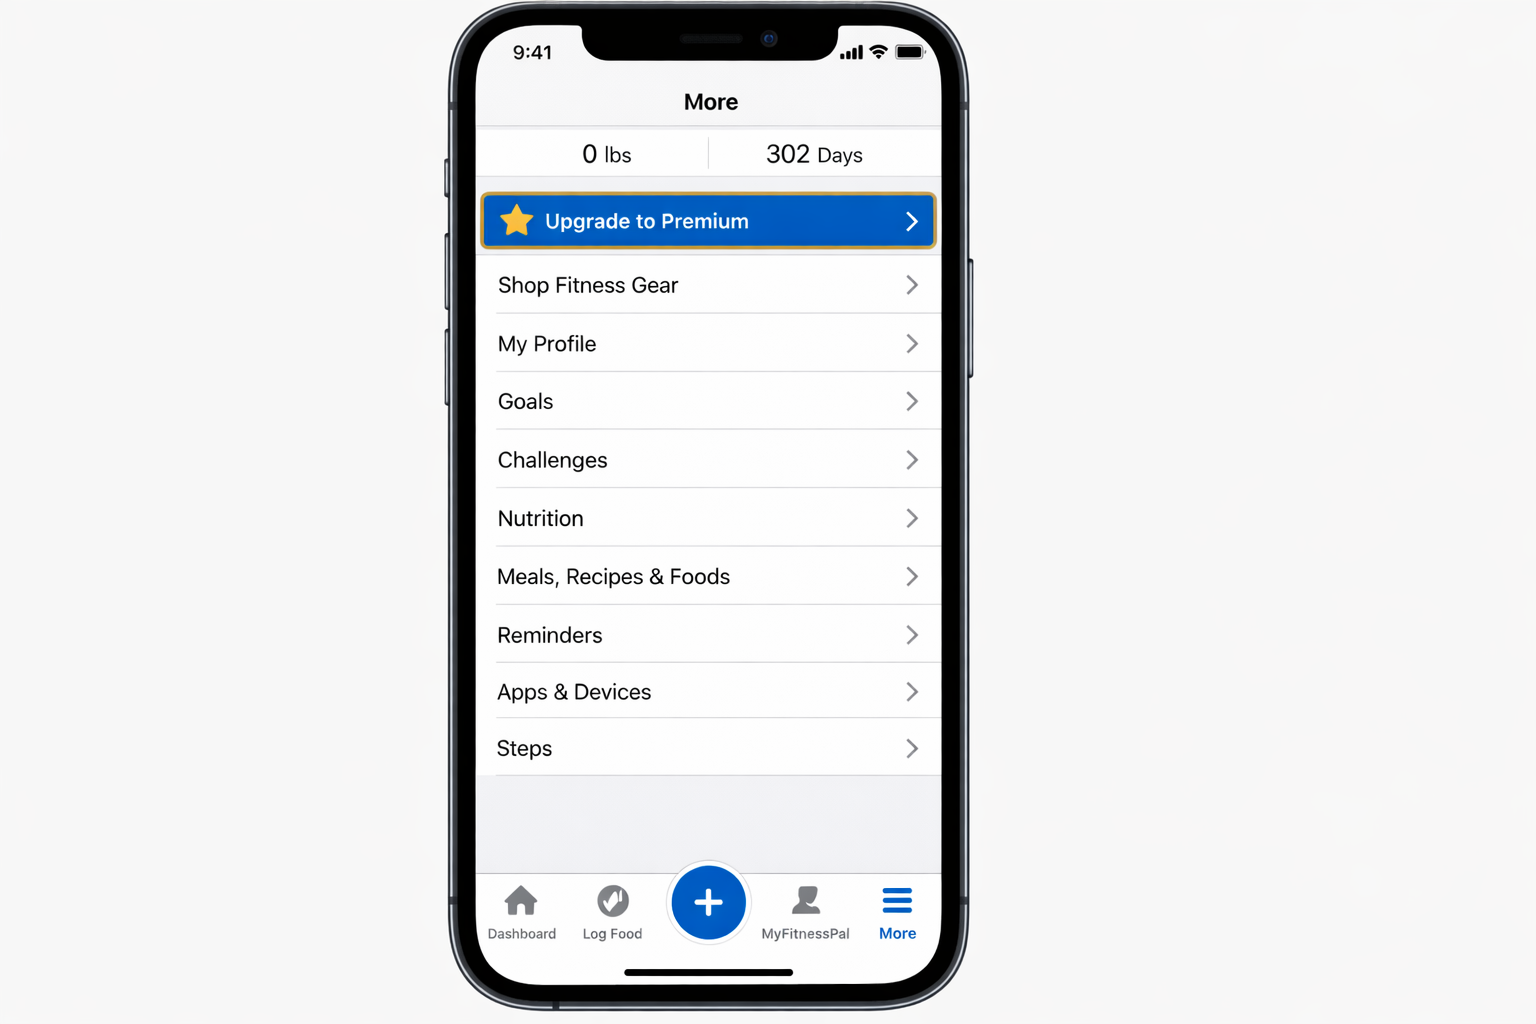
- Tap Apps & Devices.
- Tap Apple Health.
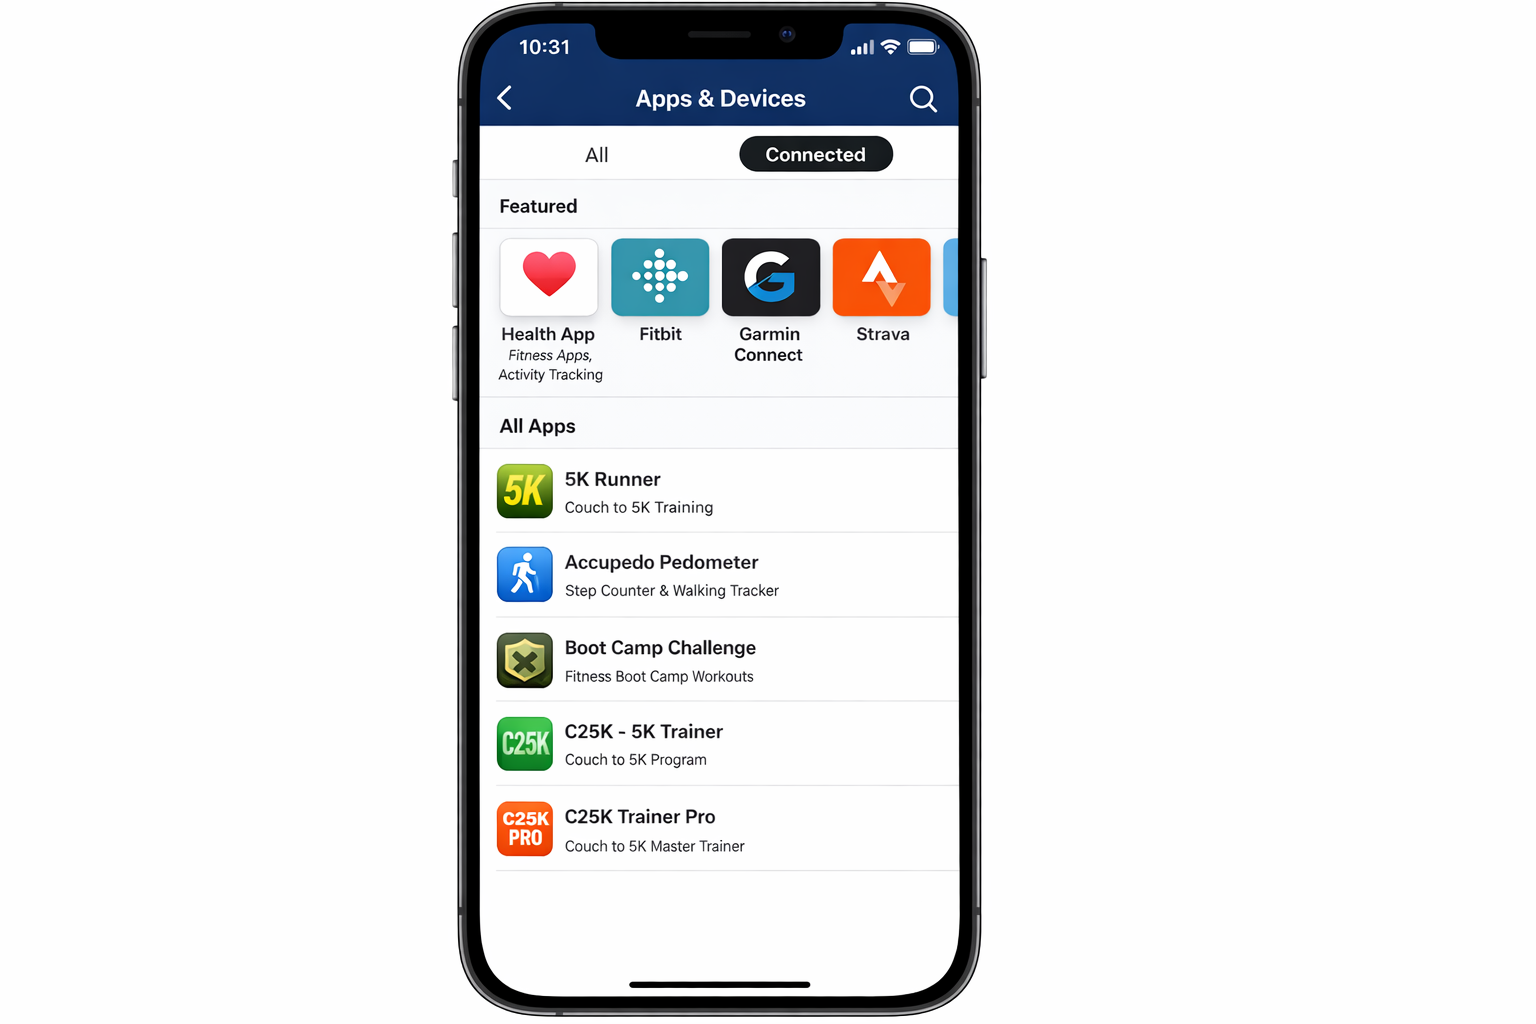
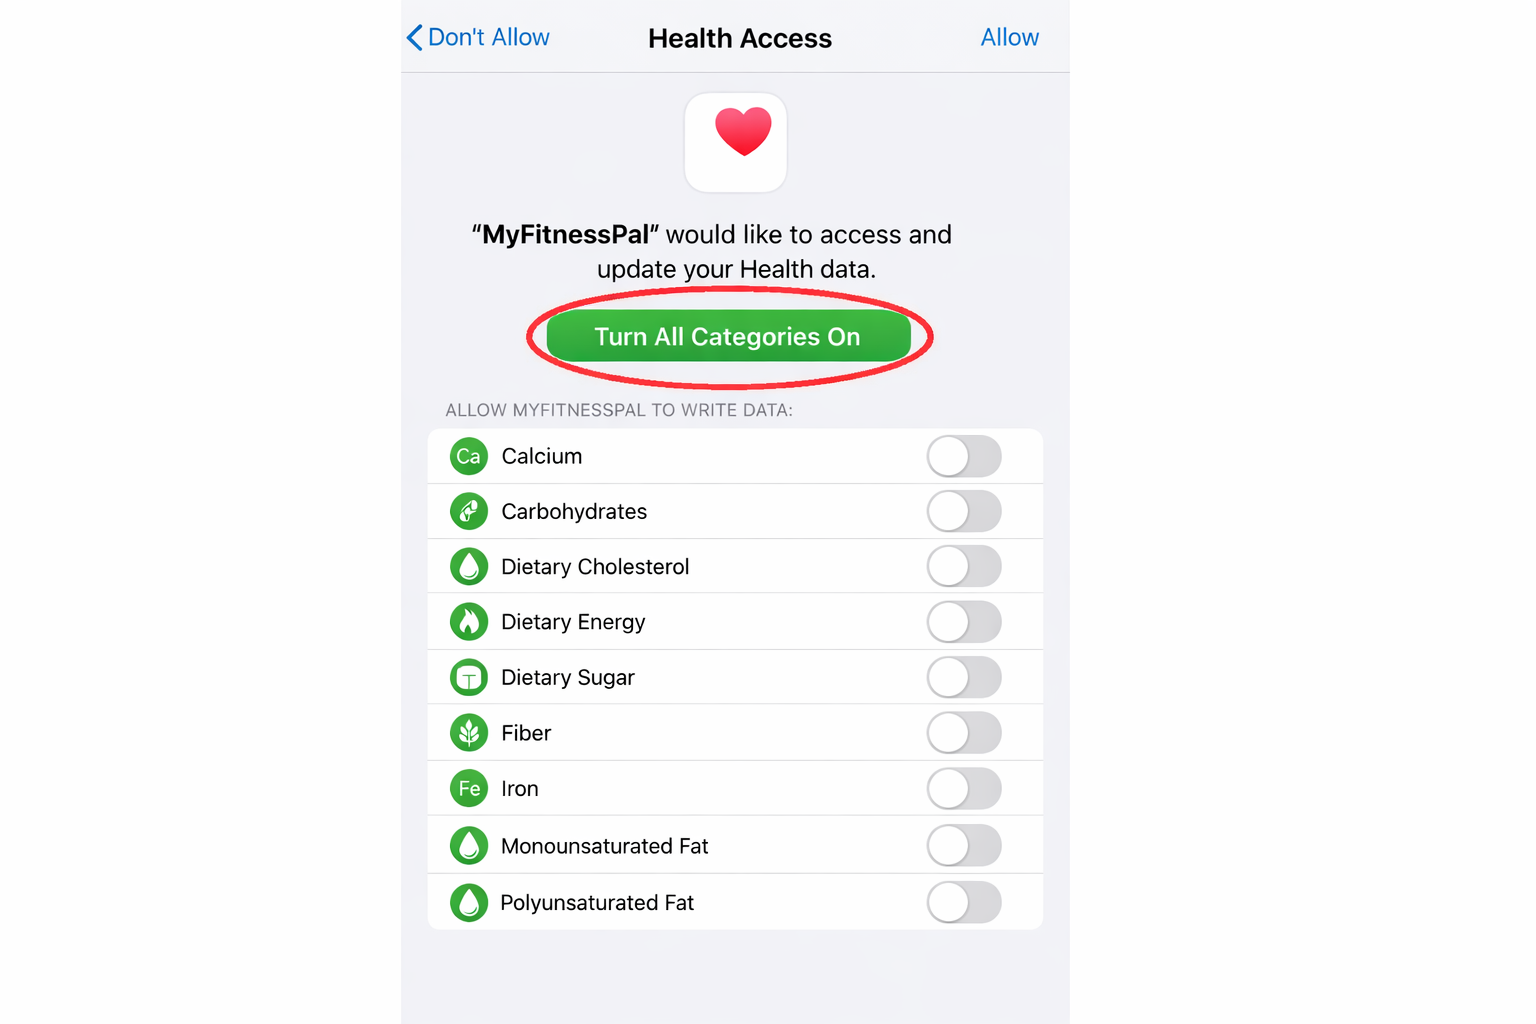
- Tap Connect (or Manage if you’ve connected before). The Health permissions screen will open.
- Tap Turn All Categories On, then tap Allow.
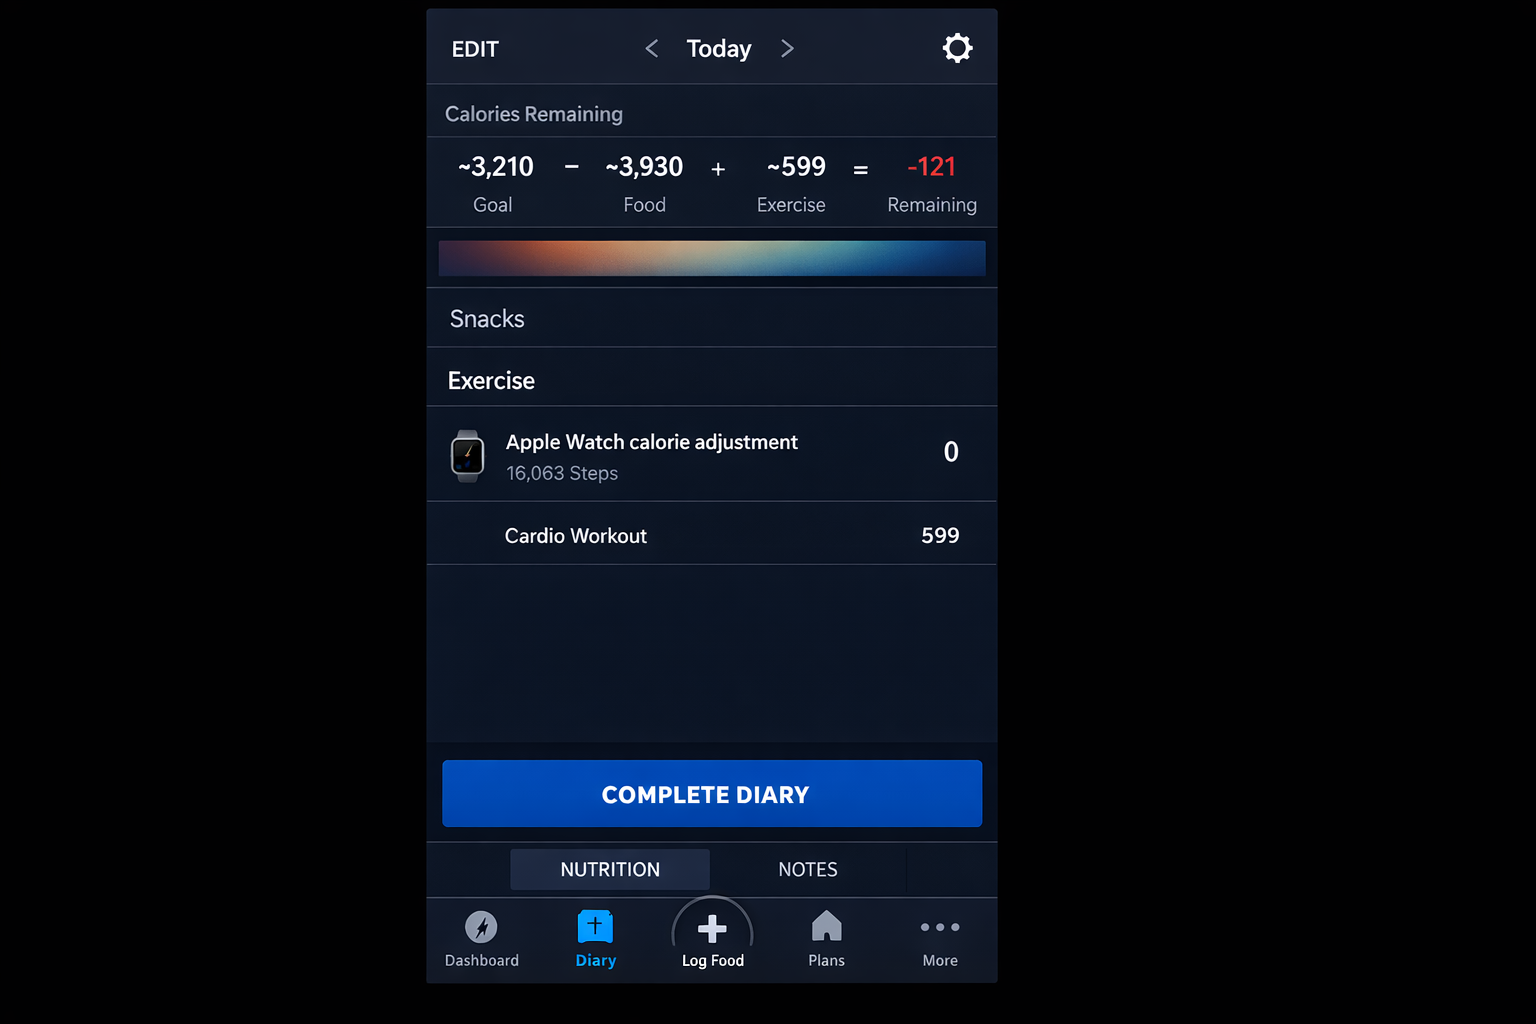
- Head back to MyFitnessPal. Your Apple Watch activity data, steps, calories burned, workouts, should now appear in your diary automatically.
Sync Apple Watch to Lose It
Same principle, slightly different path inside the app.
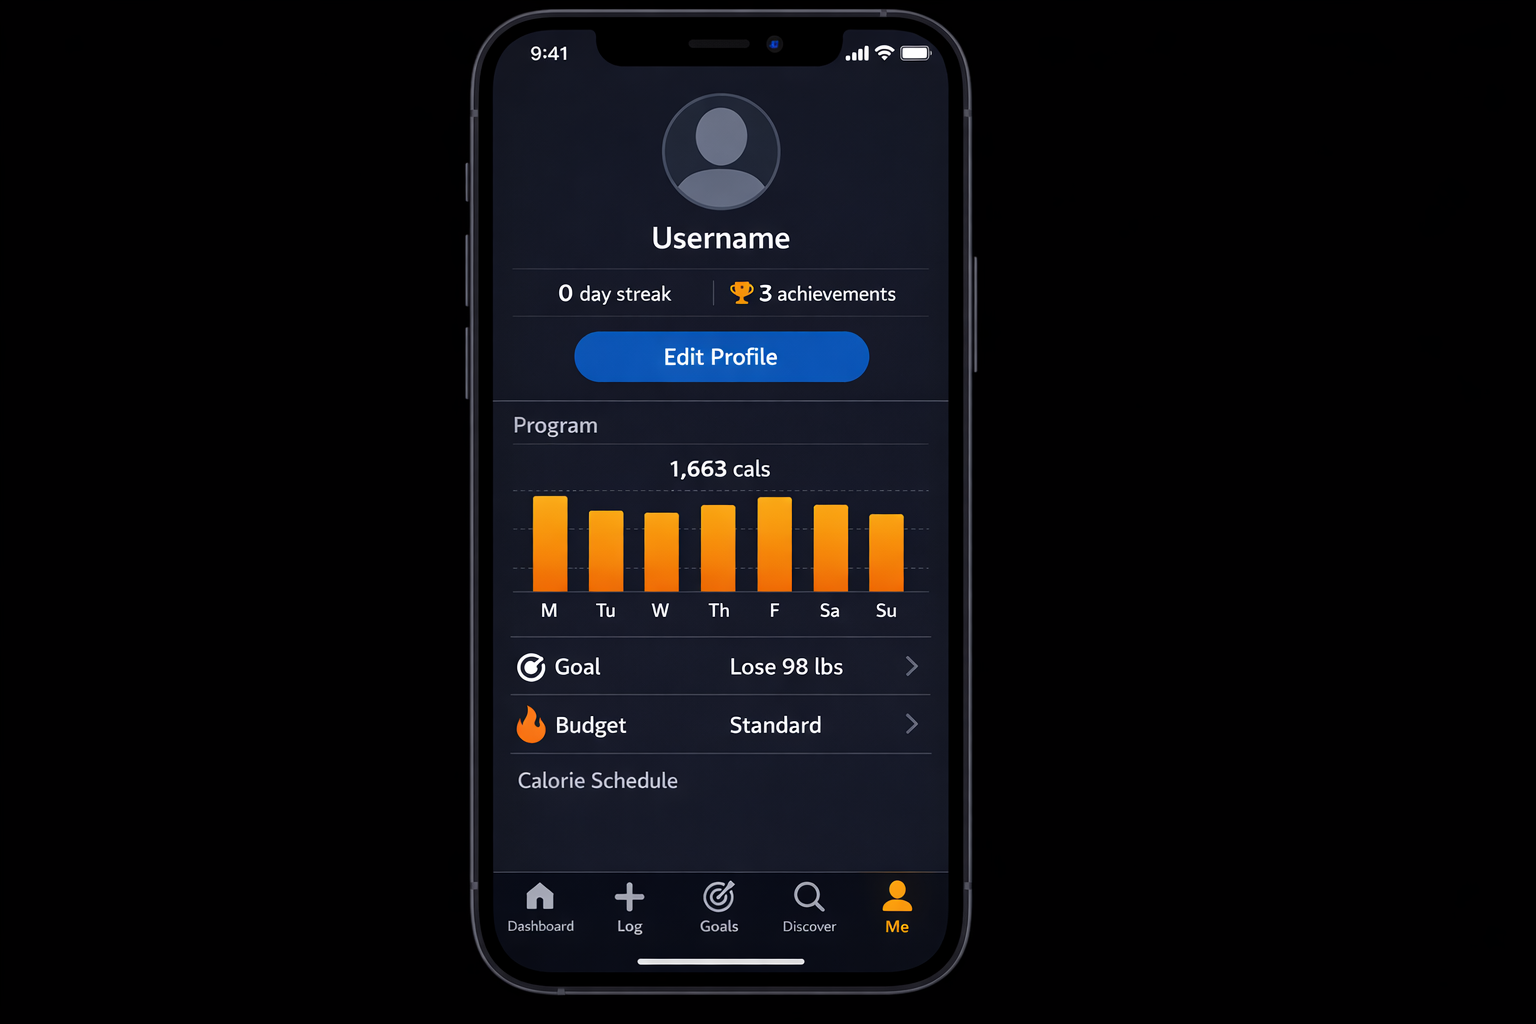
- Open Lose It on your iPhone and tap Me in the bottom navigation bar.
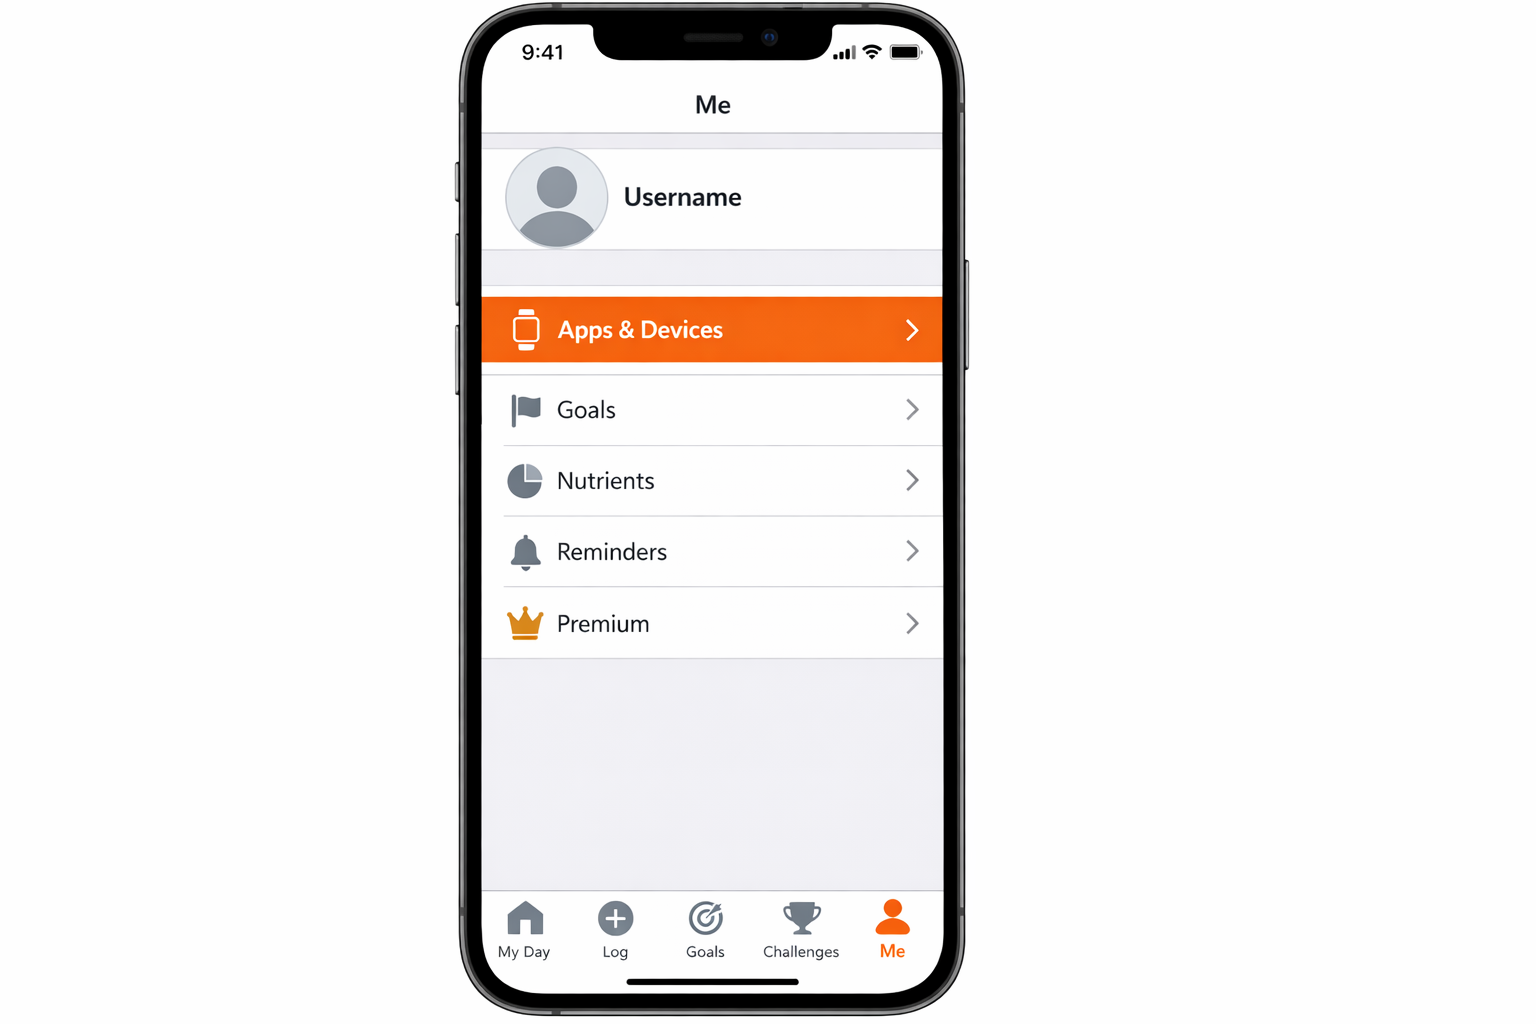
- Tap Apps & Devices.
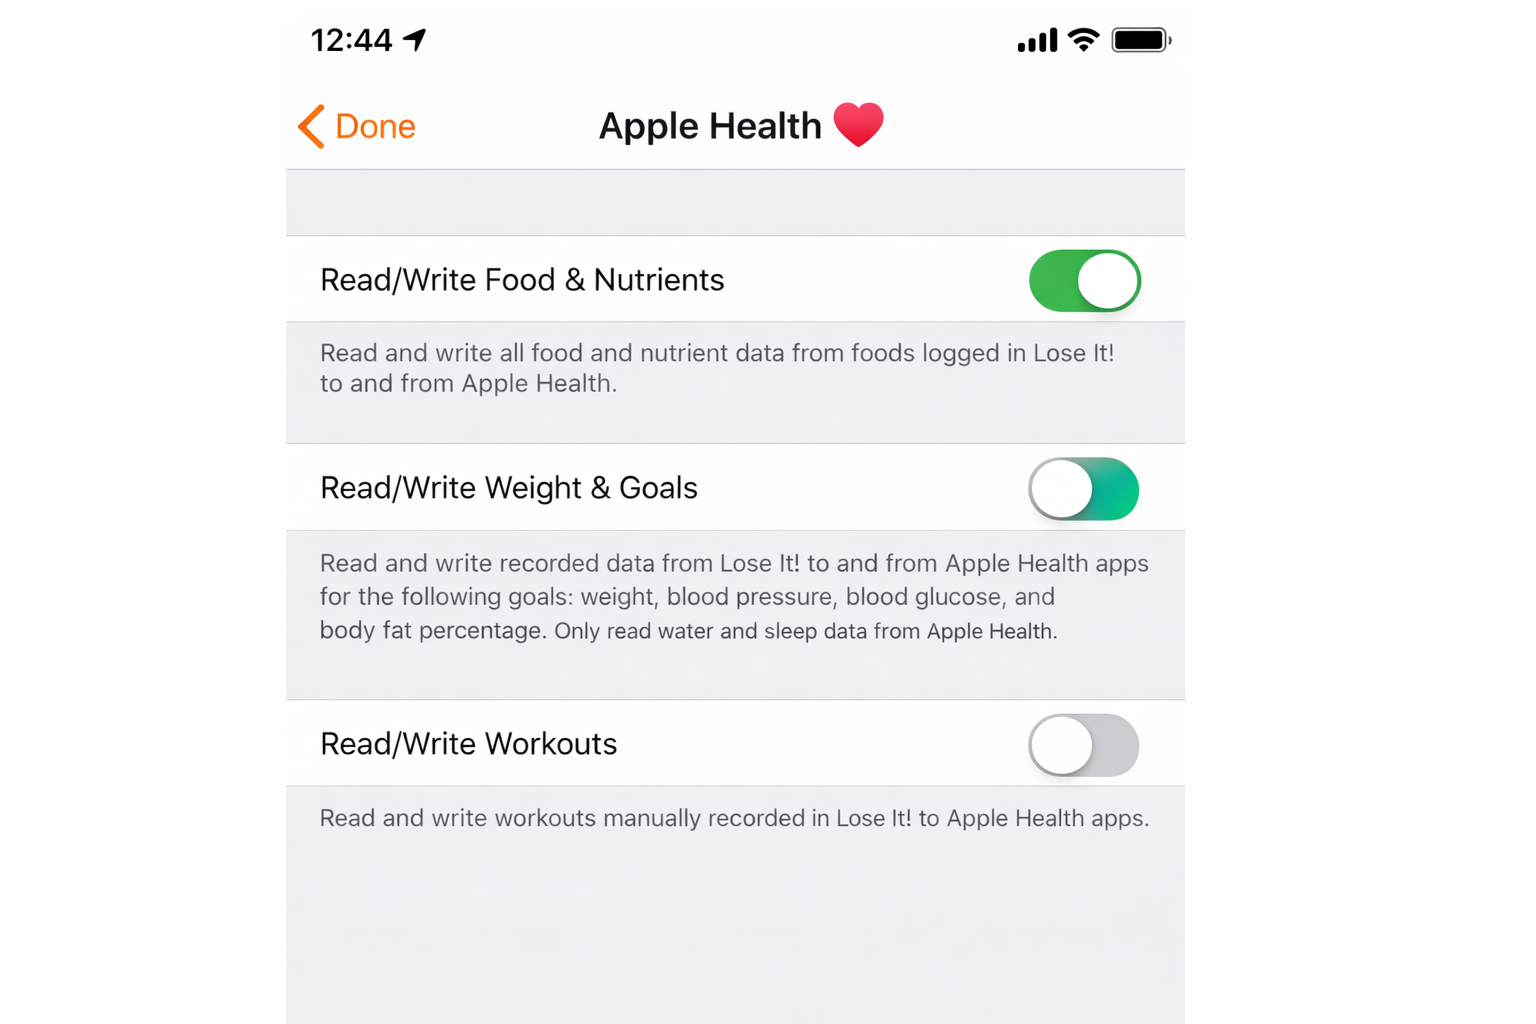
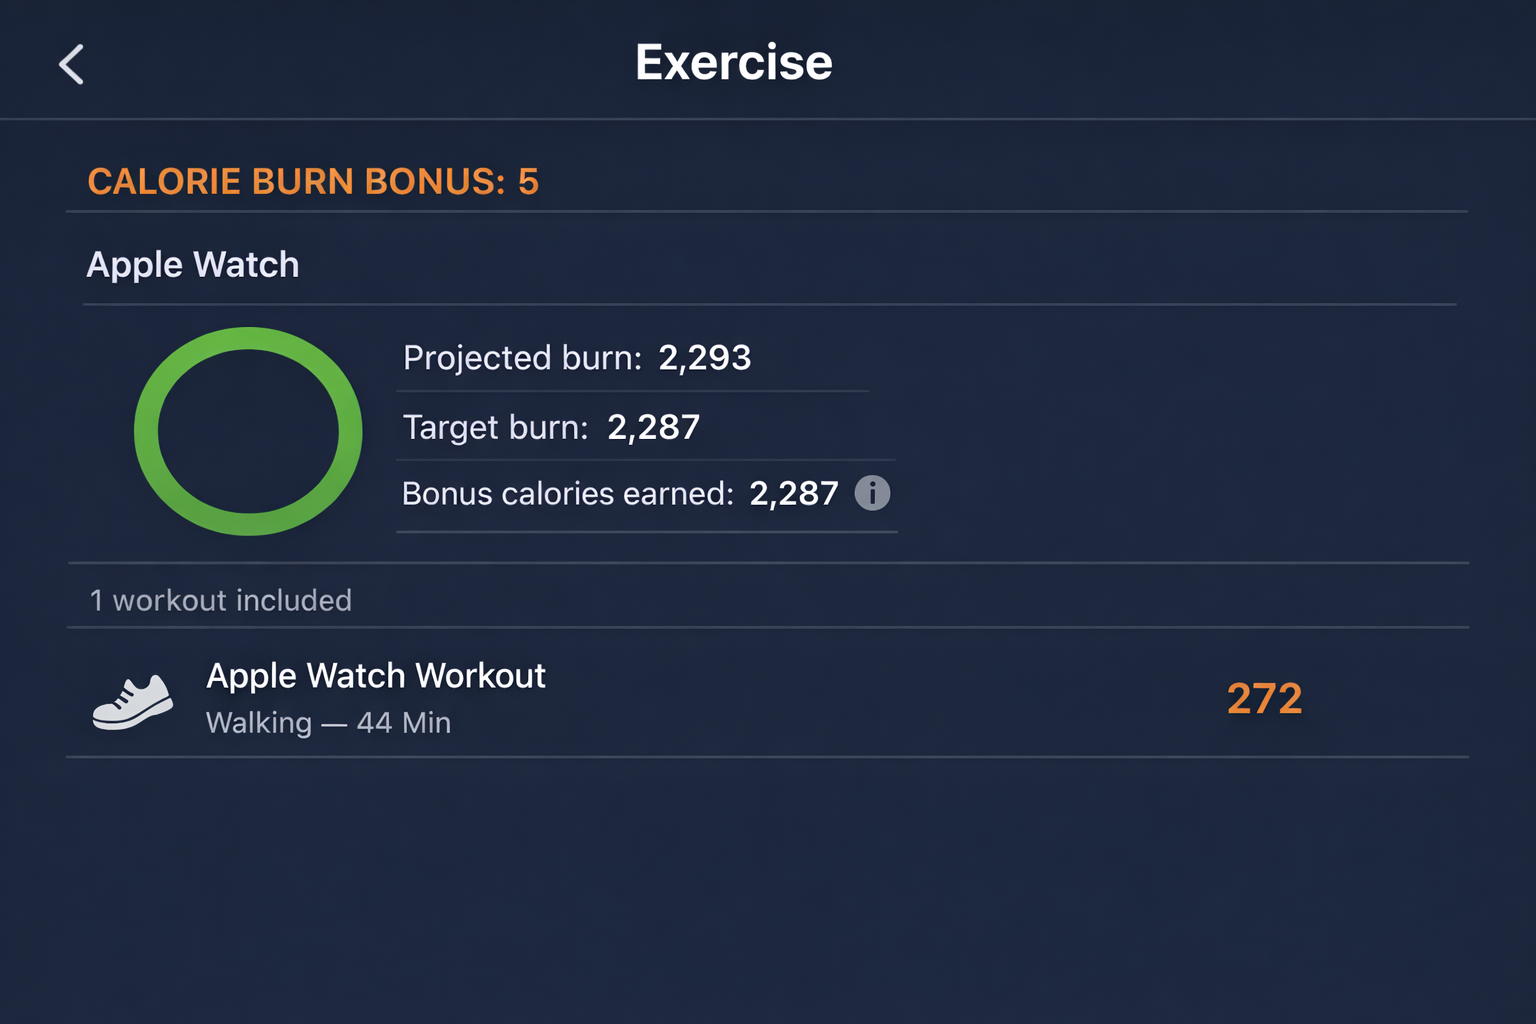
- Tap Apple Health, then toggle Auto Logging on.
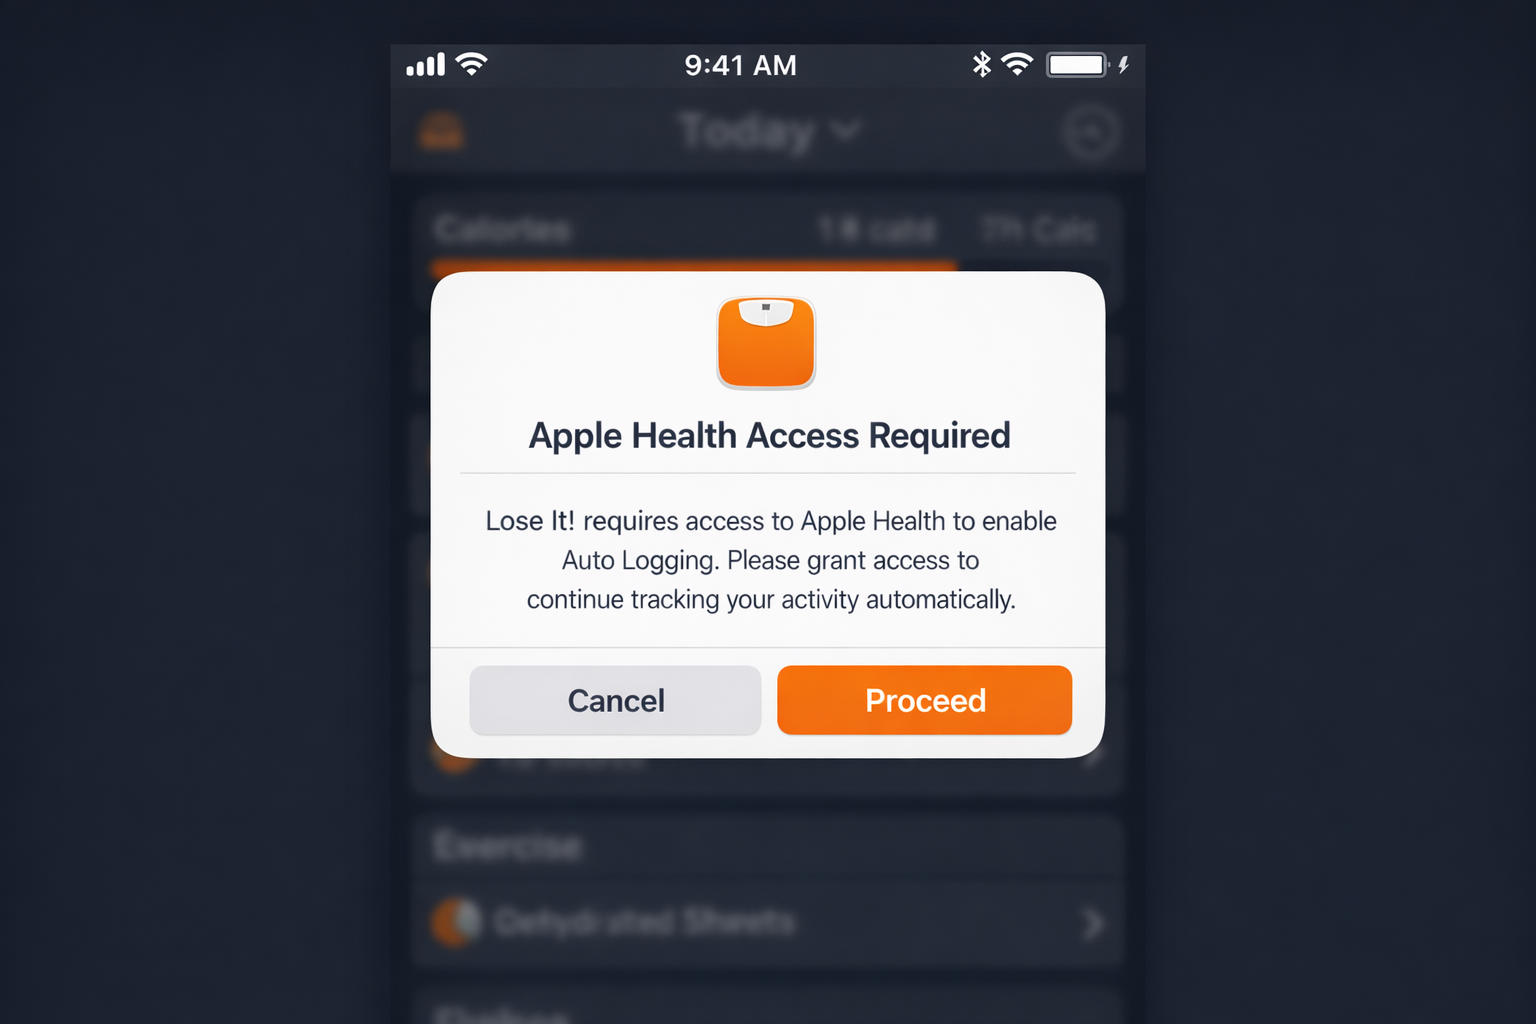
- When the prompt appears warning you that Apple Health access is required, tap Proceed.
- On the Health permissions screen, tap Turn All Categories On, then Allow.
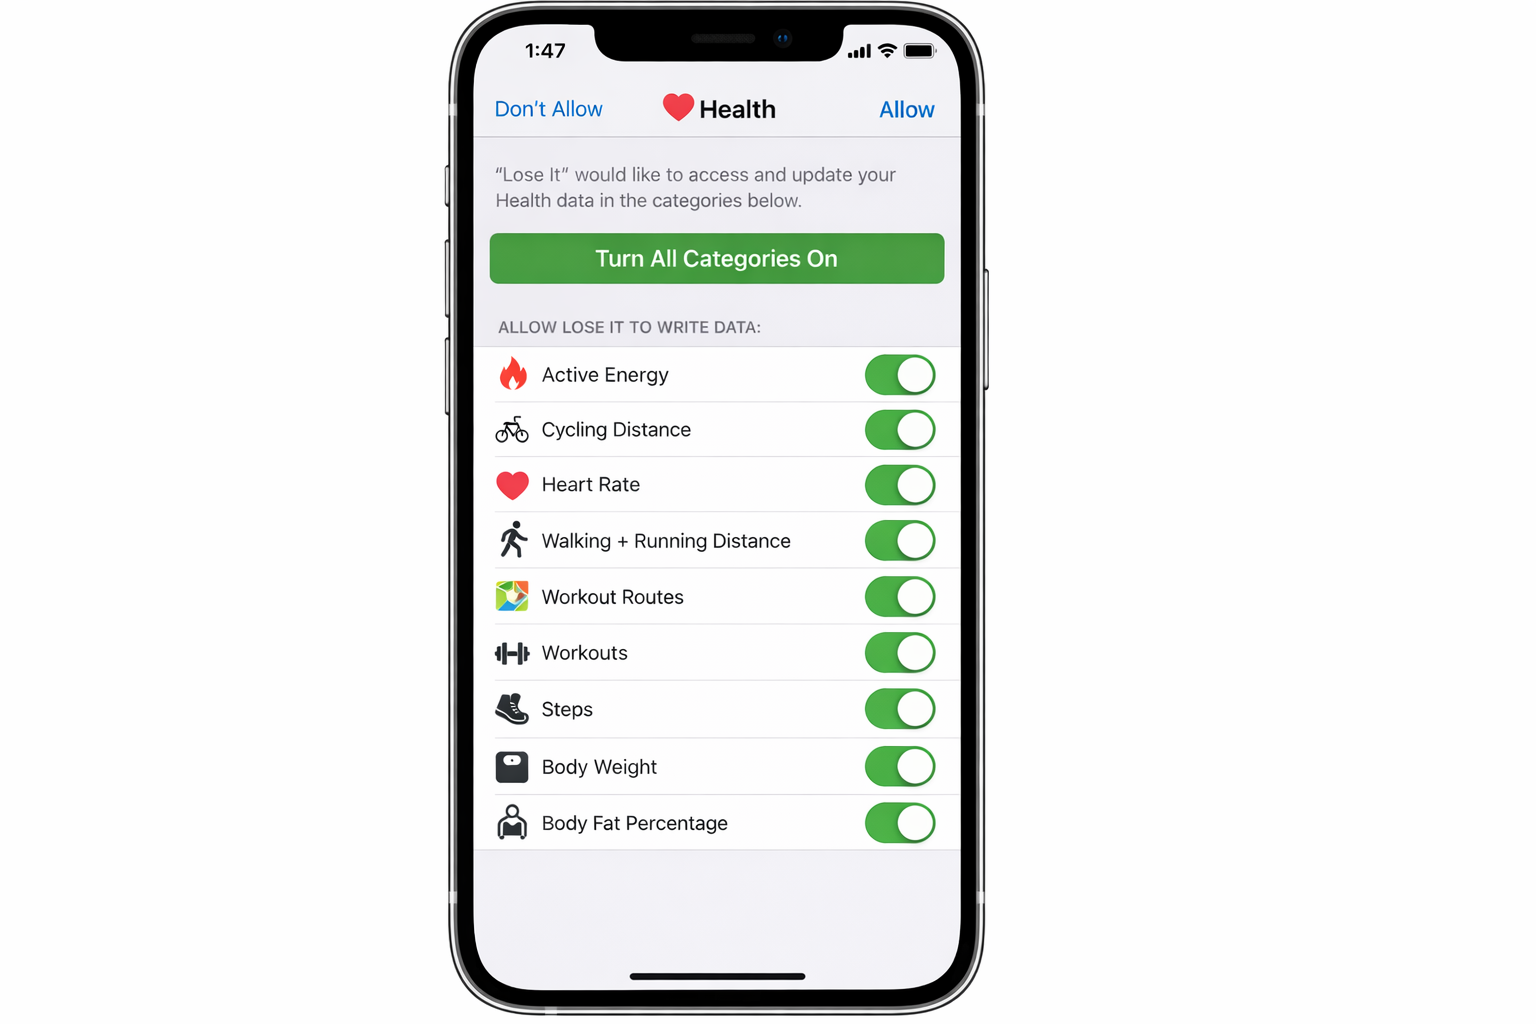
- Done. Lose It will now read your Apple Watch activity data through Health and log it automatically.
Worth Knowing: The Native Fitness App Is Actually Good Now
If you haven’t given Apple’s own Fitness app a real look recently, it’s worth revisiting. It syncs Watch data with zero configuration, tracks your activity rings, logs workouts automatically, and backs everything up via iCloud. For most people who just want steps, calories, and workout history without managing permissions, it’s genuinely the easiest option.
MyFitnessPal and Lose It still have a clear edge for calorie counting and nutrition tracking, which is not what Apple Fitness does. But if your goal is activity tracking rather than diet logging, the native app might be all you need.
Other solid options if you want more than the basics:
- Strava, GPS run/ride tracking with social features and solid Apple Watch integration
- Nike Run Club, great for guided runs, pulls Watch GPS data natively
- WHOOP, if you have a WHOOP strap alongside your Watch, useful for recovery metrics
All of these connect to Apple Health the same way as MyFitnessPal and Lose It. Grant permissions, and you’re done. If you’re looking for more options, check out our picks for the best weight loss apps for Apple Watch.
Fixing Apple Watch Sync Issues
Sync stopped working after a watchOS or iOS update? You’re not alone. This is one of the most common complaints after major updates, and Apple Community and MacRumors forum threads document recurring activity syncing bugs reported by users on watchOS 26.0 and 26.1. Here’s how to fix it, in order of effort.
Quick Fixes (Try These First)
- Restart both devices. Obvious, but it resolves the majority of post-update sync glitches.
- Check software versions. Open the Watch app on your iPhone > General > Software Update. Users on Apple’s support forums report that syncing improved for many people after updating to watchOS 26.2 and later, though some issues can still occur.
- Verify Health permissions. Go to the third-party app’s settings and confirm Apple Health is still connected. Updates occasionally reset permissions.
Deeper Fixes
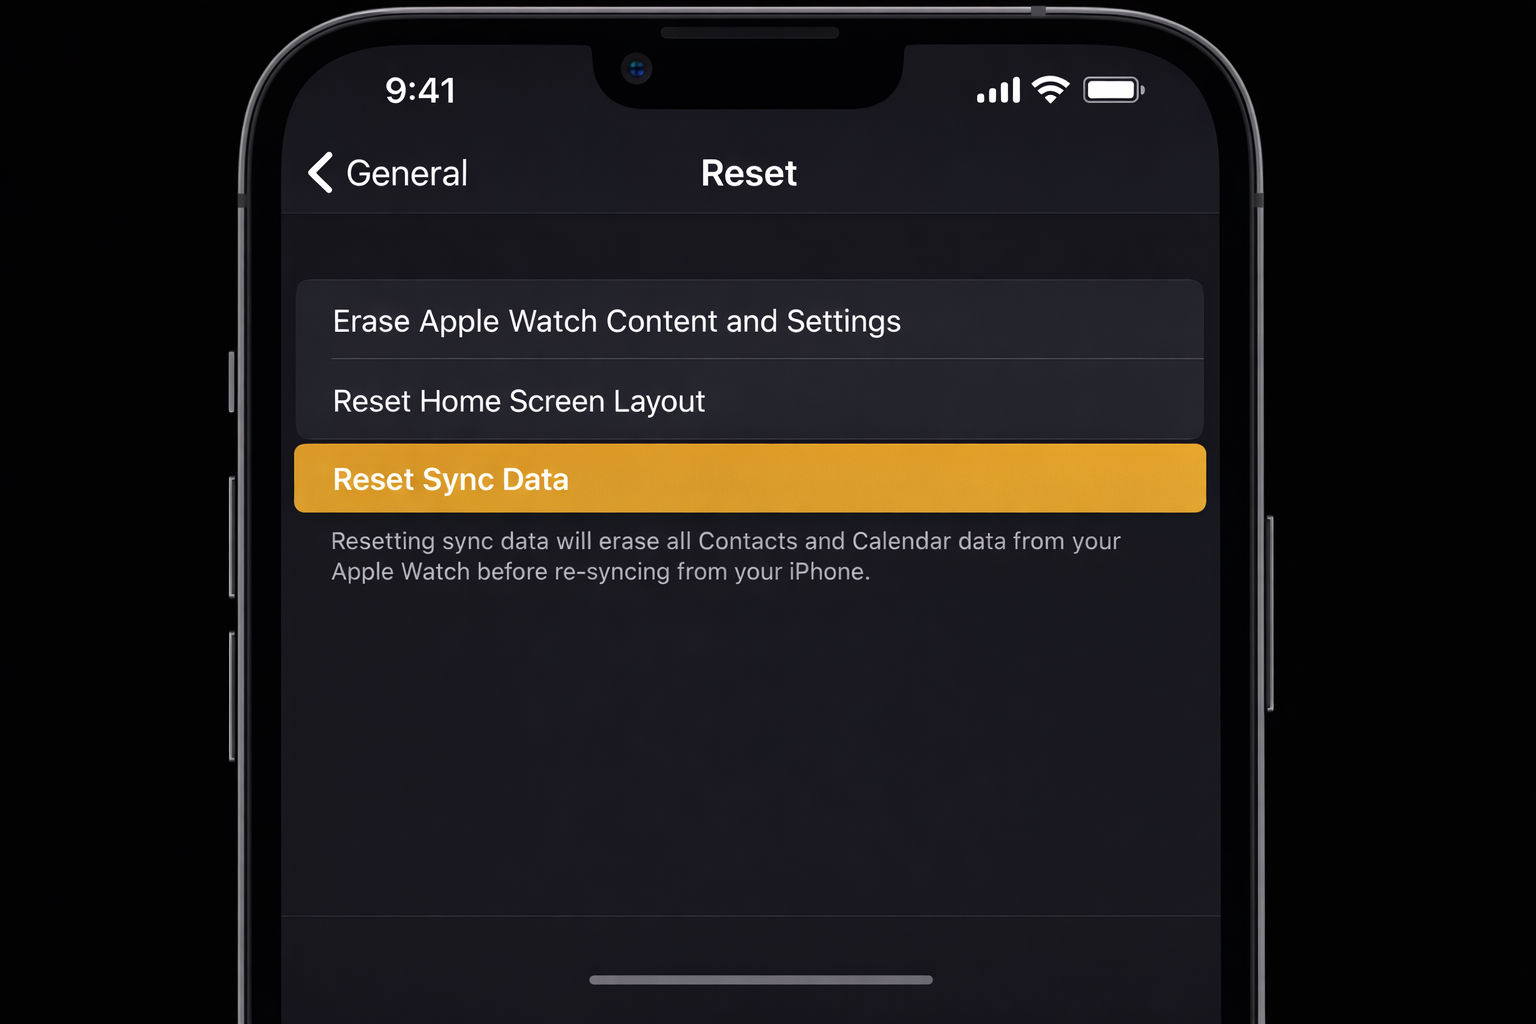
- Reset Sync Data. Open the Watch app > My Watch > General > Reset > Reset Sync Data. This resyncs contacts, calendar, and health data between your Watch and iPhone without deleting anything.
- Toggle iCloud Health sync off and on. Go to Settings > [Your Name] > iCloud > See All, toggle Health off, wait 30 seconds, toggle it back on. This forces a fresh sync.
Nuclear Option
If nothing above works, you’re looking at an unpair and re-pair. Before you do this:
- Export your Health data: Health app > profile icon > Export All Health Data.
- Make sure iCloud backup is current: Settings > [Your Name] > iCloud > iCloud Backup > Back Up Now.
- Unpair your Watch: Watch app > My Watch > tap the i next to your Watch > Unpair Apple Watch. (This creates a Watch backup automatically.)
- Re-pair your Watch and restore from the backup when prompted.
- Re-enable iCloud Health sync as above.
This clears most persistent profile-level bugs. If you’re still stuck after this, contact Apple Support. At that point it’s likely an account-level issue they’ll need to investigate.
Everything Should Be Talking to Each Other Now
Once the Health permissions are set up correctly, your Apple Watch data flows into whatever app you’re using without any ongoing effort. The persistence pays off, as seeing your actual activity numbers in your calorie tracker makes the whole system more useful.
If you run into a sync failure after a future update, start with the quick fixes above before going nuclear. Most of the time, a restart and a software update is all it takes.