
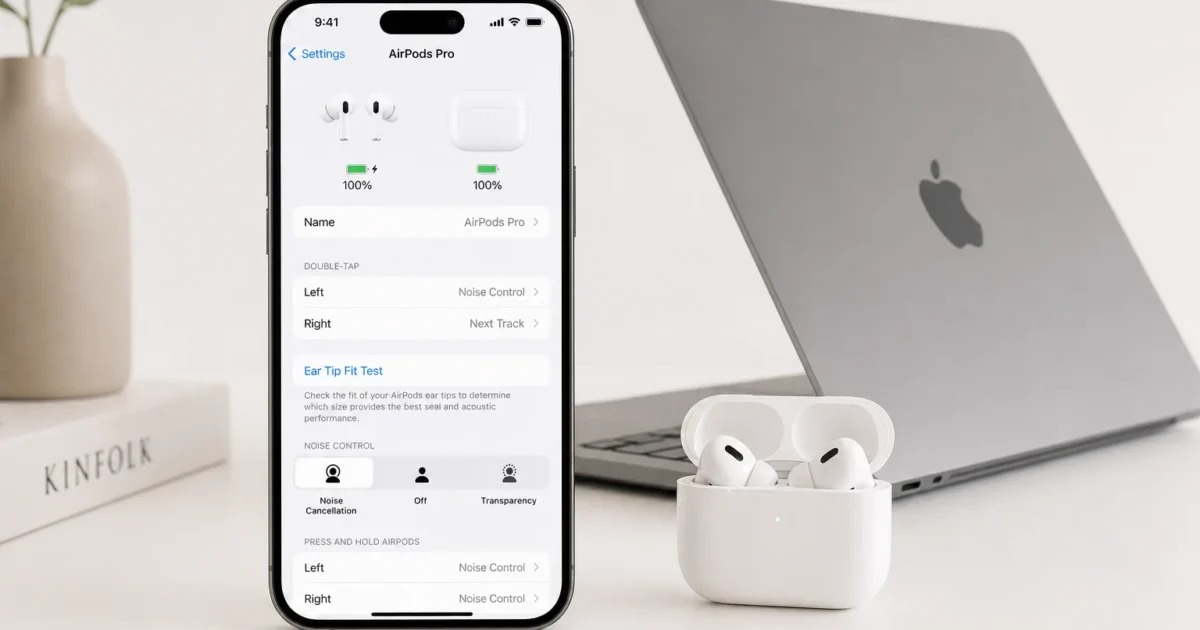
AirPods settings are worth a look if you’ve never opened their dedicated panel. Apple tucks a surprising amount in there, including gesture assignments, listening modes, ear detection, call controls, and model-specific audio options.
The exact choices depend on your AirPods model and firmware. Recent models use stem presses, squeezes, or head gestures, while first- and second-generation AirPods still support customizable double-tap actions.
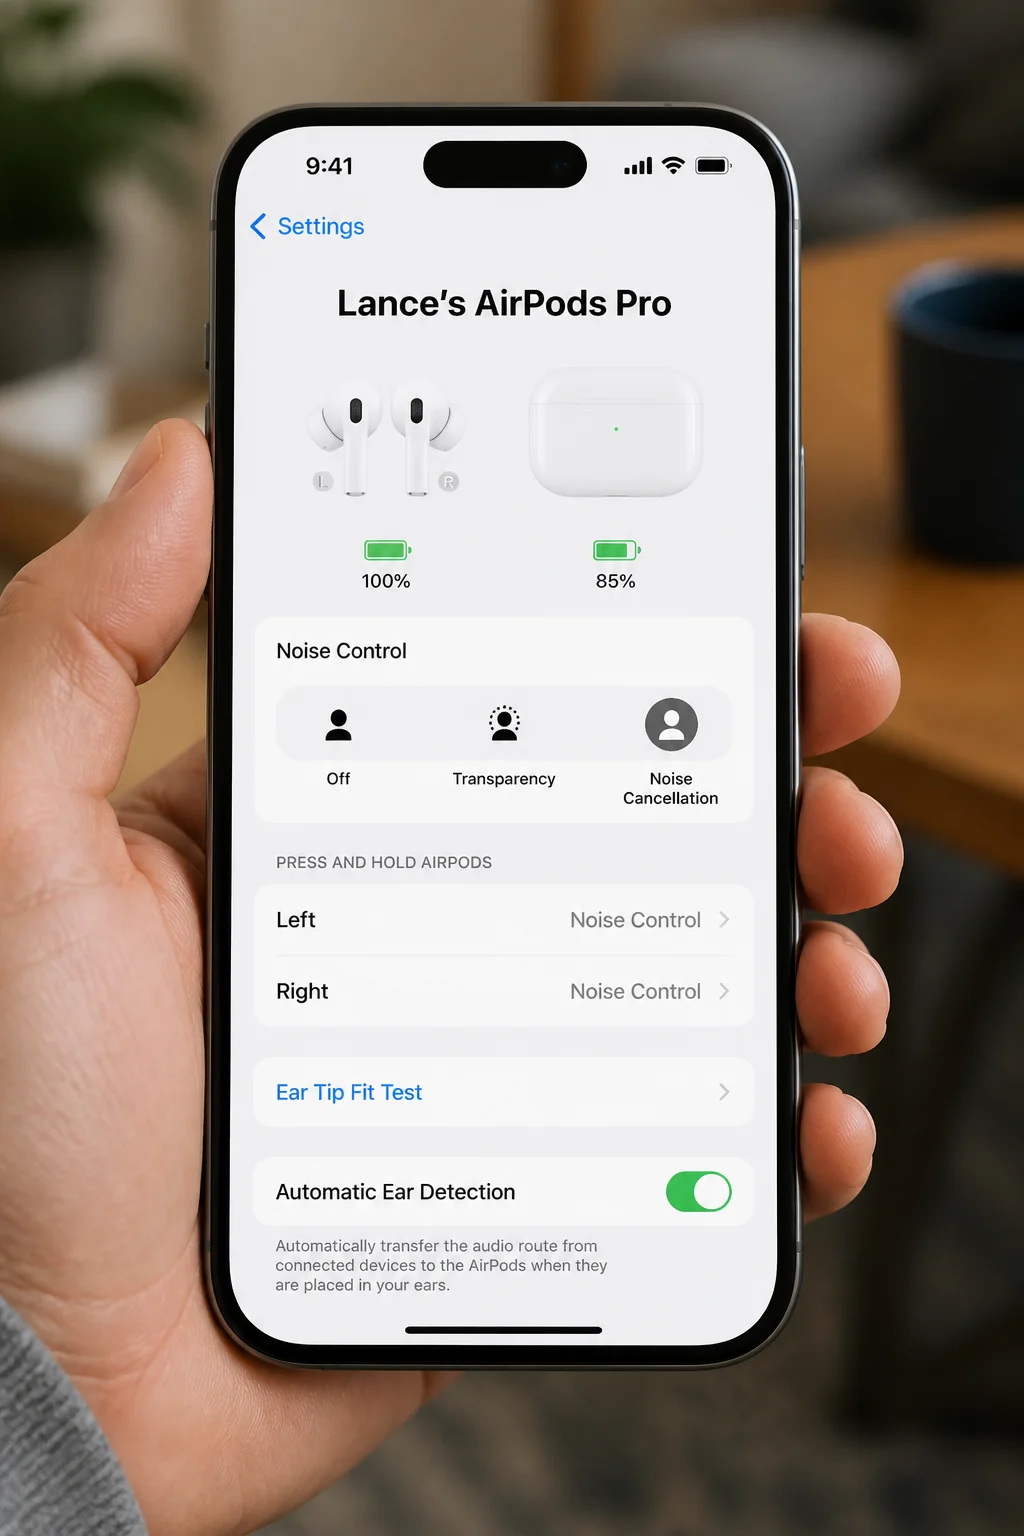
Before You Change Your AirPods Settings
Connect your AirPods to your iPhone or iPad first. They should appear near the top of Settings while they’re connected.
If you don’t see them there, use Settings > Bluetooth, then tap the Information button beside their name. Both routes open the same device settings on current software.
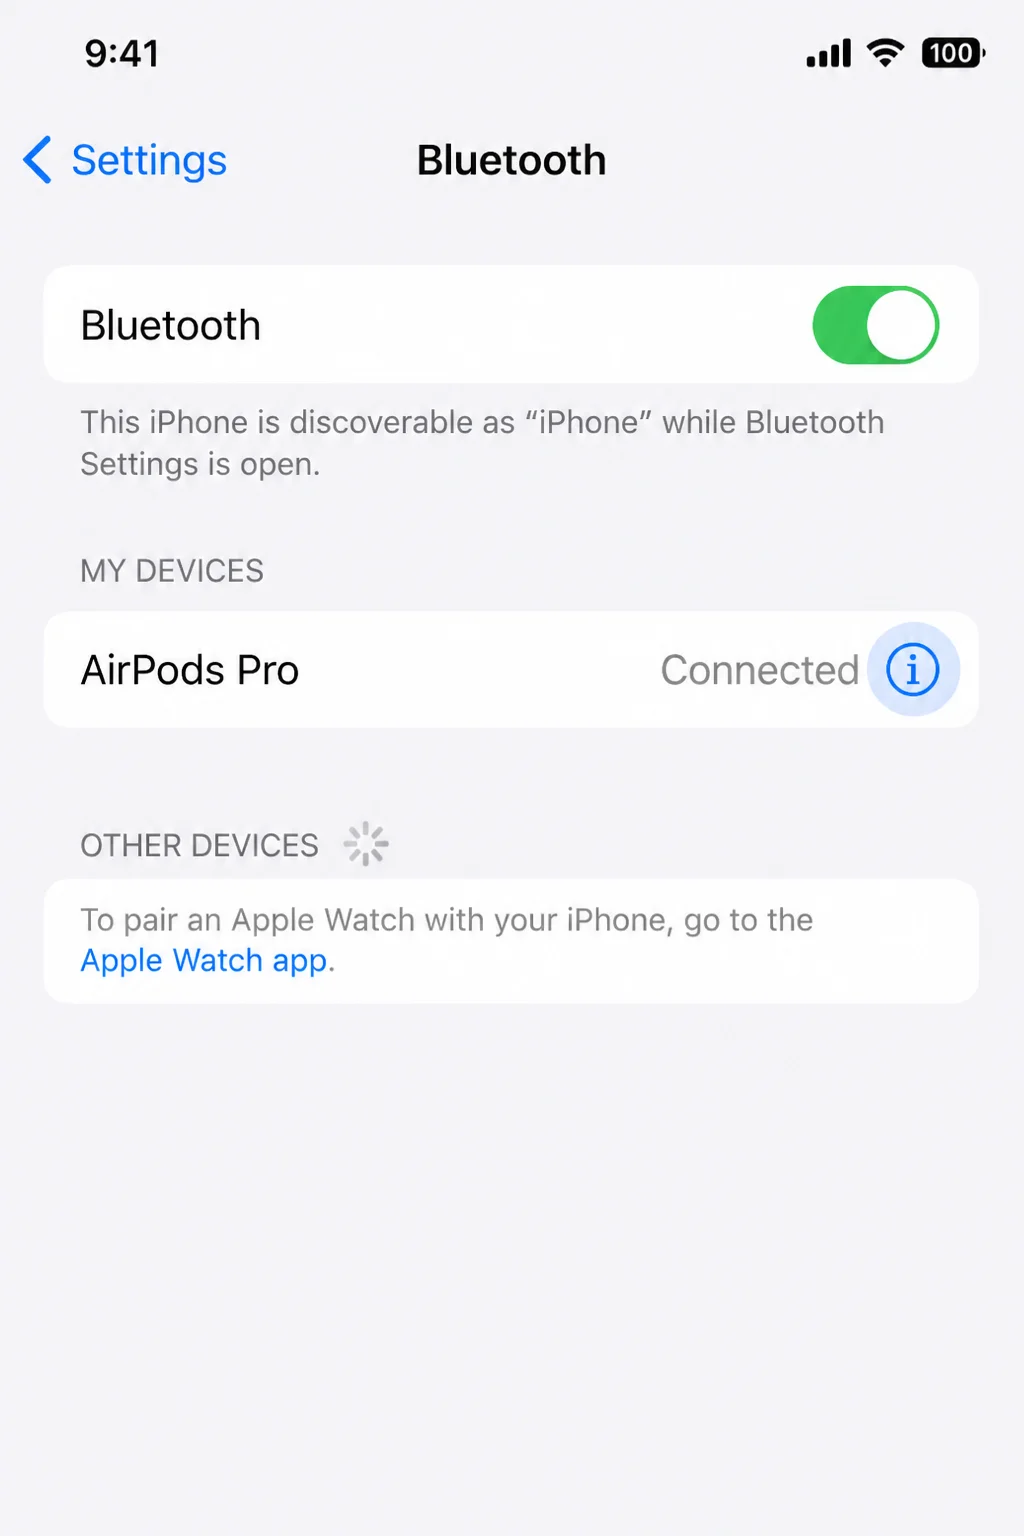
Keep your iPhone or iPad updated through Settings > General > Software Update. AirPods firmware installs automatically in the background when the earbuds are charging in their case and near a paired device.
Rename Your AirPods
The default possessive name gets old quickly, especially when several people in your home own AirPods. A recognizable name also makes them easier to spot in Bluetooth menus and Find My.
- Connect your AirPods and open Settings.
- Tap your AirPods name near the top. You can also open Settings > Bluetooth and tap the Information button beside them.
- Tap Name.
- Enter the new name, then tap Done.
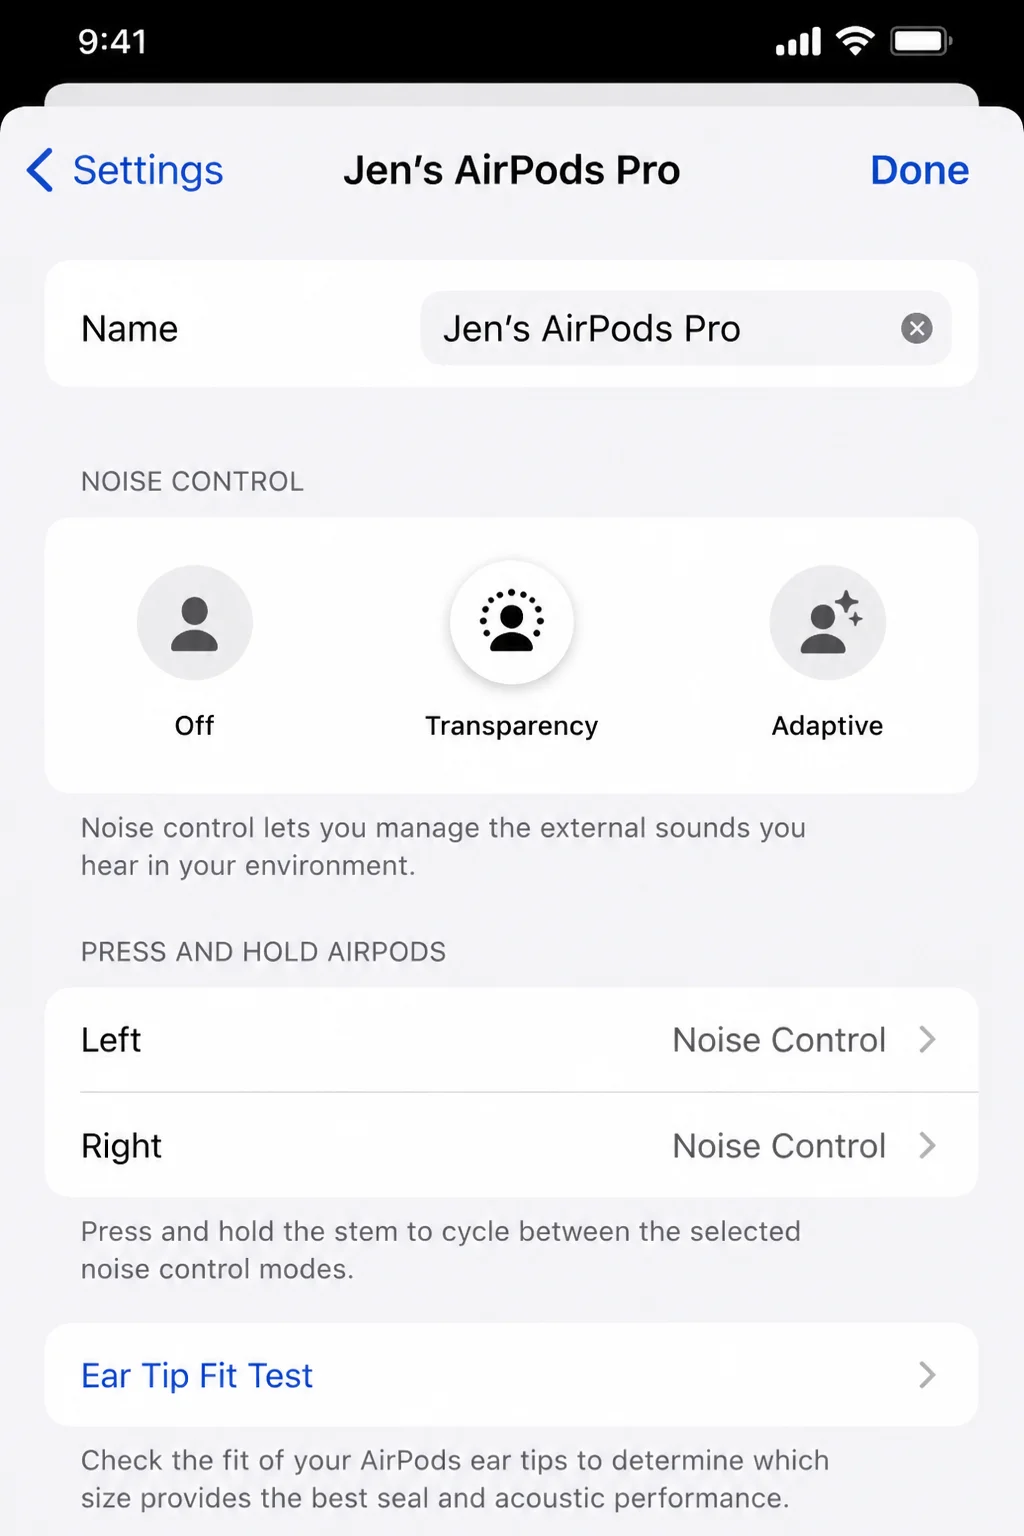
The new name should sync across devices signed in to your Apple Account. If it doesn’t appear immediately on your Mac, reconnect the AirPods.
Change What Your AirPods Controls Do
Current AirPods don’t share one universal control system. Your settings may include Press and Hold AirPods, Call Controls, Head Gestures, or double-tap assignments, depending on the model.
- Put your AirPods in your ears and confirm they’re connected.
- Open Settings, then tap your AirPods name.
- Scroll to the control section.
- Select the left or right AirPod when that choice appears.
- Choose the action you want assigned.
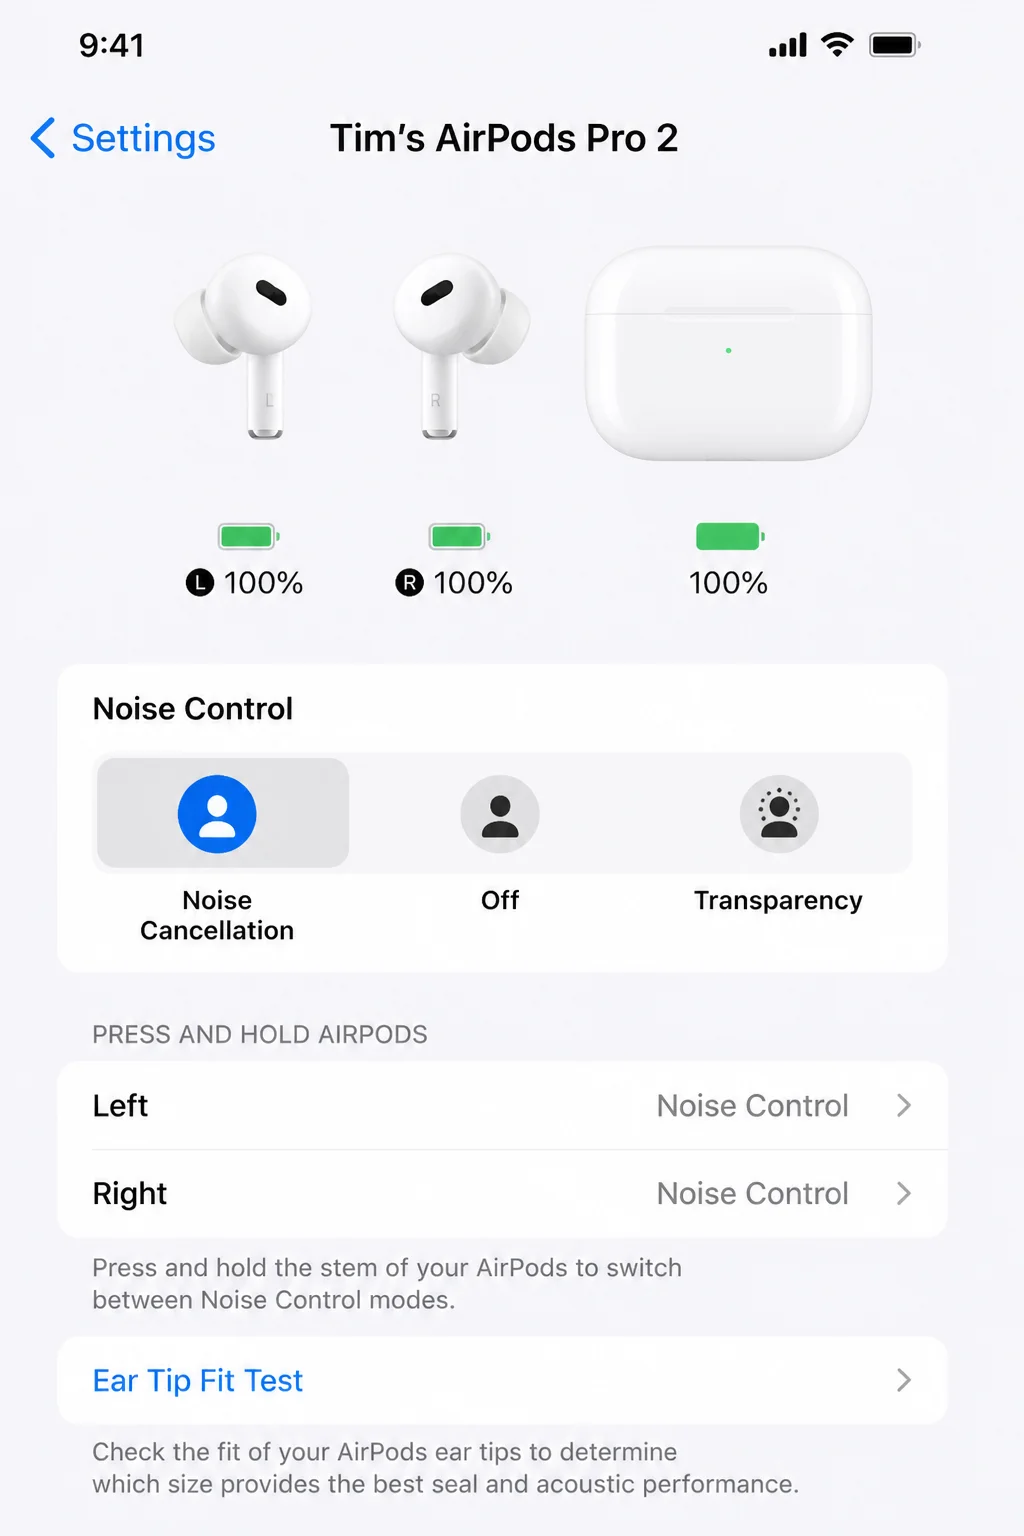
Customize Press-and-Hold Controls
On supported stem-based AirPods, pressing and holding can activate Siri or switch between available listening modes. Those modes can include Noise Cancellation, Transparency, and Adaptive Audio, depending on your hardware.
Assigning different actions to each side works nicely. For example, you can keep Siri on one AirPod and use the other to move between listening modes.
Change Double-Tap Actions on Older AirPods
First- and second-generation AirPods use double-tap controls. You can assign actions such as Siri, play/pause, next track, or previous track to each earbud.
Open the AirPods settings panel, choose the left or right AirPod under the double-tap section, and select an action. Newer AirPods won’t show this section because their stems use press-based controls.
Set Up Head Gestures
Supported AirPods can use head movements for calls and notification interactions. Open the AirPods settings panel and select Head Gestures if that option appears.
Follow the setup prompts to assign nodding and shaking actions. It’s a clever feature when your hands are occupied, though I’d leave it off if you tend to move your head while talking.
Adjust Adaptive Audio and Other Sound Options
Supported AirPods models include additional settings for Adaptive Audio, audio routing, and hearing-related controls. Open Settings > your AirPods name, then check the available audio sections.
Adaptive Audio blends noise control with awareness of your surroundings. It actually works well in places where full Noise Cancellation feels too isolating, such as an office or a busy street.
Some 2026 software and firmware releases also include newer audio adjustments for supported H2-based AirPods. If an equalizer appears under an audio or routing section, you can use it to tune the sound. The label and placement can vary with the installed software, and this option isn’t available on every model.
Turn Automatic Ear Detection On or Off
Automatic Ear Detection pauses playback when you remove an AirPod and resumes it when you put the earbud back. It also routes audio based on whether you’re wearing the AirPods.
To change it:
- Open Settings and tap your AirPods name.
- Scroll down to Automatic Ear Detection.
- Turn the switch on or off.
Leaving it enabled is the better choice for daily use. Turn it off if the sensors keep pausing your audio or if you want sound routed to the AirPods whenever they’re connected, even when they aren’t in your ears.
Change Call Audio While You’re Using AirPods
During a call, open Control Center and select the current microphone mode. Voice Isolation can reduce background noise when supported by your device, software, and calling app.
This setting applies during the call rather than through the main AirPods panel. Apple spreads related controls across two places, which isn’t its cleanest bit of interface design.
What to Do When an AirPods Setting Is Missing
A missing option usually points to compatibility, software, or connection state rather than a faulty pair of AirPods.
Try these fixes in order:
- Put both AirPods in your ears and confirm they’re connected.
- Open Settings > General > Software Update and install any available update.
- Place the AirPods in their case, connect the case to power, and leave it near your paired iPhone or iPad so firmware can install.
- Return to Settings > Bluetooth and tap the Information button beside the AirPods.
- Check whether your AirPods model supports the missing feature.
Beta firmware may expose upcoming features through Settings > Bluetooth > Information next to your AirPods > AirPods Beta Updates. I’d skip beta firmware unless you’re comfortable with bugs; AirPods don’t provide the kind of easy rollback you get with a typical app.
If your AirPods won’t connect to a Mac, follow these AirPods connection fixes. Connection problems can prevent the settings panel from showing the current name and options correctly.
AirPods Controls Are Better Than Their Default Setup
The default controls cover basic listening, but a few minutes in the AirPods settings panel can make them much smoother to use. Separate left and right actions are especially useful, and Adaptive Audio is a gem on supported models.
I’d recommend bookmarking the settings path: Settings > your AirPods name, or Settings > Bluetooth > Information. For more ideas, these AirPods tips and tricks cover other useful features. AirPods Max owners should also consider the controls and pricing differences covered in our AirPods Max review. You can also learn more about AirPods on Apple’s official support page or check out using controls and gestures with your AirPods for more information.