
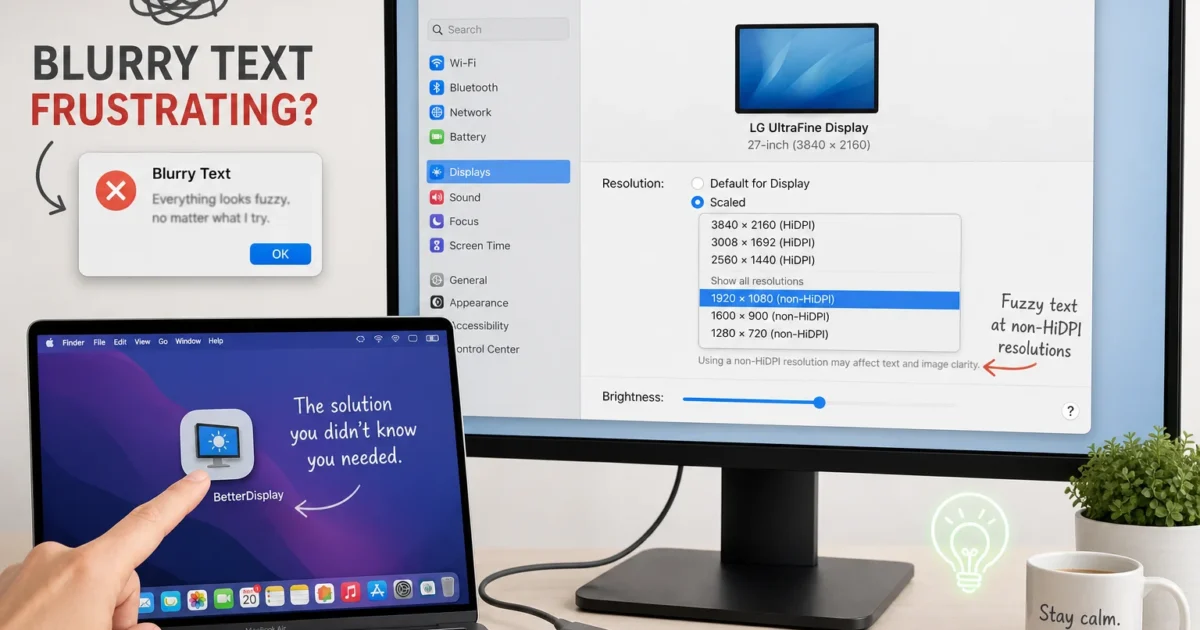
A blurry 4K screen is frustrating, especially when the monitor looked fine with your previous Mac. If text looks fuzzy or a useful HiDPI resolution vanished after moving to an M4 or M5 Mac, the monitor may still be working correctly.
The cause is often the scaling modes macOS offers for that display and connection. Start with Apple’s controls. Try BetterDisplay if macOS leaves you choosing between huge text and tiny text.
Quick Diagnosis
Before installing another display utility, check whether scaling or the connection is causing the problem.
- Confirm that macOS detects the monitor. Open Apple menu > System Settings > Displays. You should see a card for the external monitor.
- Select the external monitor. macOS keeps separate settings for each display. It’s easy to change the MacBook screen by mistake.
- Check the current resolution. Native
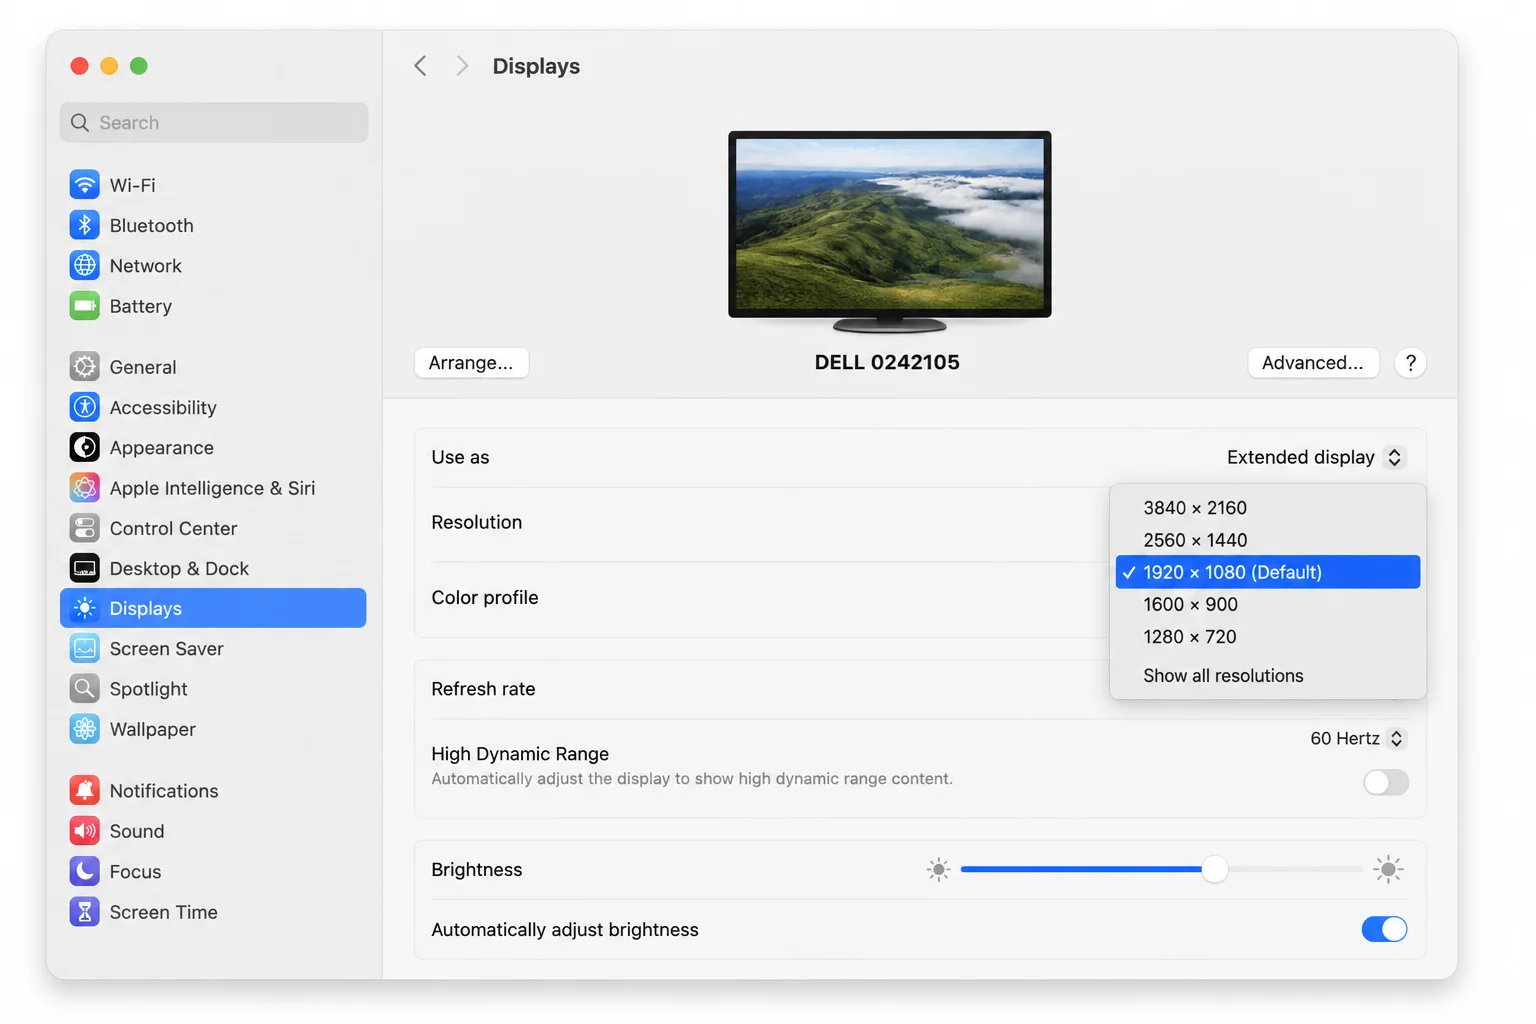
3840 × 2160gives you the most space, but text is usually tiny on a 27-inch 4K monitor. A1920 × 1080HiDPI mode is sharp, though the interface may look too large.
- Reveal hidden modes. Turn on Show all resolutions if the switch appears.
- Check the connection type. Direct HDMI, DisplayPort, Thunderbolt, and USB-C video don’t need DisplayLink Manager. Install it only for a dock or adapter that explicitly supports DisplayLink.
- Test one direct connection. Disconnect the dock and attach the monitor directly to your Mac when possible. This removes dock bandwidth and DisplayLink software from the test.
- Restart after reconnecting. Shut down the monitor and Mac. Reconnect the cable, turn on the monitor, and start the Mac.
How HiDPI differs from an ordinary low-resolution mode
HiDPI lets macOS draw text, buttons, and icons with extra physical pixels. A setting that “looks like 2560 × 1440” can use a much higher drawing resolution. macOS then scales the image to the panel. Curves and fine lines look smoother because the system has more pixel detail.
A low-resolution mode sends a less detailed image and stretches it across the screen. Objects stay about the same size, but text often looks soft or jagged. You may remember this blur from running a Windows PC below an LCD’s native resolution.
macOS doesn’t label every suitable choice as “HiDPI.” Compare small text at about the same visible size. Clean edges usually point to high-resolution scaling. Stretched edges suggest a low-resolution mode. BetterDisplay labels HiDPI or High Resolution modes more clearly.
What may be happening on M4 and M5 Macs
Some third-party reports point to a different display-pipe or framebuffer budget on certain M4 and M5 setups. In these cases, macOS may omit demanding 4K HiDPI modes that appeared on an Intel or M1-M3 Mac.
Apple hasn’t confirmed a hardware limit or firmware defect. Apple’s documentation says scaling choices can depend on the display and available system resources. The framebuffer theory fits some reports, but it remains a third-party explanation.
The problem doesn’t affect every M4 or M5 Mac with a 4K screen. Monitor timing data, connection type, refresh rate, other displays, and the macOS version can change the available modes. That’s why the direct-connection test matters.
Symptoms and Fixes
| Symptom | Likely cause | Best first fix |
|---|---|---|
| Text looks fuzzy at a readable size | Low-resolution output is active | Select a scaled high-resolution mode |
3840 × 2160 looks sharp but tiny | Native pixels are shown without interface enlargement | Choose a HiDPI-scaled resolution |
1920 × 1080 is sharp but too large | The 2× HiDPI workspace is too small | Try a denser scaled mode |
| A preferred mode disappeared after changing Macs | macOS exposes a different set of scaling modes | Enable Show all resolutions |
| The monitor is absent from Displays | Cable, input, dock, or detection failure | Test a direct connection and detect displays |
| Some choices appear only at 60Hz | Connection bandwidth or display timing limit | Lower the refresh rate temporarily |
| DisplayLink screen remains blank | Manager, permission, or driver problem | Update DisplayLink Manager and check permission |
| BetterDisplay mode flickers or fails | Unsupported timing or bandwidth combination | Revert to the last stable mode |
Common M4/M5 Mac HiDPI Issues and Solutions
These fixes move from safe built-in changes to third-party overrides. Stop when text is sharp, the workspace feels comfortable, and the display wakes from sleep correctly.
Problem 1: Text Looks Blurry or Fuzzy
Symptoms:
- Text has soft edges even though the monitor reports a 4K signal.
- Browser text looks worse than it did on an older Mac.
- A readable resolution is available, but it doesn’t look Retina-sharp.
- The picture fills the screen and remains stable.
Why it happens: Your Mac may send a low-resolution image instead of using a HiDPI mode. macOS may also hide the preferred high-resolution scale for this Mac, monitor, and connection.
Fix 1: Choose a built-in scaled resolution:
- Open Apple menu > System Settings > Displays.
- Click the external 4K monitor.
- Find Resolution.
- Select one of the scaled thumbnails or resolution values.
- Wait several seconds for the display to settle.
- Open a page with small text and compare the edges.
If only a few choices appear, turn on Show all resolutions. In current macOS releases, this control appears in the selected monitor’s settings. It’s usually near or below the resolution choices. Its exact position depends on the Mac, monitor, and macOS release.
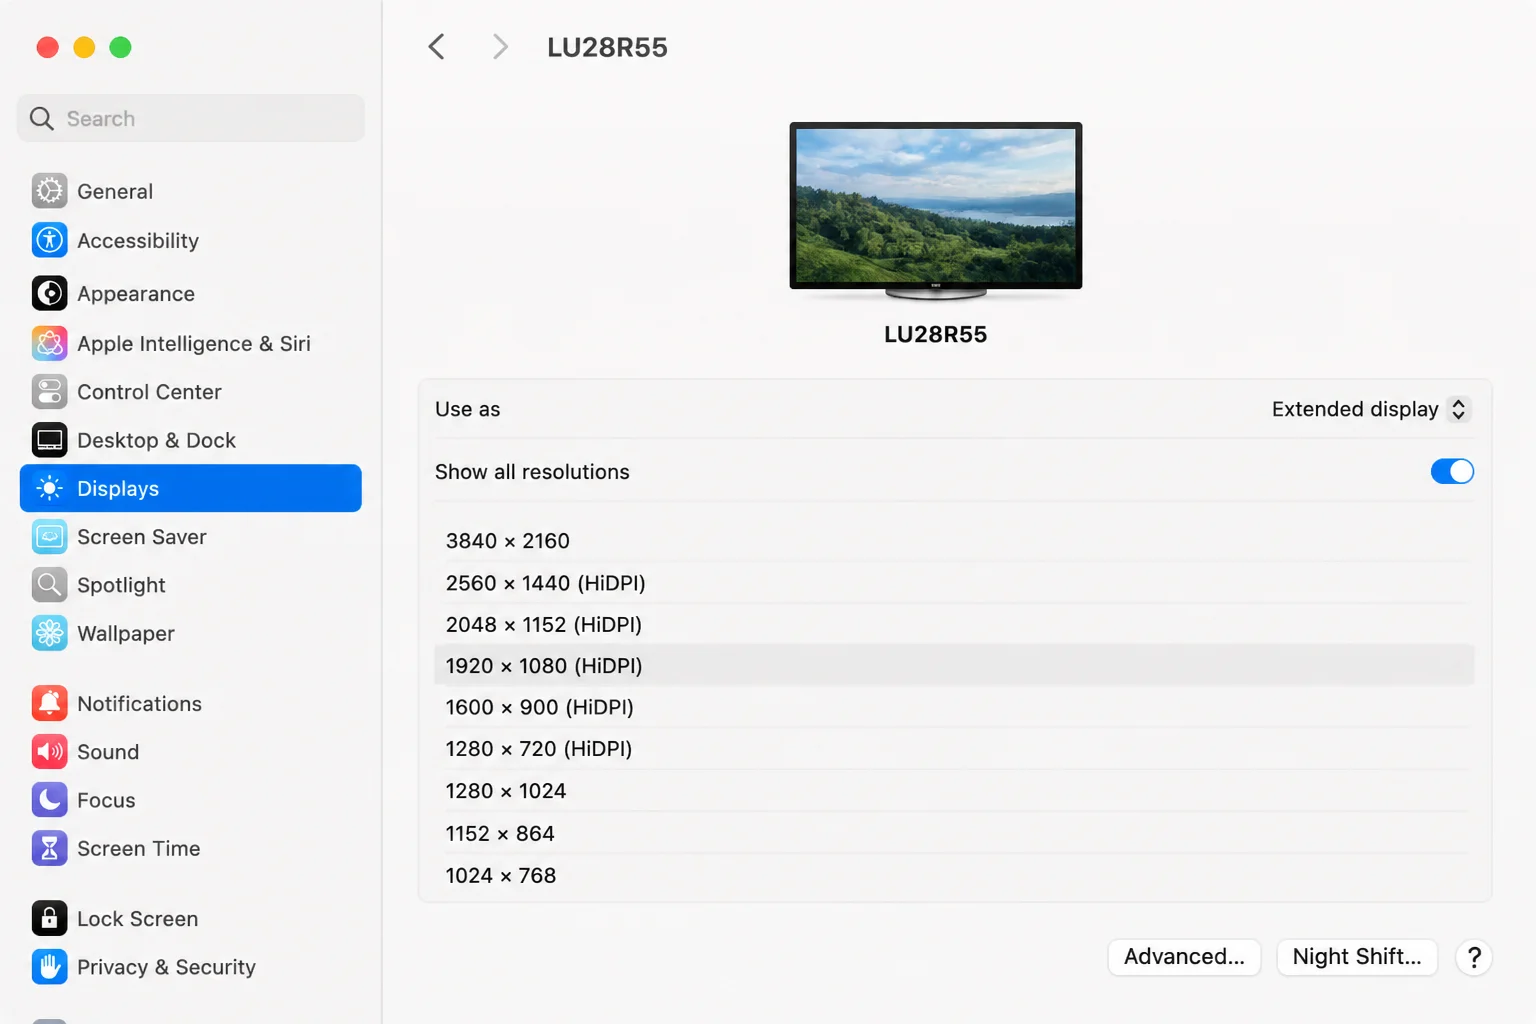
Verification: Small black text on a white background should have clean edges. The monitor may report a 3840-by-2160 input while macOS uses 4K-based HiDPI scaling. Monitor menus describe this in different ways.
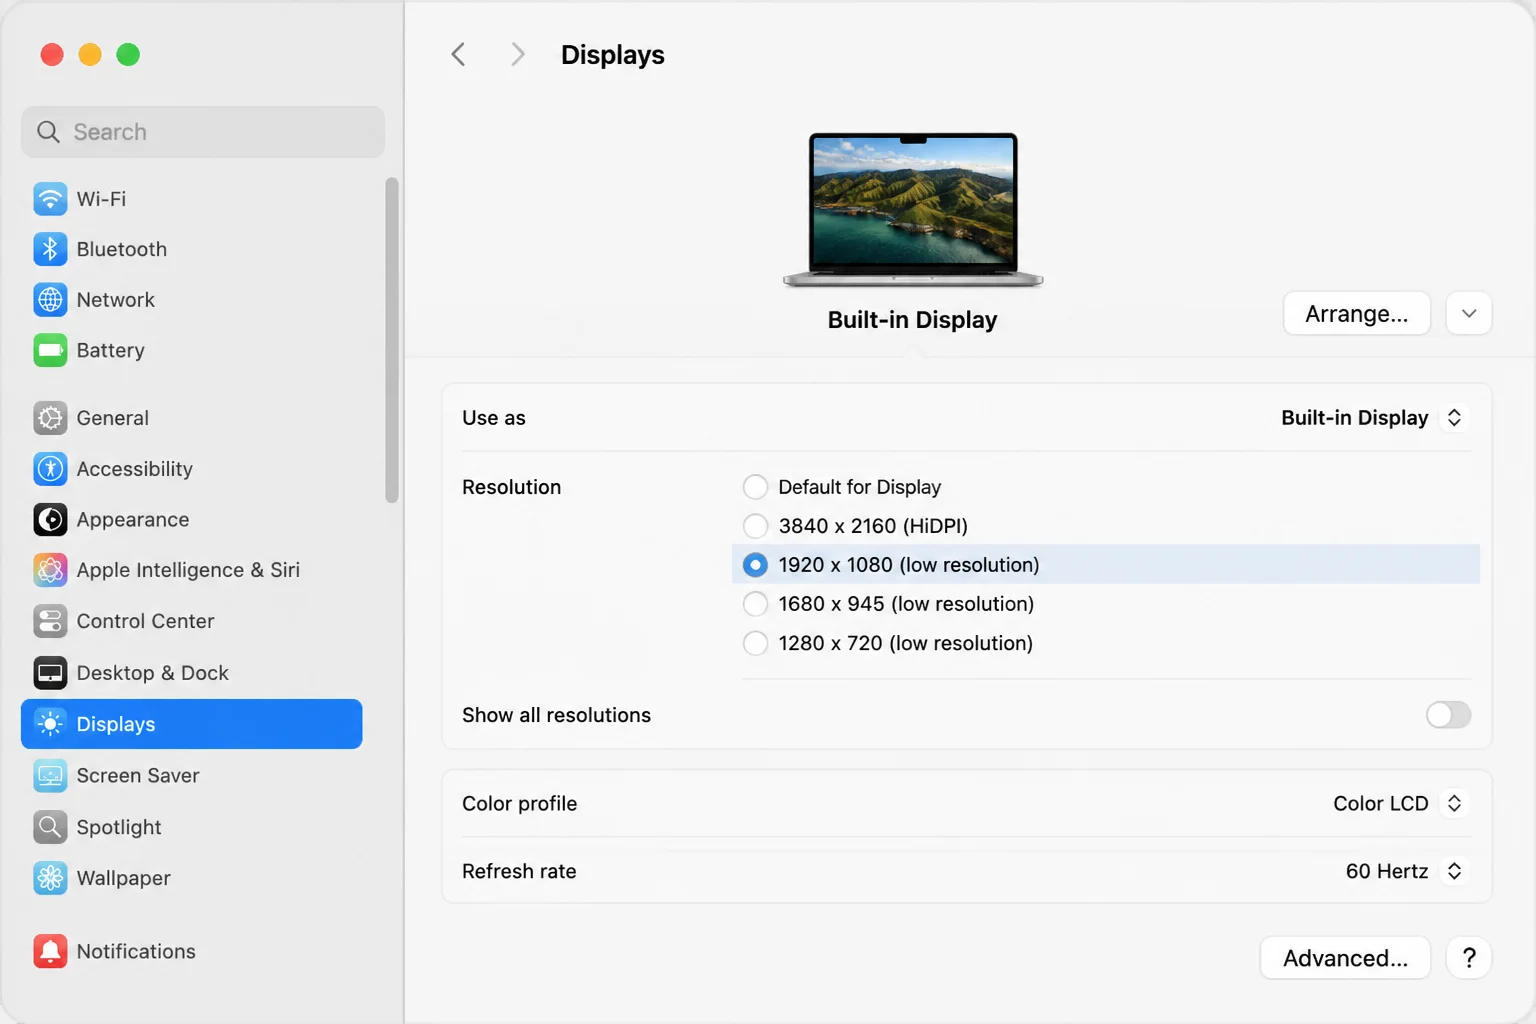
Avoid entries marked Low Resolution unless an old app or capture device needs one. They can help with compatibility, but they’re poor choices for daily reading.
Problem 2: The Preferred HiDPI Resolution Is Missing
Symptoms:
- A mode that worked on an Intel or M1-M3 Mac is absent.
- The monitor offers
1920 × 1080and native3840 × 2160, but no comfortable choice between them. - A 2560-by-1440-like workspace is missing.
- Show all resolutions doesn’t reveal a suitable option.
Why it happens: macOS builds its mode list from the Mac, monitor, connection, timing data, and available display resources. Some M4/M5 combinations seem to omit HiDPI choices that older Macs offered.
Fix 2: Simplify the display configuration:
- Disconnect your other external displays for now.
- Bypass the dock and connect the 4K monitor directly to the Mac.
- Use a port that supports the target resolution and refresh rate.
- Open Apple menu > System Settings > Displays.
- Select the monitor and turn on Show all resolutions.
- Check whether the missing mode has returned.
If the choice returns after you disconnect another screen, you’ve probably reached a display or resource limit. Check Apple’s display support specifications for your exact Mac model. The chip family alone doesn’t show the full limit.
Verification: Reconnect each display one at a time. Check that the HiDPI mode remains available and stable after each connection.
Problem 3: Native 4K Is Sharp but Everything Is Tiny
Symptoms:
3840 × 2160provides plenty of workspace.- Menus, labels, and browser text are difficult to read.
- The image is sharp, but larger text inside apps doesn’t fix the whole interface.
Why it happens: Native 4K uses all 3840 by 2160 panel pixels without enlarging the macOS interface. On a typical 24- or 27-inch monitor, controls look uncomfortably small at normal desk distance.
Fix 3: Select a “looks like” HiDPI mode:
- Open Apple menu > System Settings > Displays.
- Select the external monitor.
- Choose a scaled setting between the largest-text option and native 4K.
- Test your usual apps from your normal sitting position.
- Keep the least dense setting that provides enough space.
A 2560-by-1440-like HiDPI mode often suits a 27-inch 4K display. It gives you more room than 1920 by 1080 while keeping text readable. This mode needs more scaling work and won’t appear on every M4/M5 setup. A 2304-by-1296-like mode is a comfortable fallback when available.
Don’t judge the setting from the Displays panel alone. Open your browser, email app, and a document you use often. Ten minutes of normal work tells you more than the resolution number.
Verification: Menus should be readable without leaning toward the screen. You should also have more space than the 1920-by-1080-like mode provides.
Problem 4: The Only Sharp Choice Makes Everything Too Large
Symptoms:
- A 1920-by-1080-like setting looks crisp.
- Windows, icons, and menu text use too much space.
- The next choice looks blurry or jumps straight to native 4K.
Why it happens: A 4K panel maps cleanly to a 1920-by-1080-like 2× HiDPI workspace. Every interface point uses four physical pixels. Text looks clean, but the desktop has the working space of a 1080p screen.
Fix 4: Use BetterDisplay for additional scaling control:
BetterDisplay is the best-documented third-party workaround in the cited sources. Its free tier includes basic HiDPI scaling and resolution overrides. BetterDisplay Pro adds flexible scaling, virtual displays, Extended Display Identification Data (EDID) tools, and more controls. It offers a 14-day Pro trial, but check the official site for current terms.
- Download BetterDisplay from the official BetterDisplay website.
- Install and open the app.
- Click the BetterDisplay icon in the macOS menu bar.
- Select your external 4K monitor.
- Open its resolution controls.
- Find HiDPI, High Resolution, or a similar high-resolution choice.
- Select a denser HiDPI scale.
- Test text, motion, wake from sleep, and full-screen video.
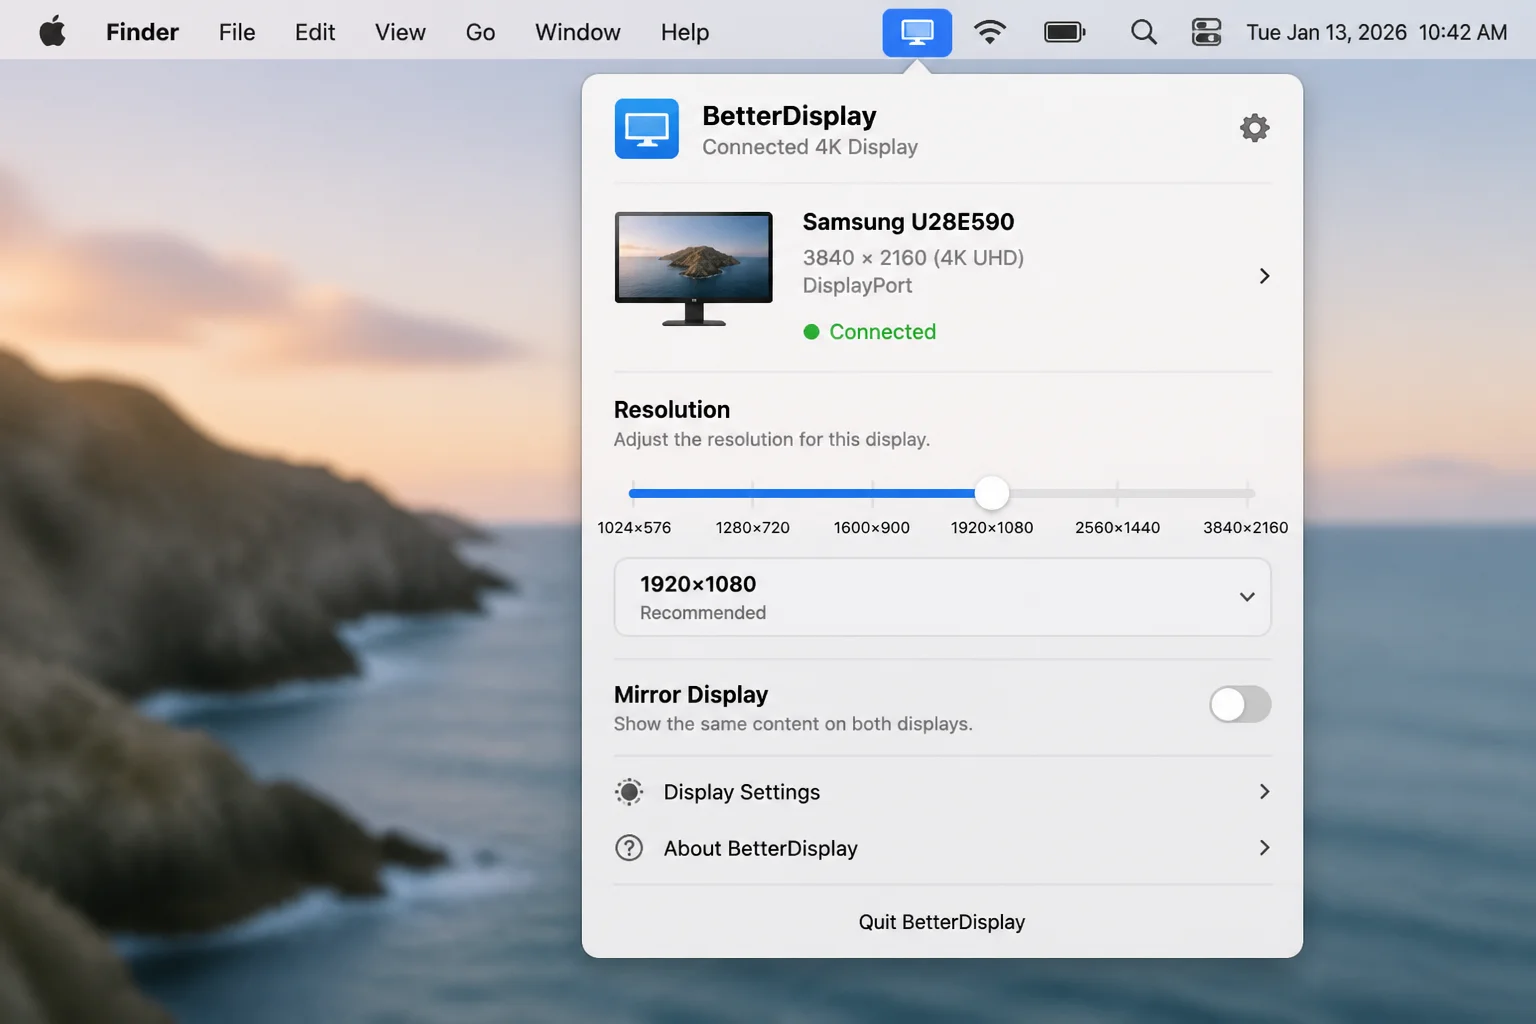
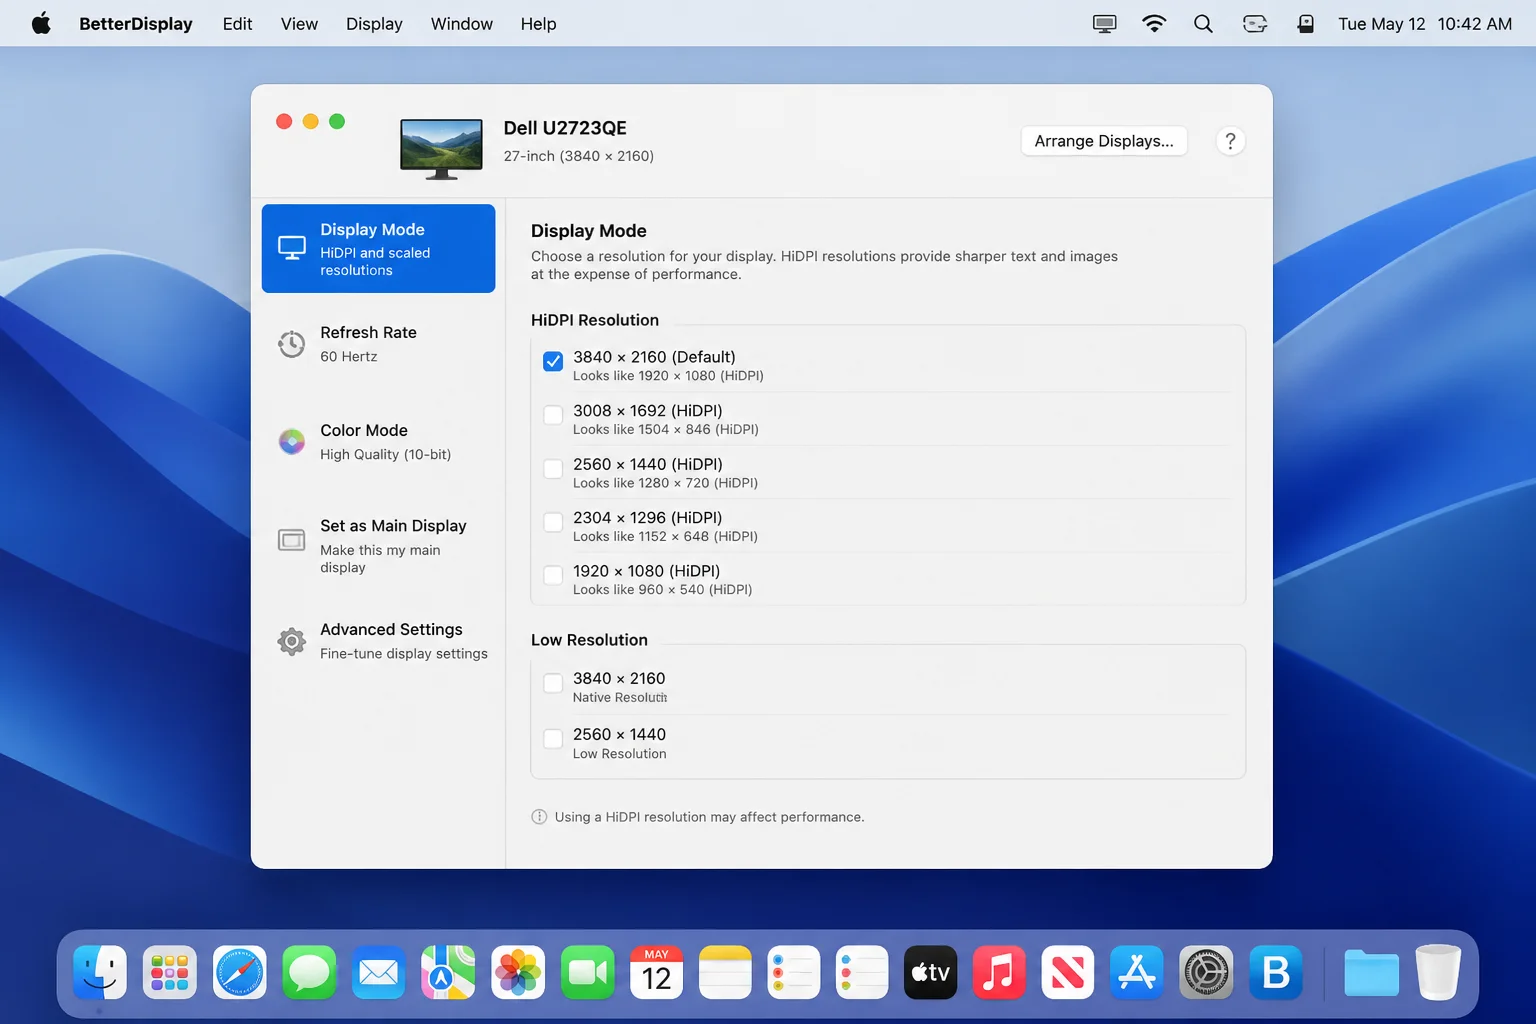
BetterDisplay can expose a useful missing mode on many setups. It can’t guarantee every resolution. The Mac, monitor, cable, refresh rate, and other displays still set hard limits.
I’d start with the basic HiDPI choices. Virtual displays, custom timings, and EDID overrides have valid uses. They also add more variables when you’re fixing one blurry monitor.
Verification: Open Apple menu > System Settings > Displays after selecting the mode. Check that text is sharp, the picture is stable, and the size feels right. Restart once and confirm that the setting returns.
Tip: Change one option at a time. If a mode causes a blank screen, wait for macOS or BetterDisplay to restore the old setting. Don’t enable several experimental overrides at once.
Problem 5: A Different Cable Does Not Restore the Missing Mode
Symptoms:
- The screen already works reliably at 4K.
- Replacing HDMI or USB-C cables doesn’t add the preferred scale.
- Several ports show the same resolution list.
Why it happens: A cable can affect detection, stability, color depth, refresh rate, and bandwidth. It doesn’t always change which HiDPI framebuffers macOS creates.
Fix 5: Test bandwidth without assuming the cable is the cure:
- Confirm that the cable supports 4K at your target refresh rate.
- Connect the display directly instead of using a hub or dock.
- Select the monitor’s correct HDMI or DisplayPort input.
- Open Apple menu > System Settings > Displays.
- Change Refresh Rate from a higher value to 60Hz.
- Recheck Show all resolutions.
- Try 30Hz only as a short diagnostic test.
A lower refresh rate can expose more choices when a port, adapter, dock, or monitor input has limited bandwidth. The trade-off is less fluid motion. At 30Hz, the pointer and windows feel sluggish, so I wouldn’t use it for regular desktop work.
Buy a new cable when the screen flickers, disconnects, can’t reach 4K at 60Hz, or works through only one input. If the current connection is stable at the required resolution and refresh rate, another cable probably won’t restore an omitted HiDPI mode.
Verification: Move windows around and play video for several minutes. Check that the image stays stable and the scaling mode survives sleep and wake.
Problem 6: The Monitor Is Not Detected at All
Symptoms:
- The external screen is black or displays “No Signal.”
- No external-monitor card appears under Displays.
- Resolution controls aren’t available.
Why it happens: This is a connection or detection failure. Common causes include the wrong input, a loose cable, a bad adapter, dock trouble, or a failed connection handshake.
If you’ve been staring at a black panel while changing resolutions, pause there. macOS can’t offer HiDPI modes until it detects the screen.
Fix 6: Restore the display connection:
- Turn on the monitor and choose the correct physical input.
- Disconnect and reconnect the cable at both ends.
- Remove the dock or adapter if you can connect directly.
- Try another known-good video port on the Mac.
- Open Apple menu > System Settings > Displays.
- Hold the
Optionkey and click Detect Displays if the button appears. - Restart the Mac and monitor.
Apple lists more tests in its guide for external displays connected to a Mac.
Verification: The external-monitor card should appear under System Settings > Displays. Once it appears, return to the resolution checks.
Problem 7: A DisplayLink Monitor Is Blank or Fails After Sleep
Symptoms:
- A monitor attached through a DisplayLink dock remains black.
- The screen works only after you reopen DisplayLink Manager.
- The display fails when the Mac wakes from sleep.
- A direct monitor connection works, but one dock output doesn’t.
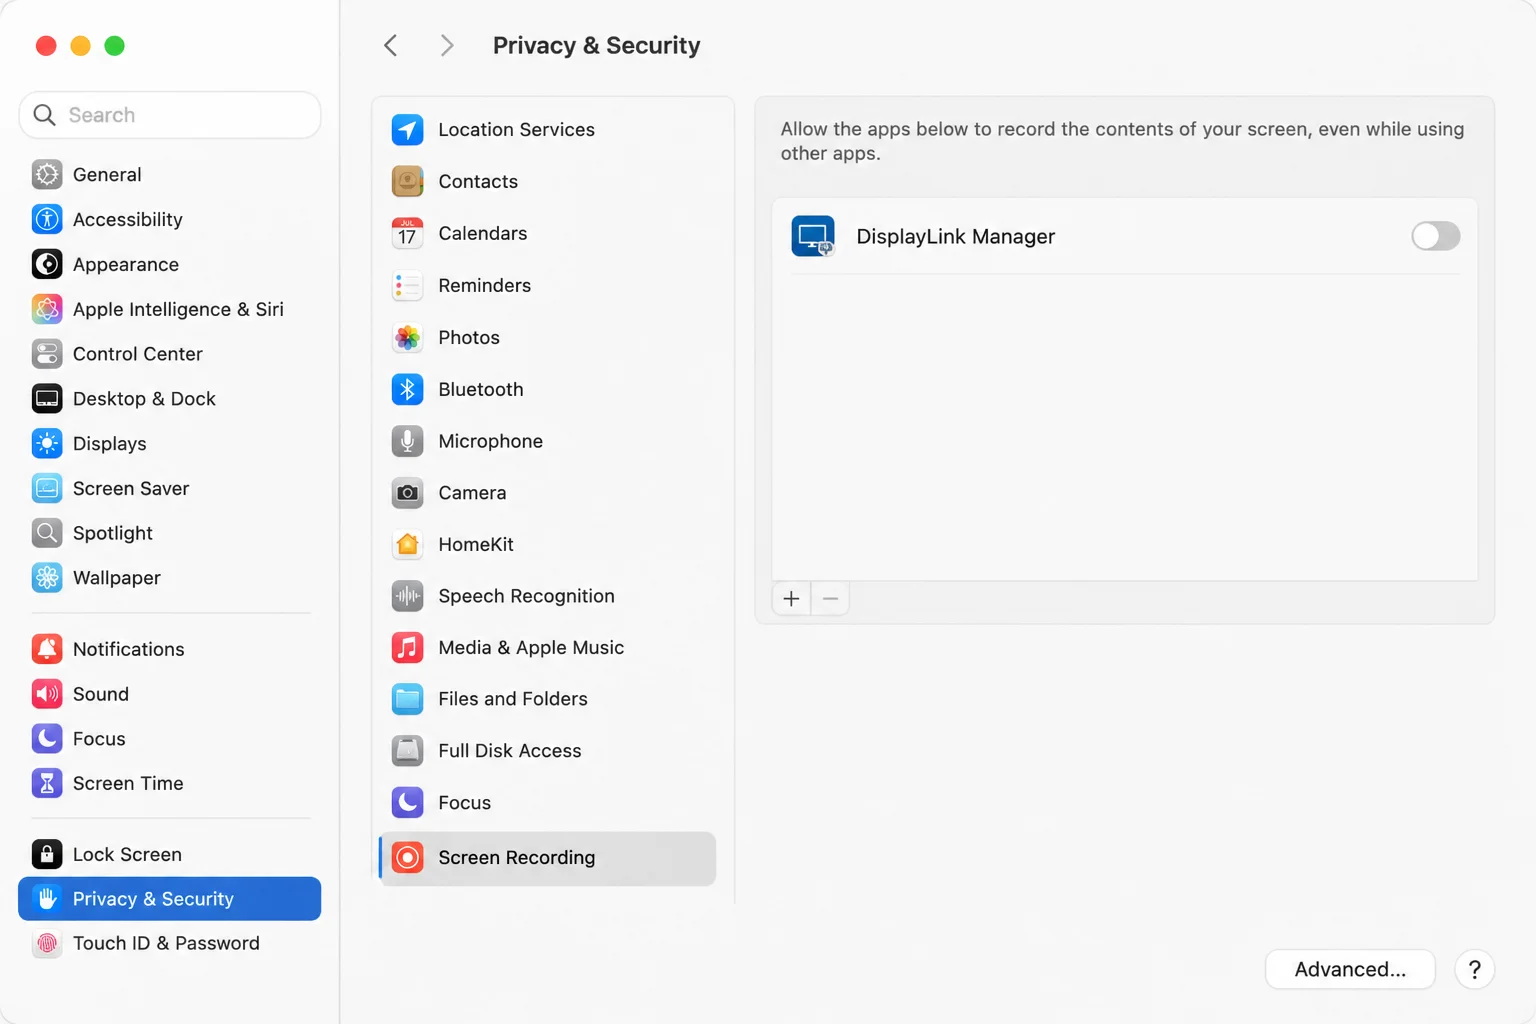
Why it happens: DisplayLink docks send video through dedicated hardware and software. They need DisplayLink Manager and macOS Screen Recording permission. Older releases can also have sleep-and-wake bugs.
Don’t install DisplayLink Manager for a monitor connected through direct HDMI, DisplayPort, Thunderbolt, or USB-C video. It won’t add direct-GPU HiDPI modes.
Fix 7: Update and authorize DisplayLink Manager:
- Confirm that the dock or adapter explicitly uses DisplayLink.
- Download the current compatible version from the official Synaptics DisplayLink page.
- Install it and finish the setup.
- Open Apple menu > System Settings > Privacy & Security > Screen Recording.
- Find DisplayLink Manager and enable access.
- Quit and reopen DisplayLink Manager if macOS asks.
- Restart the Mac, then test sleep and wake.
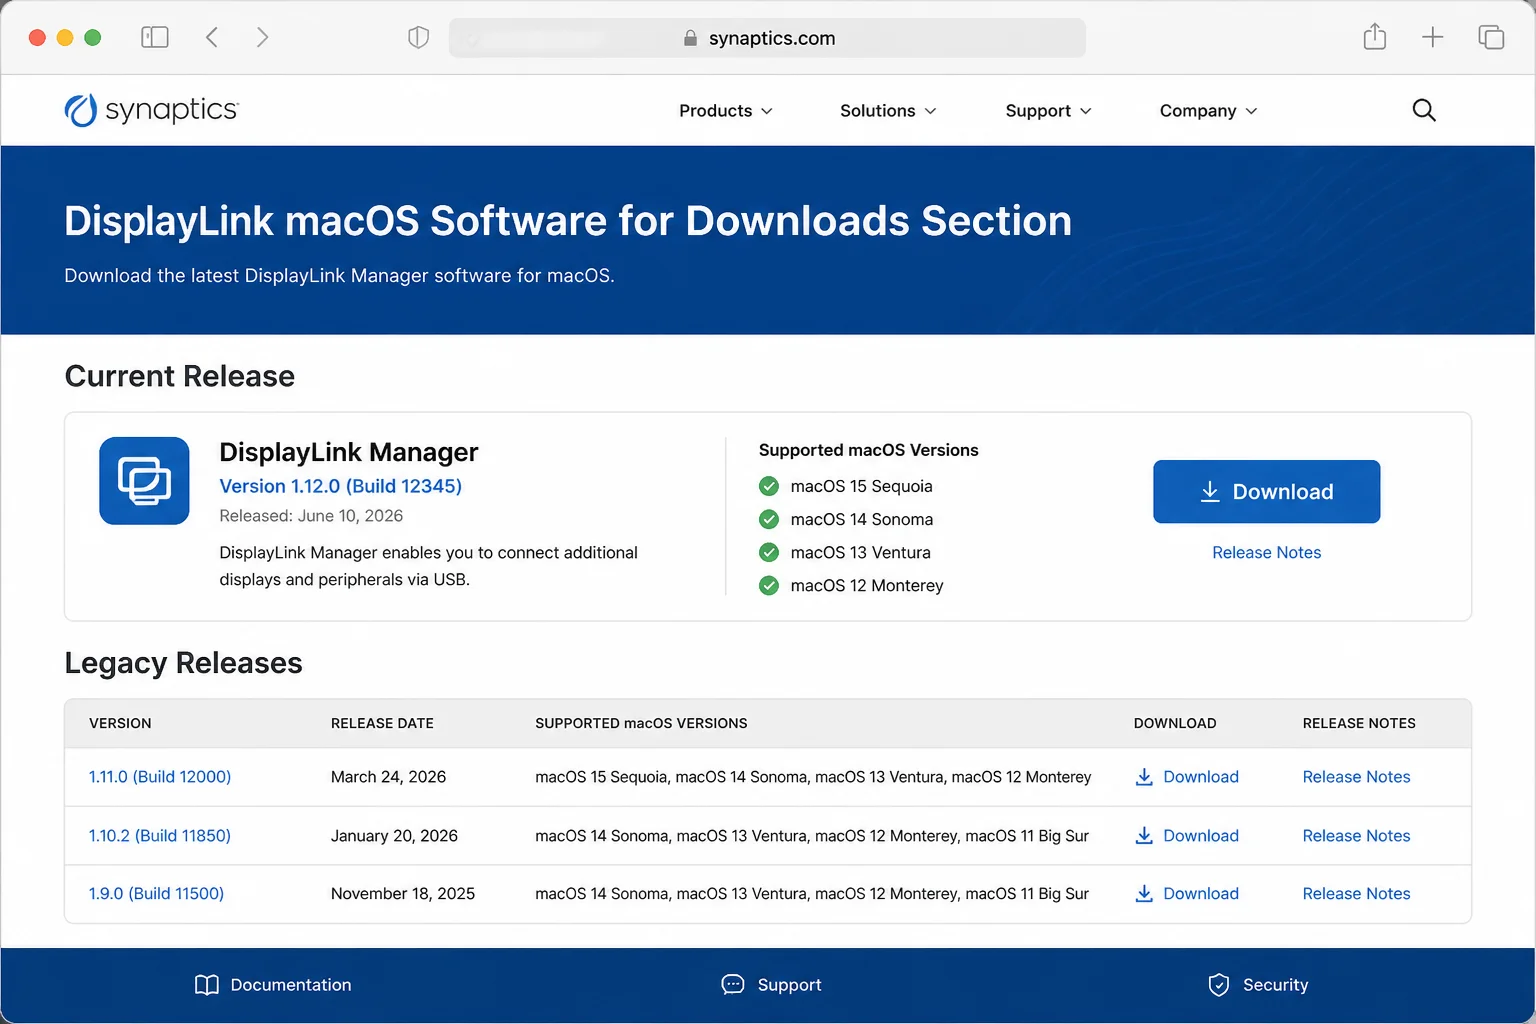
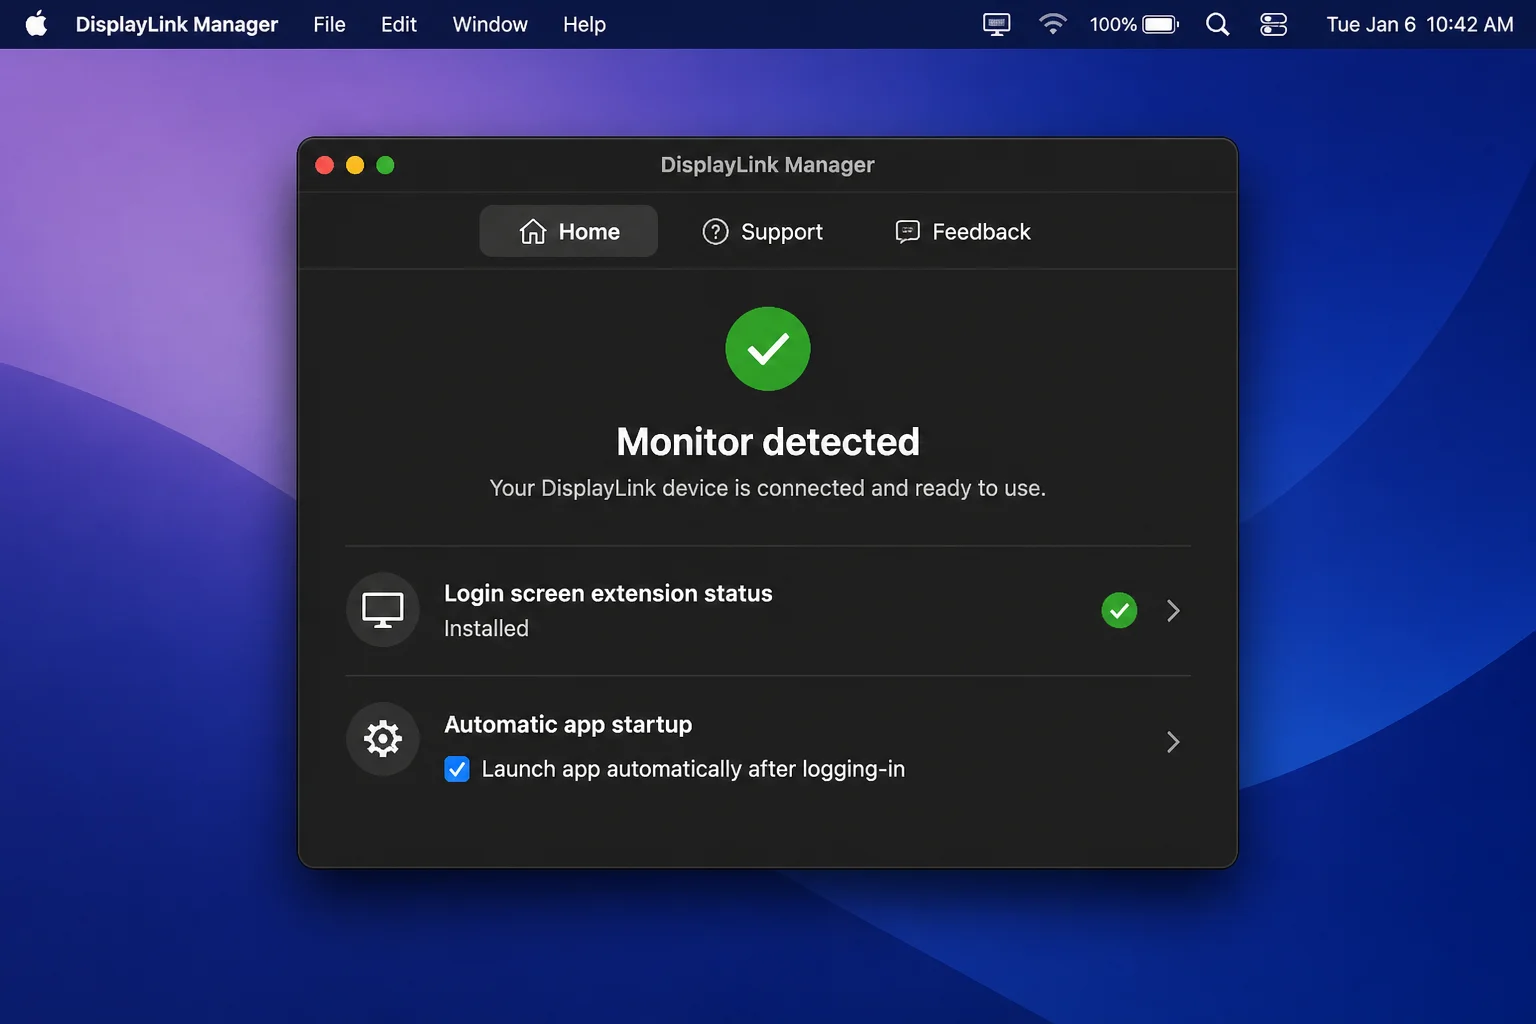
DisplayLink Manager 16.2 fixed some reported blank-screen problems after sleep. Install 16.2 or a later compatible release when Synaptics offers it for your macOS version. Check the current download page instead of choosing an old package by version number alone.
Screen Recording permission sounds odd for a display driver, especially if you’re coming from Windows. DisplayLink needs it to send desktop content through its software-driven output.
Verification: Put the Mac to sleep, wait briefly, and wake it. Each DisplayLink screen should return without an app restart.
Error Messages and Status Explanations
| Message or status | What it means | What to do |
|---|---|---|
| No Signal | The monitor isn’t receiving video from the selected input | Check the input, cable, adapter, dock, and Mac port |
| No external display detected | macOS hasn’t completed the display handshake | Reconnect directly, restart, and use Detect Displays |
| Input Not Supported | The selected resolution, timing, or refresh rate exceeds the input’s limit | Select 60Hz or a lower supported resolution |
| Out of Range | The monitor can’t display the current timing | Wait for automatic reversion or reconnect with a supported mode |
| Low Resolution | macOS is offering a non-HiDPI output mode | Choose a high-resolution scaled option |
| Screen Recording permission required | DisplayLink Manager can’t create its software-driven output | Enable it under Privacy & Security > Screen Recording |
| DisplayLink device not detected | The app can’t communicate with compatible DisplayLink hardware | Reconnect the dock and verify that it uses DisplayLink |
| Resolution unavailable | The current Mac, monitor, timing, or connection doesn’t support the requested mode | Lower the refresh rate, simplify the setup, or choose another HiDPI mode |
| Blank screen after selecting a mode | The display couldn’t lock onto the requested timing | Wait for reversion, then return to the last stable mode |
| BetterDisplay mode marked experimental | The override may behave unreliably on this hardware | Test cautiously and keep a known-good mode available |
Platform-Specific Issues
On macOS Tahoe 26
These steps cover M4 and M5 Macs running macOS Tahoe 26. Controls may move or get new labels in later point releases.
To see every mode macOS offers:
- Open Apple menu > System Settings > Displays.
- Select the external monitor.
- Find Resolution.
- Turn on Show all resolutions if available.
If the switch is missing, check the selected display card. The external monitor must be active, rather than the MacBook’s built-in panel. Some monitor and connection combinations don’t show the control.
On Older Supported macOS Versions
BetterDisplay‘s documentation lists support for macOS Ventura 13.2 or later on Apple Silicon and Intel Macs. Labels and menu layouts depend on the app and macOS version.
DisplayLink has separate compatibility rules. Check Synaptics’ current list for macOS Sonoma 14, Sequoia 15, and Tahoe 26 before installing a release. BetterDisplay support doesn’t imply DisplayLink support, or the reverse.
Direct GPU Connection Versus DisplayLink
This distinction prevents unnecessary driver troubleshooting:
| Connection | Examples | Needs DisplayLink Manager? |
|---|---|---|
| Direct GPU video | Mac HDMI port, USB-C-to-DisplayPort cable, Thunderbolt display connection | No |
| Ordinary USB-C dock with DisplayPort Alt Mode | Dock passes the Mac’s native video signal | Usually no |
| DisplayLink dock or adapter | Product specifications explicitly name DisplayLink | Yes |
| Thunderbolt dock | Native video unless the product also includes DisplayLink hardware | Check its specifications |
Installing DisplayLink Manager won’t add native HiDPI modes to a directly connected screen. The app manages displays attached through compatible DisplayLink hardware.
Configuration Issues to Check
The Wrong Display Is Selected
Each monitor has separate settings. macOS doesn’t always make the selected card clear, especially when two displays have similar names.
Incorrect: Changing the MacBook’s built-in display resolution while expecting the external monitor to change.
Correct: Open Apple menu > System Settings > Displays, click the external monitor, and choose its resolution.
Native Resolution Is Being Confused With HiDPI
Incorrect: Assuming 3840 × 2160 is the best setting because it matches the panel.
Correct: Choose a HiDPI mode that keeps the 4K image sharp. The workspace can look closer to 2560 × 1440, 2304 × 1296, or 1920 × 1080.
Screen size and viewing distance decide which setting feels right. Native 4K gives you the most space, but its interface is often too small on a desktop 4K monitor.
A Low-Resolution Mode Has a Familiar Number
Two modes can offer similar workspace sizes but very different text quality. If macOS marks one Low Resolution, choose the high-resolution version when available.
The number alone doesn’t tell you how macOS draws the image. Check the label and inspect small text.
The Refresh Rate Is Too Ambitious for the Connection
A 4K monitor may accept 120Hz through DisplayPort but only 60Hz through one HDMI input. A dock can add another bandwidth limit.
Set Apple menu > System Settings > Displays > Refresh Rate to 60Hz. Then inspect the resolution list again. If more choices appear, the old connection couldn’t carry that mix of resolution, refresh rate, and color settings.
The Dock Is Being Blamed for a macOS Scaling Limit
Bypassing the dock is a useful test. If the same HiDPI mode remains absent through a stable direct connection, trying several other docks probably won’t change the result.
Test another refresh rate or use BetterDisplay. Keep the direct cable nearby. It’s useful when a future macOS update changes display behavior.
Too Many Overrides Are Enabled
BetterDisplay‘s Pro controls include resolution overrides, virtual screens, custom timings, and EDID changes. Turning on all of them makes a blank screen or failed wake harder to diagnose.
Start with basic HiDPI scaling or one resolution override. Test it through a restart and sleep cycle before changing another control.
Using Unverified force-hidpi Instructions
The available sources don’t verify the exact project, maintainer, current release, supported macOS versions, graphical workflow, or security details. Don’t run unverified commands or weaken macOS security to install it.
Try built-in scaling first. BetterDisplay has clearer documentation and an official download source when macOS doesn’t offer a usable mode.
How to Check for an Official Apple Fix
Apple hasn’t confirmed a firmware fix for the reported M4/M5 4K HiDPI behavior through August 24, 2026. Display handling can change through macOS or firmware updates, even when Apple’s notes use different terms.
To check for a newer fix:
- Back up your important files.
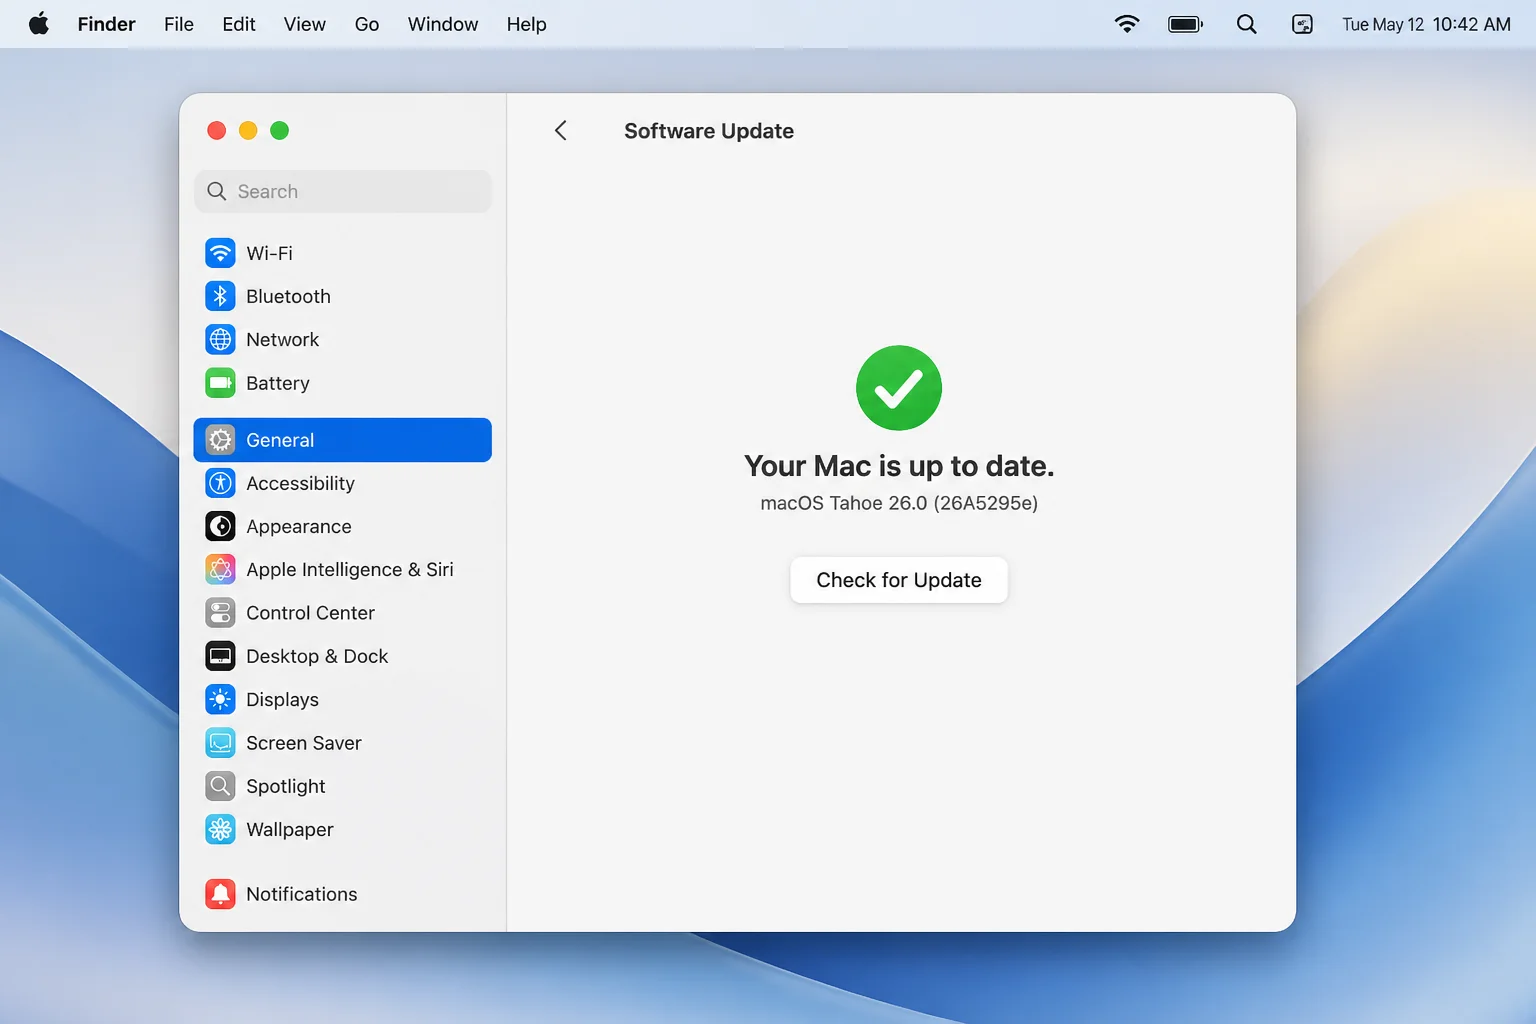
- Open Apple menu > System Settings > General > Software Update.
- Wait while the Mac checks for updates.
- Install a stable update that fits your workflow.
- Restart the Mac.
- Turn off BetterDisplay overrides for now.
- Return to Apple menu > System Settings > Displays.
- Select the 4K monitor and recheck Show all resolutions.
Turning off the override matters. Otherwise, you can’t tell whether macOS added a native mode or BetterDisplay still supplies it.
Also check Apple’s Displays settings guide, the support page for your Mac, and the release notes linked from Software Update. Search for external display, scaling, HDMI, Thunderbolt, and sleep or wake changes.
Getting Help
Contact Apple Support when the monitor is missing from Displays, a direct connection keeps dropping, or built-in modes change after an update. Contact the monitor or dock maker when one input fails, advertised refresh rates don’t work, or its firmware updater reports a fault.
Collect these details first:
- Exact Mac model and chip, such as a 14-inch MacBook Pro with M4 Pro.
- Installed macOS version from Apple menu > About This Mac.
- Monitor make, model, and firmware version.
- Cable or adapter type.
- Dock model and whether it uses DisplayLink.
- Selected resolution and refresh rate.
- Number of connected displays.
- Whether the problem occurs through a direct connection.
- Whether Show all resolutions changes the available list.
- Whether BetterDisplay is installed and which mode it selected.
This information saves you from repeating the same cable checks during each support handoff. A photo of the monitor’s input-information screen can also capture timing details that macOS doesn’t show clearly.
Useful log and diagnostic locations
For display events, open Applications > Utilities > Console, select your Mac, and reproduce the problem. Note the exact time when the display disconnects, flickers, or fails to wake. Console logs can contain private information, so read them before sharing screenshots or exports.
You can also create a system report:
- Open Apple menu > About This Mac.
- Click More Info.
- Scroll down and click System Report.
- Select Graphics/Displays.
- Record the monitor name, resolution, pixel depth, and connection details.
Apple’s Support website is the right contact for native display failures. For app problems, use the official BetterDisplay website or Synaptics’ DisplayLink download and support page.
Prevention Tips
- Check display support before upgrading: Read Apple’s specifications for your exact Mac, especially if you use several external displays.
- Keep a known-good direct cable: It separates macOS scaling behavior from dock and adapter faults.
- Use cables rated for the required bandwidth: Match the cable to your resolution and refresh rate.
- Record working settings: Save the resolution, refresh rate, input, and BetterDisplay setup before updating macOS.
- Update one component at a time: Don’t update macOS, monitor firmware, dock firmware, and display utilities on the same day.
- Prefer stable modes: A slightly larger desktop that wakes every time beats an experimental mode that flickers.
- Download utilities from official sources: Avoid BetterDisplay mirrors and unverified HiDPI scripts.
- Test sleep and wake: Do this before using a new setup for a meeting or paid work.
A quick phone photo of your working settings is enough. It isn’t elegant, but it’s easier than recalling which of five similar resolutions worked.
Frequently Asked Questions
Why did my 4K monitor look sharp on an older Mac but blurry on an M4 or M5 Mac?
The newer Mac may offer a different set of HiDPI modes for the same display. Third-party reports suggest that display-pipe or framebuffer resources could explain some missing choices. Apple hasn’t confirmed that internal explanation.
Enable Show all resolutions, disconnect other displays, and test a direct connection first. If the useful mode stays missing, BetterDisplay is the best-documented third-party option in the cited sources.
How can I tell whether macOS is using HiDPI?
Look for a High Resolution or HiDPI label when one appears. Avoid entries marked Low Resolution. You can also compare small text. Proper HiDPI text has smooth, clear edges instead of a stretched look.
BetterDisplay shows clearer HiDPI or High Resolution controls for many monitors. Your monitor’s information menu may still report a 3840-by-2160 input. That’s normal because macOS scales the interface before sending the 4K image.
Where is Show all resolutions in current macOS?
Open Apple menu > System Settings > Displays, select the external monitor, and look near or below Resolution. The switch doesn’t appear for every display or setup.
If you can’t find it, click the external-monitor card again. The expected control can seem missing when you’ve selected the MacBook’s built-in display.
Which resolution gives the best balance of sharpness and workspace?
A 2560-by-1440-like HiDPI workspace works well on many 27-inch 4K monitors. A 2304-by-1296-like mode gives you larger text. The 1920-by-1080-like HiDPI choice is very sharp, but it leaves less room for windows.
Choose based on comfort rather than the largest resolution number. If you’re leaning toward the screen by lunchtime, the workspace is too dense.
Can BetterDisplay restore a missing HiDPI mode?
BetterDisplay often exposes extra high-resolution choices or provides resolution overrides. It can’t create every requested mode on every Mac, monitor, and connection. Display resources and signal bandwidth still matter.
Test wake from sleep and full-screen video after selecting an override. A mode that looks good for five minutes may fail after a restart.
Which BetterDisplay features are free?
BetterDisplay‘s pages list basic HiDPI scaling and resolution overrides in the free tier. Pro adds flexible scaling and advanced tools such as virtual displays and EDID management.
Check the official comparison before installing or buying. App tiers can change, and many blurry 4K screens don’t need the advanced controls.
Is force-hidpi safe and currently maintained?
The available sources don’t verify the exact project, maintainer, current release, supported macOS versions, graphical setup, or security model. Don’t run unverified commands or weaken Mac security to install it.
Try built-in scaling first. BetterDisplay has clearer documentation and an official download source when macOS doesn’t offer a usable mode.
Will a new HDMI or USB-C cable solve the problem?
A suitable cable can fix flicker, failed detection, lower refresh rates, or a missing 4K signal. It usually can’t restore a HiDPI mode that macOS omits when the existing 4K connection is stable.
Try another known-good cable before buying one. You get a useful test without turning the desk drawer into a cable archive.
Does lowering the refresh rate reveal more resolution choices?
Sometimes. Reducing a 4K display from 120Hz or 144Hz to 60Hz uses less bandwidth. That can reveal more resolution or color combinations.
It can’t bypass every macOS display-resource limit. Use 30Hz only for testing because desktop motion looks much less fluid.
Is DisplayLink Manager relevant to a directly connected monitor?
No. Don’t install it for a direct HDMI, DisplayPort, Thunderbolt, or USB-C video connection. DisplayLink Manager works only with compatible DisplayLink docks and adapters.
Check the product specifications instead of relying on the connector shape. Two USB-C docks can use different video systems.
Has Apple released an official firmware fix?
Apple hasn’t confirmed one through August 24, 2026. Check Apple menu > System Settings > General > Software Update. Review Apple’s release notes and display-support pages after updating.
Turn off third-party overrides for a short test. This shows whether macOS now provides the mode itself.
Does this affect every 4K monitor?
No. Available modes depend on the Mac model, monitor timing data, connection, refresh rate, macOS version, and attached displays. Some M4/M5 Macs offer comfortable 4K HiDPI scaling without extra software.
Two monitors with the same panel resolution can report different timing information. Their resolution lists may differ on the same Mac.
Are 5K and 6K displays affected in the same way?
They use the same pixel-density and scaling principles, but their larger pixel grids allow more natural Retina-style workspaces. A 5K display maps cleanly to a 2560-by-1440-like 2× workspace. A 6K panel can provide a larger sharp desktop.
Connection bandwidth and display limits still matter. Check the specifications for your exact Mac before buying a 5K or 6K screen, especially if you’ll connect more than one.
Do I need to replace my monitor?
Probably not. Try Apple’s scaled modes, a direct connection, 60Hz, and BetterDisplay before pricing a replacement.
A new monitor makes sense when your screen can’t produce a sharp, comfortable, stable mode and that limit disrupts your work. A 5K display usually gives macOS a cleaner 2560-by-1440-like 2× match, but it costs much more.
Wrapping Up
| Step | Action | Applies to |
|---|---|---|
| 1 | Check Displays and enable Show all resolutions | Every direct or docked monitor |
| 2 | Test a direct connection and 60Hz | Missing modes, flicker, or dock problems |
| 3 | Try BetterDisplay HiDPI controls | Stable 4K screens missing a comfortable scale |
| 4 | Update DisplayLink Manager and permissions | DisplayLink hardware only |
| 5 | Check Software Update and Apple release notes | All M4 and M5 Macs |
You can usually make a 4K monitor comfortable on an M4 or M5 Mac without replacing it. Start with macOS, test a direct 60Hz connection, and try BetterDisplay if Apple’s choices are too large or too small.
I’d avoid unverified force-hidpi tools that weaken Mac security. A dependable scaled mode that wakes correctly matters more than a perfect resolution that fails during your next video call.
Last updated: August 24, 2026 | Applies to M4 and M5 Macs running macOS