Renders it completely useless to anyone else
If you’re worried about losing your Mac to theft or loss, there are some steps you can take to protect yourself. One of those is to use the new Activation Lock feature, included on recent iMacs, Mac Minis, MacBook Pros, and MacBook Airs. This uses a new security chip called the T2 Security Chip to let you remotely lock and wipe your Mac.
Even after wiping it, the Activation Lock prevents anybody else from using your Mac, rendering it completely useless to anybody else. To activate it, you’ll need macOS Catalina, have two-factor authentication enabled on your Apple ID, and have Secure Boot set to the default “Full Security” setting.
What Is Activation Lock On Apple Mac?
Owners of Apple devices like iPhones and iPads will already be familiar with the Find My app. This lets you track your Apple devices down when they’re lost or stolen, pinpointing their location on a map. It also allows you to securely lock or erase the device to prevent it from being used and to stop your data from being stolen.
The Activation Lock feature on Mac brings this security, previously restricted to iOS devices, to newer Apple Mac devices. It requires the T2 Security Chip to be able to securely lock and wipe your Mac. The newer iMac Pro has this chip, as do Mac Minis and MacBooks (both Pro and Air) from 2018 onward.
Like iPhone and iPad users, this brings you remote control over your Mac security to the Find My app. You can access this online or from the Find My app on your iOS or other Mac devices.
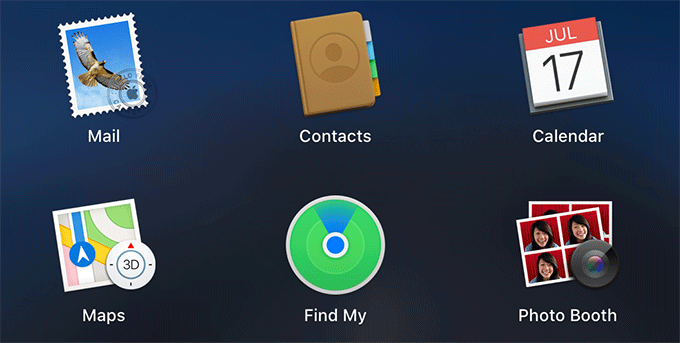
If you want to control a Mac remotely and you have more than one macOS device, you can do this using the Find My app. To access it, look for Find My in the Launchpad, accessible from the Dock at the bottom of your Mac screen.
Checking T2 Security Chip and Activation Lock Status
If you’re unsure whether your Mac has the T2 Security Chip installed that allows the Activation Lock mode to work, you can quickly check this from your Mac’s System Report.
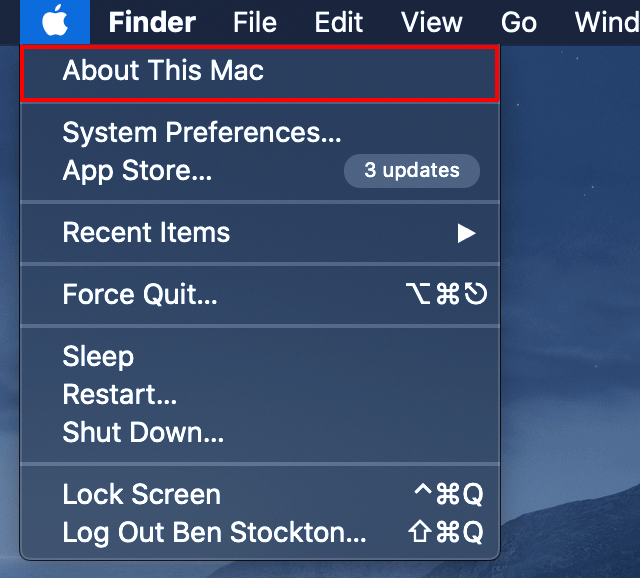
- To access your Mac System Report, click to enter the Apple menu in the top-left of your screen, then click About This Mac.
- In the Overview tab of your Mac’s information dialog box, click the System Report button.
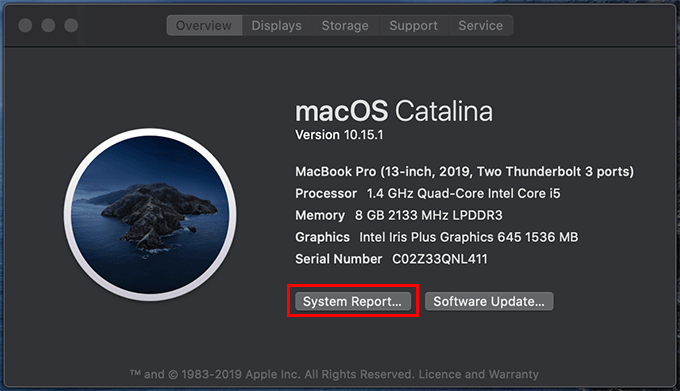
- Under the Hardware section in the left-hand menu, click Controller. If you don’t see Controller, look for iBridge instead. Under Model Name, you should see Apple T2 Security Chip displayed.

- If you have the T2 Security Chip installed, check to see whether Activation Lock is already activated. To do that, click Hardware in your System Report and check the Activation Lock Status field.
- If this is set to Enabled, Activation Lock is active and you don’t need to do anything. If it says Disabled, you’ll need to follow the instructions below to activate it.
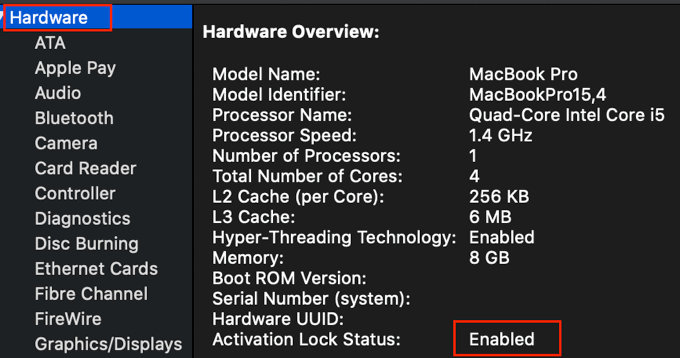
- To enable Activation Lock on your Mac, you’ll need to set up Find My Mac. If you’ve altered your Secure Boot setting at any point, you’ll need to change this first, however.
Set Secure Boot To Full Security
The Activation Lock setting will only work if your Mac Secure Boot setting is set to Full Security. Secure Boot is another advanced setting, introduced on modern Mac hardware, that ensures that only legitimate, trusted Apple and Microsoft operating systems can boot.
- Changing this setting requires you to boot into your macOS recovery system and access the Startup Security Utility. To do that, hold the Command + R keys on your keyboard as soon as the Apple logo appears during the boot process.
- From there, click Utilities, then Startup Security Utility. Use your macOS username and password to authenticate, then under Secure Boot, make sure that Full Security is the setting enabled.
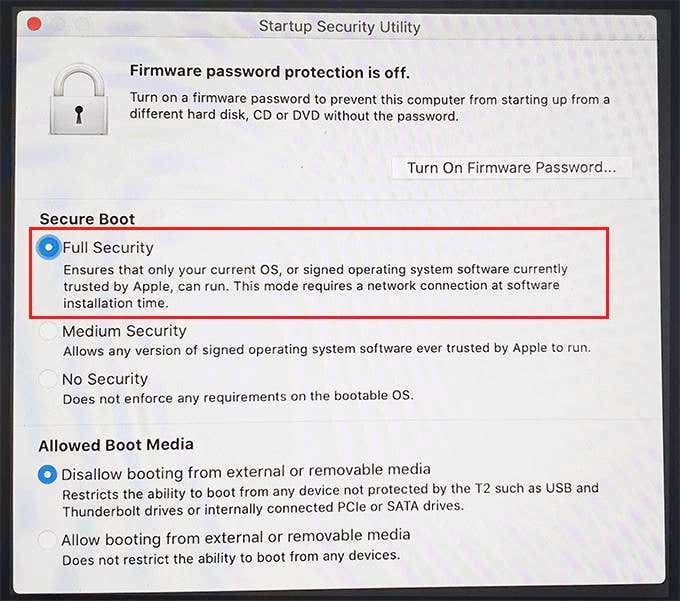
- Reboot your Mac as normal to proceed after this point.
Turn On Find My Mac
Apple’s Find My app lets you keep track of your Apple devices. It lets you locate them, remotely control and lock them, and erase them, if needed.
Activation Lock is central to this remote defense, and it requires the Find My Mac setting to be enabled.
- To turn on Find My Mac, click to enter the Apple menu in the top-left, then click System Preferences.
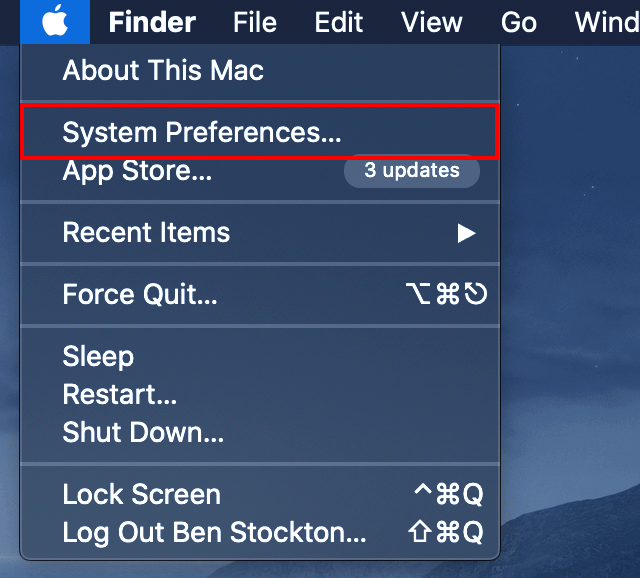
- In your System Preferences, click Apple ID. On macOS Catalina, this entry is in the top-right of the window.
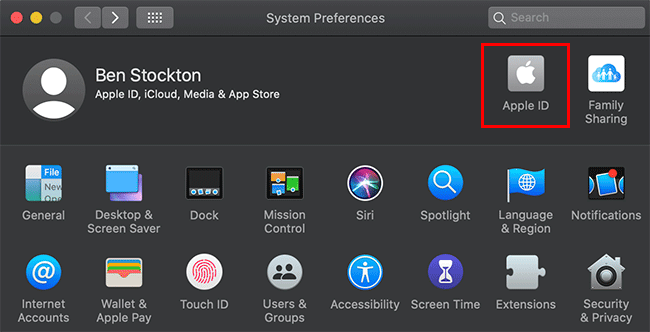
- Under your Apple ID settings, click iCloud. Listed under the various apps that use the iCloud service, click the checkbox next to Find My Mac.
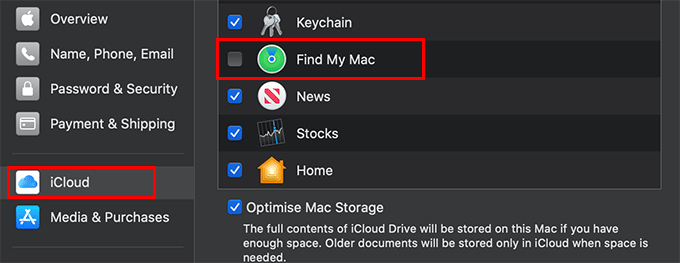
- macOS will prompt you to confirm whether you want to enable the Find My Mac feature. To confirm, click Allow.
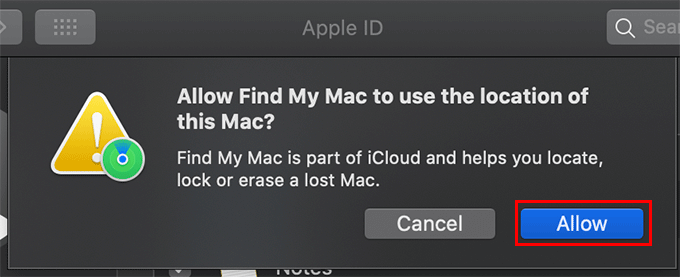
Once enabled, you can confirm that Activation Lock is enabled by reporting to your System Report (Apple Menu > About This Mac > System Report > Hardware).
Using Find My Mac
You can make use of the Activation Lock on your Mac by using the Find My app, either on other Apple devices you own or by visiting the iCloud website.
- Sign in to the iCloud website using the same Apple ID you use for your Mac. Click the Find iPhone button to access Find My online. Despite saying iPhone, this will still work for your Mac.
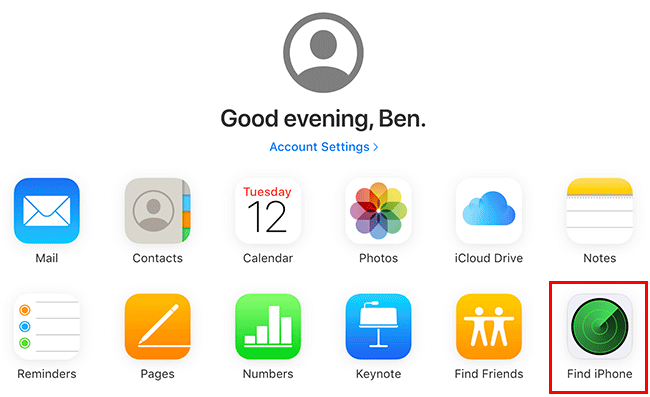
- You’ll need to sign in again with your Apple ID. Once you’ve down that, click the drop-down menu in the top menu bar, then select your Mac from the list.
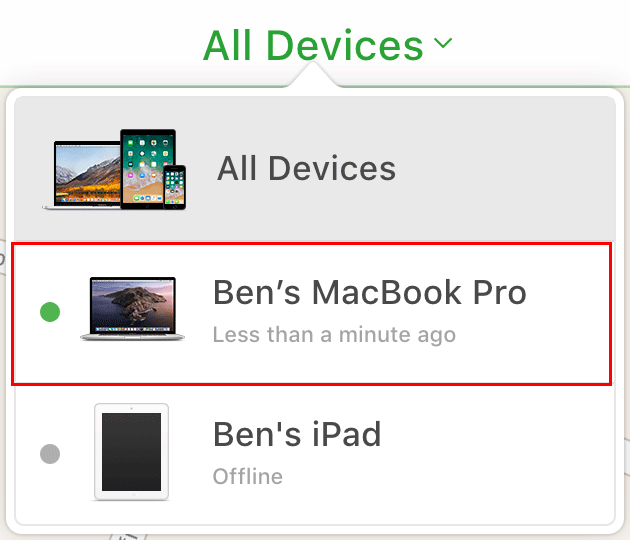
- To take advantage of the Activation Lock mode, click Lock in the options menu that appears in the Find My page. You can also click Erase Mac if your device is lost and you want to ensure your data is secured.
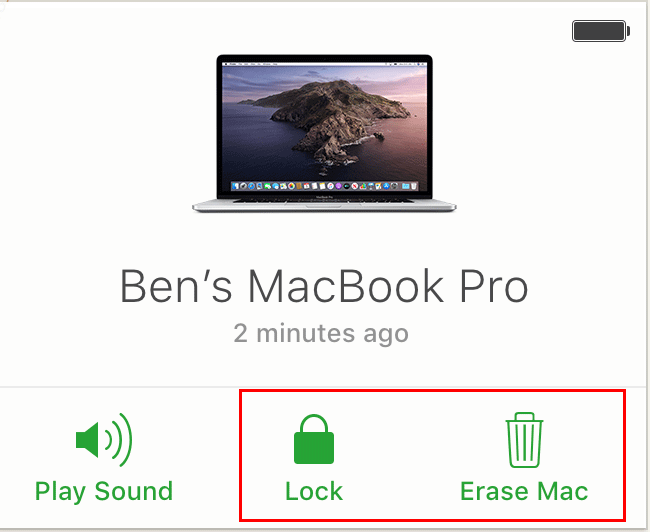
With either of these options pressed, your Mac device will then begin to lock or erase remotely.


