Never tell someone duck you again
Whenever you type on an iPhone, you’ll quickly notice the bizarre ways that the keyboard’s Auto-Correction functionality can mess things up. The reason? It just doesn’t have every slang, name, or acronym in its dictionary, and that introduces lots of embarrassing errors by mistake.
Auto-Correction does take advantage of machine learning to make changes to your writing based on context. It even adds new words to the keyboard dictionary over time. But, that’s simply not enough to prevent it from making frequent blunders.
Having said that, it is possible to improve your typing experience on the iPhone by actively fixing Auto-Correction issues. You can immediately undo inaccurate changes (and speed up machine learning), use text shortcuts to correct recurring errors, or reset the keyboard dictionary when things get out of hand.
Undo Auto-Corrected Words Quickly
When your iPhone ends up mistakenly “correcting” a word that you just typed, you can undo that easily without having to retype it.
Tap the Delete key as soon as Auto-Correction adjusts, and you should immediately see a suggestions bar with the original word to the left of it. Select it to use that in place of the auto-corrected word.
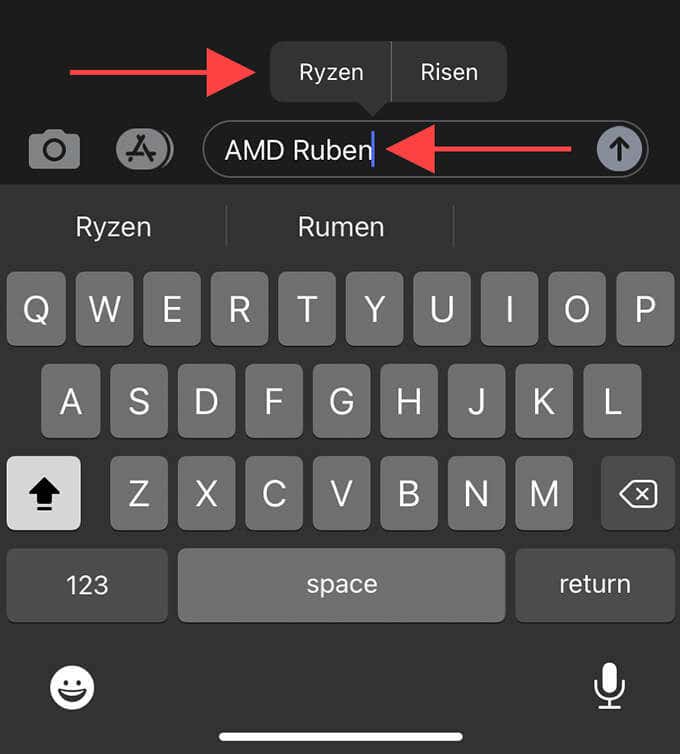
Once you’ve undone the same word a couple of times, Auto-Correction’s machine learning algorithm should kick into gear and save it to your keyboard’s dictionary. Put that into practice, and you’ll soon end up with a substantial library of custom words you can freely use while typing.
You can also revert changes after you’ve finished typing in everything (like an iMessage, for example). Just double-tap an auto-corrected word and pick the original from the suggestions bar.
Stop Auto-Correction From Kicking In
Rather than undoing changes that Auto-Correction makes, you can prevent it from taking over and modifying words as you type them out.
The iPhone highlights a word before replacing it with something else. Instead of tapping Space and letting Auto-Correction make its move, simply select the same word you just typed from the onscreen keyboard’s predictive text bar—it should show up within quotes. The word should then appear without any changes.
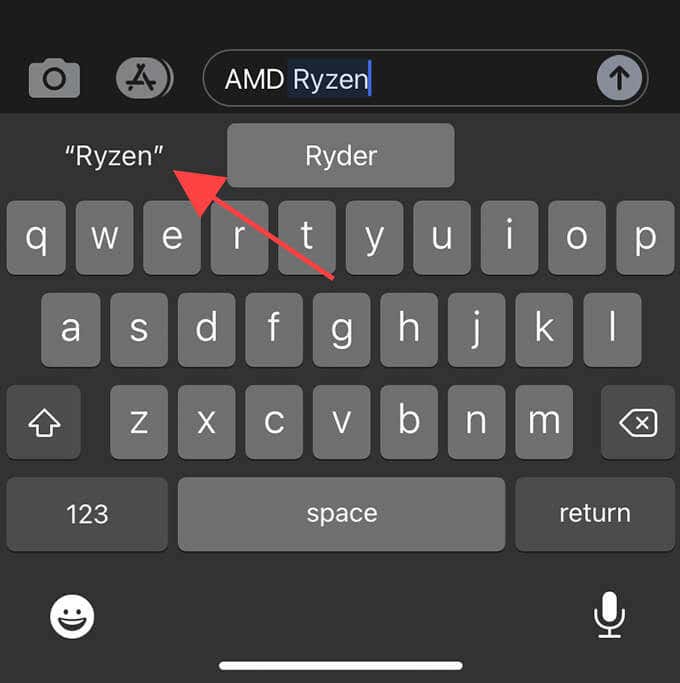
Any words you insert that way should eventually save over to the iPhone’s keyboard dictionary.
Use (or Double-Check Your) Text Replacements
Auto-Correction doesn’t always save new words no matter how much you undo or type them into the onscreen keyboard. To make matters worse, it may even end up “learning” your mistakes and repeating them over and over again. That’s where Text Replacement can prove useful.
Text Replacement is a feature that allows you to trigger long phrases with the use of shortcuts. For example, you can type the acronym “HMU” and have the phrase “Hit me up” show in its place instead.
But you can also take advantage of Text Replacement to override Auto-Correction for words that it fails to add to your iPhone’s dictionary. For instance, you can set “Ryzen” both as the trigger and replacement, and your iPhone will never change that to “Ruben” or “Ryder” again.
Go to Settings > General > Keyboard > Text Replacement. Then, tap the Add icon at the top-right of the screen to start creating a shortcut. Fill in a word that you don’t want your iPhone to auto-correct into both the Phrase and Shortcut fields, and tap Save.
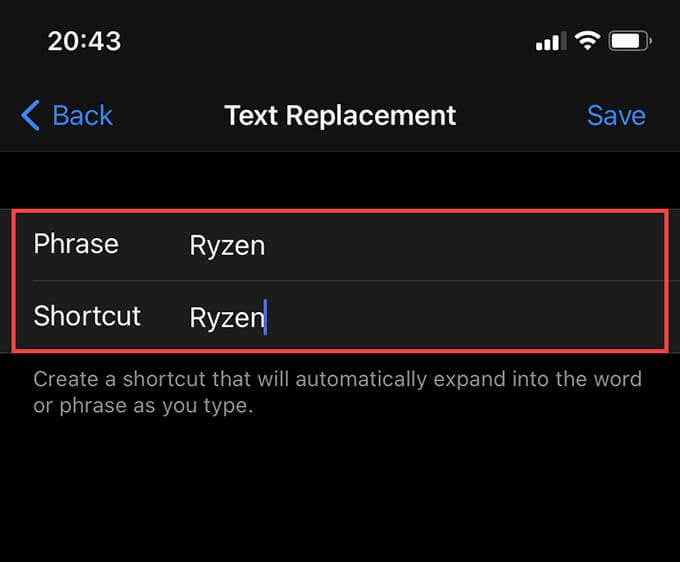
You can create as many shortcuts as you want. They’ll sync over iCloud to other iOS and iPadOS devices, so you don’t have to add your shortcuts everywhere.
You should also check your Text Replacement entries when Auto-Correction starts to behave strangely. You never know if someone’s pranked you with some funny shortcut triggers while your iPhone was lying around unlocked!
Update iPhone With Latest System Software
You may occasionally run into bugs and glitches with Auto-Correction on the iPhone. For instance, you may find the functionality replacing perfectly correct words or capitalizing them for no reason. When that happens, you must apply pending iOS updates immediately to fix auto-correct issues.
For instance, iOS 13 had numerous problems with Auto-Correction, and subsequent updates helped fix them. But similar issues can crop up again, so go to Settings > General and tap Software Update to install the latest updates for your iPhone.
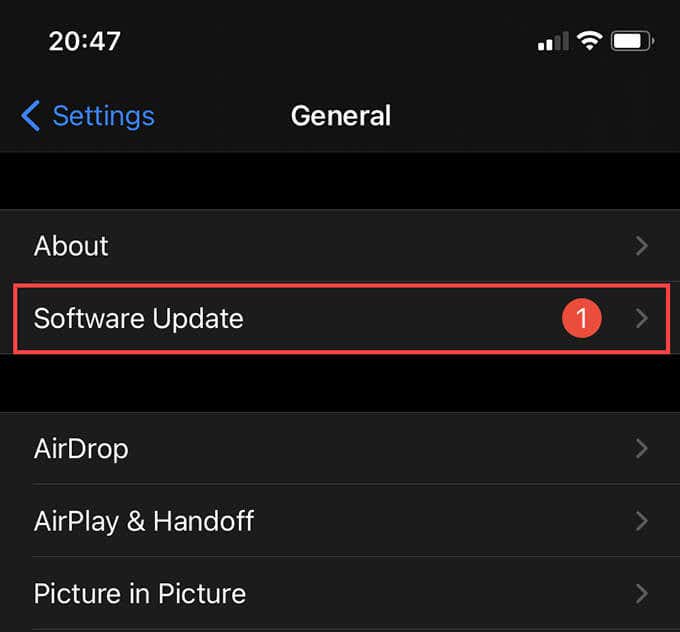
In instances where there aren’t any new updates available, you should try restarting your iPhone. Go to Settings > General > Shut Down and drag the Power icon to the right of the screen. Then, wait for 30 seconds before holding down the Side button to boot it back up again.
Reset Your iPhone’s Keyboard Dictionary
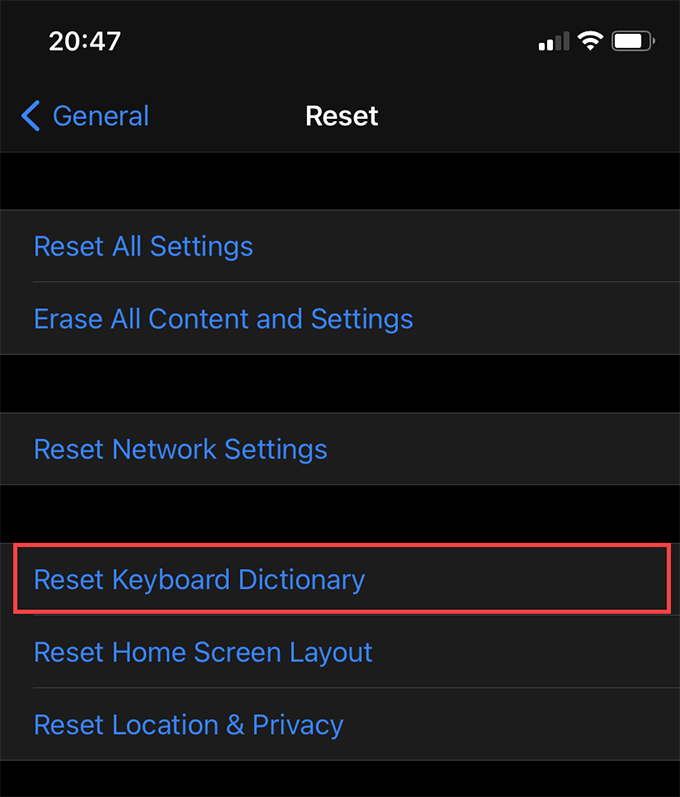
If Auto-Correction continues to cause issues by repeatedly making incorrect changes, you should reset the iPhone’s keyboard dictionary. That should delete every custom word and provide you with a clean slate to start “training” Auto-Correction from scratch.
Head over to Settings > General > Reset and select Reset Keyboard Dictionary to reset the keyboard dictionary to factory defaults. The procedure will not remove any Text Replacement entries that you may have set up on your iPhone.
Disable Auto-Correction on iPhone
If Auto-Correction feels like too much of a hassle and makes more mistakes than it corrects, you can turn it off completely.
To do that, head over to Settings > General > Keyboard and turn off the switch next to Auto-Correction. The page also has other keyboard-related features that you may want to disable, such as Auto-Capitalization.
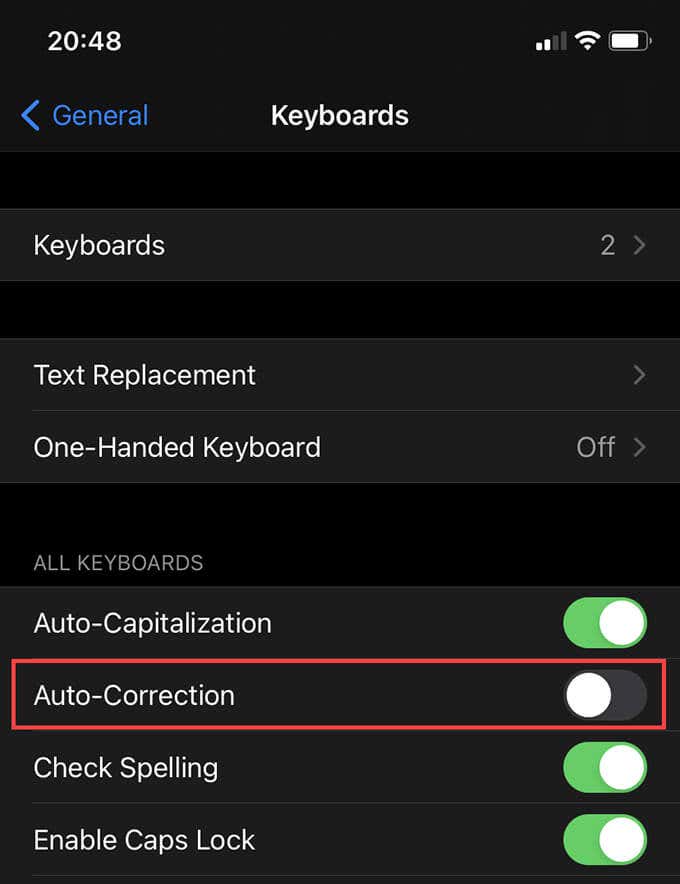
Despite turning off Auto-Correction, you can still rely on Text Replacement to correct common typos that you make (such as “teh” with “the”).
Fixing Auto-Correct
If you just started using an iPhone, Auto-Correction isn’t as bad as you may think. The more you type, the better it gets at its job, and the pointers above should help iron out the creases. If you’re thinking about disabling the functionality, however, it’s still a good idea to spend some time with it before pulling the plug. You just might change your mind.


