
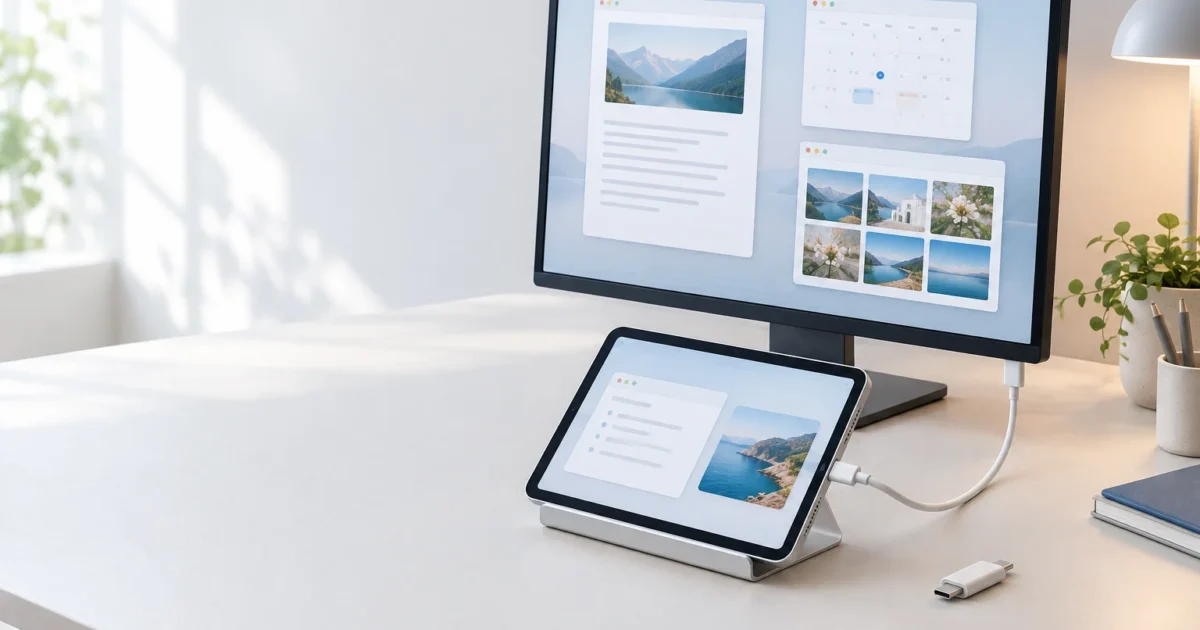
Plugging your iPad into a monitor sounds simple. But what you see on that monitor depends on which iPad you own. This guide shows you how to connect your iPad to an external monitor with a cable or over AirPlay. It also explains whether you’ll get a mirrored copy of your screen or a separate extended workspace, and what to do when the screen stays blank.
The short answer: With a compatible cable or adapter and a display that accepts its signal, any iPad with video output can mirror its screen. You’ll see an exact copy of the iPad on the monitor. Only a specific list of iPad Air and iPad Pro models can use Stage Manager extended display, where the monitor becomes its own workspace with separate app windows.
Based on Apple’s current support documentation, AirPlay is designed for mirroring your screen. We didn’t find Apple documentation describing an extended-display mode over AirPlay, even on those supported models.
Connect iPad to External Monitor: Quick Reference
| What you want | What you need | Works on |
|---|---|---|
| Show your iPad screen on a monitor or TV (mirroring) | USB-C display cable or adapter, or a Lightning AV/VGA adapter | Any iPad with video-out capability |
| Separate app windows on the monitor (extended display) | Wired connection + Stage Manager turned on | Only the models on Apple’s external-display list |
| Show your screen on a TV with no cables | Apple TV or AirPlay-compatible receiver (typically on the same Wi-Fi network) | Any iPad, mirroring only |
| Use an Apple-branded external display | The cable included with the display | Supported iPad models (check Apple’s display support pages for details) |
What Is Mirroring vs. Extended Display on iPad?
Mirroring means the monitor shows exactly what’s on your iPad. If you open Photos on the iPad, Photos appears on the monitor too. It’s ideal for presentations, sharing photos with a group, or watching something on a bigger screen.
Extended display works more like adding a second monitor to a Mac or Windows PC. With Stage Manager turned on, the external screen becomes an independent canvas. You can keep Notes on your iPad and put Safari on the monitor, then drag windows between the two.
If you’re coming from a Mac or Windows PC, here’s the comparison: iPadOS has its own display arrangement setting, similar in spirit to the Displays settings in macOS or Windows. Apple’s iPad User Guide doesn’t spell out the path, but university IT guides and user reports place it in Settings > Display & Brightness > Arrangement. Look for it with the monitor connected; it isn’t shown when no display is attached.
From there, set which side of the monitor your iPad sits on (left, right, above, or below) so it matches your desk. Getting this right matters: it determines which edge your pointer and windows cross when you move between the iPad and the external screen. You’ll also find the choice between mirroring and using the monitor as a separate display in the same area.
You still turn Stage Manager on and move individual app windows by dragging them, as described in Steps 4 through 6.
Before You Begin
Make sure you have:
- An iPad updated to the latest version of iPadOS (iPadOS 27.2 is the current release). The external-display and windowing features covered here arrived with the redesigned multitasking in the iPadOS 26 release, and Apple’s current iPad User Guide still documents them. Check yours in Settings > General > Software Update.
- To know your iPad’s port type: USB-C or Lightning
- The right cable or adapter for that port (covered in Step 2)
- A monitor, TV, or projector with a free HDMI, USB-C, or VGA input
- For AirPlay only: an Apple TV or AirPlay-compatible TV, generally on the same Wi-Fi network as your iPad
- For extended display only: a supported iPad model (see Step 1)
| Requirement | Details |
|---|---|
| Device | Any iPad with video-out for mirroring; specific iPad Air/iPad Pro models for extended display |
| OS version | iPadOS 27.2 or later (check in Settings > General > About) |
| Cost | Mirroring and Stage Manager are included with iPadOS. Cables, adapters, and the monitor are separate purchases. |
| Network | Devices are typically on the same Wi-Fi network (AirPlay only) |
Step-by-Step Guide
Step 1: Check Whether Your iPad Supports Extended Display or Only Mirroring
This step saves the most frustration. Apple keeps two different lists:
- iPads that can use Stage Manager on their own screen
- A shorter list of iPads that can move windows to an external display
Only the second list matters for extended display. Here it is, per Apple’s Stage Manager support page (checked November 1, 2026, with iPadOS 27.2 current). Apple lists nine entries; we’ve combined the M2 and M3 iPad Air sizes into two lines:
- iPad Air 11-inch (M2 or M3)
- iPad Air 13-inch (M2 or M3)
- iPad Pro 13-inch (M4)
- iPad Pro 11-inch (M4)
- iPad Pro 12.9-inch (5th generation and later)
- iPad Pro 11-inch (3rd generation and later)
- iPad Air (5th generation)
To find your exact model, go to Settings > General > About and look at Model Name. Check the generation as well as the product family. For example, not every iPad Pro 11-inch is on the list, only the 3rd generation and later.
Expected result: You know whether your iPad will extend or only mirror. If your model isn’t listed, you can still follow Steps 2–3 for wired mirroring or Step 7 for AirPlay.

Step 2: Get the Right Cable or Adapter for Your iPad’s Port
Look at the charging port on your iPad. A small oval connector is USB-C. A thin, flat connector is Lightning. Then pick a connection based on Apple’s iPad User Guide:
If your iPad has USB-C:
- A USB-C display cable that goes straight into a monitor with a USB-C input, or
- The USB-C Digital AV Multiport Adapter plus an HDMI cable, or
- The USB-C VGA Multiport Adapter plus a VGA cable for older monitors and projectors
If your iPad has Lightning:
- The Lightning Digital AV Adapter plus an HDMI cable, or
- The Lightning to VGA Adapter plus a VGA cable
If you have an Apple-branded display:
- Use the cable that came with the display, and check Apple’s display support pages for current compatibility details with your iPad model.
Warning: Many USB-C cables only charge and transfer data. They don’t carry video. If you connect USB-C to USB-C, the monitor’s USB-C port must also accept video input (often labeled DisplayPort or Thunderbolt). If you grab a random USB-C cable from a drawer and nothing appears, the cable is the most likely culprit. Look for a cable or USB-C hub that’s specifically rated for video output.
Expected result: You have a cable or adapter that matches both your iPad’s port and your monitor’s input.
Step 3: Connect Your iPad and Select the Right Input
- Plug the cable or adapter into your iPad.
- Connect the other end to your monitor, TV, or projector. If you’re using an adapter, connect an HDMI or VGA cable from the adapter to the display.
- Turn on the display.
- If the picture doesn’t appear on its own, press the Source or Input button on the display (or its remote). Choose the input your iPad is plugged into, such as HDMI 1, USB-C, or VGA.
If you’re using an Apple-branded external display, it may turn on automatically and charge your iPad while connected. Check Apple’s display support pages for specifics on your model.
Expected result: Your iPad’s screen appears on the external display as a mirrored copy. On a mirroring-only iPad, you’re done. Everything you do on the iPad now shows up on the big screen.
Step 4: Turn On Stage Manager from Control Center (Supported Models Only)
On a supported iPad, this is what switches the monitor from mirroring to an extended workspace.
- Connect the display first (Step 3).
- Turn your iPad to landscape orientation.
- Swipe down from the top-right corner of the screen to open Control Center.
- Tap the Stage Manager button.
You can also touch and hold the Stage Manager button to switch between Stage Manager and Windowed Apps.
Expected result: The external display stops mirroring and becomes its own workspace. Your iPad keeps its own windows, and the monitor can show different ones.
Tip: If you don’t see the Stage Manager button in Control Center, use the Settings method in Step 5 instead.
Step 5: Or Turn On Stage Manager from Settings
If you prefer not to use Control Center, you can also turn on Stage Manager from the Settings app, per Apple’s support page.
- Open Settings > Multitasking & Gestures.
- Select Stage Manager.
The same screen offers two other modes for the iPad itself. Here’s what they do:
- Stage Manager: Groups apps into overlapping, resizable windows. On supported models with a wired display, this is the mode that lets you use the monitor as a separate workspace.
- Full Screen Apps: One app fills the screen at a time. An external display mirrors the iPad.
- Windowed Apps: Lets apps open in resizable windows on the iPad itself.
Expected result: Stage Manager is selected. With the display connected, the monitor now acts as a separate screen.
Step 6: Move App Windows to the External Display
With your displays arranged in Settings > Display & Brightness > Arrangement (see the comparison section above), you move individual apps by dragging their windows.
- Open an app on your iPad with Stage Manager turned on.
- Drag the app’s window toward the external display.
- Use your trackpad or mouse pointer to work with windows on the monitor. A keyboard and pointing device make the external screen much easier to use, since you can’t touch the monitor directly.
Apple’s iPad User Guide also lists other ways to do it: tap the app’s icon in the Dock on the display you want, or open the app’s menu bar, tap Window, then Move to Display. If the drag doesn’t behave as you expect, see Apple’s Move an app to an external display and its companion page, Connect iPad to a display with a cable.
Expected result: An app window appears on the monitor while a different app stays on your iPad.
For tiling and window layouts on the iPad’s own screen, see our Split View and Slide Over guide and our iPad multitasking and Stage Manager guide. We won’t repeat those here.
Step 7: (Optional) Mirror Wirelessly with AirPlay
AirPlay is Apple’s wireless streaming system. It skips the cables, and based on Apple’s current documentation, it works for mirroring your screen. We didn’t find Apple documentation describing an extended-display mode over AirPlay, even on supported iPads.
- Make sure your iPad and your Apple TV or AirPlay-compatible TV are generally on the same Wi-Fi network.
- Open Control Center.
- Tap Screen Mirroring.
- Choose your Apple TV or AirPlay-compatible TV from the list.
- If a code appears on the TV, type it on your iPad.
To stop, open Control Center, tap Screen Mirroring, and tap Stop Mirroring.
Expected result: Your iPad’s screen appears on the TV as a mirrored copy.
If your Apple TV doesn’t show up in the list, see our AirPlay troubleshooting guide.
Configuration
Your settings rarely need changing after the first setup. Here are the ones that matter:
| Setting | Where to find it | What it does |
|---|---|---|
| Stage Manager button | Control Center | Turns Stage Manager on or off. Touch and hold to switch between Stage Manager and Windowed Apps. |
| Multitasking mode | Settings > Multitasking & Gestures | Lets you turn Stage Manager on or off, which affects whether a connected monitor mirrors or extends. |
| Display arrangement | Settings > Display & Brightness > Arrangement (look for it with the display connected) | Sets the iPad’s position relative to the external monitor, so the pointer and windows cross the correct edge. |
| Screen Mirroring | Control Center | Pick an AirPlay receiver to mirror to wirelessly. |
| Display input | Buttons or remote on your monitor/TV | Selects which port the display shows. Not an iPad setting. |
Common patterns:
- Presenting in a meeting room: Wired connection with Stage Manager off (or a mirroring-only iPad). Everyone sees exactly what you see.
- Desk setup on a supported iPad: USB-C display cable or Thunderbolt dock, a keyboard and trackpad, and Stage Manager on.
- Movie night on the TV: AirPlay to an Apple TV. No cables, mirror-only.
Tips and Troubleshooting
Monitor says “No Signal”
Why it happens: The display is on the wrong input, the cable doesn’t carry video, or the adapter isn’t compatible.
Fix:
- Press Source or Input on the display and pick the port your iPad is plugged into.
- Unplug and reconnect the cable or adapter at both ends.
- Try a cable you know supports video, or one of Apple’s adapters listed in Step 2.
- Restart your iPad and the display.
- Test with a different cable or a different display to find the faulty part.
iPad charges but no video appears
Why it happens: Your cable or USB-C hub supports charging and data only. This is very common with generic USB-C cables.
Fix: Switch to a cable or adapter that’s explicitly rated for video output. On a Lightning iPad, a regular charging cable never carries video. You’ll need the Lightning Digital AV Adapter or Lightning to VGA Adapter.
The monitor mirrors instead of showing separate windows
Why it happens: Your iPad isn’t on the external-display list, Stage Manager is off, or you’re using AirPlay.
Fix:
- Compare your exact model and generation against the list in Step 1.
- Use a wired connection instead of AirPlay, since AirPlay is designed for mirroring rather than extended display.
- With the display connected, open Control Center and tap Stage Manager.
Stage Manager is missing or grayed out
Why it happens: Your iPad runs an older iPadOS version, the display isn’t connected yet, or your model supports Stage Manager on its own screen but not on an external display.
Fix:
- Update in Settings > General > Software Update.
- Connect the display first, then open Control Center.
- Check Settings > Multitasking & Gestures and make sure Stage Manager is selected.
- Re-check your model against Apple’s external-display list. Remember, the Stage Manager list and the external-display list aren’t the same.
Apps won’t move to the external display
Why it happens: Your iPad supports mirroring but isn’t on the external-display list, even if it runs Stage Manager on its own screen.
Fix: Check the precise generation in Settings > General > About. “iPad Pro 11-inch” alone isn’t enough. It needs to be the 3rd generation or later.
The picture looks blurry or low resolution
Why it happens: The final resolution depends on your iPad, cable or adapter, and monitor working together. VGA adapters and older HDMI gear limit the output.
Fix: Connect with USB-C directly to the monitor’s native input where possible, rather than through a VGA adapter. Also check the monitor’s own maximum resolution in its manual.
Want the reverse: iPad as a Mac monitor?
That’s a different feature called Sidecar. It extends your Mac’s desktop onto the iPad, not the other way around. See our guide on using Sidecar to turn your iPad into a second Mac display.
Wrapping Up
You can now get your iPad onto a bigger screen: mirror with any compatible cable or AirPlay, or turn on Stage Manager for a real second workspace if your iPad is on Apple’s list. Honestly, extended display on a supported iPad Air or iPad Pro with a keyboard and trackpad gets surprisingly close to a desktop setup.
Setting up the arrangement in Settings > Display & Brightness takes a minute the first time, but after that the external monitor behaves much like a second screen on a Mac or PC. If your iPad is mirror-only, a good USB-C or Lightning adapter still makes it a great presentation and movie machine.
| Step | Action | Applies To |
|---|---|---|
| 1 | Check your model against Apple’s external-display list | All iPads |
| 2–3 | Connect the right cable/adapter and select the display input | All iPads with video-out |
| 4–5 | Turn on Stage Manager in Control Center or Settings | Supported models only |
| 6 | Drag app windows to the monitor | Supported models only |
| 7 | Mirror wirelessly with Screen Mirroring | Any iPad + AirPlay receiver |