
You need Windows…occasionally, maybe for a work app that’s still Windows-only or because some legacy software refuses to die. Rather than keeping a separate PC around, your Mac can handle both operating systems.
The landscape changed dramatically when Apple moved to their own processors. If you have an Intel Mac, you’ve got options. If you have Apple Silicon (M1, M2, M3, or M4), your path is different but arguably smoother.
Here’s how to get Windows running on your Mac, what each method costs, and which one actually works best.
Check Your Mac First
Before diving in, you need to know what kind of Mac you have. Click the Apple menu > About This Mac.

If you see “Intel” in the processor line, you can use Boot Camp for native Windows installation. If you see Apple M1, Apple M2, Apple M3, Apple M4 or Apple M5, you’ll need virtualization software, but honestly, that’s turned out to be the better experience anyway.
Boot Camp (Intel Macs Only)
Boot Camp remains the official way to run Windows natively on Intel Macs. You’re literally installing Windows as a second operating system that you boot into separately.
What you need:
- Intel-based Mac with at least 64GB free storage
- Windows 10 or Windows 11 ISO file (download from Microsoft)
- 16GB USB drive for installation media
The process:
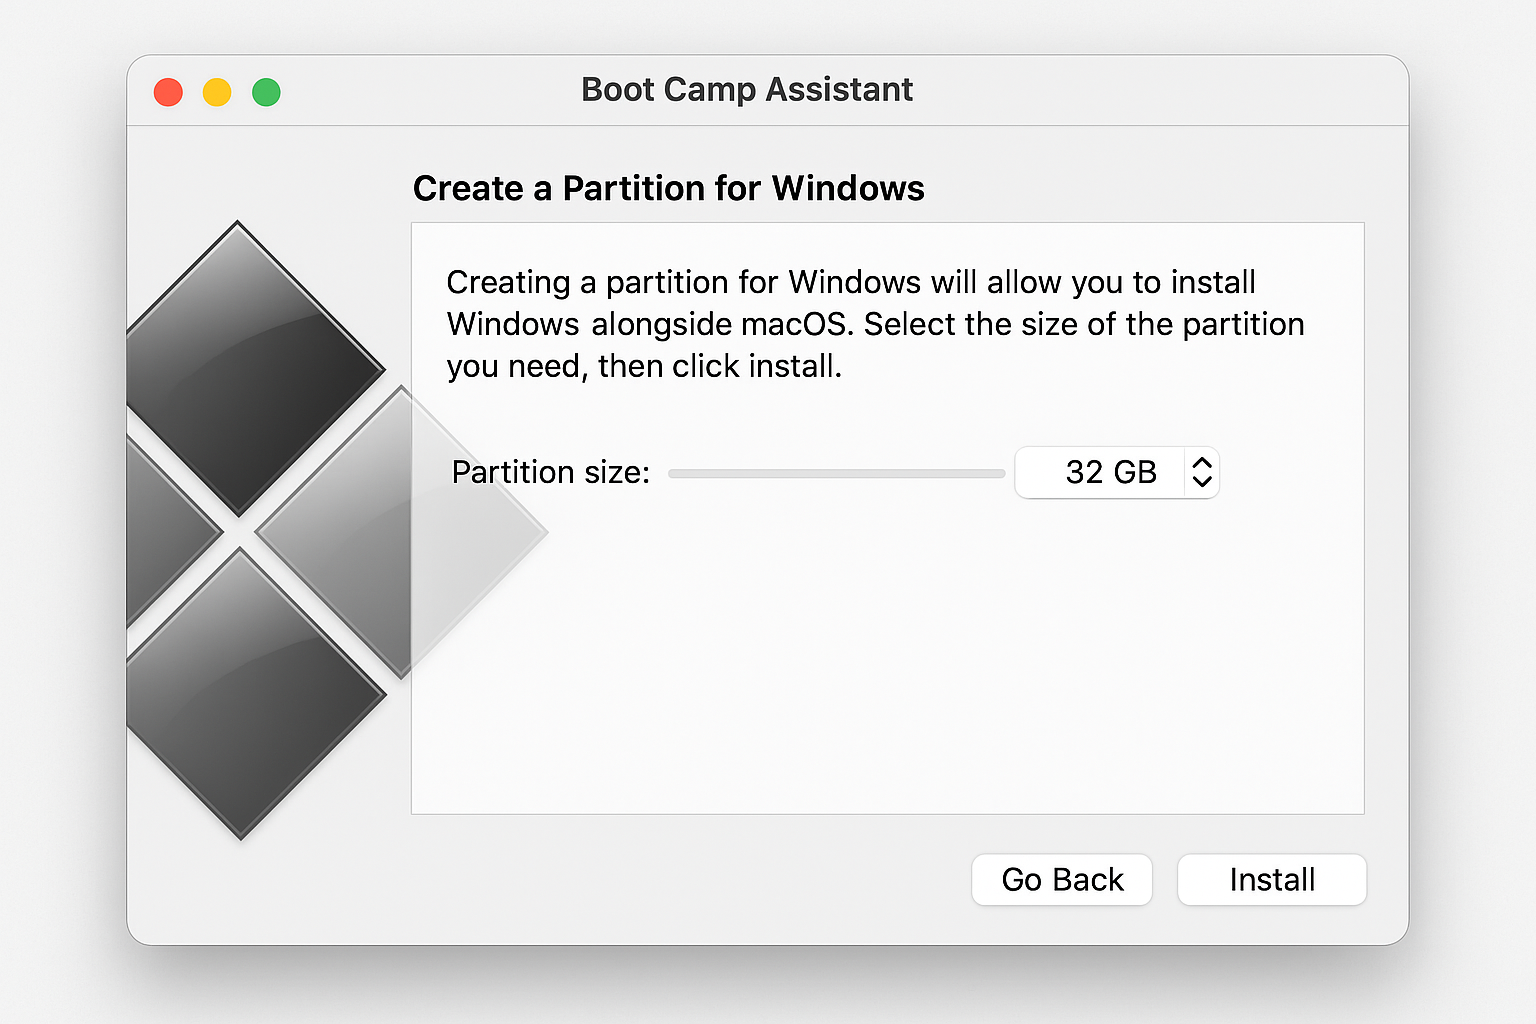
- Open Boot Camp Assistant from Applications > Utilities
- Follow the prompts to download Windows support software and create installation media
- Partition your drive (you can’t change this later — allocate generously)
- Install Windows from the USB drive
- Install Boot Camp support software for proper drivers
Advantages: Windows runs at full speed since it’s using your Mac’s hardware directly. You can install any Windows software without limitations.
Downsides: You have to restart to switch between macOS and Windows. The partition size is permanent. Windows 11 might need registry tweaks for full compatibility.
Parallels Desktop (Apple Silicon Macs)
For Apple Silicon Macs, Parallels Desktop has become the gold standard. Version 26 runs Windows 11 ARM smoothly enough that you’ll forget you’re in a virtual machine.
What you need:
- Apple Silicon Mac (M1, M2, M3, or M4)
- Parallels Desktop ($99/year or $129 one-time)
- Windows 11 ARM ISO (Parallels can download this for you)
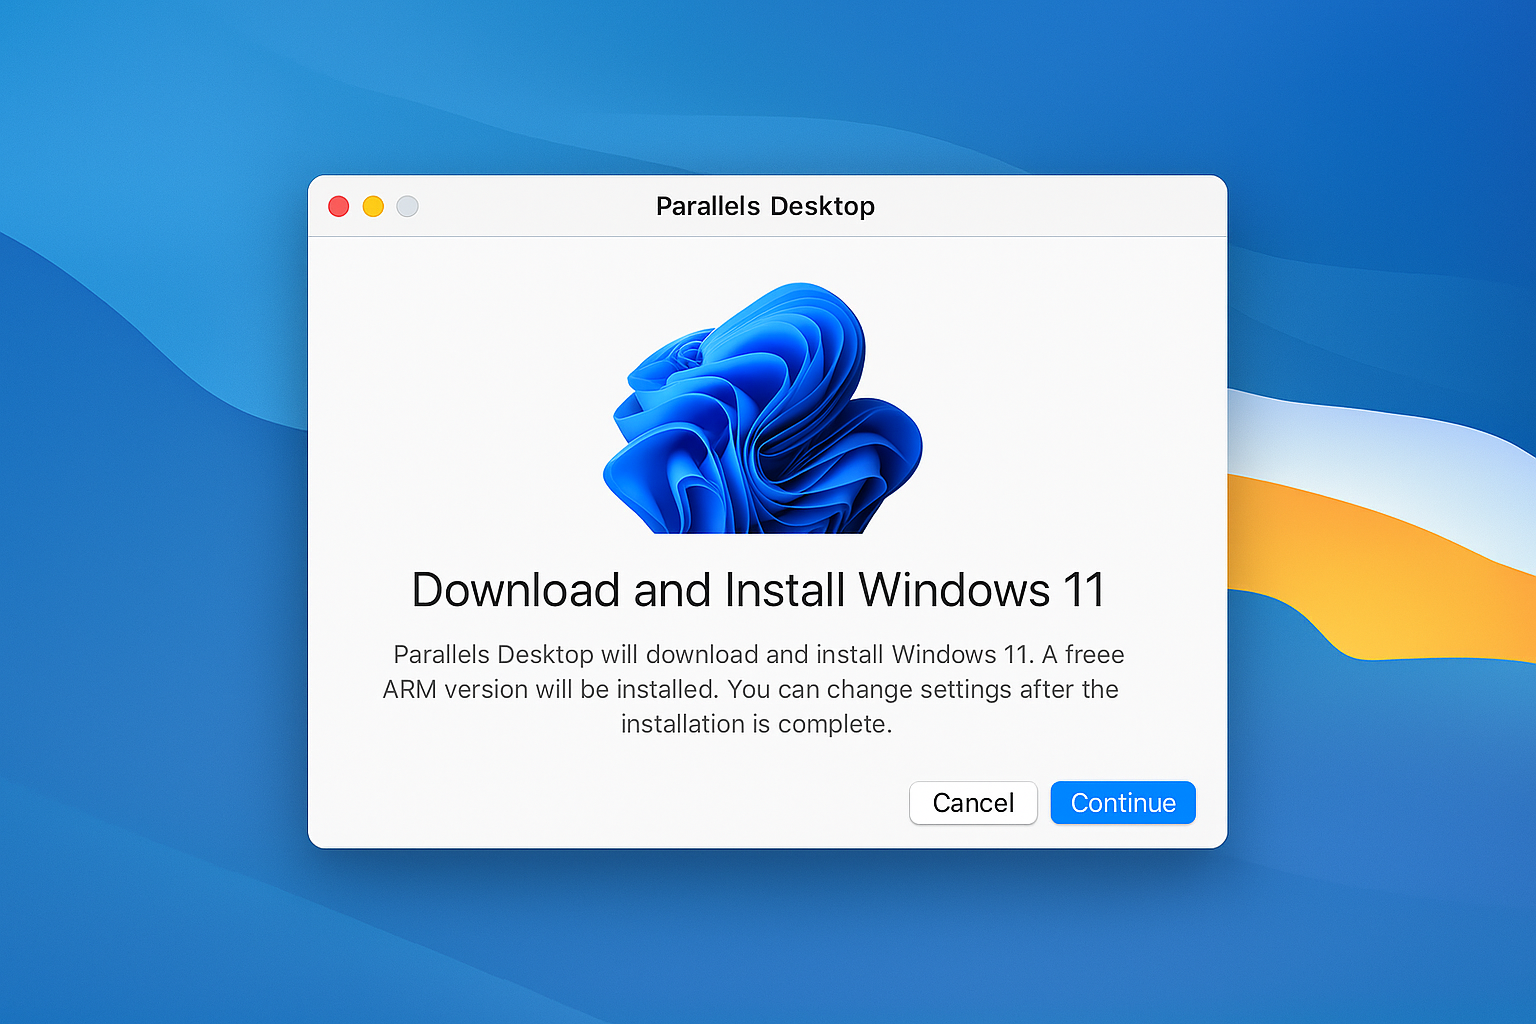
The process:
- Download Parallels Desktop from their website
- Launch Parallels and choose “Install Windows”
- Let Parallels handle the Windows 11 ARM download and installation
- Allocate RAM and storage (you can adjust these later)
Why it’s excellent: You can run Windows and macOS simultaneously. Copy and paste works between systems. Windows apps appear in your Mac’s dock. Performance is surprisingly good — Microsoft Office feels native.
The catch: It’s not free, and you’re running Windows ARM, which means some older x86 software won’t work (though Windows 11’s emulation handles most cases).
Alternative Virtualization Options
UTM is a free alternative that works on Apple Silicon Macs. It’s more technical to set up but costs nothing. Good for occasional Windows use or if you want to experiment first.
VMware Fusion and VirtualBox work on Intel Macs but trail Parallels in performance and polish. VirtualBox is free but feels like it – slower and more finicky.
Remote Desktop Connection
If you already have a Windows PC on your network, you might not need Windows installed locally at all.
Set up the Windows PC:
- Open Settings > System > Remote Desktop
- Enable Remote Desktop
- Note the computer’s IP address
Connect from your Mac:
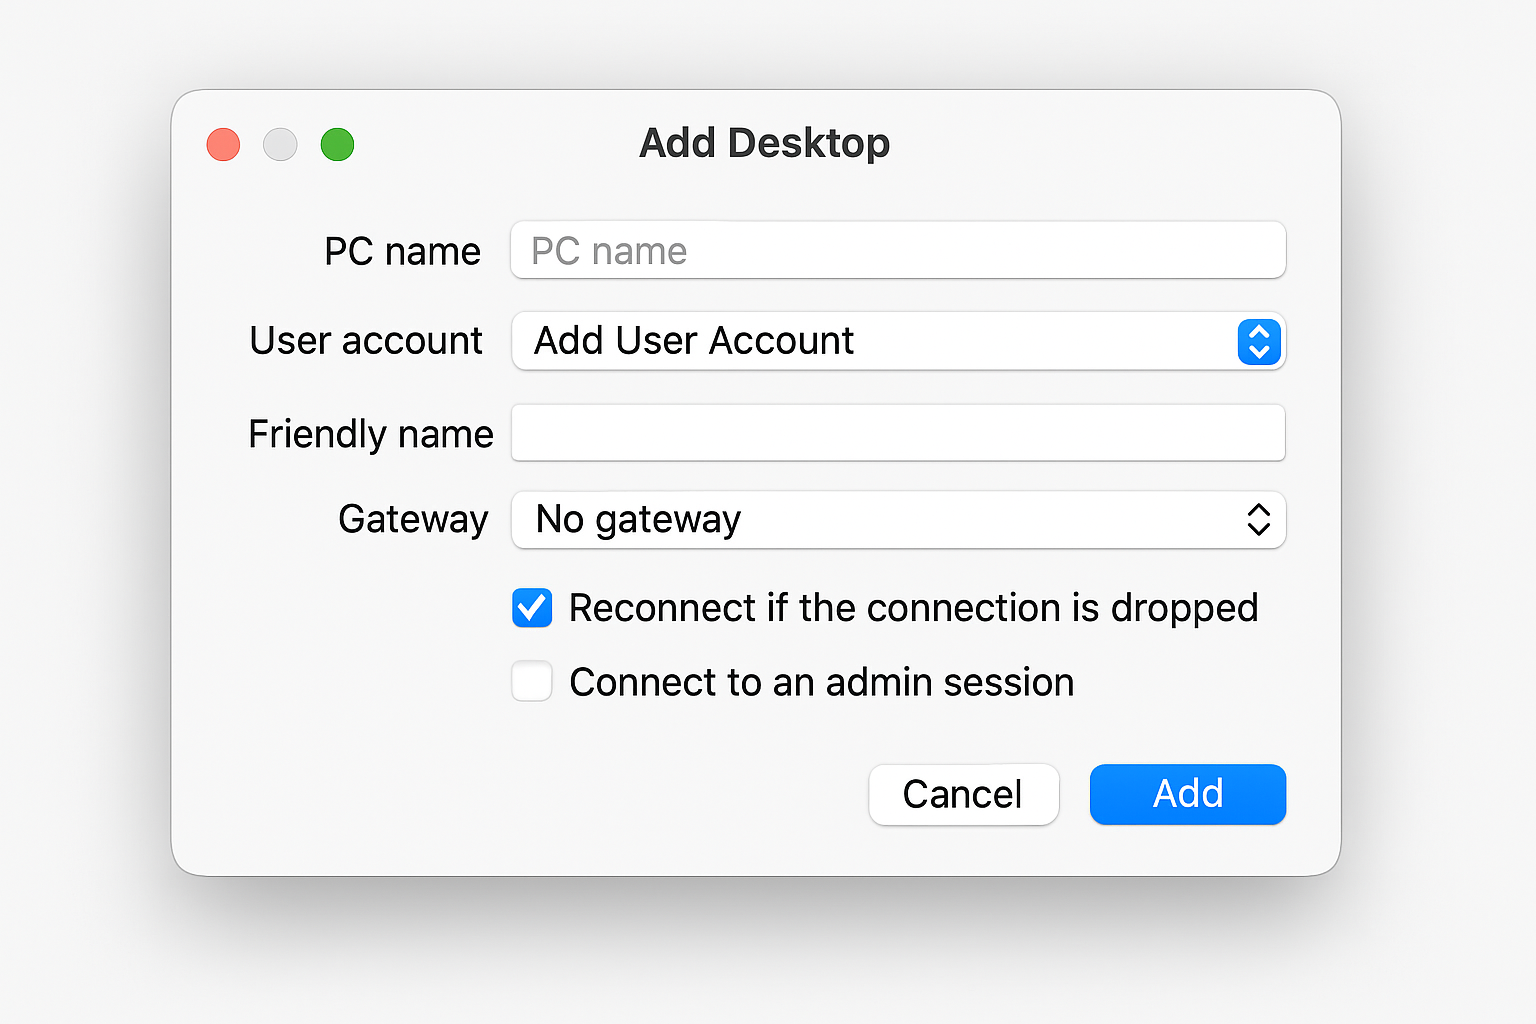
- Download Microsoft Remote Desktop from the Mac App Store
- Add a new connection with your Windows PC’s IP address
- Enter your Windows username and password
When this works well: You’re on the same network, have fast WiFi or Ethernet, and only need Windows occasionally. The Windows PC does all the heavy lifting.
When it doesn’t: Slow networks make this painful. You need the Windows PC powered on and accessible.
CrossOver (Compatibility Layer)
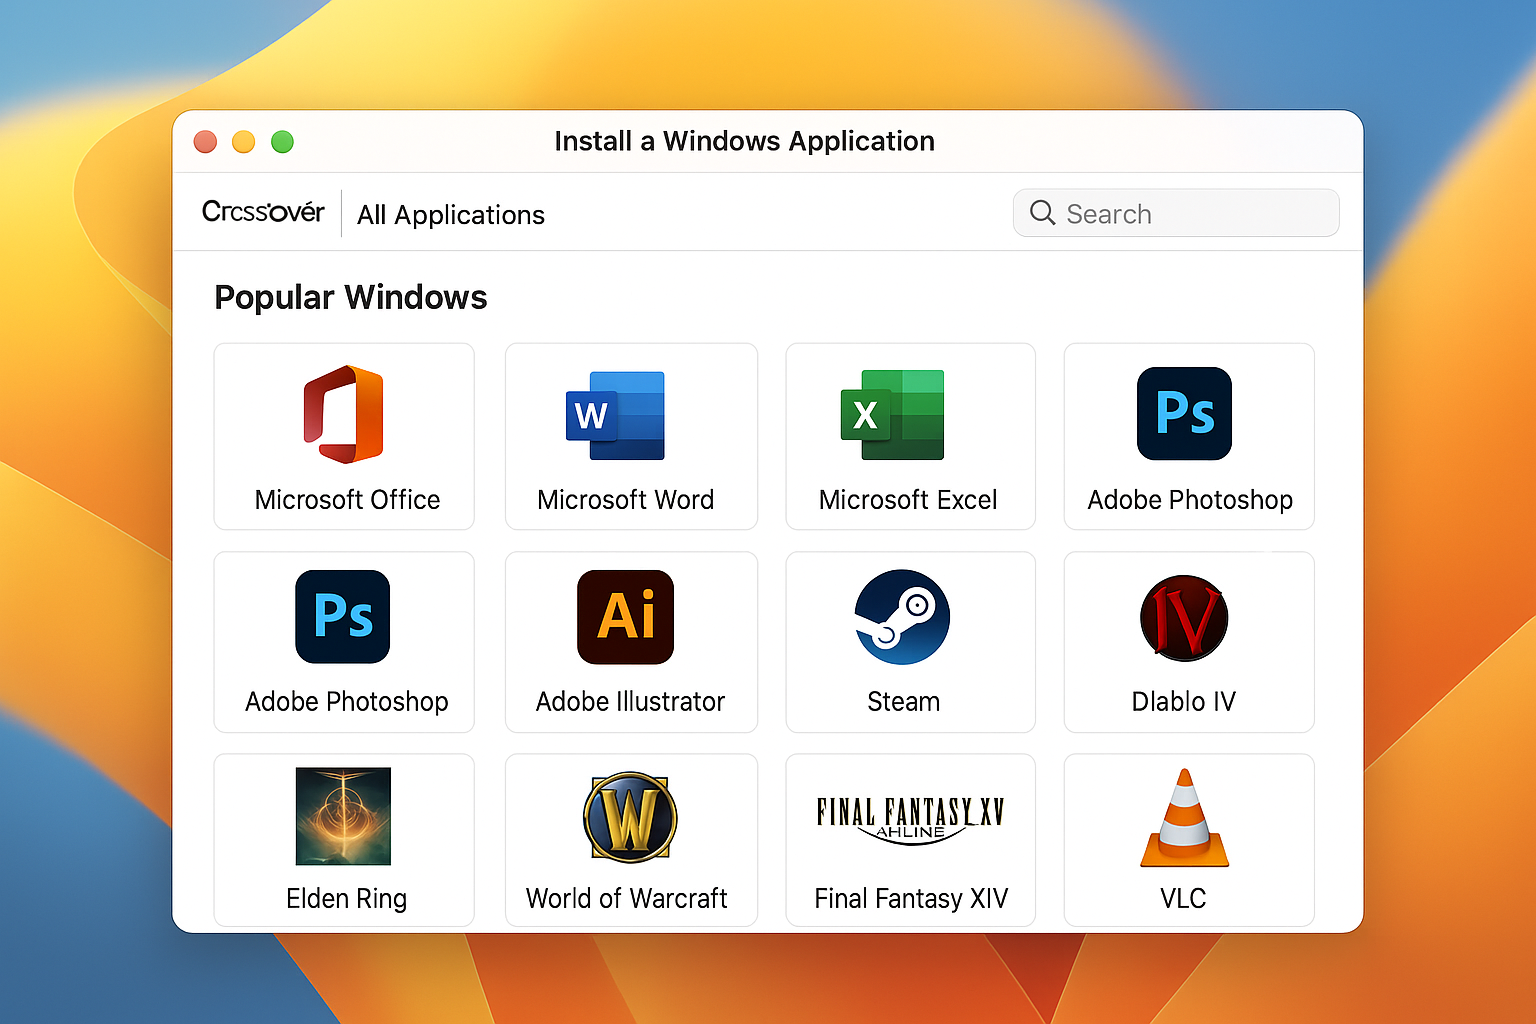
CrossOver runs specific Windows apps without installing Windows at all. It’s based on Wine and works by translating Windows API calls to macOS equivalents.
What works: Microsoft Office, many games, older Windows software. Their compatibility database lists thousands of tested applications.
What doesn’t: Newer software, anything requiring deep Windows system integration, most modern games.
Cost: $74/year, but no Windows license required.
This is worth trying if you only need one or two specific Windows apps and they’re on CrossOver’s compatibility list. It’s hit-or-miss, but when it works, it’s elegant.
Our Recommendations
For Apple Silicon Mac users: Parallels Desktop. Yes, it costs money, but the experience is polished enough that you’ll actually use it. UTM if you’re budget-conscious and don’t mind tinkering.
For Intel Mac users: Boot Camp if you need maximum performance or plan to use Windows heavily. Parallels or VMware Fusion if you want to run both operating systems simultaneously.
For occasional use: Remote Desktop to an existing Windows PC, or CrossOver if your specific apps are supported.
Skip entirely: The nuclear option of wiping macOS completely to install Windows. You bought a Mac so keep macOS around.
What About Windows 11?
Windows 11 is now the current version and what you should install for new setups. Intel Macs can run standard Windows 11 through Boot Camp (though some registry edits might be needed). Apple Silicon Macs need Windows 11 ARM, which Parallels handles automatically.
Windows 10 still works fine if you already have it installed, but Microsoft’s support ends in 2025.
Storage and Performance Tips
Allocate enough space upfront. Boot Camp partitions can’t be resized later. Plan for at least 100GB if you’ll install software. Virtual machines can be expanded but it’s easier to start generous.
External displays may go blank for up to 2 minutes during Boot Camp installation on Thunderbolt 3 connections. This is normal.
Back up first. Any method involving disk partitioning or major software installation should start with a complete backup.
The Windows-on-Mac experience has genuinely improved. Apple Silicon made virtualization fast enough for daily use, while Intel Macs still get the raw performance of native installation. Pick the method that fits your hardware and usage pattern, you’ll likely be pleasantly surprised by how well it works.