You can't use it to kill bugs
Your iPhone and iPad have all sorts of features for calls, texts, emails, games, apps, and everything else you do with your device. However, the Magnifier might be the best feature you’re overlooking.
This handy built-in tool lets you zoom in on anything you need a clear view of— from reading small print to threading a needle. The Magnifier also gives you features to adjust your view, apply a filter, and save photos of what you’re magnifying.
When your reading glasses are in the other room or your physical magnifying glass is lost, remember to take advantage of the Magnifier on your iPhone and iPad.
Access the Magnifier
You can open the Magnifier a couple of ways, as an Accessibility shortcut or from the Control Center. Here’s how to make sure it’s set up for each.
Use an Accessibility Shortcut
If you’d like to quickly open Magnifier by triple-clicking the side button or Home button (depending on your device), follow these steps to enable it.
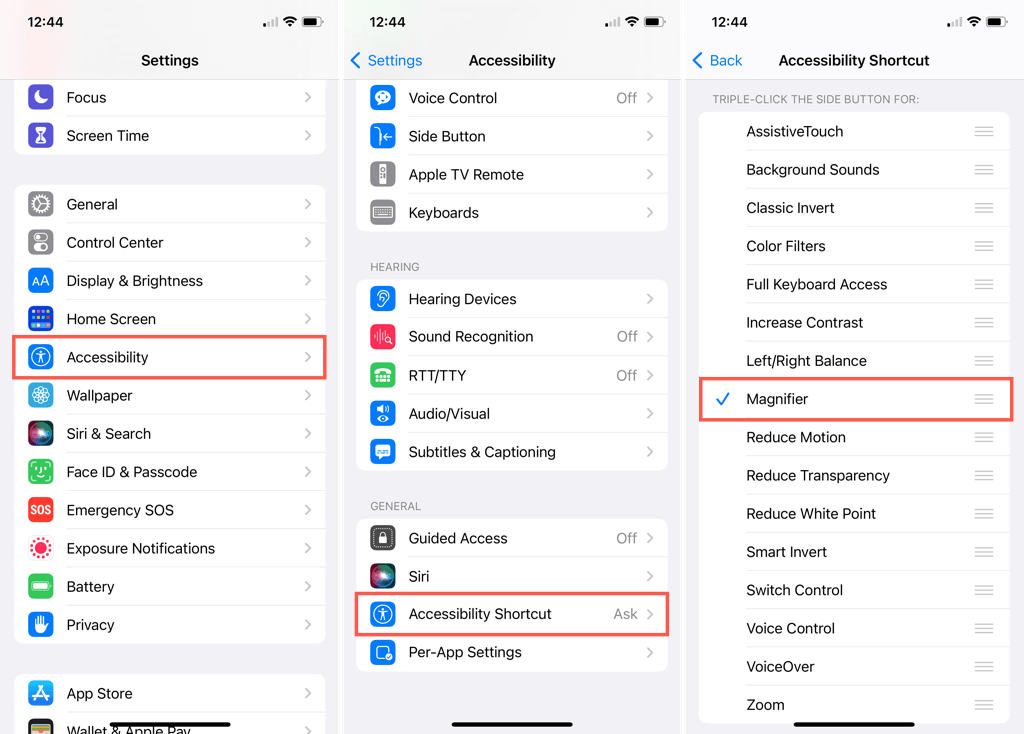
- Open the Settings app and select Accessibility.
- Move down to the last section for General and pick Accessibility Shortcut.
- Select Magnifier to put a checkmark next to it.
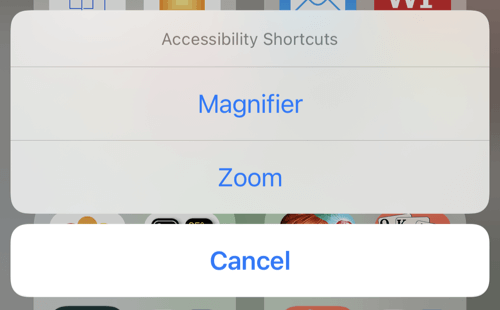
When you triple-click your button, the Magnifier app will open right up. If you have more than one item set for your Accessibility Shortcut, you’ll see a pop-up box to pick the one you want.
Use the Control Center
Another handy spot for the Magnifier is in your Control Center. This lets you open the tool with a simple swipe and tap.
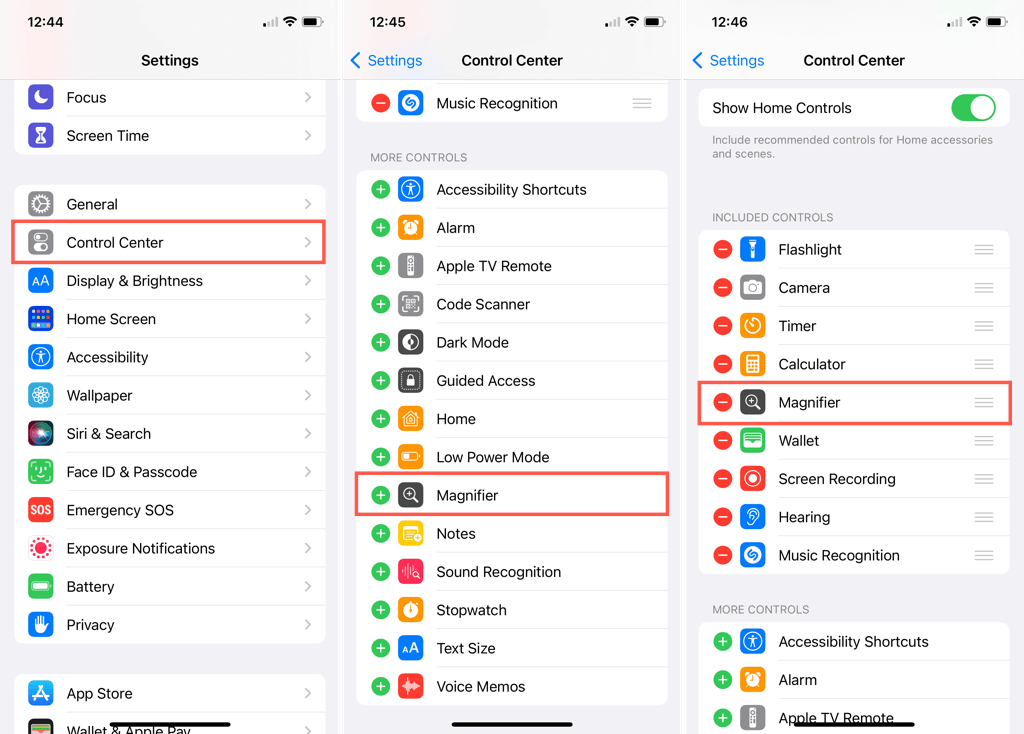
- Open the Settings app and select Control Center.
- Move down to the section for More Controls and tap the plus sign next to Magnifier.
- When it’s added to the top section, Included Controls, drag to pop it into the location you want in the list.
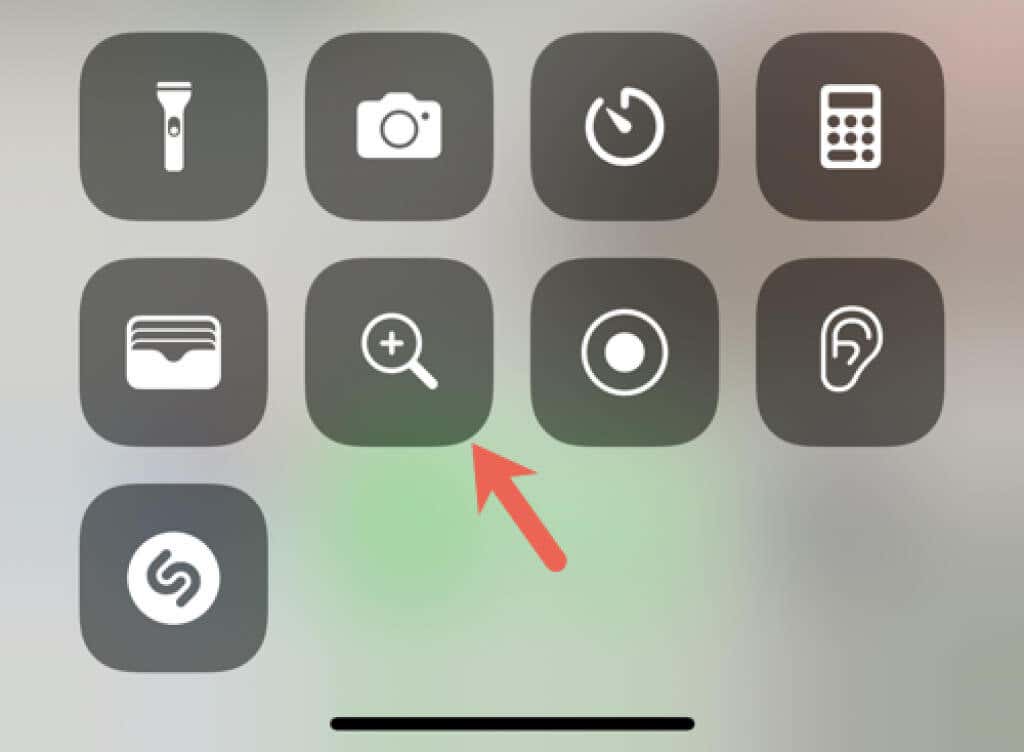
Then, just open your Control Center and tap the Magnifier icon to open it.
Use the Magnifier to Zoom In
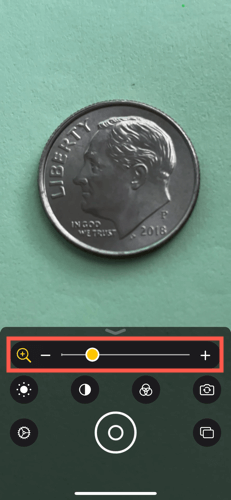
When you’re ready to use the Magnifier, open it from one of the spots described above. The tool uses your device camera to capture the object you’re viewing.
Use the Zoom slider, tap the plus and minus buttons, or pinch your fingers on the screen to increase or decrease the magnification of your object.
Adjust the Brightness
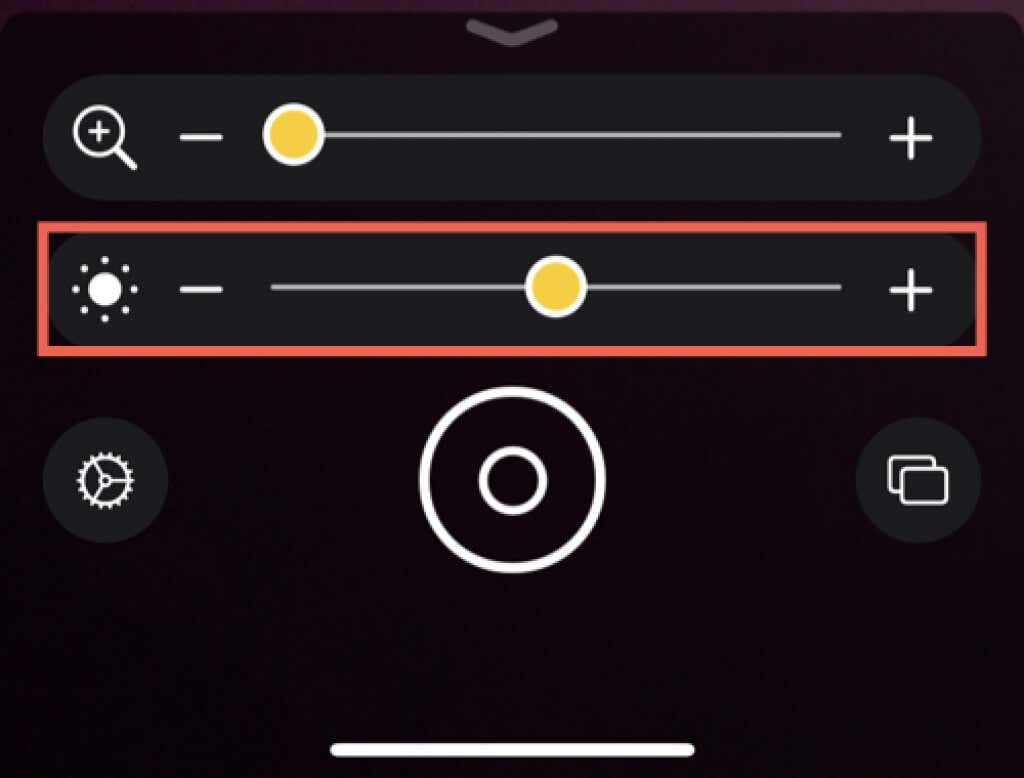
To lighten your screen, tap the Brightness icon. Then, drag the slider or use the plus and minus signs to increase or decrease the brightness.
Change the Contrast
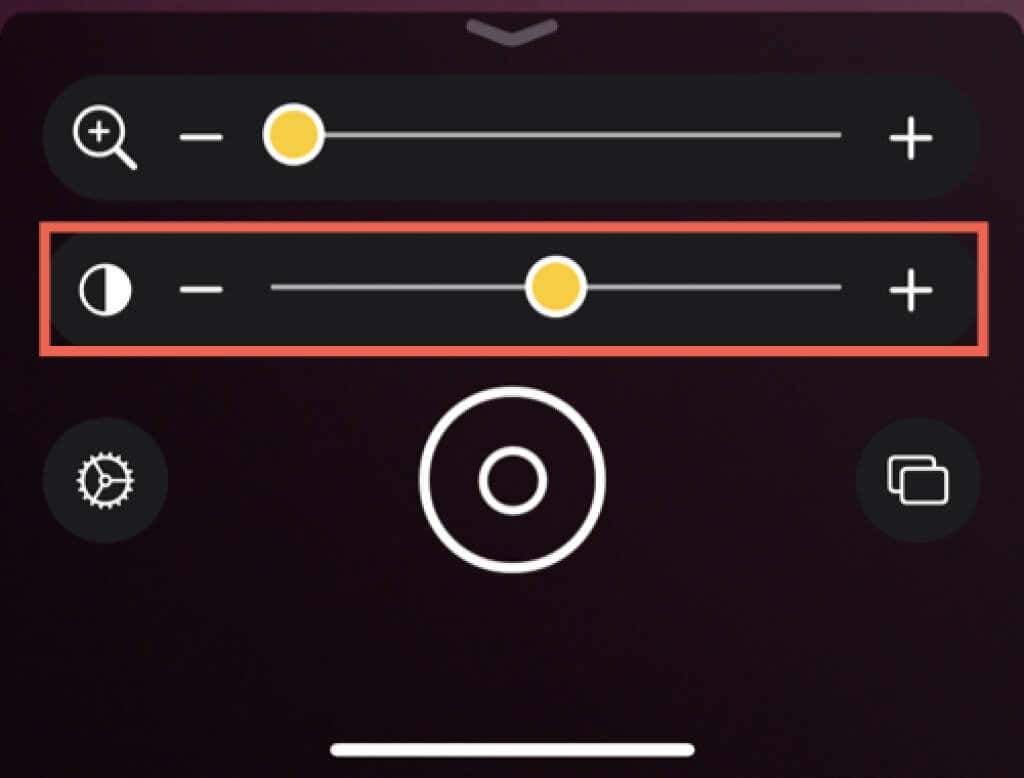
Along with adjusting the brightness, you can change the contrast. Tap the Contrast icon and use the slider or plus and minus signs to increase the contrast for a sharper view or decrease to lessen the contrast.
Apply a Filter
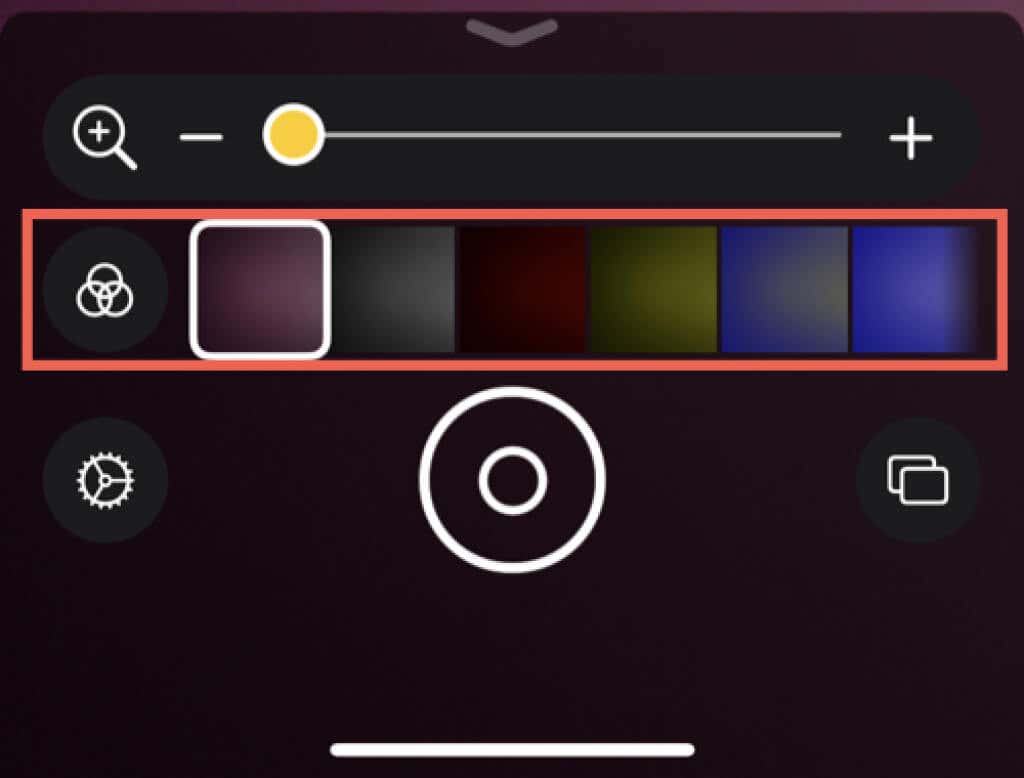
If you have a color vision deficiency, applying a filter might help. Tap the Filter icon and slide to the right to see the options. Even if your color vision is fine, using the filters can make some things stand out better.
You can pick from grayscale, red on black, yellow on black, yellow on blue, white on blue, inverted, inverted grayscale, black on red, black on yellow, blue on yellow, and blue on white.
When you land on the filter you want, your screen updates immediately. You can also choose which color filters to display, which we’ll describe in the Customize the Controls for the Magnifier section below.
Lock the Focus
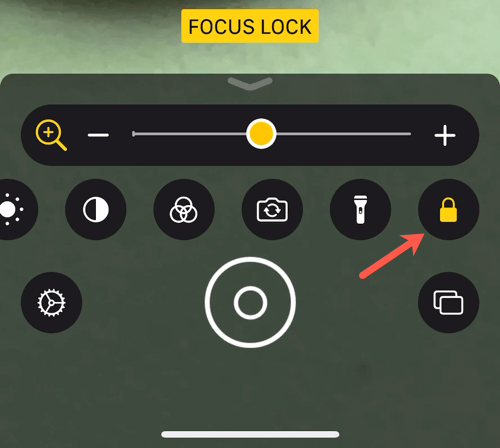
As you move your device, you’ll notice that it attempts to focus and refocus on the object you’re viewing. While this is helpful, it can also be difficult to zoom in on the exact part you want.
To lock the focus on the object you’re magnifying, tap the Focus Lock icon. Then as you move your device, the focus will remain. Tap the icon again to unlock the focus.
Switch the Front and Rear Camera
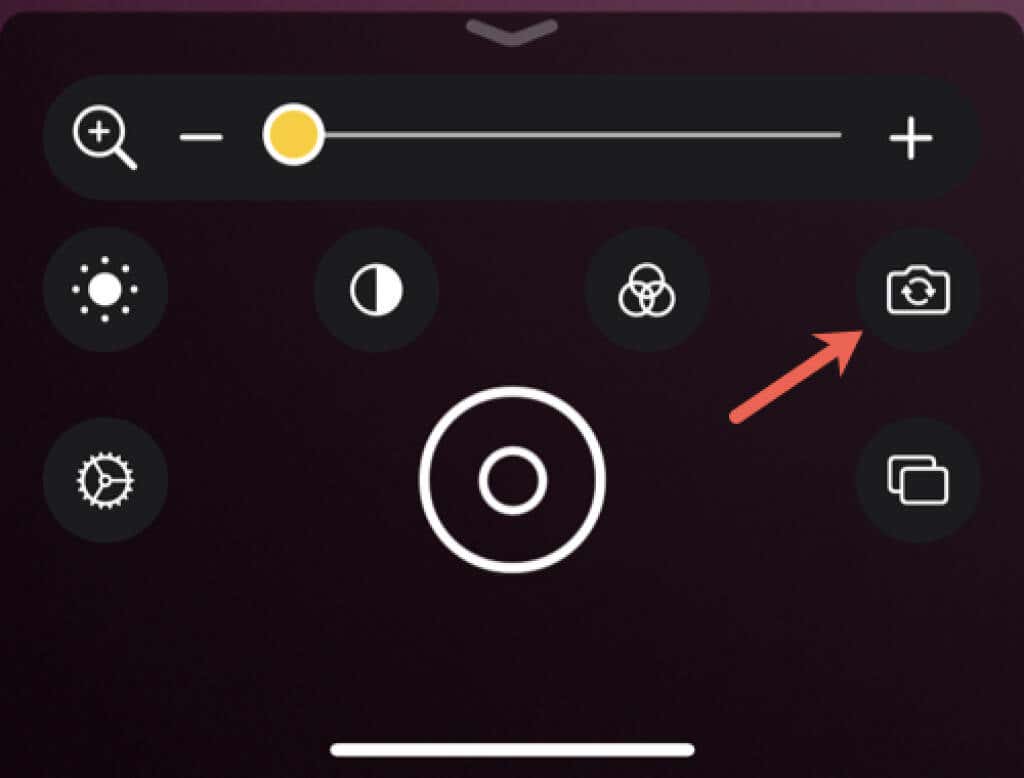
Maybe the object you want to magnify would be easier to capture if you change cameras. Tap the Camera icon to switch between the front- and rear-facing cameras.
Add More Light
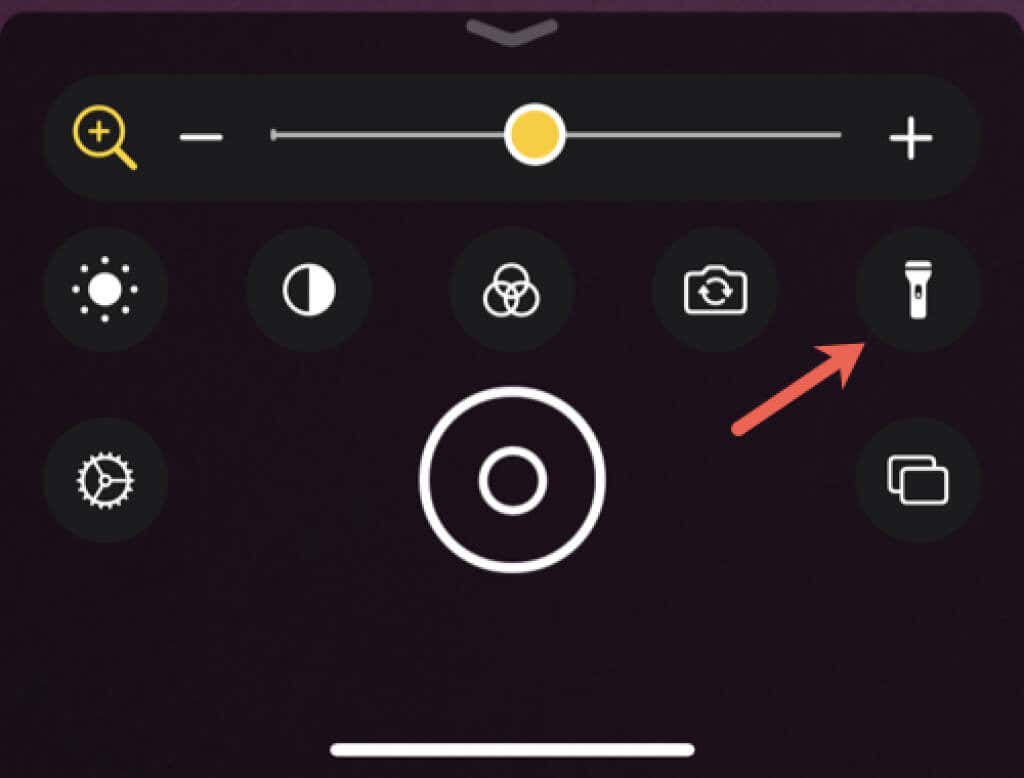
Brightening the screen isn’t always the best method for adding light. Tap the Flashlight icon to use your device’s built-in flashlight. This gives you more light on the actual object.
Customize the Controls for the Magnifier
You can remove each of the controls described above from the Magnifier screen while using it. You can also rearrange the order and place those you use most at the top. Additionally, you can choose which Filters to display if you like.
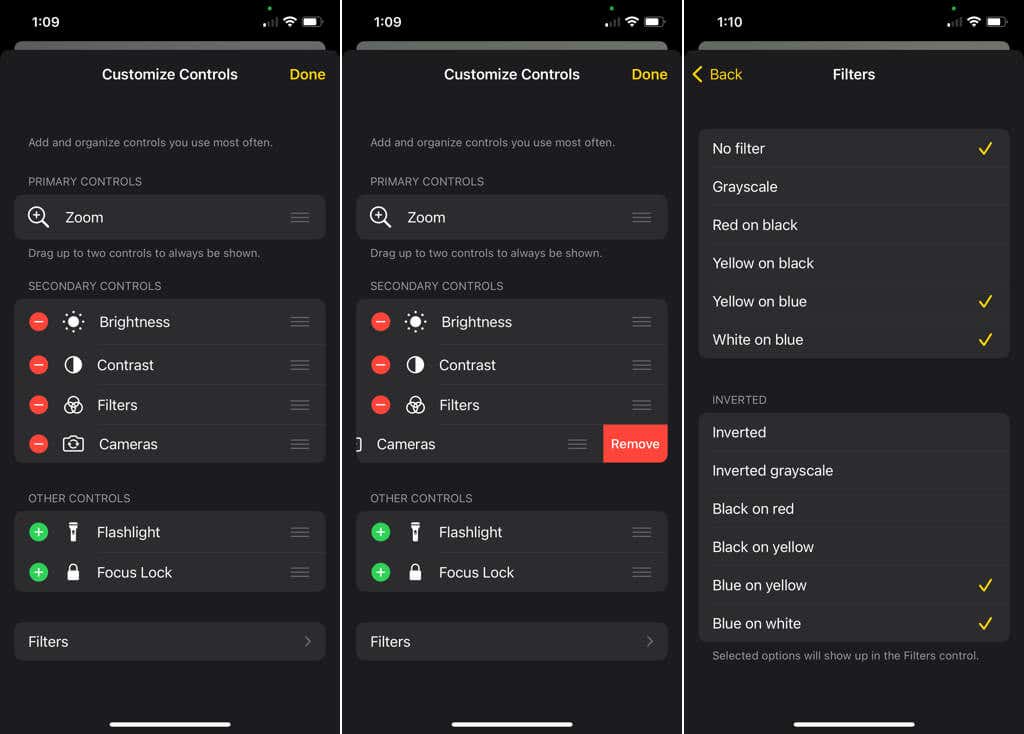
Tap the gear icon to open the Customize Controls screen. You’ll then see these sections:
- Primary Controls: These appear at the top of the control box on the Magnifier.
- Secondary Controls: These appear directly below the Primary Controls.
- Other Controls: These are controls you don’t want to use but remain available should you want to add them later.
To remove a control, tap the minus sign on the left and choose Remove on the right.
To add a control, tap the plus sign on the left.
To rearrange controls, drag the three lines on the right up or down to place the control where you want it. You can shuffle them between the Primary and Secondary Controls sections or within each section.
To change the filters that display for the Magnifier, tap Filters below Other Controls. Tap to place a checkmark next to a filter you want to display. This allows you to show only those filters that are useful to you.
Freeze the Frame
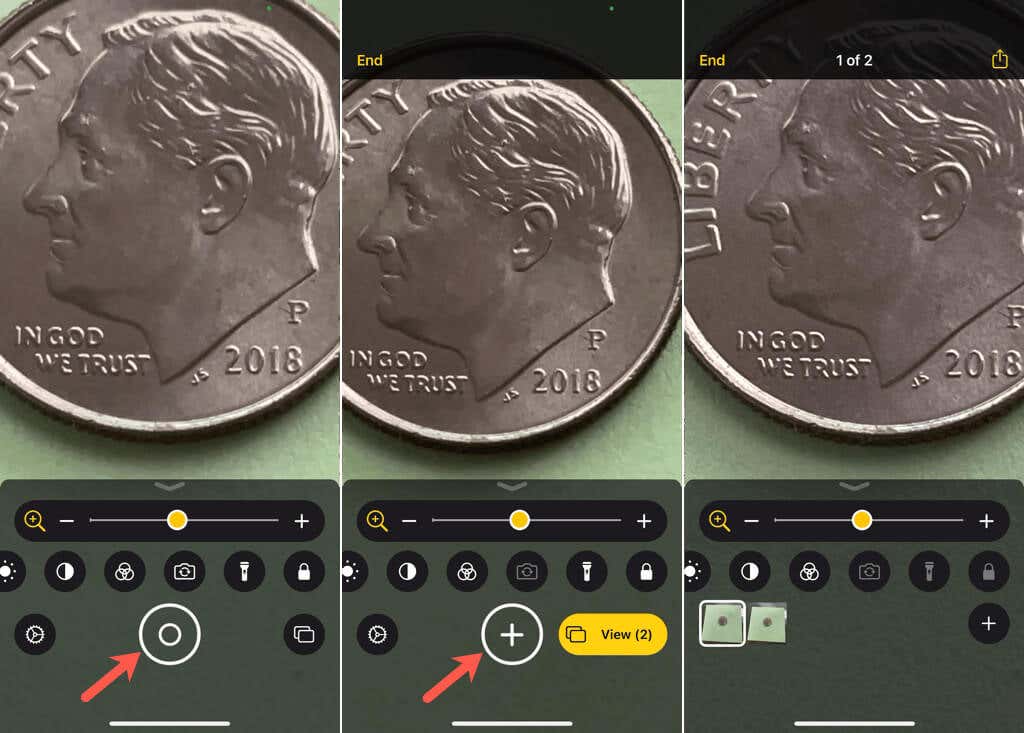
If you arrive at a spot in the object you’re magnifying that you want to capture and keep, tap the Freeze icon. This feature can also help capture a magnified image of something when you can’t directly view the screen. For example, maybe you’re trying to snap a shot of the sometimes too small label on an internal computer part or a splinter on the back of your arm.
You’ll then see an image of the frame you froze. To freeze additional frames, tap the rectangle icon, move your device or the object, and tap the Freeze icon again, which will appear as a plus sign.
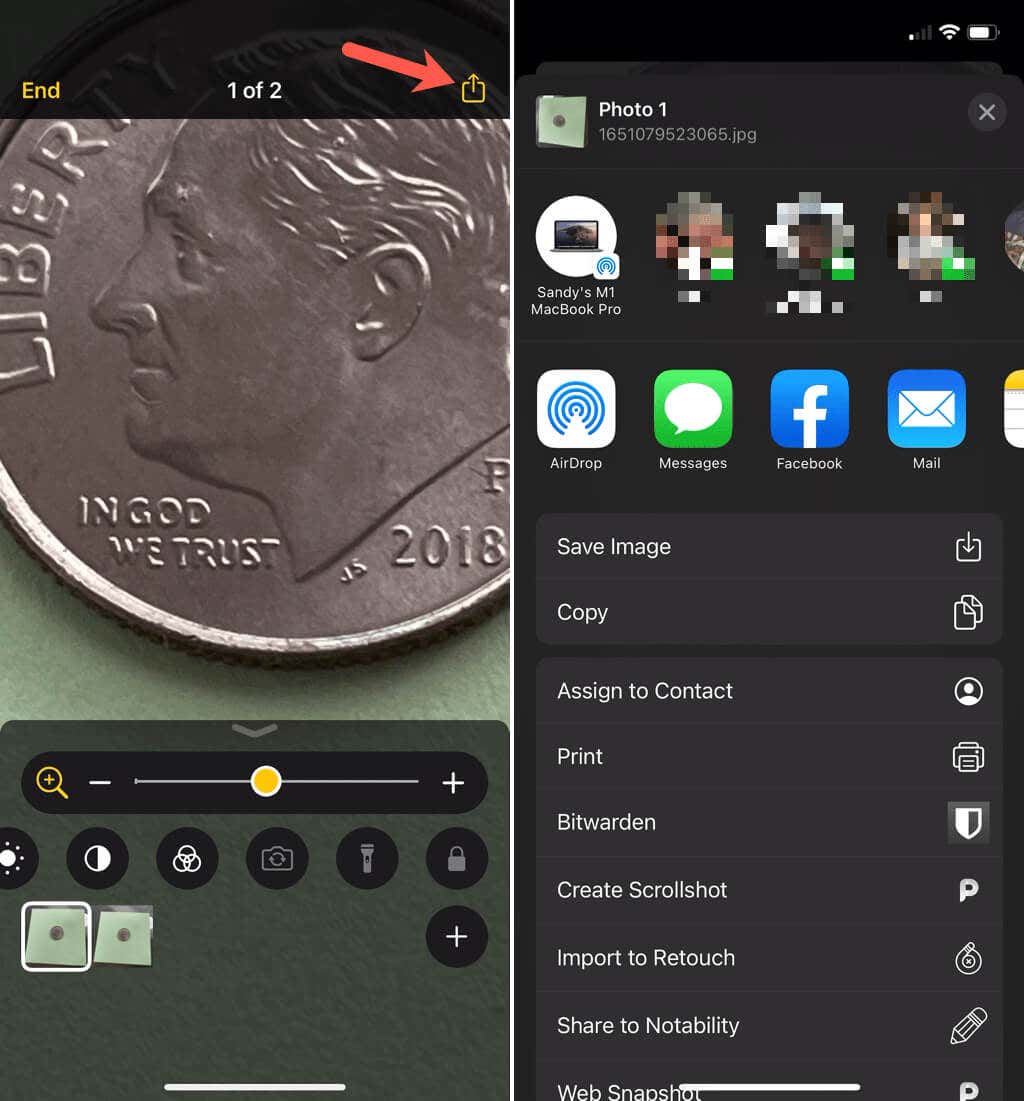
Tap View next to the rectangle icon to see the images you captured. These screenshots are not saved to the Photos app by default. If you want to save or share them, tap the Share icon on the top right. Then pick an option like Save Image or share it via Messages.
When you finish reviewing the images, tap End on the top left.
Detect People Around You
If you have an iPhone 12 Pro, iPhone 12 Pro Max, iPhone 13 Pro, or iPhone 13 Pro Max, you can also use the Magnifier to detect people near you. This helps you to maintain a safe social distance.
Tap the People icon to enable the feature. Move your iPhone so that your camera captures those around you. Your device notifies you with sounds and speech for others nearby. When you finish, tap End to return to the Magnifier.
For more on the people detection feature, head over to Apple Support.
The camera on your iPhone or iPad is obviously useful for snapping photos or capturing video. However, it’s also a great way to zoom in on objects, so keep the convenient Magnifier tool in mind!

