
Installing macOS on an external drive remains one of the most practical ways to troubleshoot other Macs, test new OS versions safely, or create a portable workspace. The process has evolved significantly since Apple Silicon arrived, but it’s still doable with some important caveats.
This guide covers the complete process for both Apple Silicon and Intel Macs, including the port restrictions and compatibility issues you need to know about in 2026.
Why Install macOS on an External Drive?
External macOS installations serve three main purposes: troubleshooting other Macs (though the external drive must match or be compatible with the target Mac’s OS version), testing new macOS versions without touching your main system, and creating a portable workspace you can boot from multiple Macs.
Performance isn’t the concern it used to be as modern Thunderbolt drives offer near-internal speeds, making external installations genuinely usable for daily work.
Hardware Requirements and Port Restrictions
You’ll need an external drive (USB 3.0 or Thunderbolt recommended) with at least 64GB of free space. On Apple Silicon Macs, avoid the DFU (Device Firmware Update) port during installation otherwise it’ll cause silent failures or installation errors. Any compatible port works fine after installation completes.
Here’s the biggest limitation: you cannot boot an external drive containing a newer macOS version from a Mac that hasn’t been upgraded to that version internally. This means your external installation is typically version-specific to the Mac model you created it on.
Format Your External Drive
Connect your external drive to an appropriate port (avoiding the DFU port on Apple Silicon Macs). Open Disk Utility from Applications > Utilities.
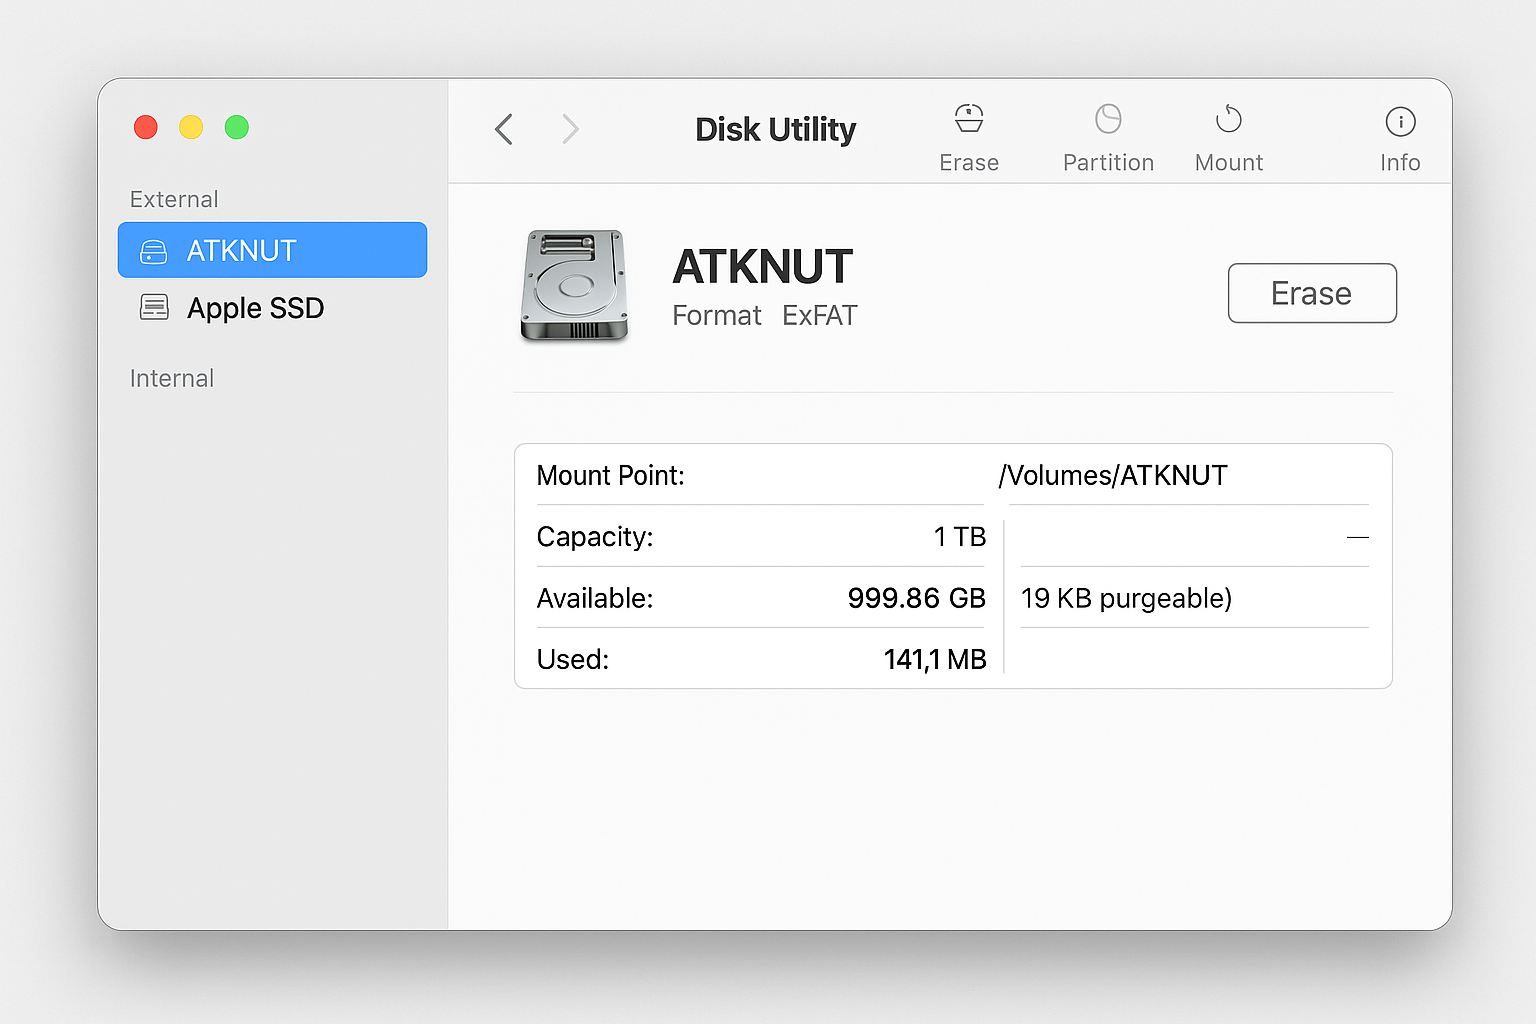
Select your external drive from the sidebar and make sure you select the top-level drive, not a partition. Click Erase and back up any important data first.
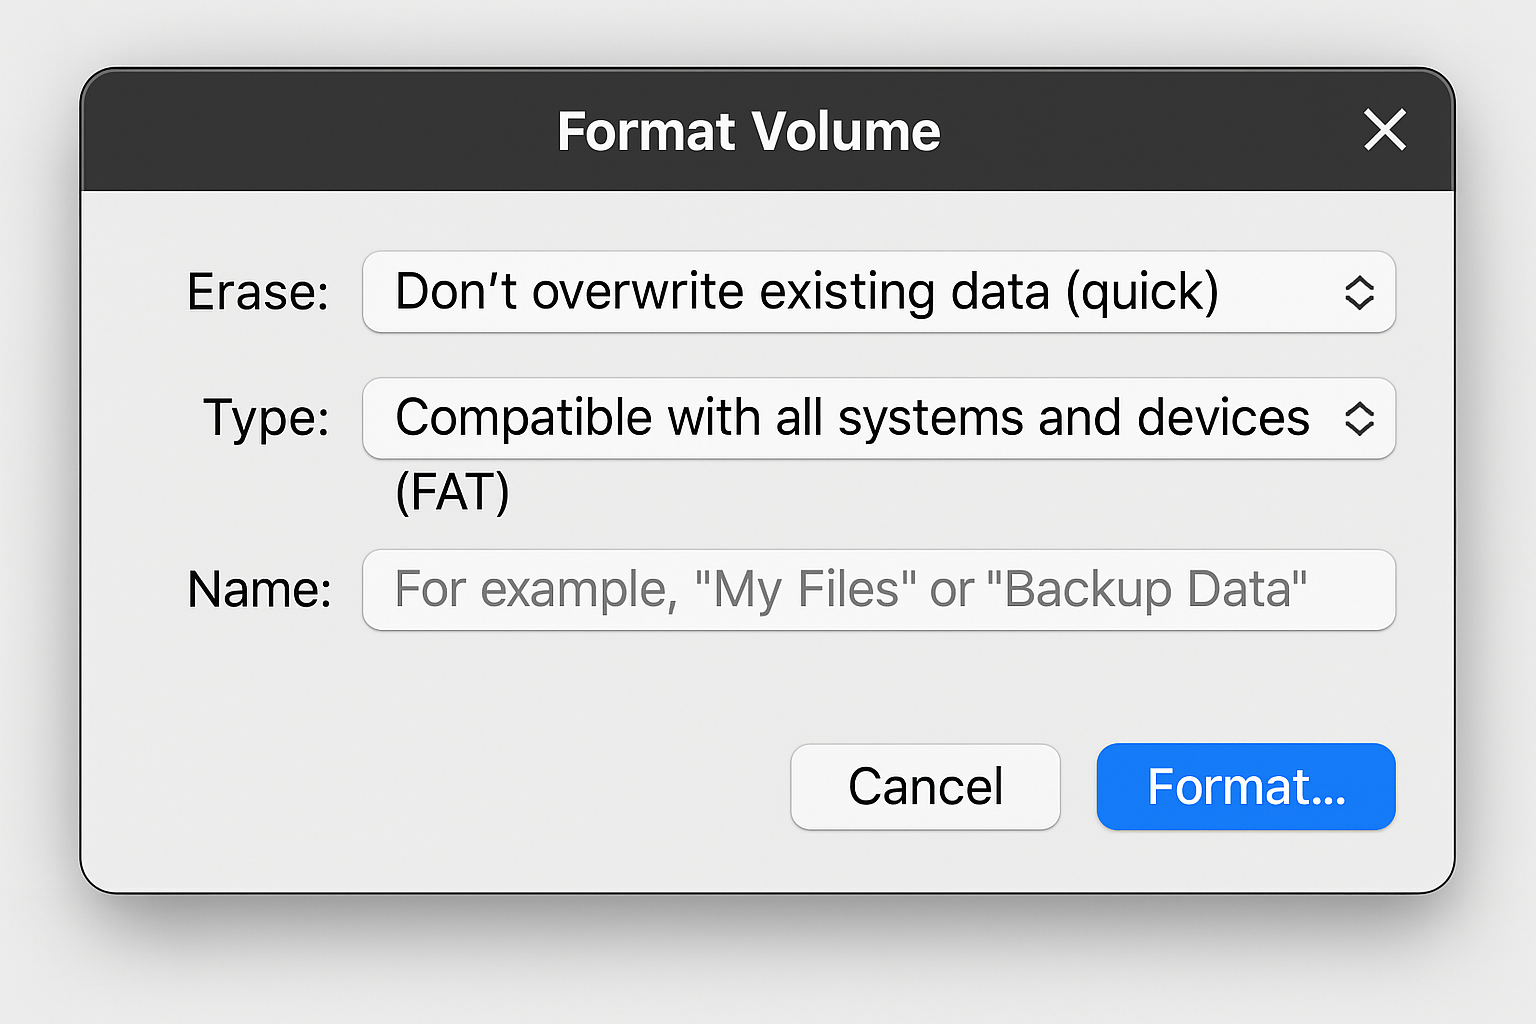
Name your drive something memorable, choose APFS for format, and GUID Partition Map for scheme. If you encounter issues during installer creation later, try reformatting with Mac OS Extended (Journaled) instead as some users report better compatibility with this older format.
The erase process takes about two minutes on modern drives.
Download the macOS Installer
You need the full macOS installer, not just an update. The easiest method is through System Settings > General > Software Update and clicking the info button next to available updates, though you can also download directly from Apple’s servers.

The installer will appear in your Applications folder once downloaded. Don’t run it yet if you’ve already got the target macOS version installed, we’ll handle that in the next step.
Install macOS to External Drive
Double-click the macOS installer from your Applications folder. If you already have this macOS version installed, you’ll see a warning, just click Continue to proceed anyway.
Work through the license agreement until you reach the destination selection screen. By default, it’ll target your internal drive.
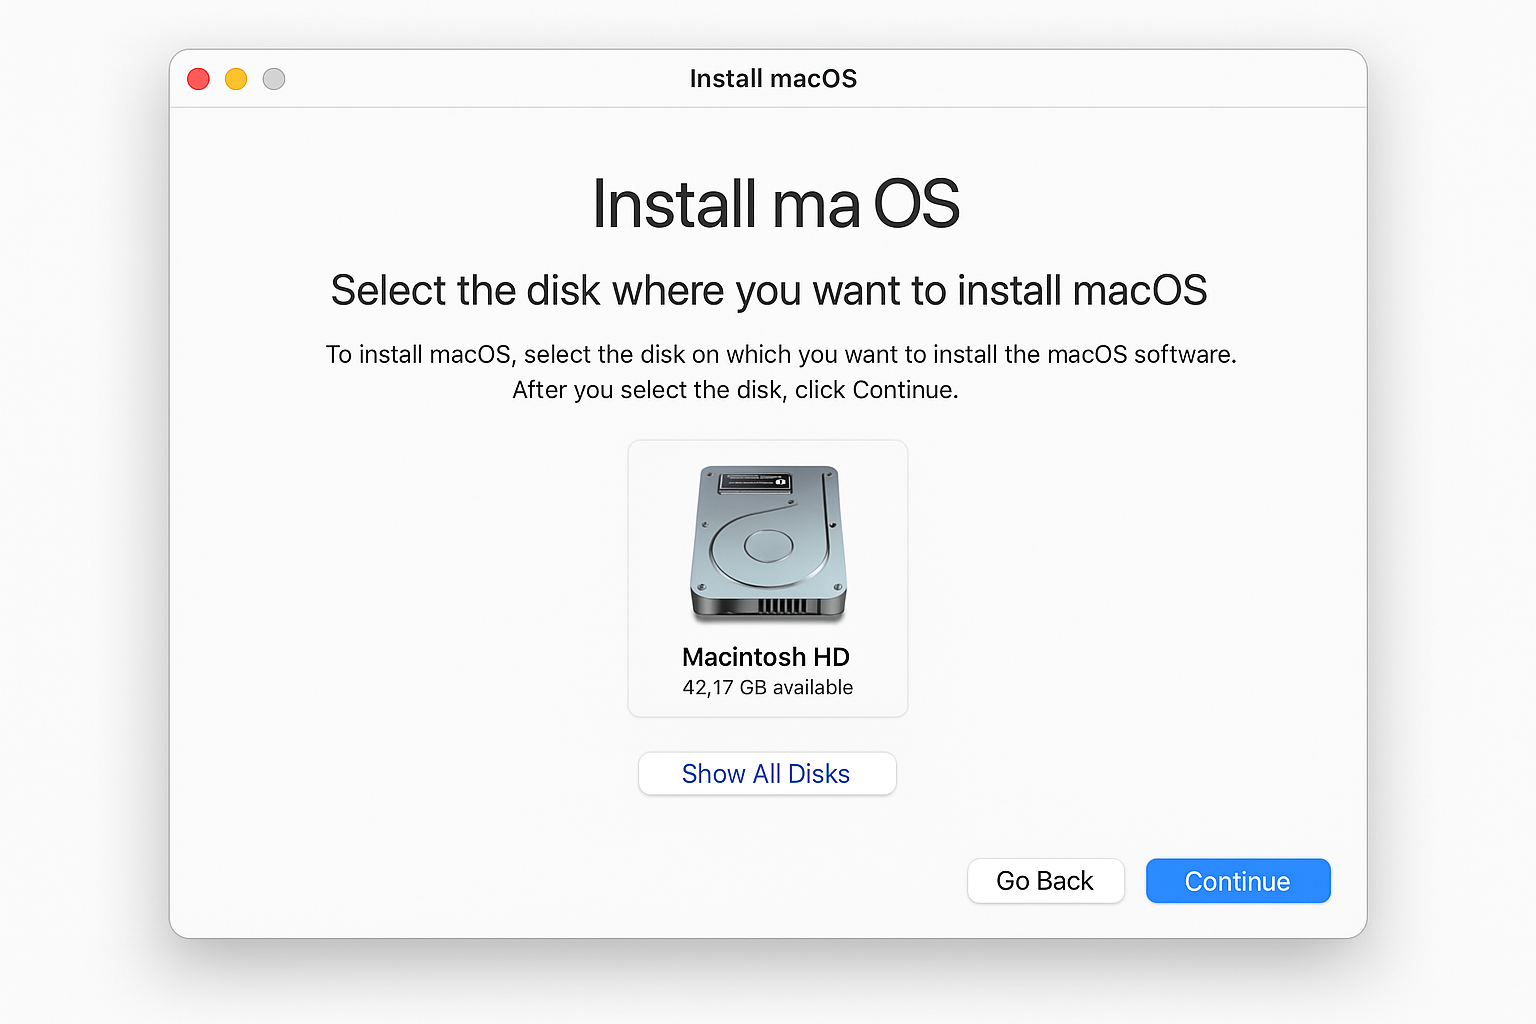
Click Show All Disks to reveal your external drive. External drives appear with an orange hard drive icon, making them easy to identify from internal storage.
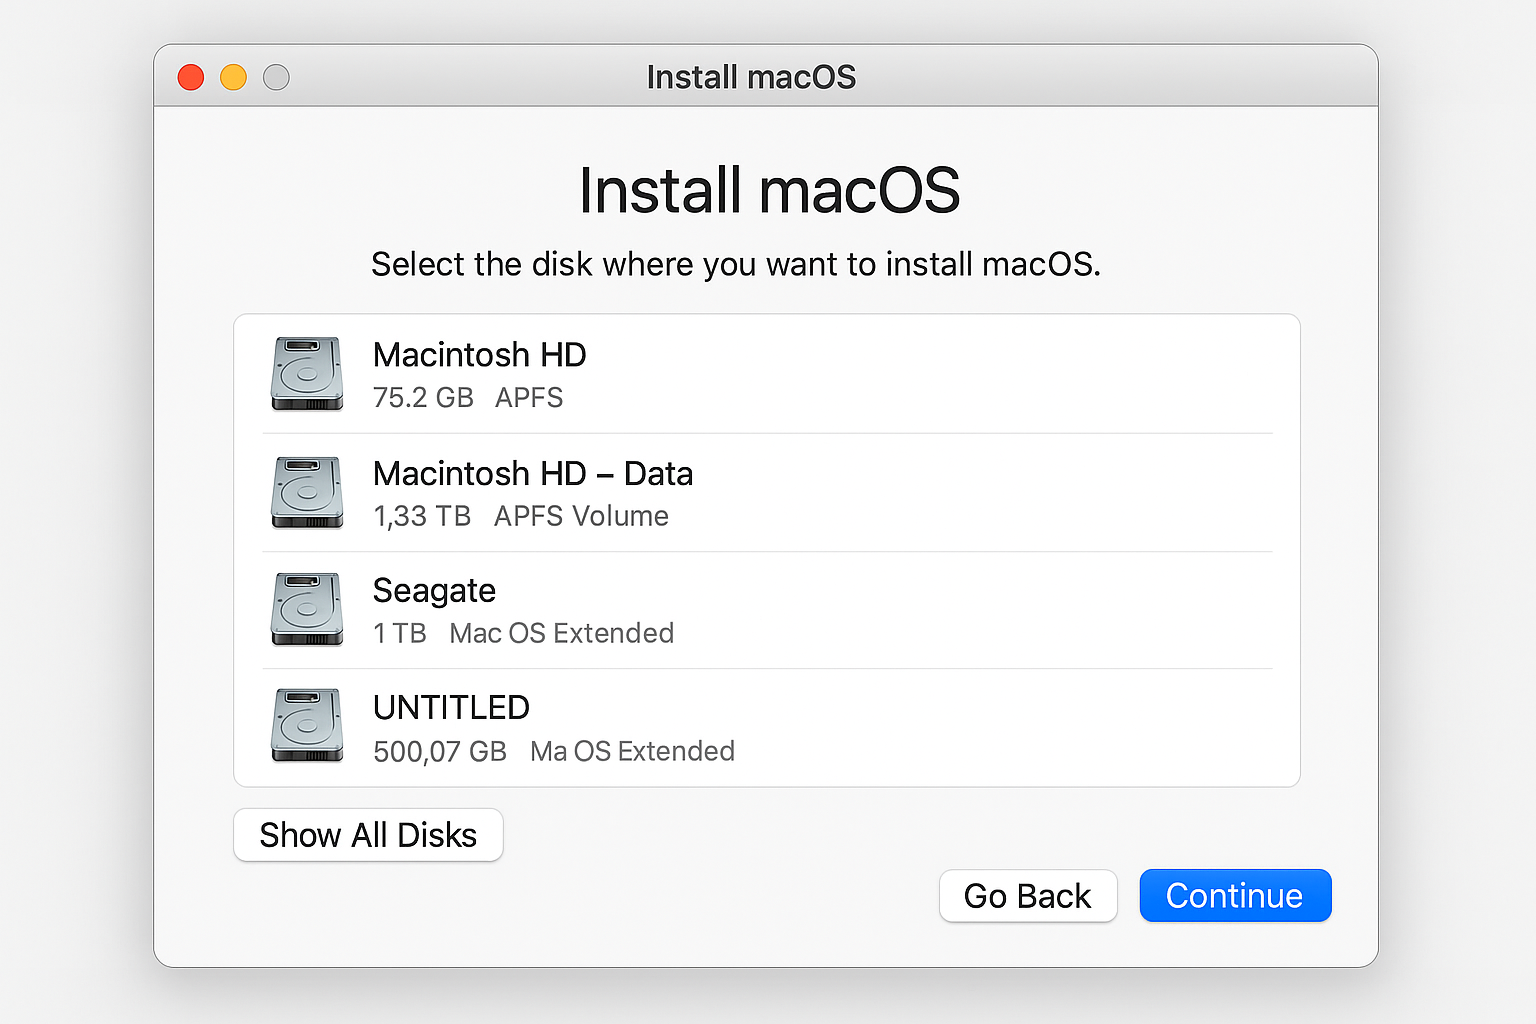
Select your external drive and click Continue. The installation takes 15-30 minutes depending on your drive speed and Mac model. Your Mac will restart several times during this process and that’s normal.
After the final restart, your Mac will boot directly into the external macOS installation. This becomes your default startup disk until you change it back.
Alternative: Recovery Mode Installation
If the App Store method doesn’t work, restart your Mac while holding Cmd + R to enter Recovery Mode.
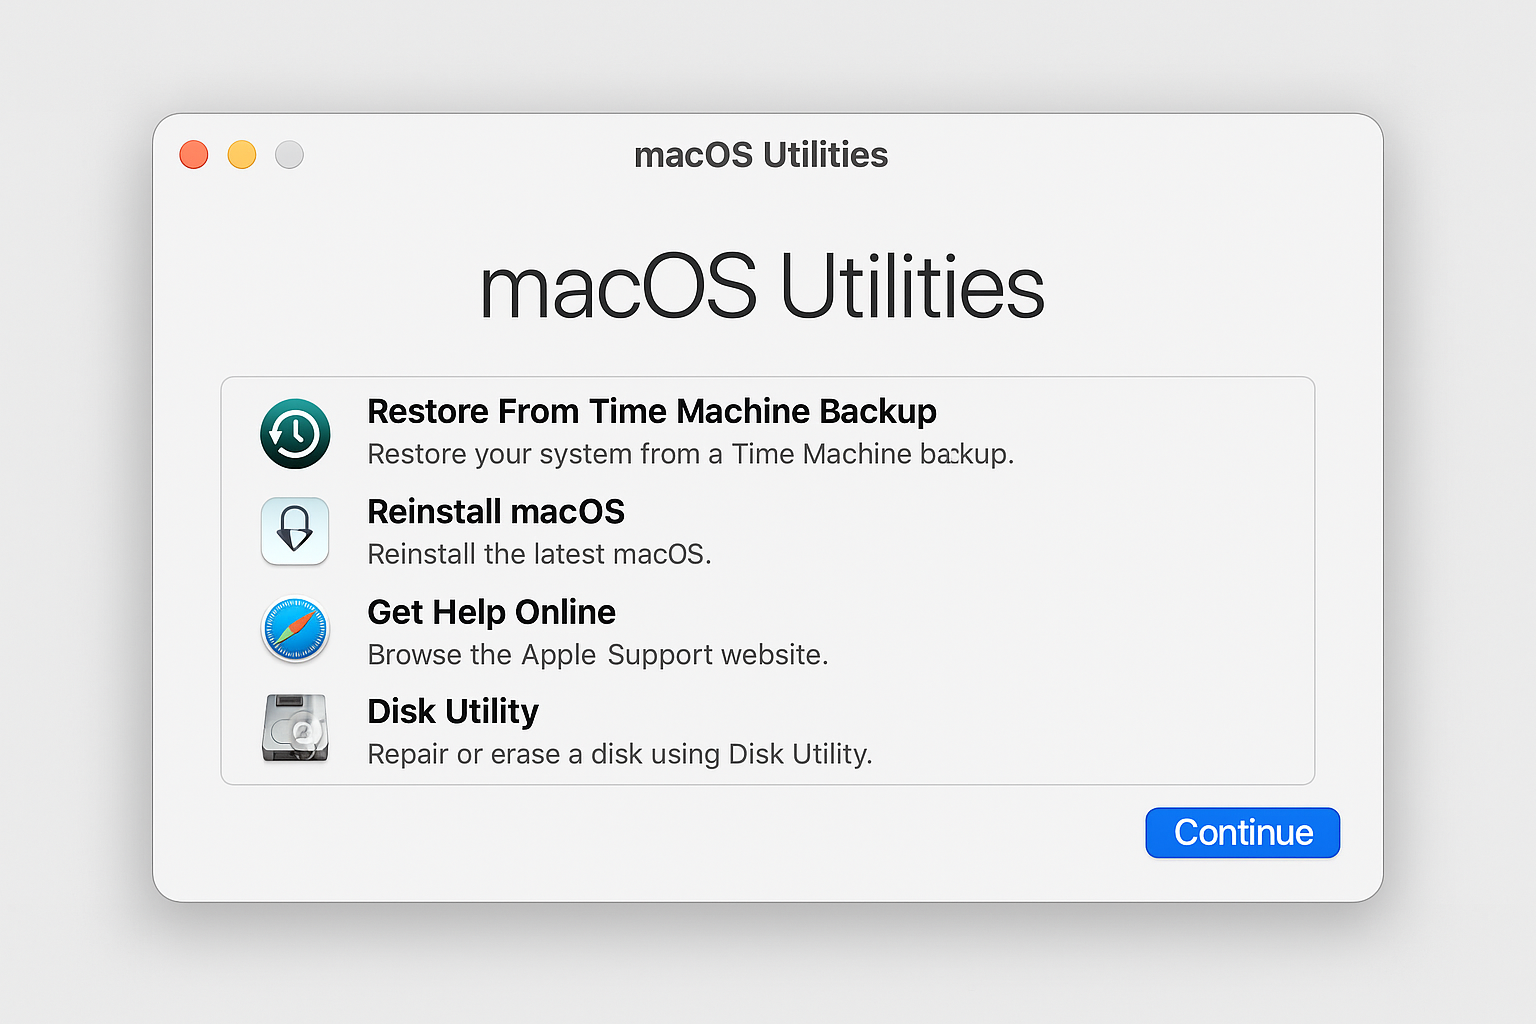
Select Reinstall macOS and follow the same destination selection process. This method downloads the installer fresh from Apple’s servers, so you’ll need your Apple ID credentials and a stable internet connection.
Recovery installation often takes longer due to the download requirement, but it’s useful when you can’t access the App Store normally.
Switching Between Internal and External macOS
To choose which macOS installation to boot from, restart your Mac while holding the Option key. You’ll see a boot selection screen with all available startup volumes.
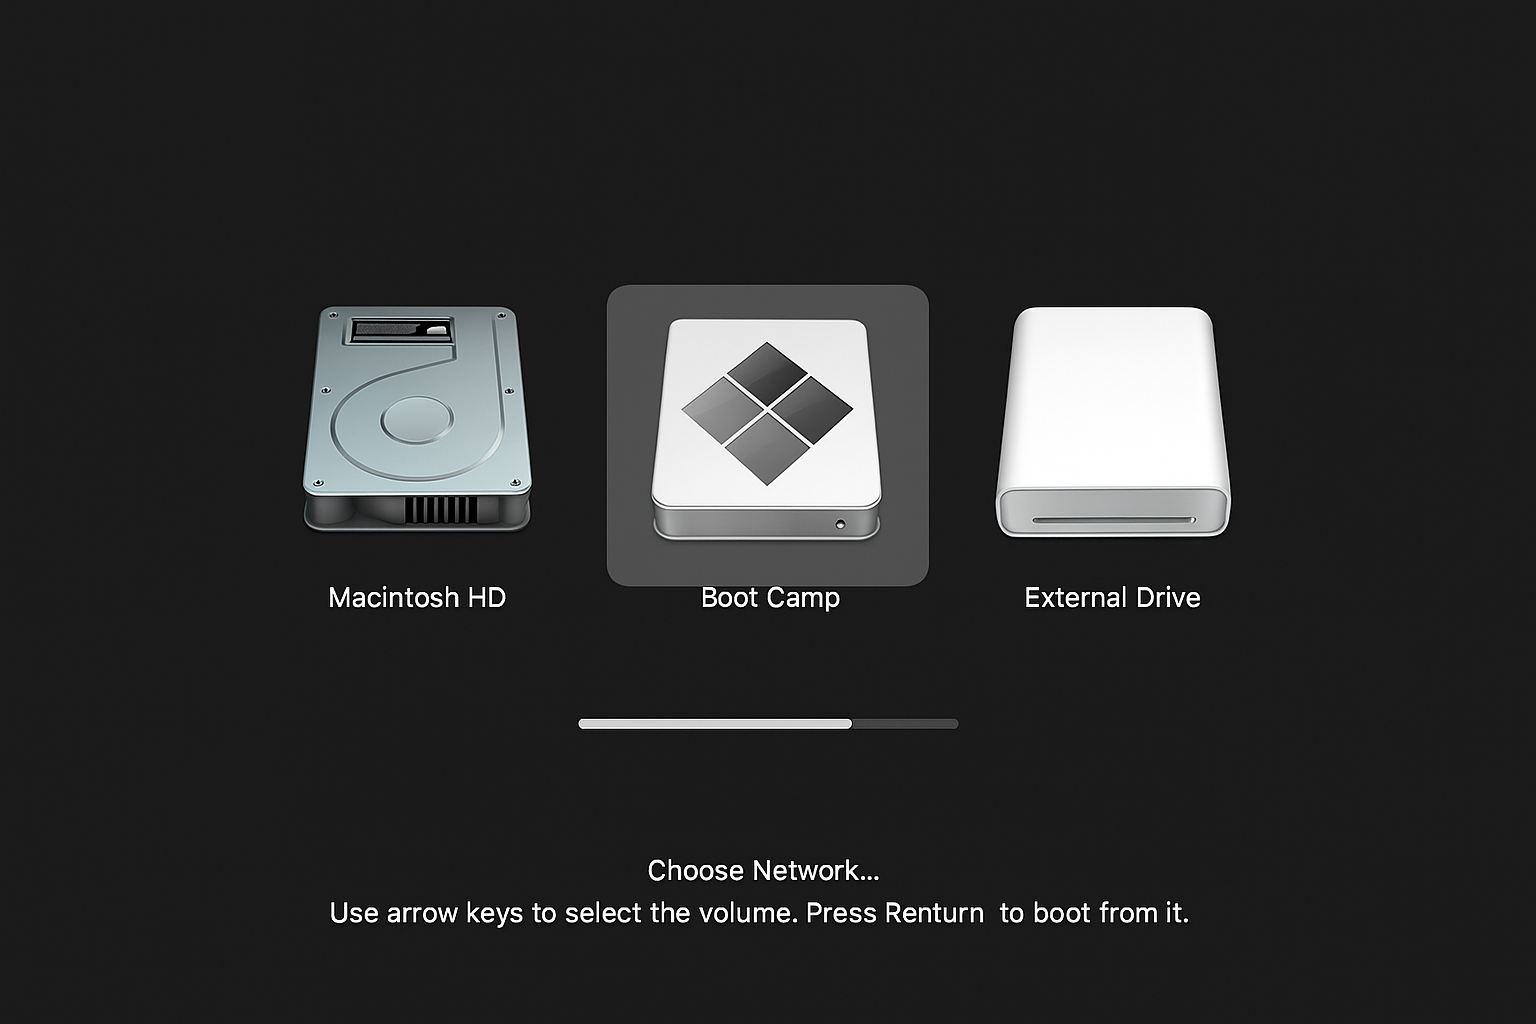
Your internal drive appears with a gray icon, while external drives show orange icons. Use arrow keys to select your preferred drive and press Enter.
For a more permanent solution, open System Settings > General > Startup Disk while booted from either installation to set your default startup volume.
Keeping External macOS Updated
Boot from your external drive and use System Settings > General > Software Update normally. Make sure you’re connected to a compatible port (not the DFU port on Apple Silicon) during the update process.
Updates install directly to the external drive, keeping it current independently of your internal macOS installation.
Troubleshooting Common Issues
Installer won’t recognize external drive: Make sure you formatted with GUID Partition Map and clicked “Show All Disks” in the installer. Try reformatting with Mac OS Extended (Journaled) if APFS causes problems.
Installation fails silently on Apple Silicon: You’re probably using the DFU port. Try a different Thunderbolt or USB-C port on your Mac.
Can’t boot newer macOS version: This is expected behavior. External drives with newer macOS versions won’t boot on Macs running older internal versions. Update your internal macOS first, then recreate the external installation.
Slow performance: USB 2.0 drives will feel sluggish. Upgrade to USB 3.0 or Thunderbolt for better performance, or accept the speed trade-off for portability.
Worth the Effort
External macOS installations are more technically demanding than they were in 2016, thanks to Apple Silicon port restrictions and version compatibility requirements. But for troubleshooting, testing, or creating portable workspaces, they remain a solid choice.
The process works reliably once you understand the limitations. Just remember the port restrictions on Apple Silicon Macs and the version compatibility rules—those are the two biggest gotchas that trip up even experienced users.