
Continuity Camera started as a neat trick for importing iPhone photos into Mac apps. In 2026, it’s a full-featured system that lets your iPhone act as a high-quality webcam, document scanner, and live camera, wirelessly and automatically, with no pairing required.
This guide covers everything: the photo and document import workflow that’s been there since the beginning, plus the webcam features (Desk View, Center Stage, Studio Light) that most people still don’t know exist.
What You Need
Before anything works, make sure you meet these requirements on both devices:
- Both devices signed into the same Apple ID with two-factor authentication enabled
- Wi-Fi and Bluetooth turned on (they usually work best when both devices are on the same network, but a direct peer connection can also work — both radios must be active either way)
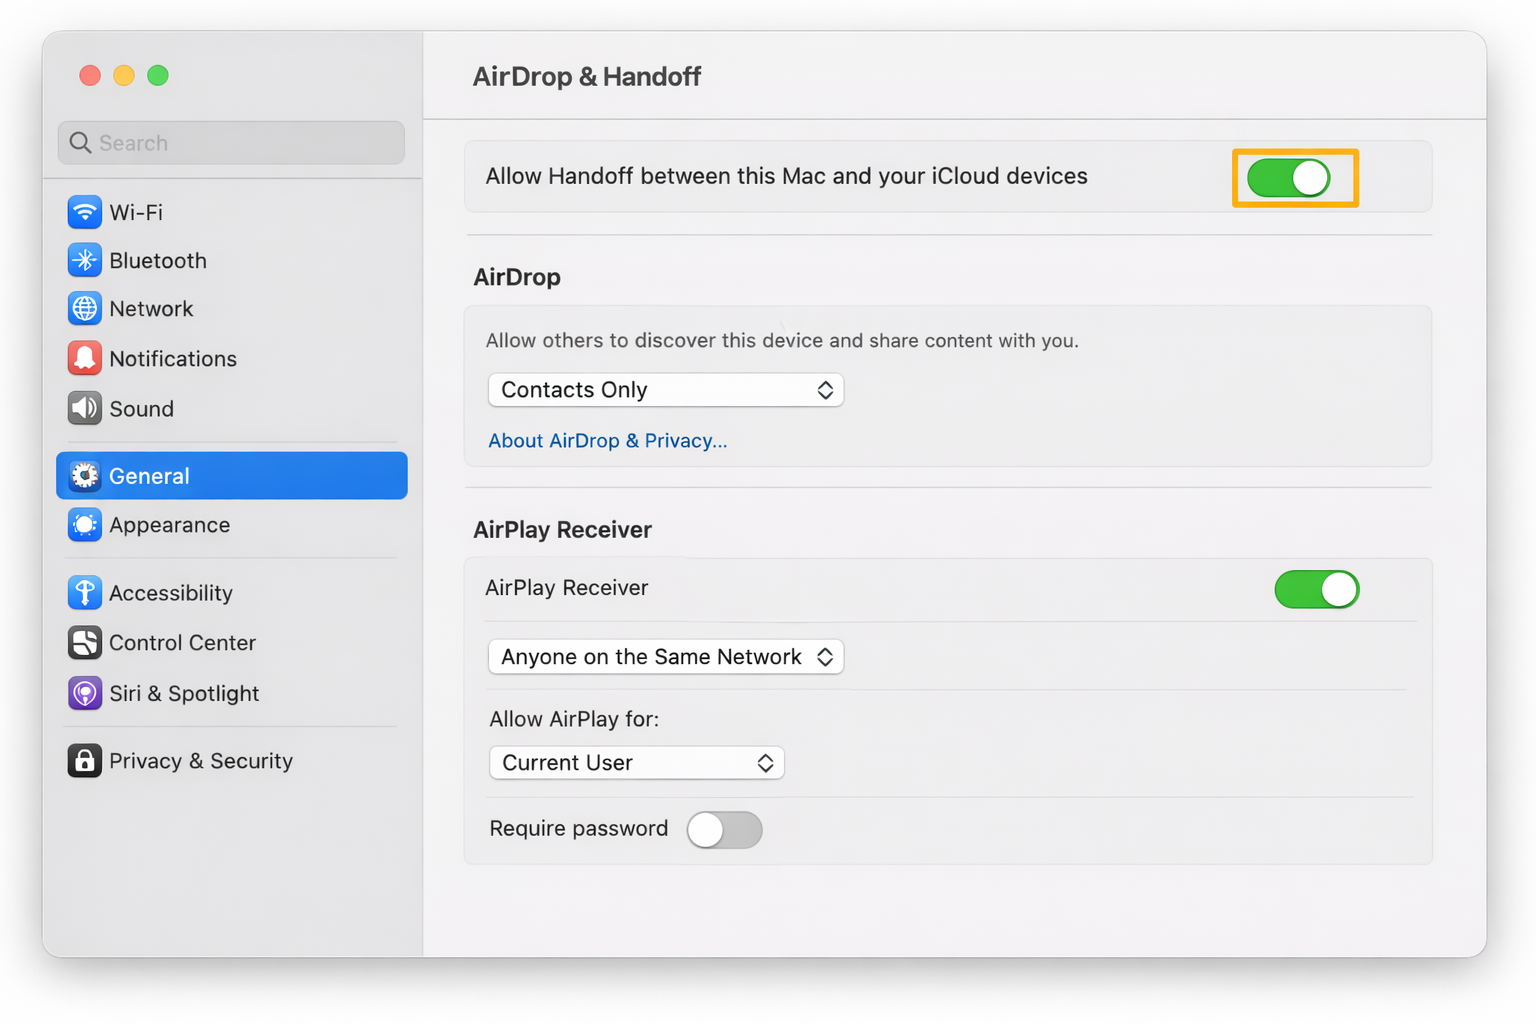
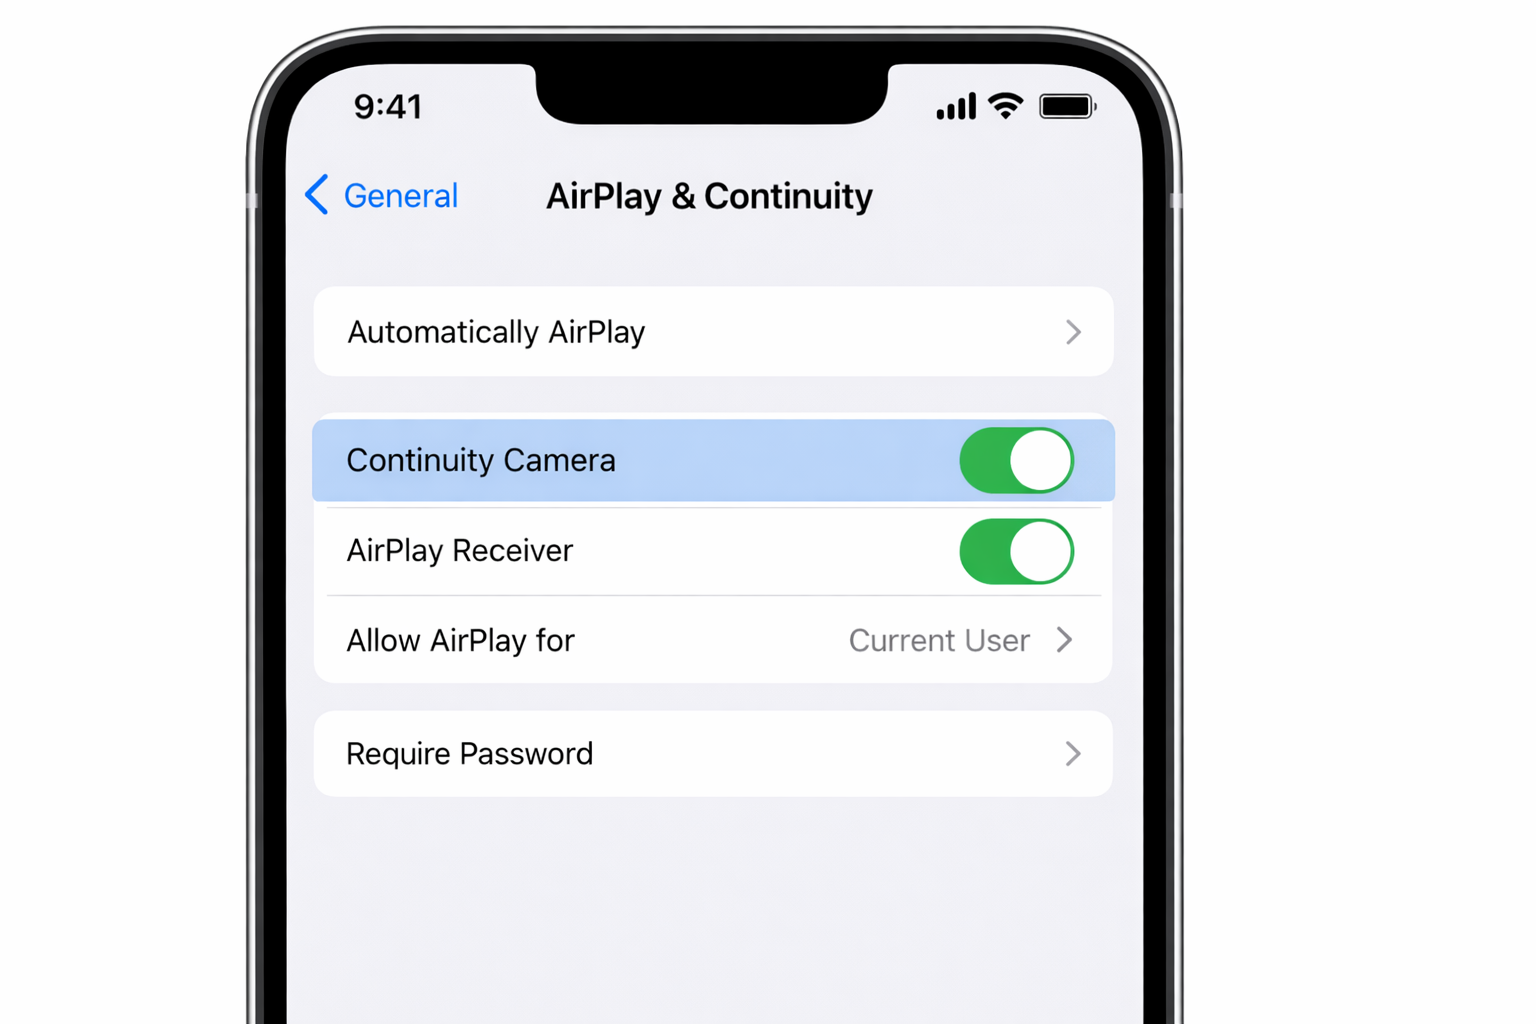
- Handoff enabled, go to System Settings > General > AirPlay & Handoff on your Mac, and Settings > General > AirPlay & Continuity on your iPhone
- iPhone XR or later running iOS 26 (earlier iPhones support photo/scan only; webcam features and effects like Desk View require iPhone 11 or later)
- A Mac running macOS Tahoe 26 for full feature support
No manual pairing needed. When your iPhone is nearby (or connected via USB), your Mac detects it automatically.
How to Import Photos and Scan Documents on Mac
This is the original Continuity Camera workflow, and it still works great. Open a supported app, Notes, Pages, Keynote, Numbers, Mail, Messages, TextEdit, or Finder, and position your cursor where you want the image to land.
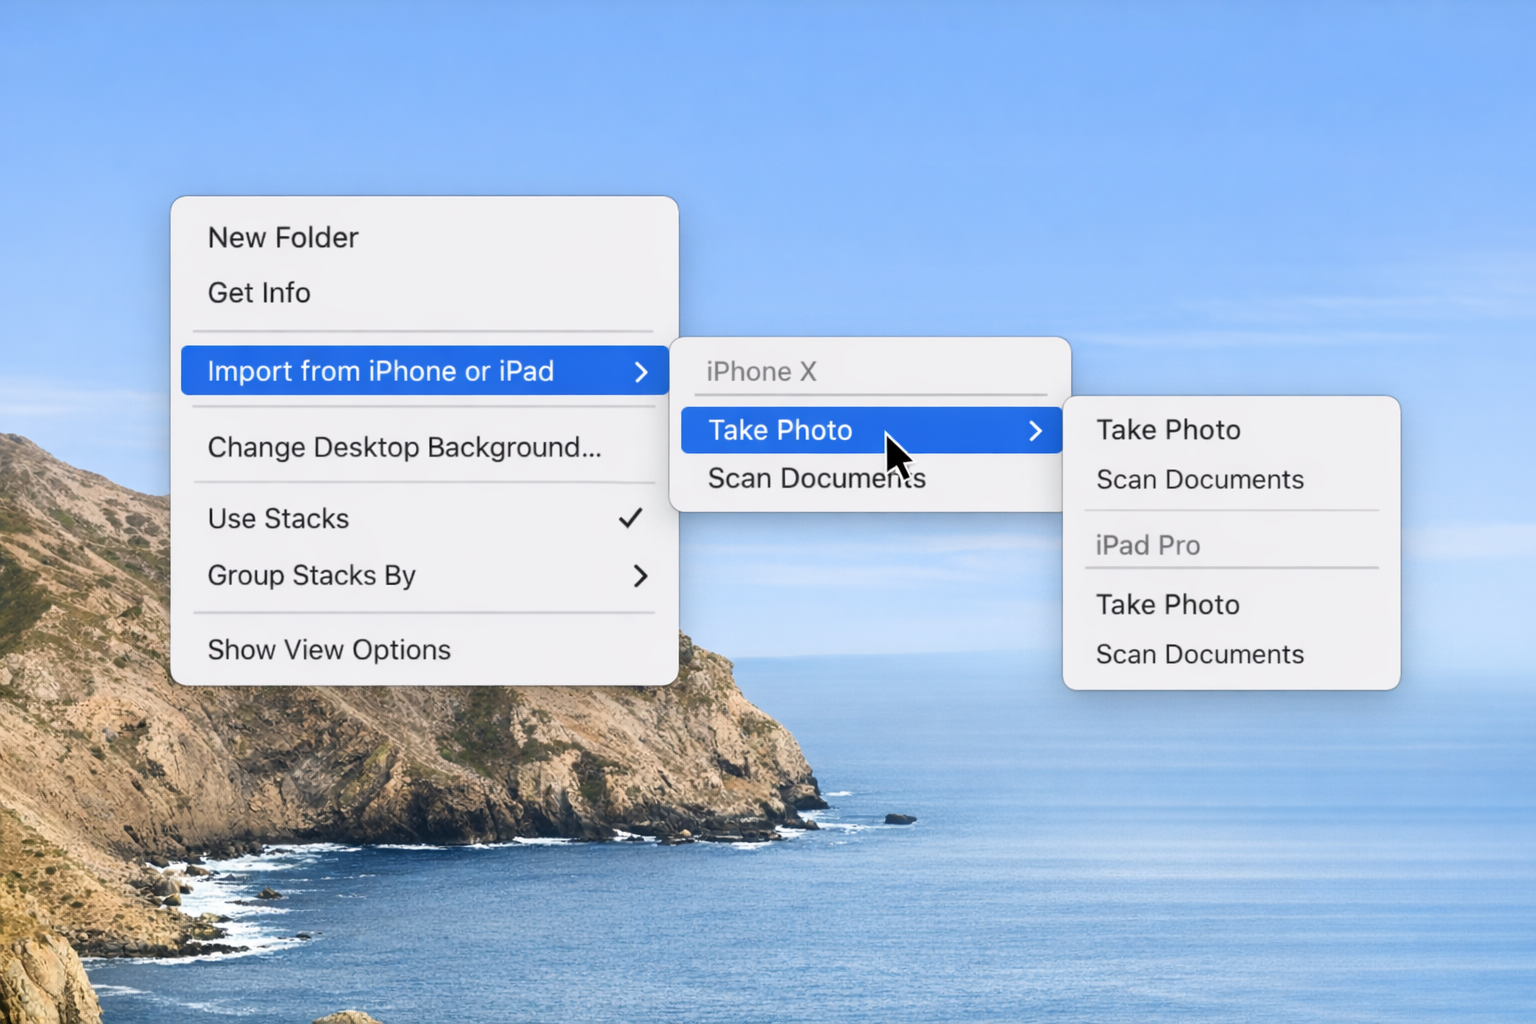
Using the Right-Click Menu
- Right-click (or Control-click) in the document at the insertion point.
- In the context menu, look for Import from iPhone or iPad.
- Select Take Photo or Scan Documents.

Your iPhone camera activates instantly. Take the shot (or position the document for scanning), then tap Use Photo or Keep Scan. The image drops straight into your Mac document. No AirDrop, no Photos library detour.
Using the File Menu
You can also trigger this from the menu bar. In most supported apps, go to File > Import from iPhone or iPad and you’ll see the same options.
Once you confirm on your iPhone, the photo or scan appears in the document on your Mac.

Scanned documents get automatically cropped and perspective-corrected, which is genuinely useful for receipts, whiteboards, or anything that isn’t lying flat.
How to Use Your iPhone as a Webcam
This is where Continuity Camera got a lot more interesting. Since macOS Ventura, your iPhone can replace your Mac’s built-in camera entirely for video calls, and the image quality difference is significant, especially on older MacBooks.
Setting It Up
- On your iPhone, go to Settings > General > AirPlay & Continuity > Continuity Camera and make sure it’s enabled.
- Mount your iPhone in landscape orientation above your Mac’s display. Apple sells a MagSafe mount for this; Belkin makes one too. The physical stability matters, as the feature suspends if the iPhone moves around.
- Join a video call in any supported app (FaceTime, Zoom, Teams, etc.). Your Mac should automatically switch to the iPhone camera if it’s nearby and in position.
- To manually select it, click the camera source in your app’s video settings, or open Control Center on your Mac and click the video icon to switch cameras.
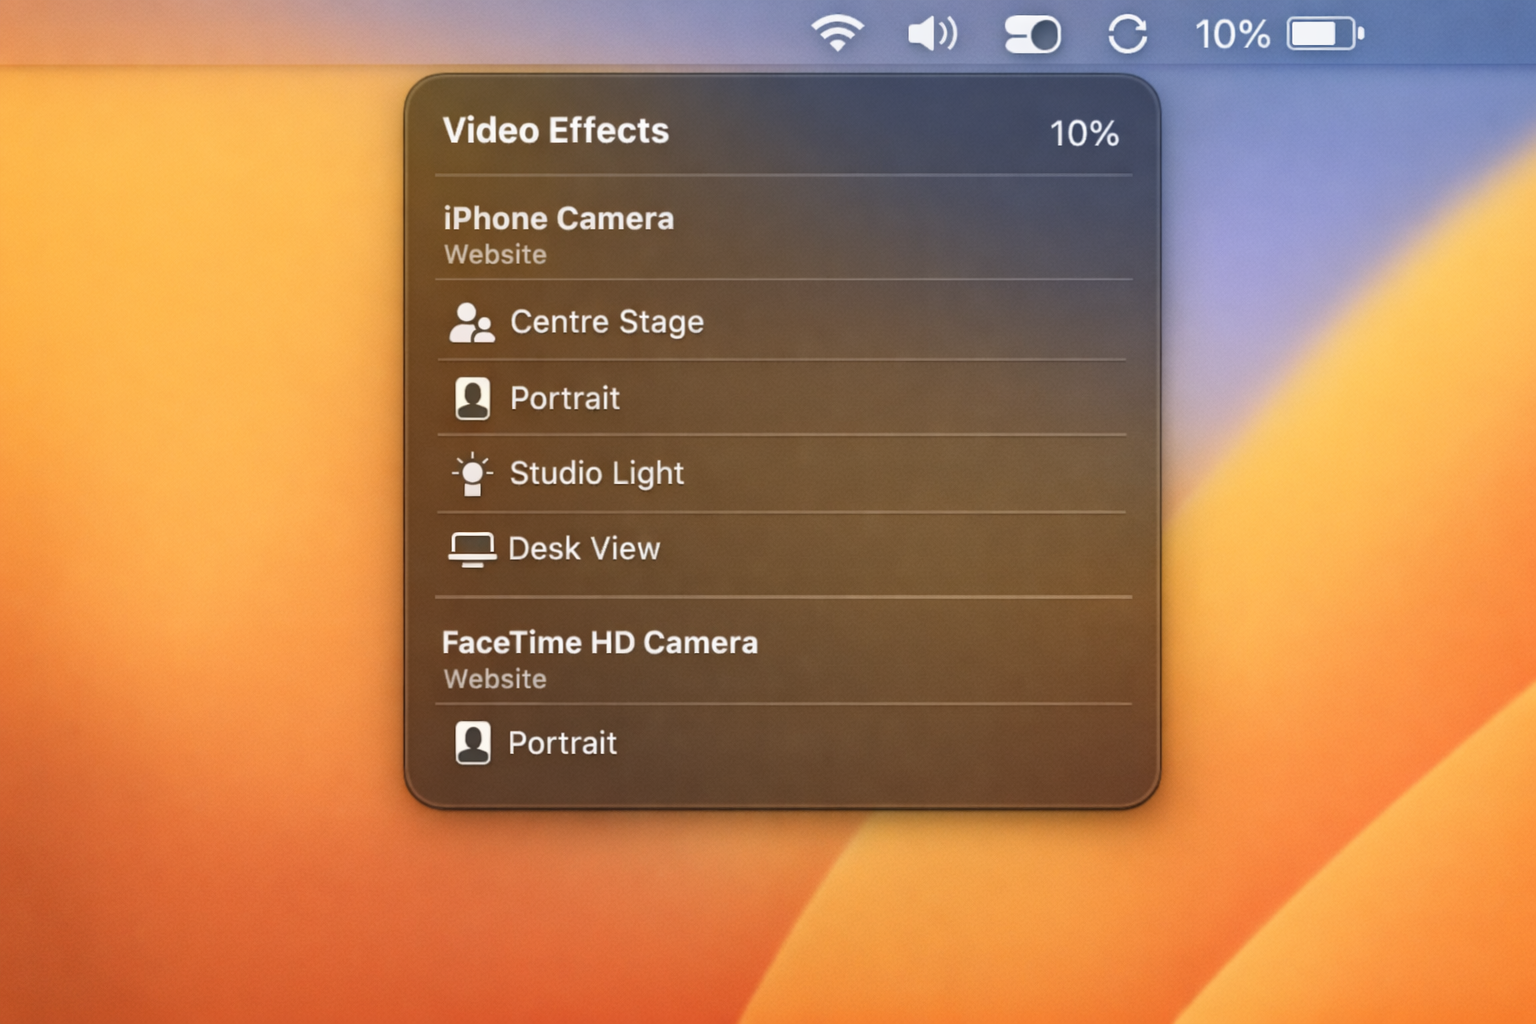
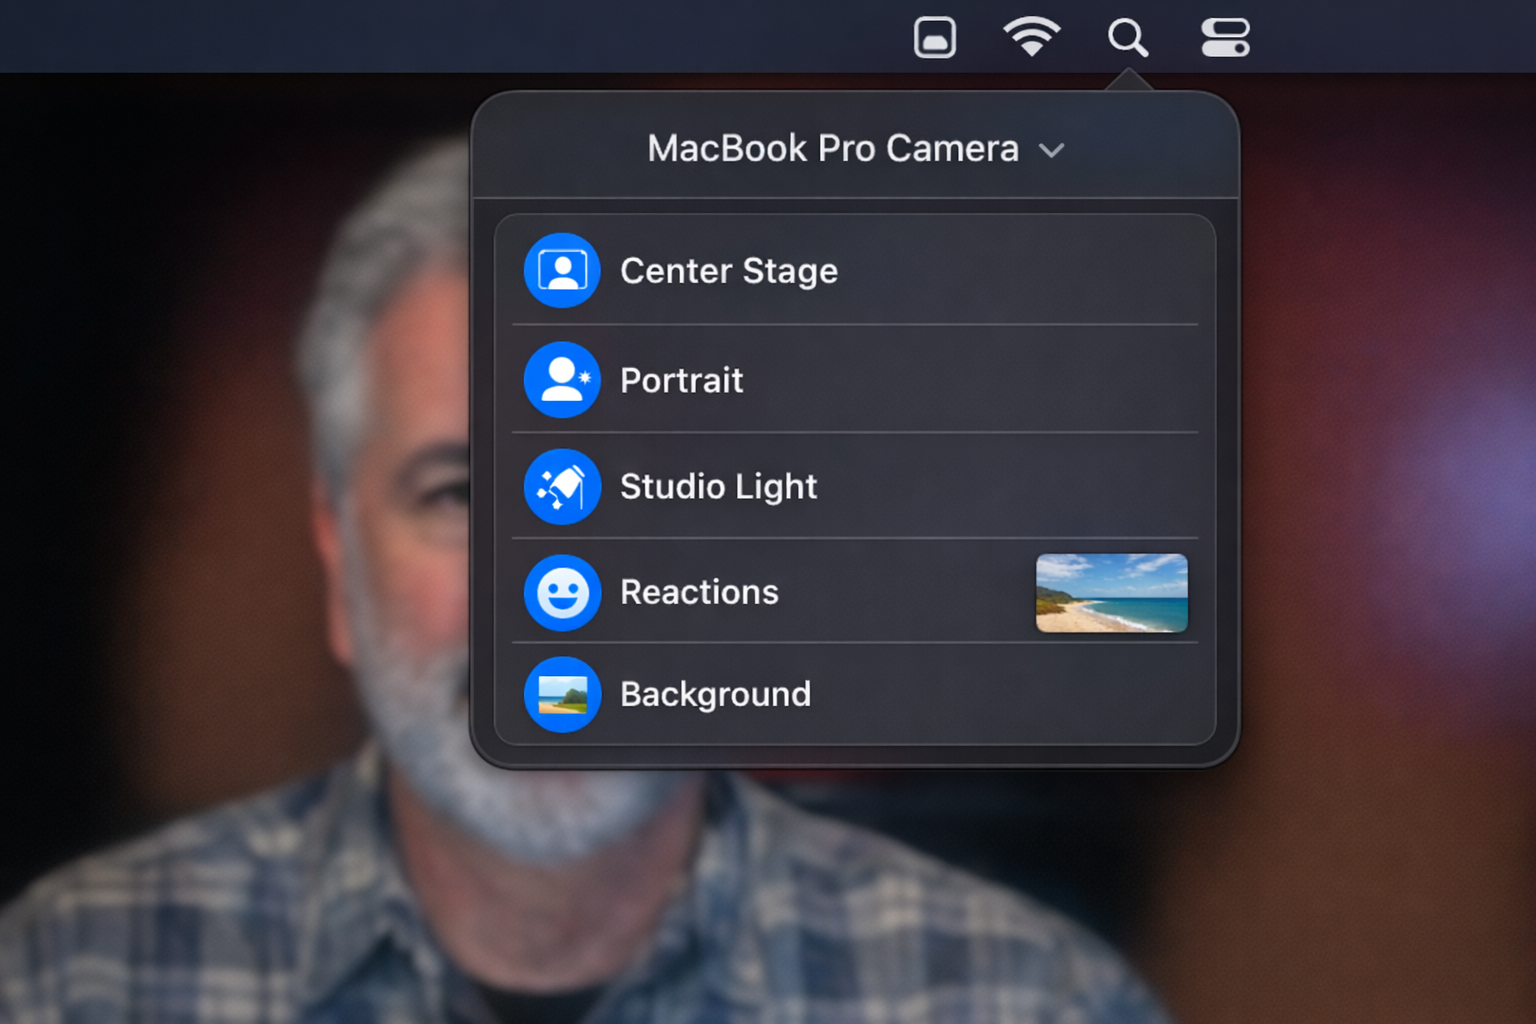
Video Effects Worth Using
Once your iPhone is active as a webcam, you can enable effects from Control Center > Video Effects:
- Center Stage, keeps you framed as you move around. Works better than you’d expect.
- Portrait, blurs the background. Decent, not as good as a dedicated camera with a fast lens, but fine for calls.
- Studio Light, brightens your face and dims the background. Useful in poor lighting.
- Desk View, uses the ultra-wide lens to show a top-down view of your desk simultaneously with your face. Genuinely useful for showing documents or working through something hands-on with someone.
Desk View shows up as a separate camera source in apps that support multiple video inputs. In FaceTime, it appears as a picture-in-picture overlay automatically.
Troubleshooting Continuity Camera
iPhone Not Showing Up
Start here before anything else:
- Confirm both devices are signed into the same Apple ID, not just the same email, but the same account with 2FA active.
- Toggle Bluetooth off and back on on both devices.
- Check that Handoff is enabled on both devices (paths above).
- Make sure your iPhone isn’t locked or face-down, for webcam use, it needs to be awake and in a stable position.
Webcam Not Auto-Switching
When your iPhone is mounted near your Mac and Continuity Camera is on, macOS usually prefers it over the built-in camera for video calls. If it keeps defaulting to the built-in camera, go to Settings > General > AirPlay & Continuity > Continuity Camera on your iPhone and toggle it off and back on. Then restart the video app on your Mac.
Lag or Poor Quality
Wireless interference is usually the culprit. Connect your iPhone via USB instead, as the feature works over USB and is noticeably more stable. If you’re getting choppy video, USB is the fix.
Desk View Not Available
Desk View requires an iPhone 11 or later (for the ultra-wide lens). If you’re on an iPhone XR, you’ll get Center Stage and Portrait but not Desk View.
App Not Showing the Import Option
Not every app supports Continuity Camera. Third-party apps need to implement Apple’s APIs explicitly. If you don’t see Import from iPhone or iPad in the right-click or File menu, the app doesn’t support it. Check for an in-app media import option instead, or use Photos as an intermediary.
A Note on Alternatives
If you want more control over the webcam setup, such as manual focus, zoom, exposure, and custom overlays, Camo by Reincubate is worth a look. It does much of what Continuity Camera does but with finer controls, and it works cross-platform if you ever need to use your iPhone as a webcam with a Windows machine. Continuity Camera is the better default for most people since it requires zero extra software, but Camo is a solid option if you do a lot of video calls and want to dial things in.
Continuity Camera has quietly become one of the more useful features in the Apple ecosystem, especially the webcam functionality, which most Mac users still haven’t tried. If you’ve got an iPhone XR or later and a Mac running macOS Tahoe 26, it’s worth setting up properly. The photo and document import workflow alone saves enough friction to justify the five minutes it takes to configure.