

If you’ve got a Mac and a Vision Pro on your desk, one setup pays off fast: turn your Mac’s screen into a giant floating display you can pull up anywhere in the room. This guide covers the real connection steps, what the “spatial” photo and video features actually do, and which visionOS apps earn a spot on your Home View, and which ones you’ll open once and forget.
Ten minutes of setup gets you there. The rest of this guide covers everything Apple’s own documentation leaves out.
What Is Apple Vision Pro?
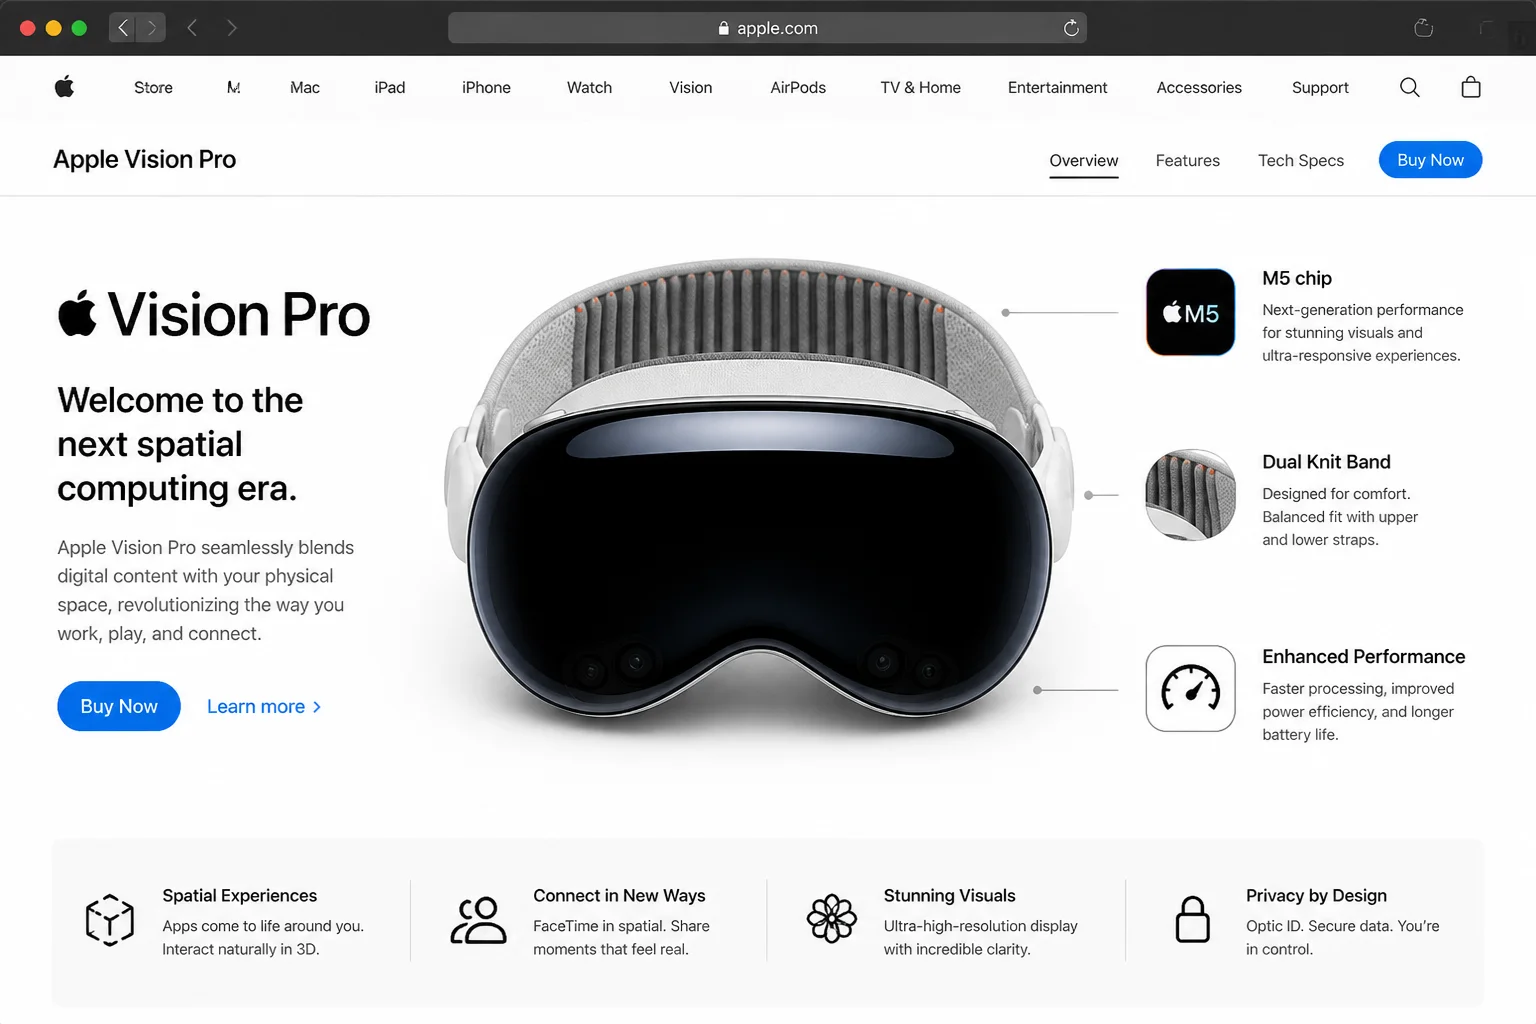
Apple Vision Pro is Apple’s mixed-reality headset. It runs its own operating system, called visionOS. Instead of holding a screen, you look at app windows, videos, and photos floating around you. You point with your eyes and select with a pinch of your fingers. No handheld controller is needed. VisionOS shares its foundation with iPadOS and iOS. That’s why a large chunk of the App Store’s iPad catalog runs on Vision Pro without any extra work from the developer.
For Mac owners, the headline feature is Mac Virtual Display. It wirelessly mirrors your Mac’s screen into a large, resizable window inside the headset, an ultra-wide monitor without the physical hardware. Beyond that, Vision Pro is genuinely good at three things: watching movies and Apple Immersive Video on a virtual “big screen,” browsing photos and videos with 3D depth, and running a modest but growing library of visionOS apps.
Vision Pro Hardware, Briefly
Apple launched the original Vision Pro in February 2024, starting at $3,499 for the 256GB configuration, with 512GB and 1TB models priced higher. Since then, Apple has released an updated version with a faster Apple-designed chip and small comfort refinements, including alternate head band options. This isn’t a ground-up redesign. Think “S-year update,” not an entirely new device. Chip names, configurations, and pricing have shifted since launch, so check Apple’s product page for today’s specs before you buy.
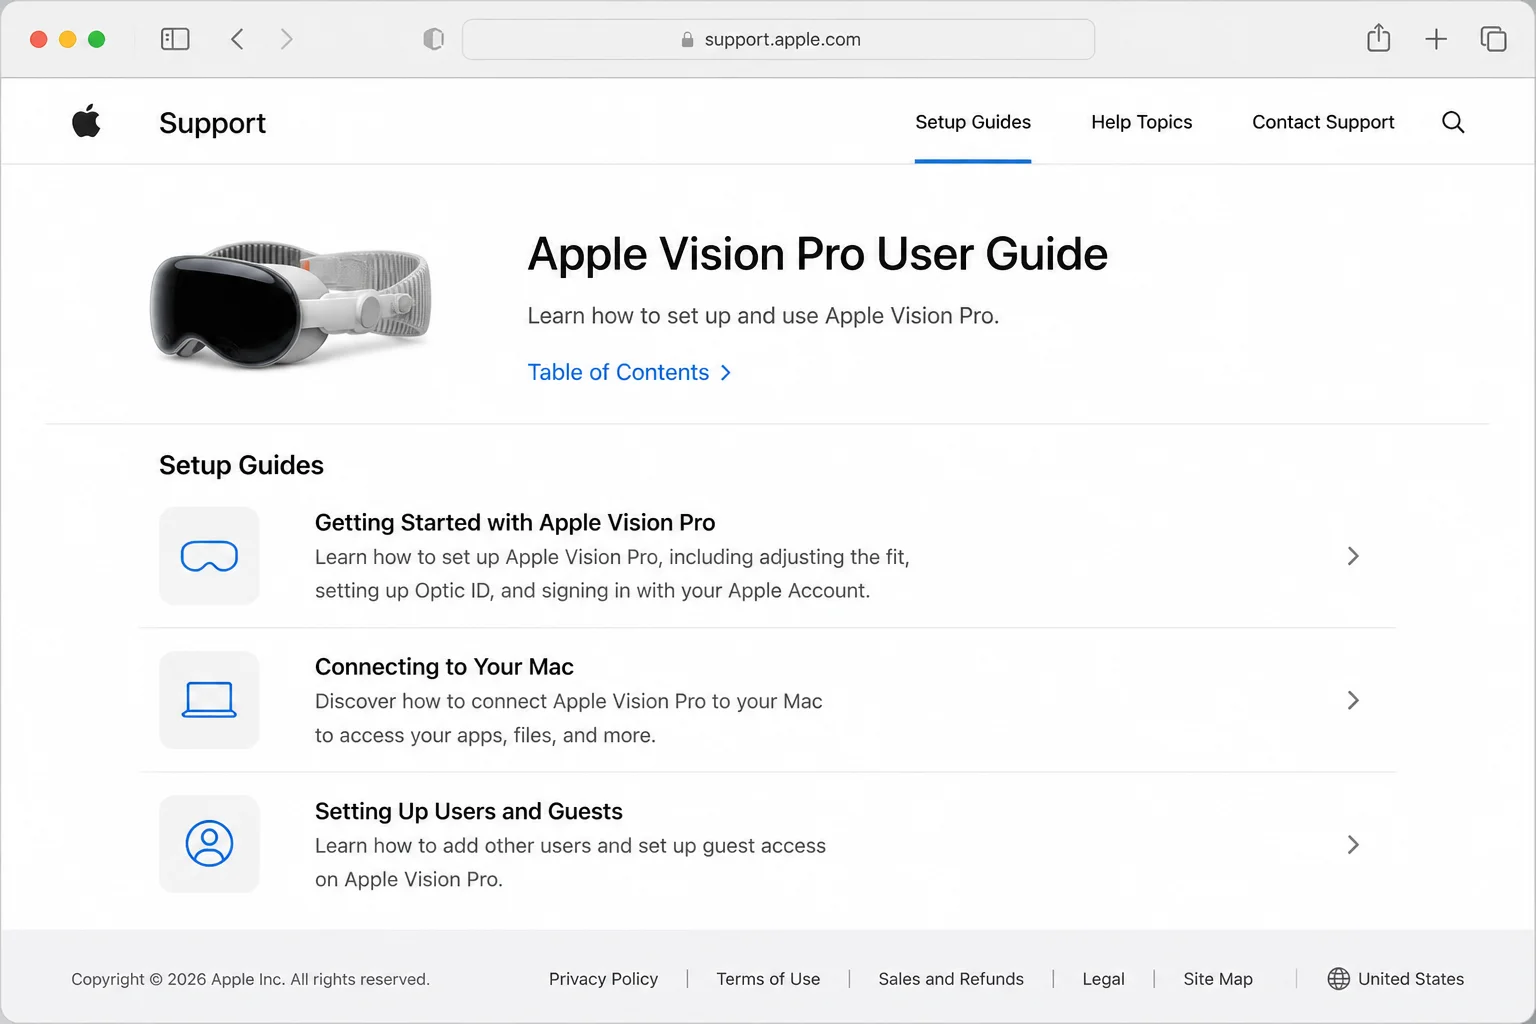
For the latest setup and troubleshooting docs, start at Apple’s support hub:
Before You Begin
Make sure you have:
- An Apple Vision Pro headset, set up and calibrated with your Apple ID
- A Mac with Apple silicon (M1 or later); Intel Macs are not supported
- Both devices signed in with the same Apple ID
- Both devices on the same Wi-Fi network, ideally 5GHz or 6GHz for the sharpest, smoothest image
- Bluetooth turned on on your Mac
- A paired Magic Keyboard and Magic Trackpad (or your Mac’s built-in keyboard/trackpad, if it’s a laptop) for typing and clicking inside the virtual display
| Requirement | Details |
|---|---|
| Device | Apple Vision Pro |
| Mac | Any Apple silicon Mac (M1 or later) |
| OS version | macOS 26 and visionOS 26 or later (check in Settings > General > About) |
| Network | Same Wi-Fi network on both devices, 5GHz/6GHz recommended |
| Account | Same Apple ID signed in on both devices |
You’ll need an Apple ID signed in on both your Mac and your Vision Pro. Check on your Mac under System Settings > [your name], and on Vision Pro under Settings > [your name].
There’s no Windows equivalent here. Mac Virtual Display and Apple’s visionOS integration features are Mac-only. Apple offers no supported way to stream a Windows PC into Vision Pro. If you’re a Windows user eyeing the headset just for this feature, it won’t work for you.
Step-by-Step Guide
Step 1: Update macOS on your Mac
Before doing anything else, confirm your Mac runs a current version of macOS. Go to System Settings > General > Software Update and install any pending updates. Mac Virtual Display gets more capable with each macOS release. Staying current matters more here than for most features.
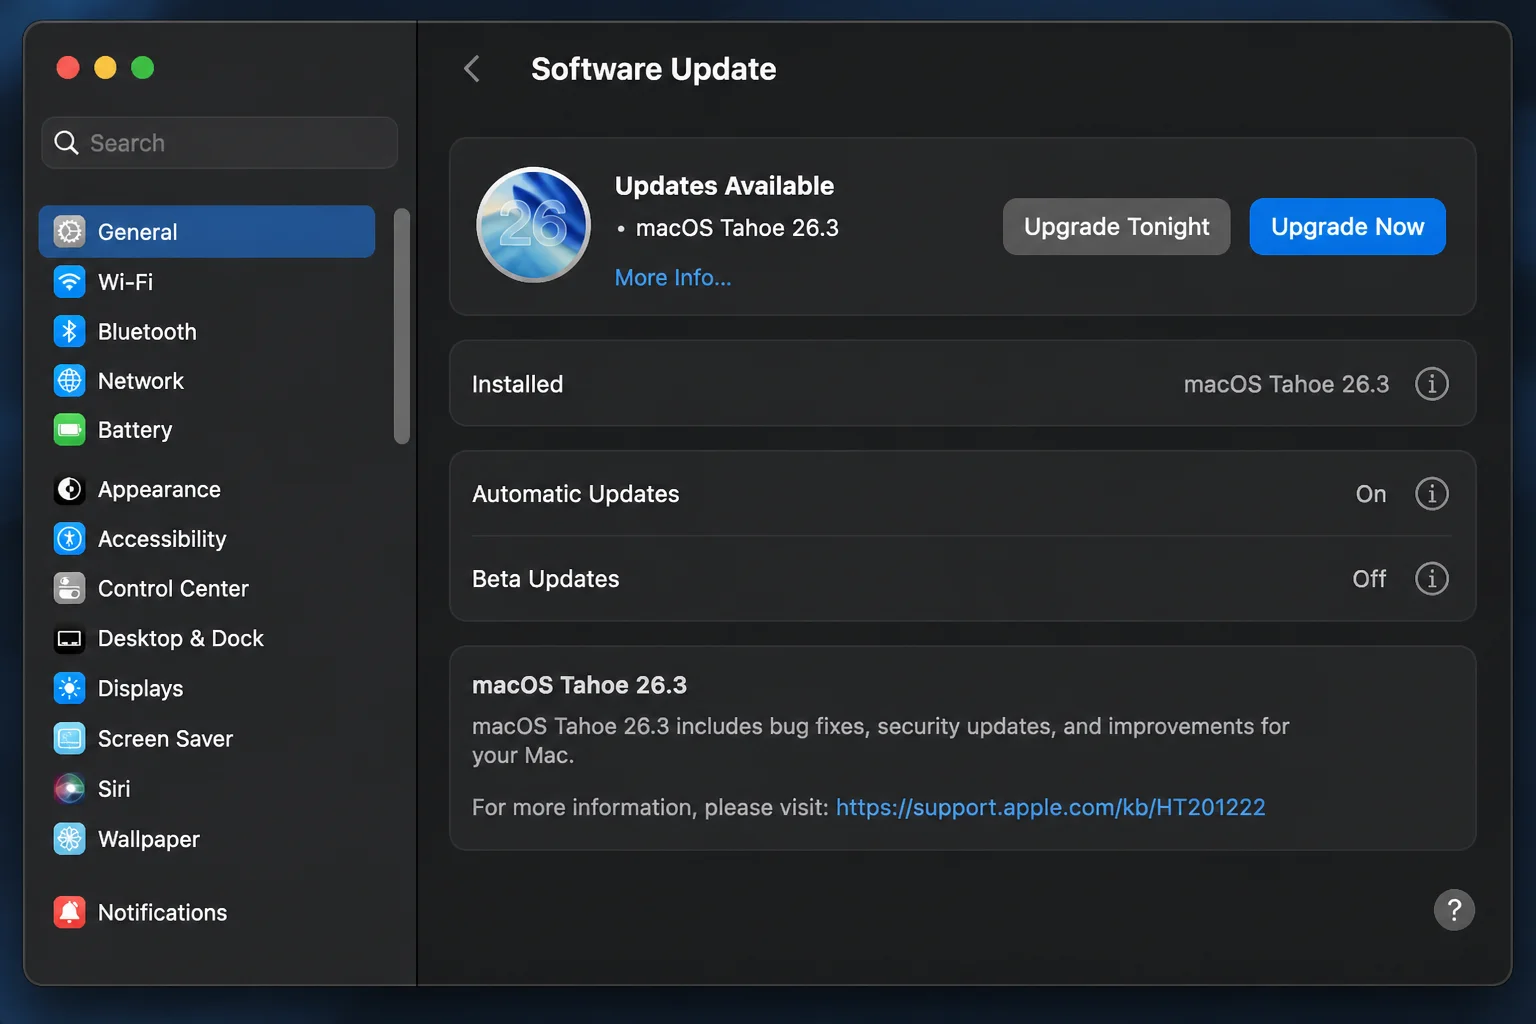
Expected result: Your Mac shows “Your Mac is up to date” or successfully installs the latest available update.
Step 2: Confirm you’re signed into the same Apple ID on both devices
On your Mac, go to System Settings > [your name] at the top of the sidebar and confirm the Apple ID email address matches the one on your headset.
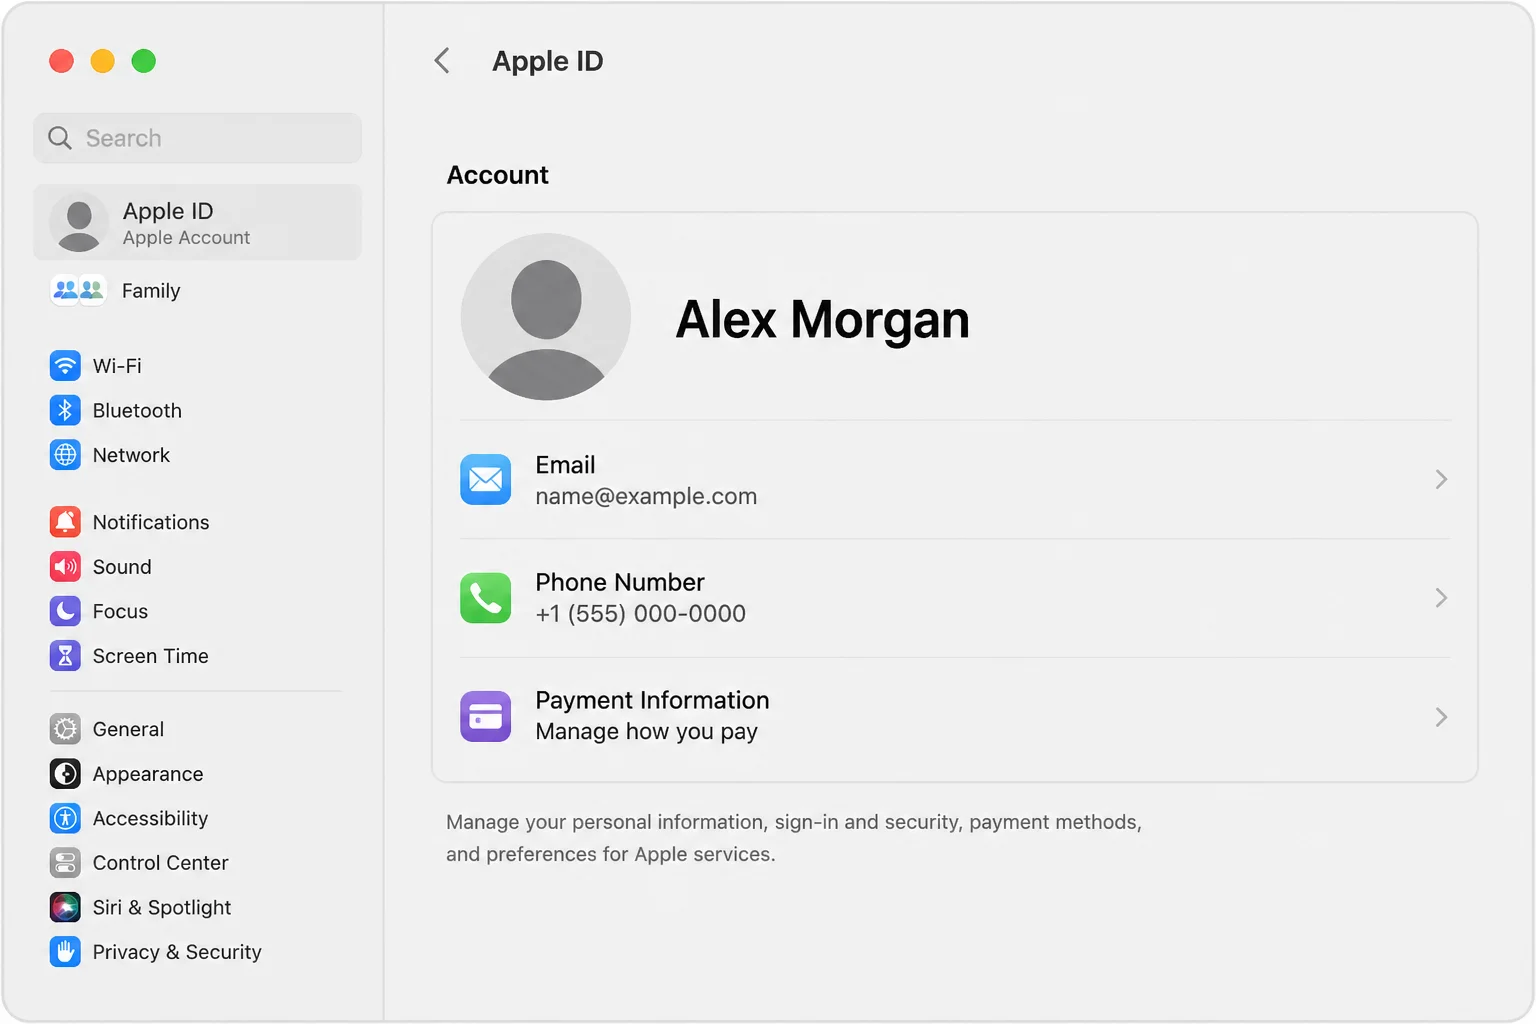
On your Vision Pro, go to Settings > [your name] and check the same thing.
Expected result: Both devices display the identical Apple ID.
Step 3: Join the same Wi-Fi network on both devices
On your Mac, open System Settings > Wi-Fi and confirm which network you’re connected to.
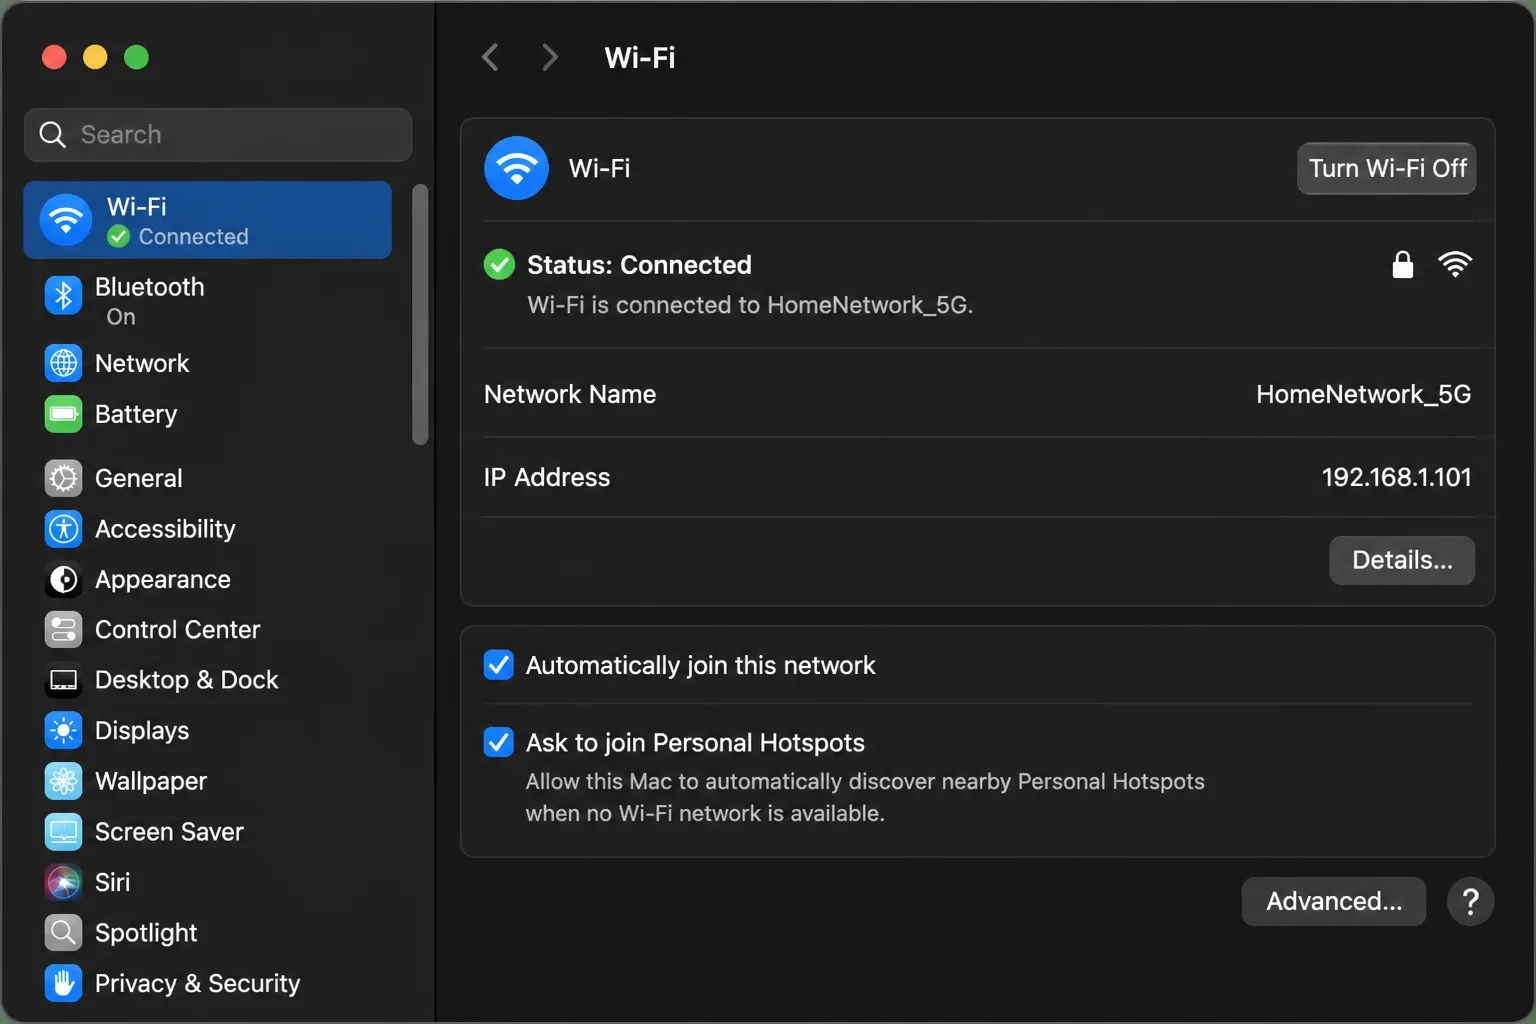
On your Vision Pro, open Settings > Wi-Fi and join the identical network. If your router broadcasts separate 2.4GHz and 5GHz networks with different names, pick the 5GHz (or 6GHz) one on both devices. It makes a real difference in how sharp and responsive the virtual display looks.
Step 4: Turn on Bluetooth on your Mac
Go to System Settings > Bluetooth on your Mac and make sure the toggle is on. If you’re using a Magic Keyboard and Magic Trackpad, pair them here now, before you put the headset on.
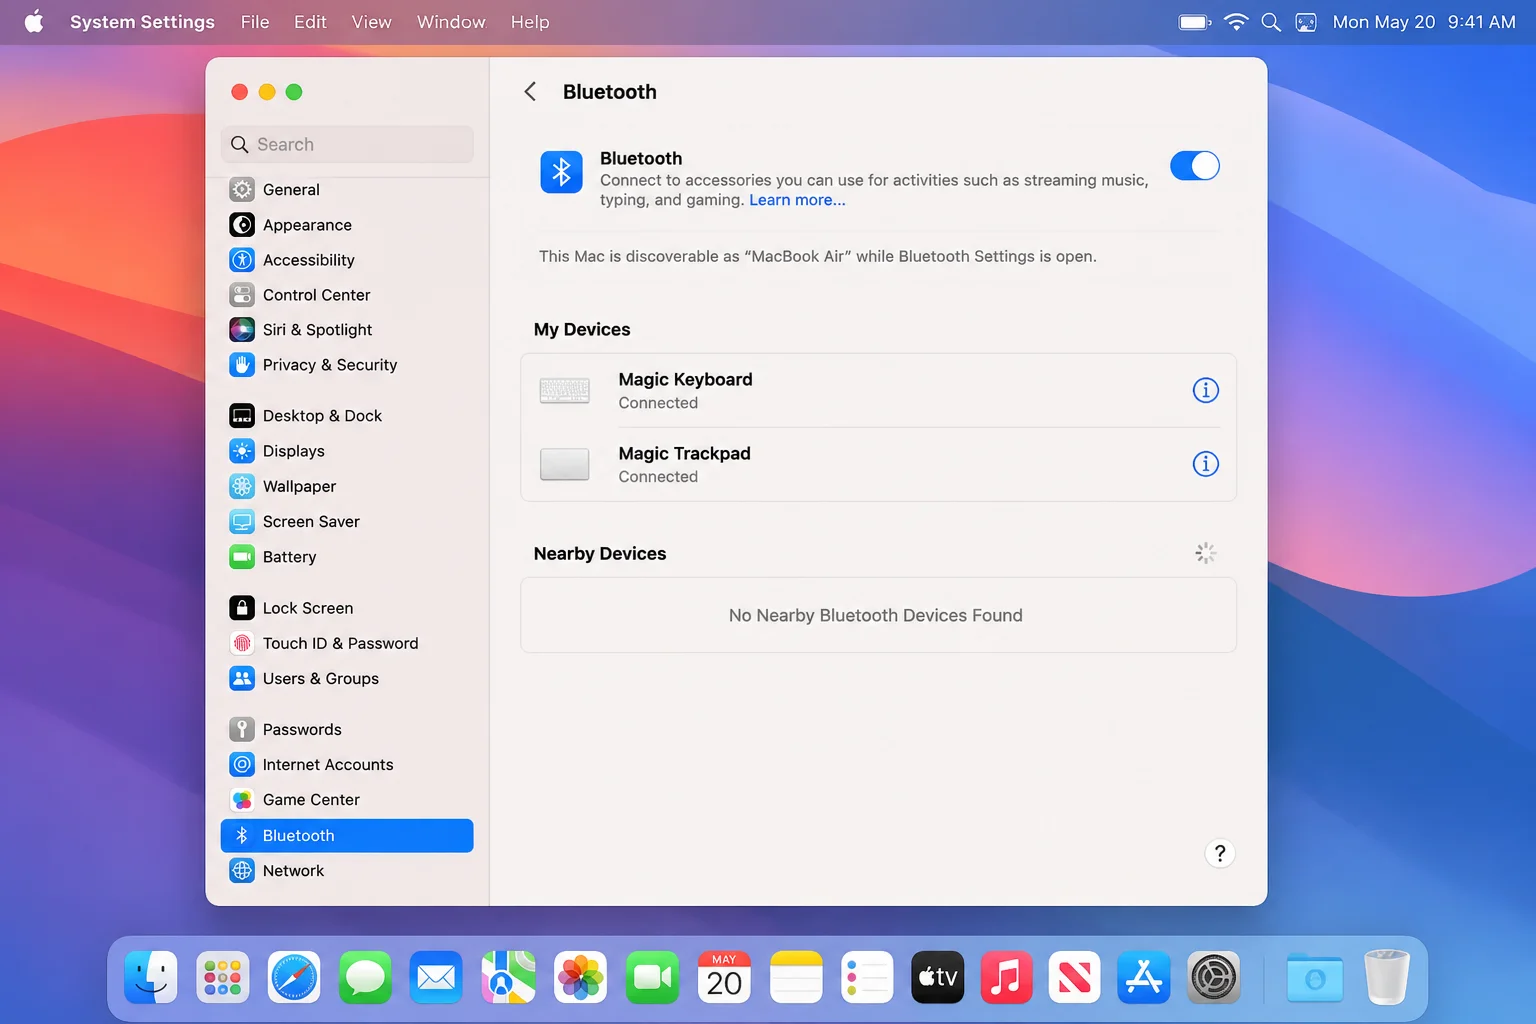
Tip: Pair your keyboard and trackpad directly to the Mac, not to Vision Pro. Mac Virtual Display just mirrors the screen; your accessories still need to talk to macOS itself.
Step 5: Keep your Mac awake and nearby
The first time you connect, Vision Pro finds your Mac by recognizing it visually. Keep the lid open (or the Mac otherwise awake) and stay within a few feet of it. Once connected, you can move around the room more freely. Just keep the Mac awake and on the same network the whole time. If it sleeps, Mac Virtual Display disconnects.
Step 6: Put on Vision Pro and look at your Mac
With the headset on, look toward your Mac’s screen. VisionOS 26 recognizes a nearby Mac signed into the same Apple ID and shows a Connect button hovering near the display.
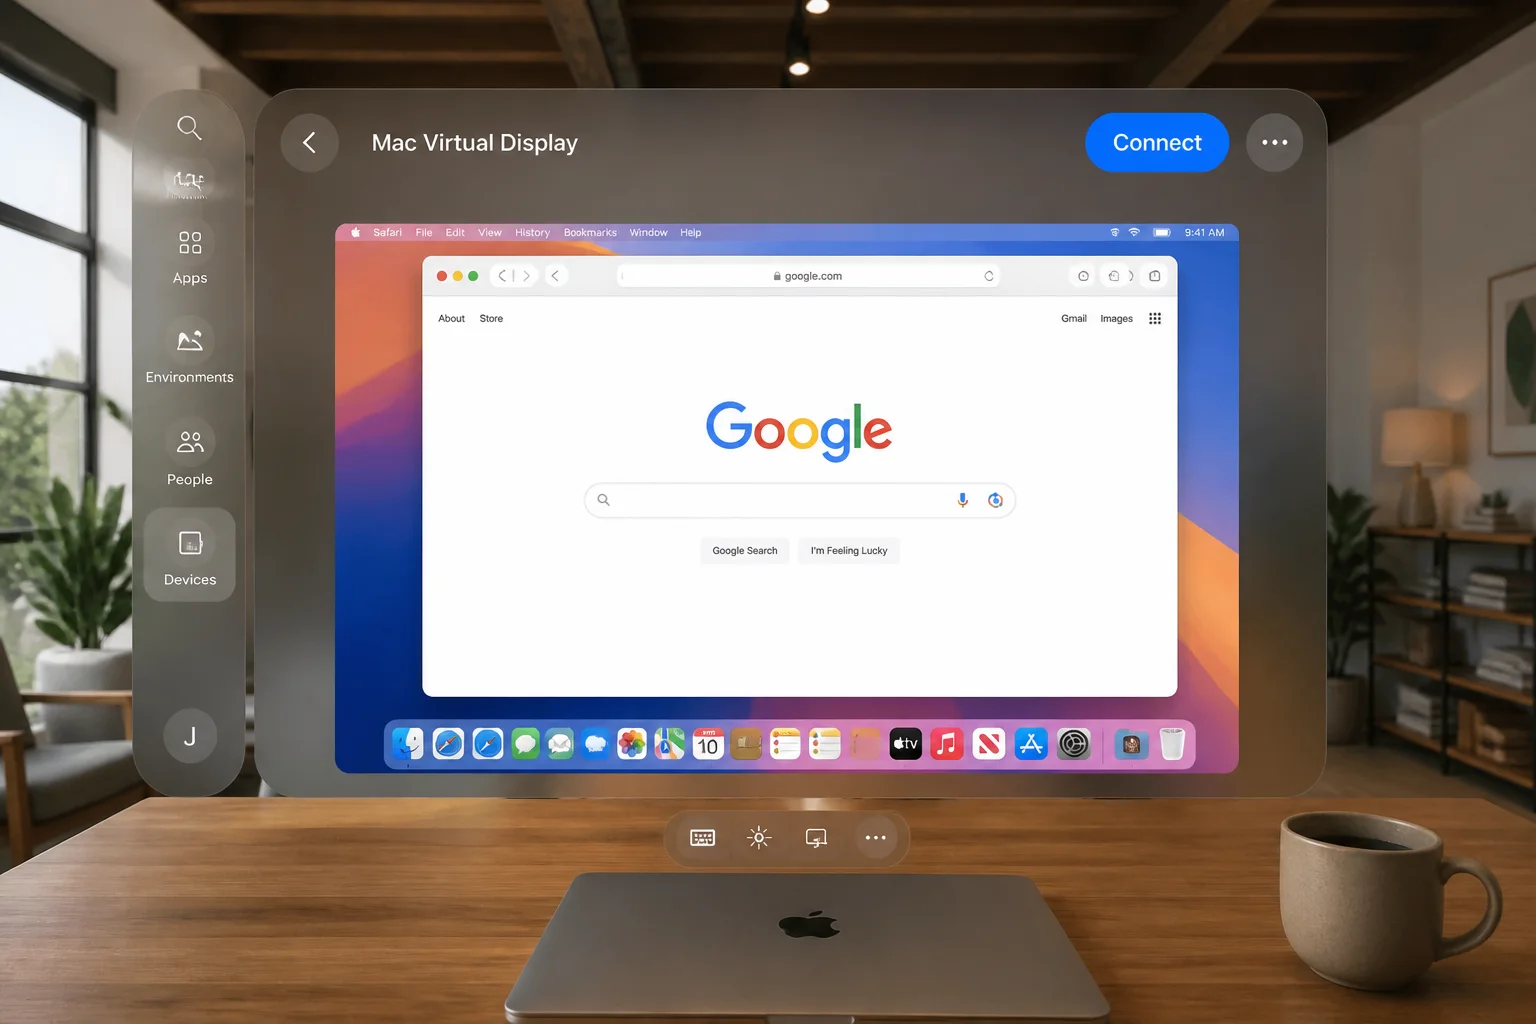
If the button doesn’t appear, open Control Center in visionOS: look up and pinch, or use the crown/button combination from calibration. Select Mac Virtual Display, then choose your Mac from the list manually.
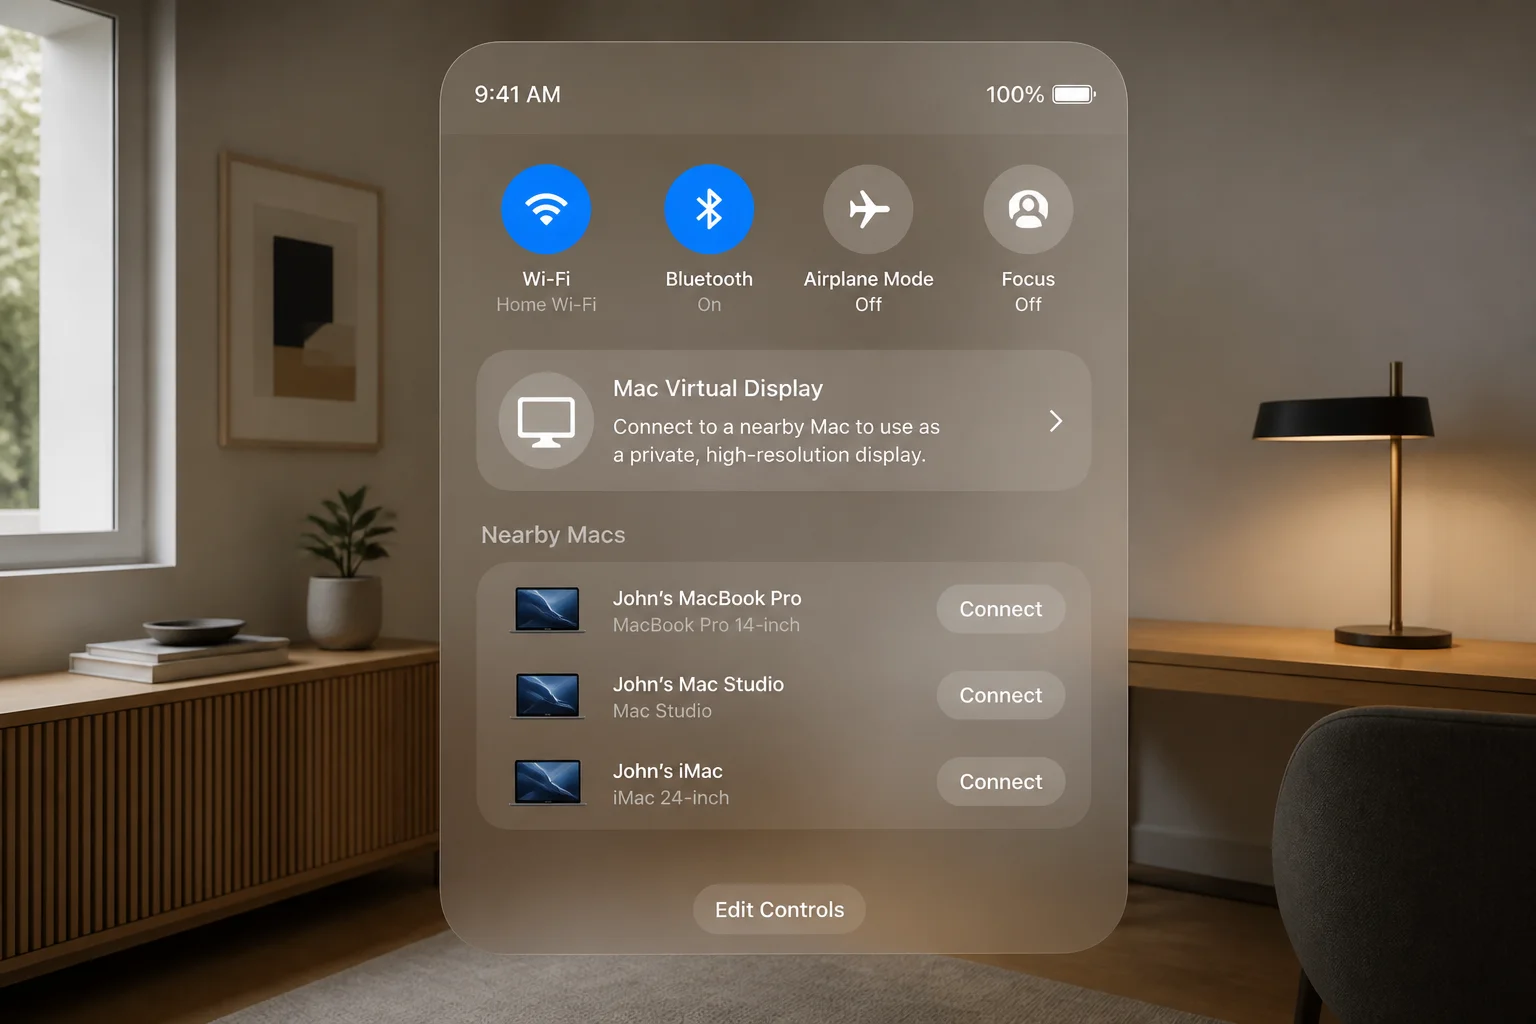
Step 7: Connect and resize the window
Select Connect. Your Mac’s entire screen appears as a large virtual window in front of you. To resize it, look at one of the corners or edges until a resize handle highlights, then pinch and drag outward or inward. To reposition it, look at the window’s bottom bar and pinch-drag it to a new spot in your room.
Expected result: You see your actual Mac desktop, menu bar, Dock, and all open windows, floating in front of you at whatever size and distance you set.
Tip: Some visionOS versions offer a wider, curved “ultra-wide” display mode in addition to the standard single-monitor mirror. Look for this option in the same Control Center panel where you connected. It’s worth trying if you regularly work with multiple app windows side by side.
Step 8: Work as you normally would
Type on your paired Magic Keyboard and click or scroll with your Magic Trackpad exactly as you would sitting at a desk. Vision Pro only displays your Mac’s screen. It isn’t replacing macOS or changing how any app works. Text, cursor movement, and app switching all behave exactly like using the Mac directly. The first few minutes feel a little strange, mostly because your brain hasn’t caught up to “this monitor doesn’t physically exist.” That wears off fast.
Step 9: Disconnect when you’re done
Open Control Center in visionOS and select Disconnect next to Mac Virtual Display, or simply take off the headset. The connection drops automatically after the Mac goes to sleep or you step away.
Configuration
A few settings are worth knowing about once the basic connection is working:
- Display mode: Toggle between the standard virtual monitor and the wider curved layout (where available) from the same Control Center panel used to connect. The wider mode is more immersive but can make text at the far edges harder to read comfortably.
- Guest User: If someone else wants to try your headset, set up Guest User in Vision Pro’s Settings app. They get their own eye/hand calibration without touching your saved settings, apps, or accounts.
- Passthrough level: Adjust how much of your real room stays visible around the virtual Mac display by turning the Digital Crown. Full passthrough keeps you aware of your surroundings; dialing it down dims the room for a more focused, theater-like feel.
- Network priority: If your home network has both 5GHz and 6GHz bands, connect both the Mac and Vision Pro to the fastest band your router supports. Less lag, fewer compression artifacts in the virtual display.
What Can visionOS Actually Do With Your Regular Photos and Videos?
VisionOS 26 includes a feature Apple calls spatial scenes. It uses on-device machine learning to add a sense of depth to ordinary flat photos, the kind already in your Photos library, not just images shot for Vision Pro. Open a photo in the Photos app on your headset, and visionOS separates the foreground from the background, then renders a subtle parallax effect as you move your head. It’s a real, shipping feature, not a mockup. But it has limits worth knowing. It doesn’t turn a 2D photo into full 3D geometry you can walk around. The depth effect is also more noticeable on some photos, such as a person against a blurred background, than on others, like a flat landscape or a screenshot.
Separately, spatial video and photos are a distinct thing. This content is actually captured with Vision Pro’s own cameras, or with the spatial camera mode on compatible iPhones (iPhone 15 Pro or later, depending on iOS version). Both record true stereoscopic depth from two lenses. These look noticeably more three-dimensional than spatial-scenes-processed photos, because they capture real depth data instead of estimating it after the fact. For the more convincing effect, shoot in spatial format going forward, rather than relying on spatial scenes to retrofit your existing camera roll.
Both features are good at what they promise: reliving a birthday party or a trip photo with a bit more presence than a flat image. Neither replaces a purpose-built 3D scan or a professional stereoscopic camera. Don’t expect either one to wow a room full of people the way a movie trailer might. The magic here is more personal than that.
Which visionOS Apps Are Actually Worth Downloading?
It helps to separate what’s genuinely useful today from what’s still more novelty than daily tool. VisionOS shares its foundation with iPadOS, so a large share of the “AR app” catalog in the App Store is really an existing iPad app running in a compatibility window, a familiar 2D interface floating in 3D space, not an app built from the ground up for spatial input. That’s not necessarily bad. It’s just worth calling what it is.
Genuinely useful today:
- Mac Virtual Display (built-in): the feature this whole guide is about; the most consistently practical reason to use Vision Pro alongside a Mac
- Apple TV+ and streaming apps with Apple Immersive Video: movies and short-form immersive content that fill your field of view like a private theater; this is one of the strongest, most polished use cases on the device
- Photos (built-in): for browsing spatial photos/videos and spatial-scenes-enhanced images from your library
- Freeform, Notes, and other Apple productivity apps: work as reliable, familiar tools in a large virtual window, similar to using them on an iPad
- Video conferencing and Mac screen-sharing workflows: useful specifically for road warriors who want a big virtual monitor in a hotel room or on a plane without packing a physical display
More hype than daily driver right now:
- Most third-party “AR games” and interactive experiences: often short tech demos rather than titles with staying power
- Adapted iPad productivity apps with no spatial-specific redesign: they work, but they don’t do anything a real iPad or Mac screen doesn’t already do better and more comfortably
- Collaborative “shared spatial” experiences: genuinely interesting in concept, but the catalog of apps that do this well is still thin
If you’re buying Vision Pro mainly to use with your Mac, plan around Mac Virtual Display, video/streaming, and spatial photo browsing as your core use cases. Treat the rest of the app catalog as a bonus you explore over time, not a reason to buy the headset by itself.
Tips and Troubleshooting
If something doesn’t work on the first try, don’t assume the hardware is broken. These are the most common snags, and all of them are fixable in a few minutes.
- Confirm both devices are signed into the exact same Apple ID.
- Confirm both devices are on the same Wi-Fi network, ideally the 5GHz or 6GHz band.
- Toggle Wi-Fi and Bluetooth off and back on on the Mac.
- Keep the Mac’s lid open and the machine awake and nearby during the first connection attempt.
- Restart both the Mac and Vision Pro if the connection still won’t establish.
The Mac doesn’t show up as an option to connect
Why it happens: The two devices aren’t on the same Wi-Fi network, aren’t signed into the same Apple ID, or Bluetooth is off on the Mac.
Fix: Double-check the Apple ID shown in System Settings > [your name] on the Mac against Settings > [your name] on Vision Pro. Join the same Wi-Fi network on both devices, toggle Wi-Fi and Bluetooth off and on, and keep the Mac awake and within a few feet of you the first time you connect.
The virtual Mac display looks blurry or laggy
Why it happens: A weak or congested Wi-Fi signal between the Mac and Vision Pro is almost always the cause.
Fix: Move closer to your router. Switch both devices to a 5GHz or 6GHz network if your router supports it. Pause bandwidth-heavy activity, such as large downloads or 4K streaming, on the same network while you use Mac Virtual Display.
Keyboard or trackpad won’t control the Mac inside the headset
Why it happens: The accessory is paired to the wrong device, or the Bluetooth pairing dropped.
Fix: Open System Settings > Bluetooth on the Mac and confirm the keyboard and trackpad are listed as connected there, not paired to the Vision Pro. Reconnect Mac Virtual Display after fixing the pairing.
Can’t find many “must-have” AR apps
Why it happens: The third-party visionOS app ecosystem is still fairly small. Much of what you’ll find is adapted iPad apps, not purpose-built spatial software.
Fix: Lean on the categories that are genuinely mature today: Mac Virtual Display, video and streaming, and spatial photo/video browsing, rather than expecting an App Store as deep as the iPhone’s.
The headset feels heavy or uncomfortable during long sessions
Why it happens: Vision Pro is heavier than a typical pair of glasses or a lightweight VR headset, and the external battery cable can feel awkward during extended use.
Fix: Try an alternate head band if you have one available, take a break every 20 to 30 minutes, and avoid multi-hour sessions until you’re used to the weight and fit.
Is Vision Pro Worth It for a Typical Mac User?
If you’re wondering whether Vision Pro is worth adding to your Mac setup purely for the Mac integration, the honest answer is probably not, by itself. Mac Virtual Display is genuinely well engineered. The tracking is smooth, text is sharp enough to read comfortably, and it’s a legitimately good way to get a huge, private screen in a hotel room or small apartment. But it’s an expensive way to solve a problem. A $300–$400 portable USB-C monitor, or the Mac’s built-in Sidecar feature paired with an iPad you may already own, solves it for a fraction of the cost and zero learning curve.
Vision Pro makes more sense if you’ll actually use the rest of what it does: watching movies and Apple Immersive Video in a private, large-format way, browsing spatial photos and videos from your own life, and occasionally running familiar iPad-style productivity apps in a bigger virtual window. If those use cases genuinely excite you, not just the idea of them, Mac Virtual Display becomes a great bonus feature on a headset you wanted anyway, rather than the reason to buy it. For most everyday Mac owners, this is still enthusiast hardware: impressive, well-built, and currently more of a premium accessory than a mainstream productivity upgrade.
Wrapping Up
Once you’ve matched Apple IDs, joined the same Wi-Fi network, and paired your accessories, connecting your Mac to Vision Pro takes about as long as it took to read this guide. From then on, it’s just look, tap Connect, go.
Whether it’s worth owning still comes down to how much you’ll actually use the entertainment and photo features beyond the virtual display trick. That part’s on you to figure out, not the setup guide.
| Step | Action | Applies To |
|---|---|---|
| 1 | Update macOS and confirm matching Apple IDs | macOS |
| 2 | Join the same Wi-Fi network (5GHz/6GHz) | macOS, visionOS |
| 3 | Turn on Bluetooth and pair keyboard/trackpad | macOS |
| 4 | Keep the Mac awake and nearby | macOS |
| 5 | Look at the Mac and select Connect | visionOS |
| 6 | Resize, reposition, and work normally | visionOS |
| 7 | Disconnect via Control Center when finished | visionOS |