
Recording instruments through an audio interface on Mac is still refreshingly straightforward in 2026. Whether you’re tackling a USB audio interface setup for the first time or revisiting the process after a macOS update, the core steps remain consistent, though modern macOS brings some helpful improvements and a few new gotchas to watch out for.
We’ll walk through the complete setup using a Focusrite Scarlett Solo, but these steps work with most USB audio interfaces. The payoff is significant: lower latency, better sound quality, and the ability to connect professional mics and instruments directly to your Mac.
What You’ll Need
Any USB audio interface will work (the Scarlett Solo is a solid budget choice), plus your instrument or microphone. Most interfaces are class compliant on Mac – no driver downloads required.
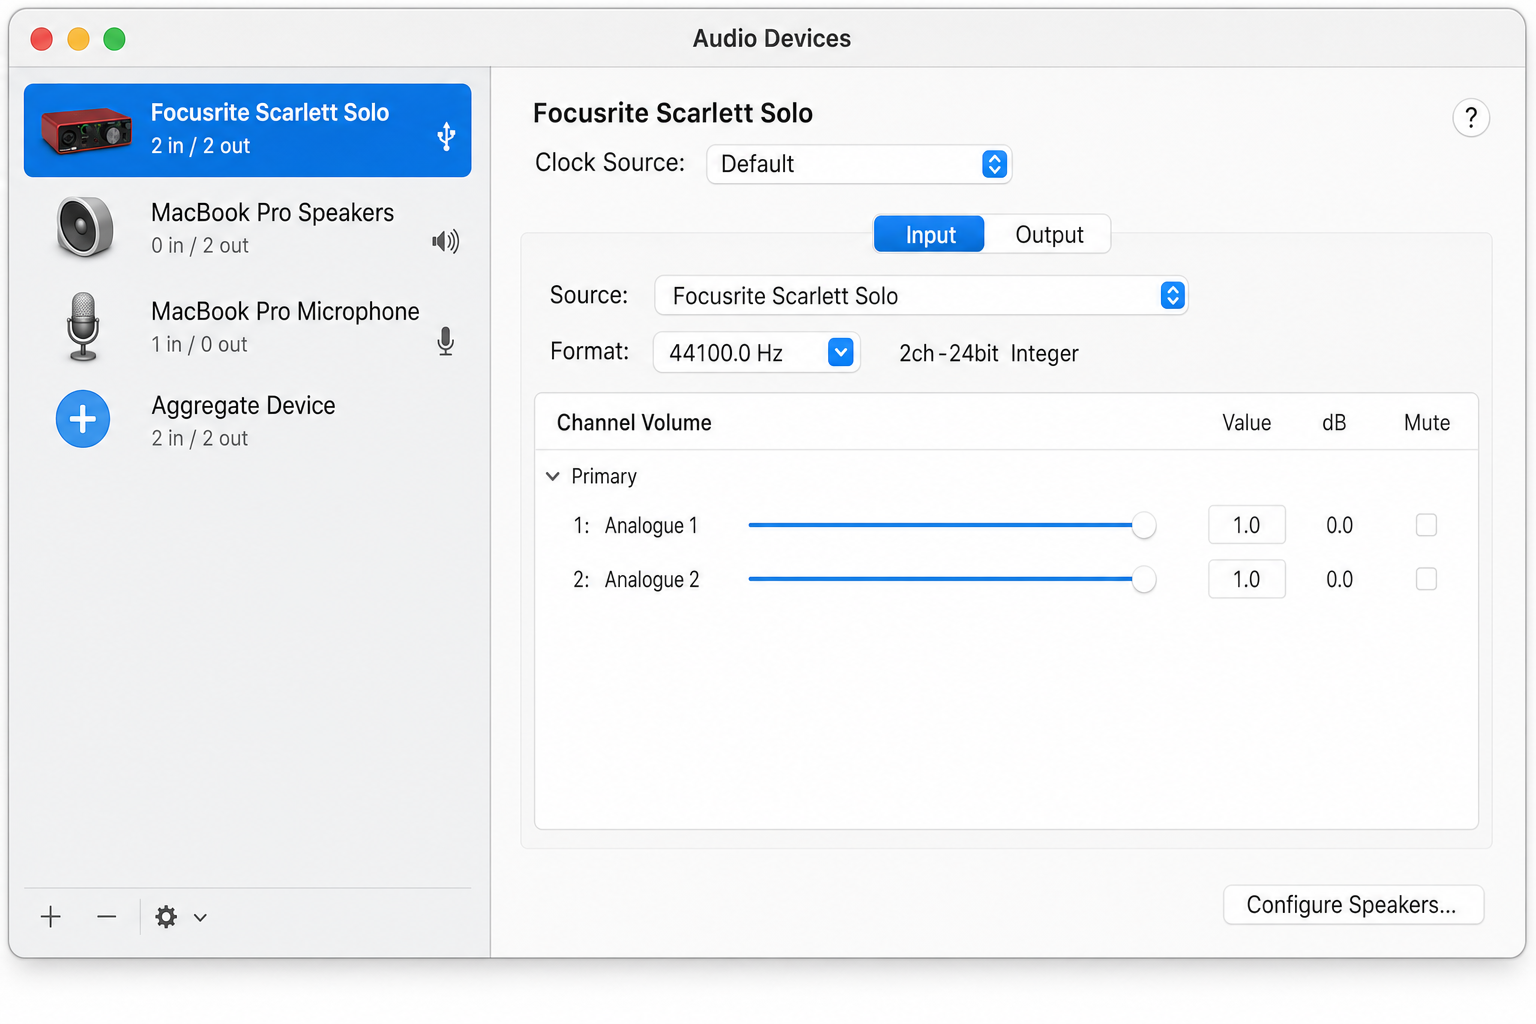
Modern Macs with USB-C ports work fine with older USB-A interfaces using a basic adapter. The Scarlett Solo draws power from USB, so no external power supply needed.
Connect Your Hardware
Plug your instrument into the interface first, then connect the interface to your Mac:
- Guitar/bass: Use input 2 (the Hi-Z instrument input)
- Microphone: Use input 1 (XLR with phantom power if needed)
- Headphones: Connect to the interface’s headphone output for zero-latency monitoring
The interface should appear immediately in your Mac’s audio devices. No setup prompts, no driver installations.
Set Up GarageBand
Open GarageBand and create a new project. The app will likely detect your interface automatically and prompt you to use it, click yes.
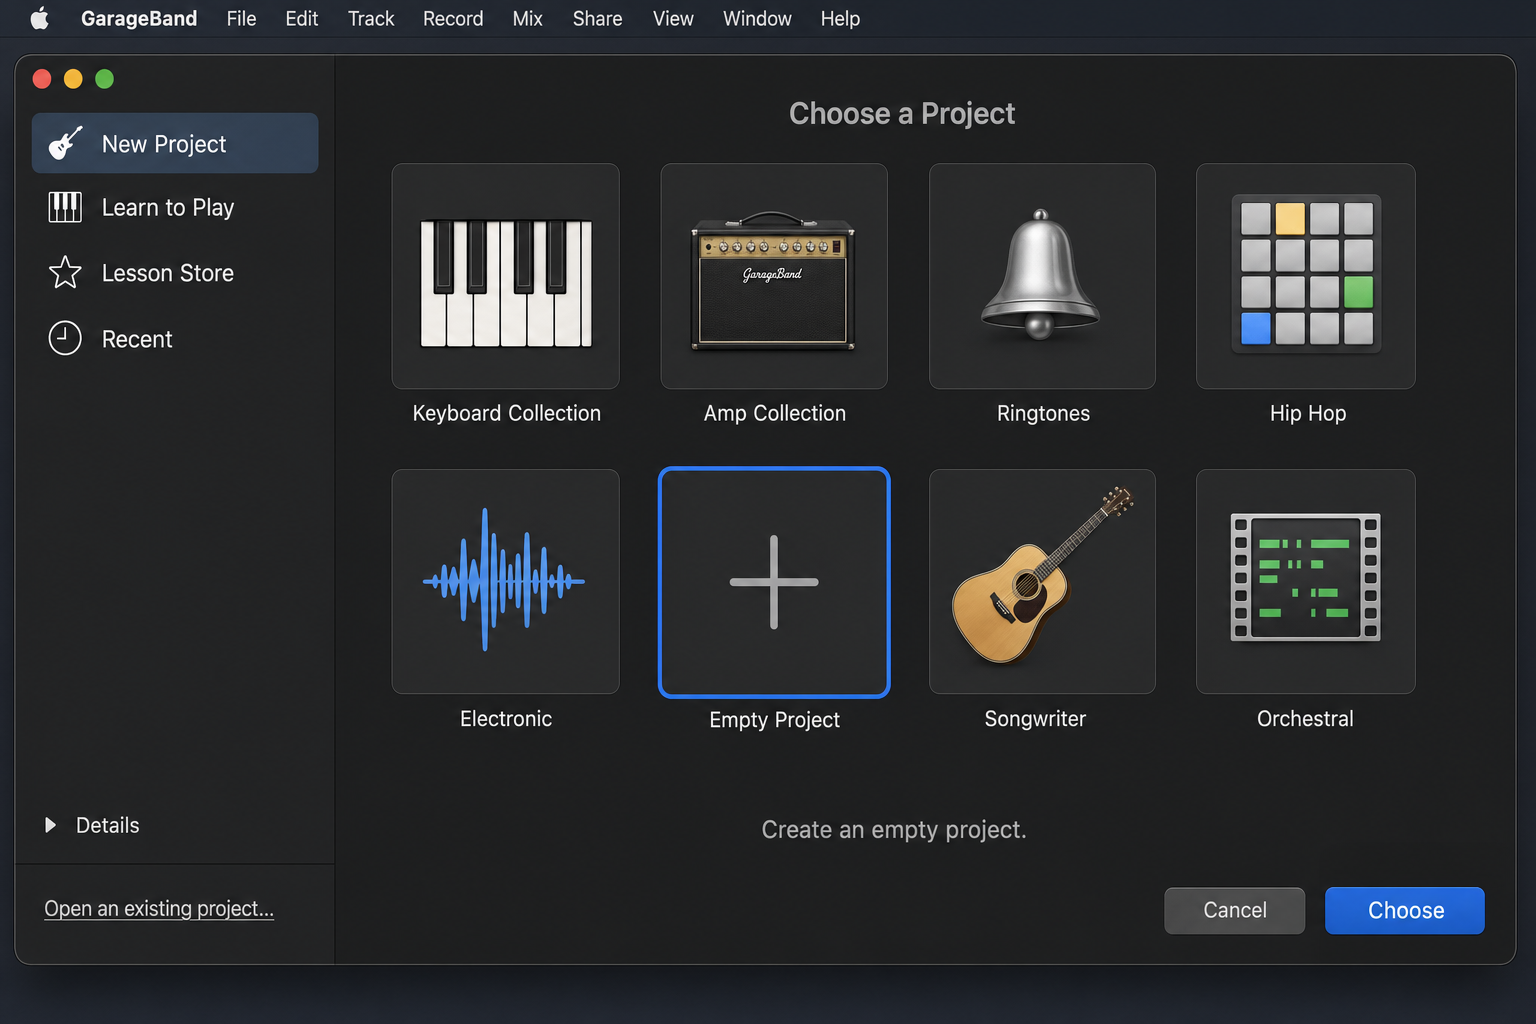
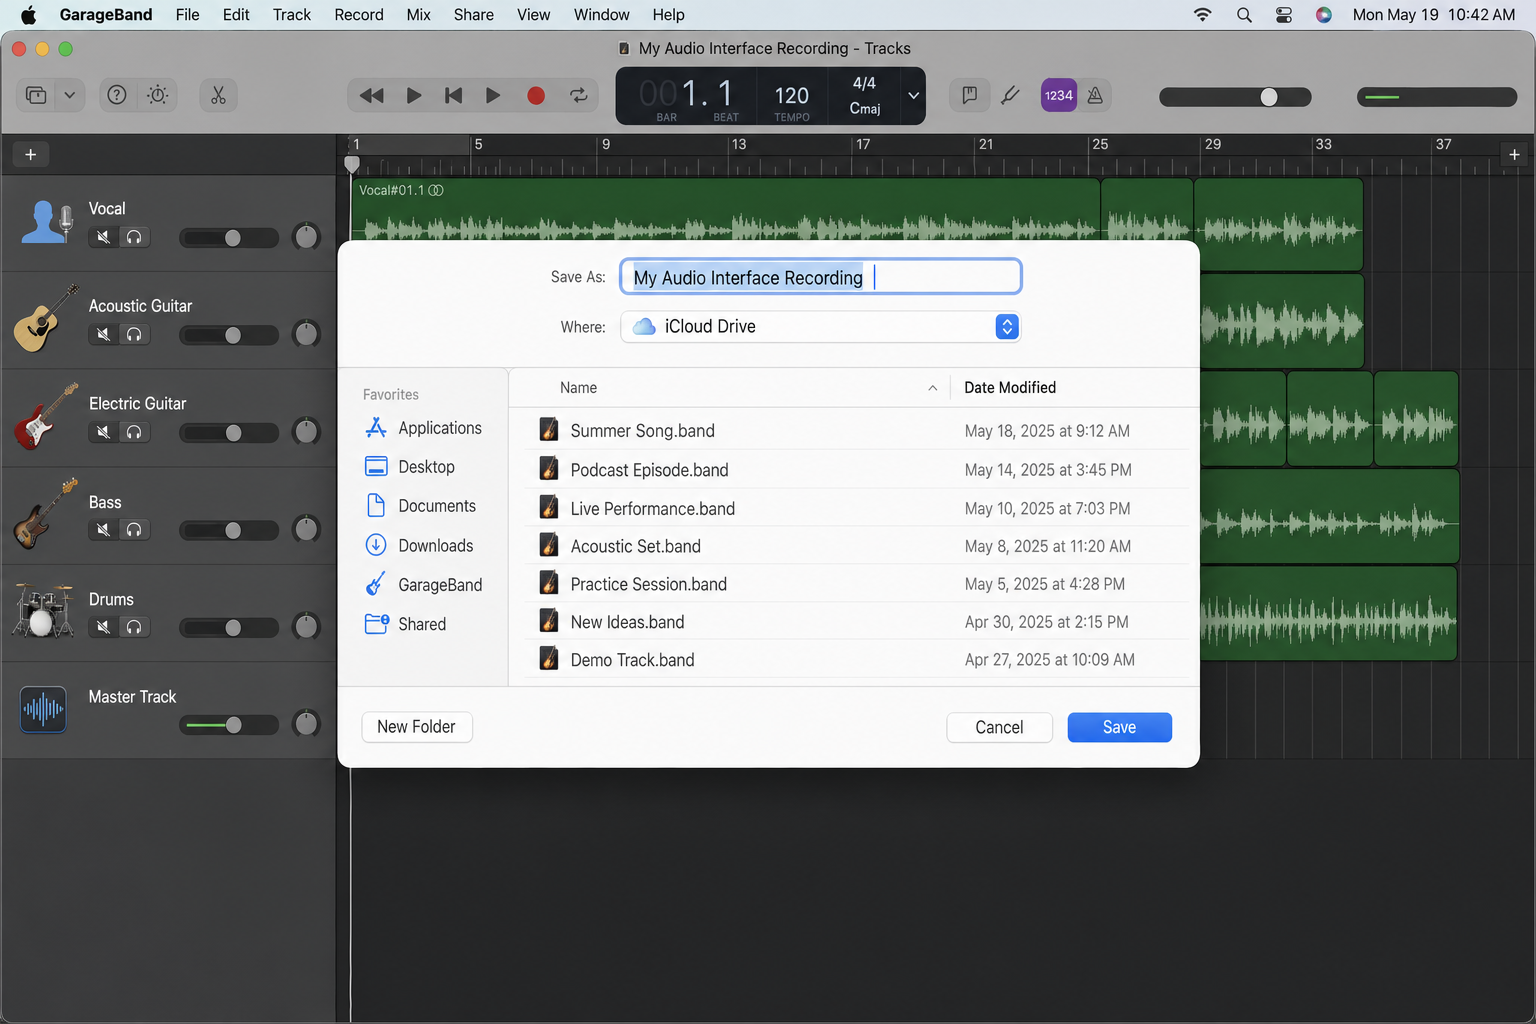
Save your project with whatever name you prefer. Don’t worry about tempo or key settings; you can adjust these later.
Configure Audio Settings
If GarageBand didn’t auto-detect your interface, go to GarageBand > Settings (or Preferences on older versions).
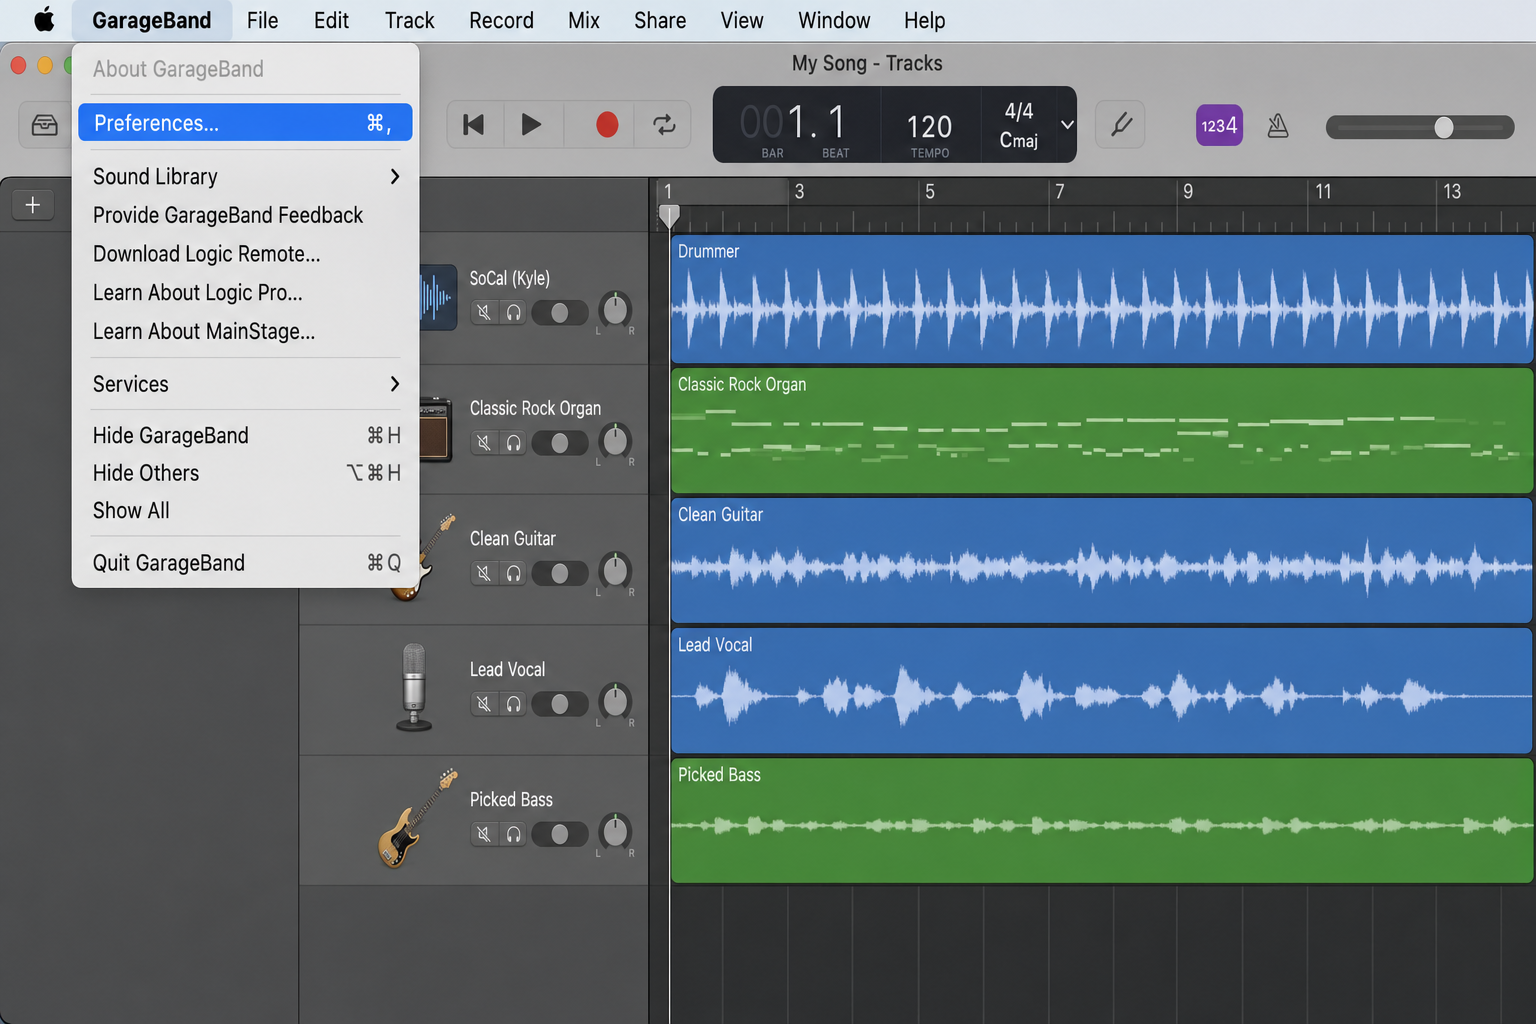
In the Audio/MIDI tab, set your Audio Input to your interface (like “Scarlett Solo USB”). For output, choose either the interface (if you want to monitor through it) or “Built-in Output” for your Mac’s speakers. If you notice a delay when monitoring yourself while recording, try lowering the Buffer Size setting in this same tab, a smaller buffer reduces latency at the cost of slightly higher CPU usage.
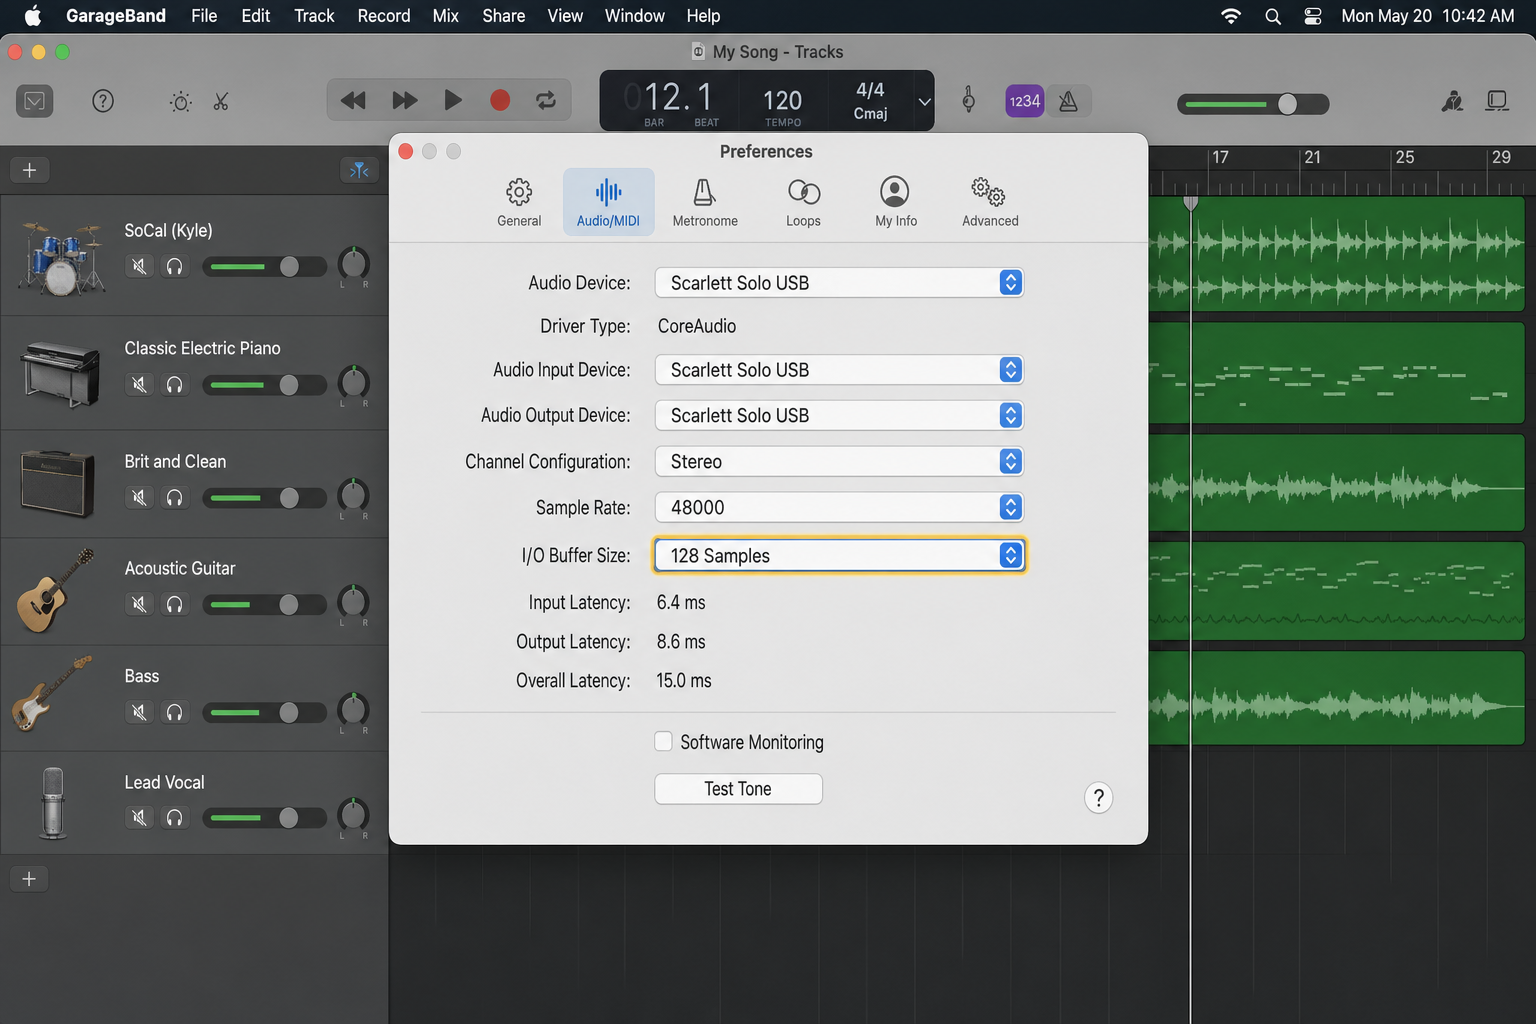
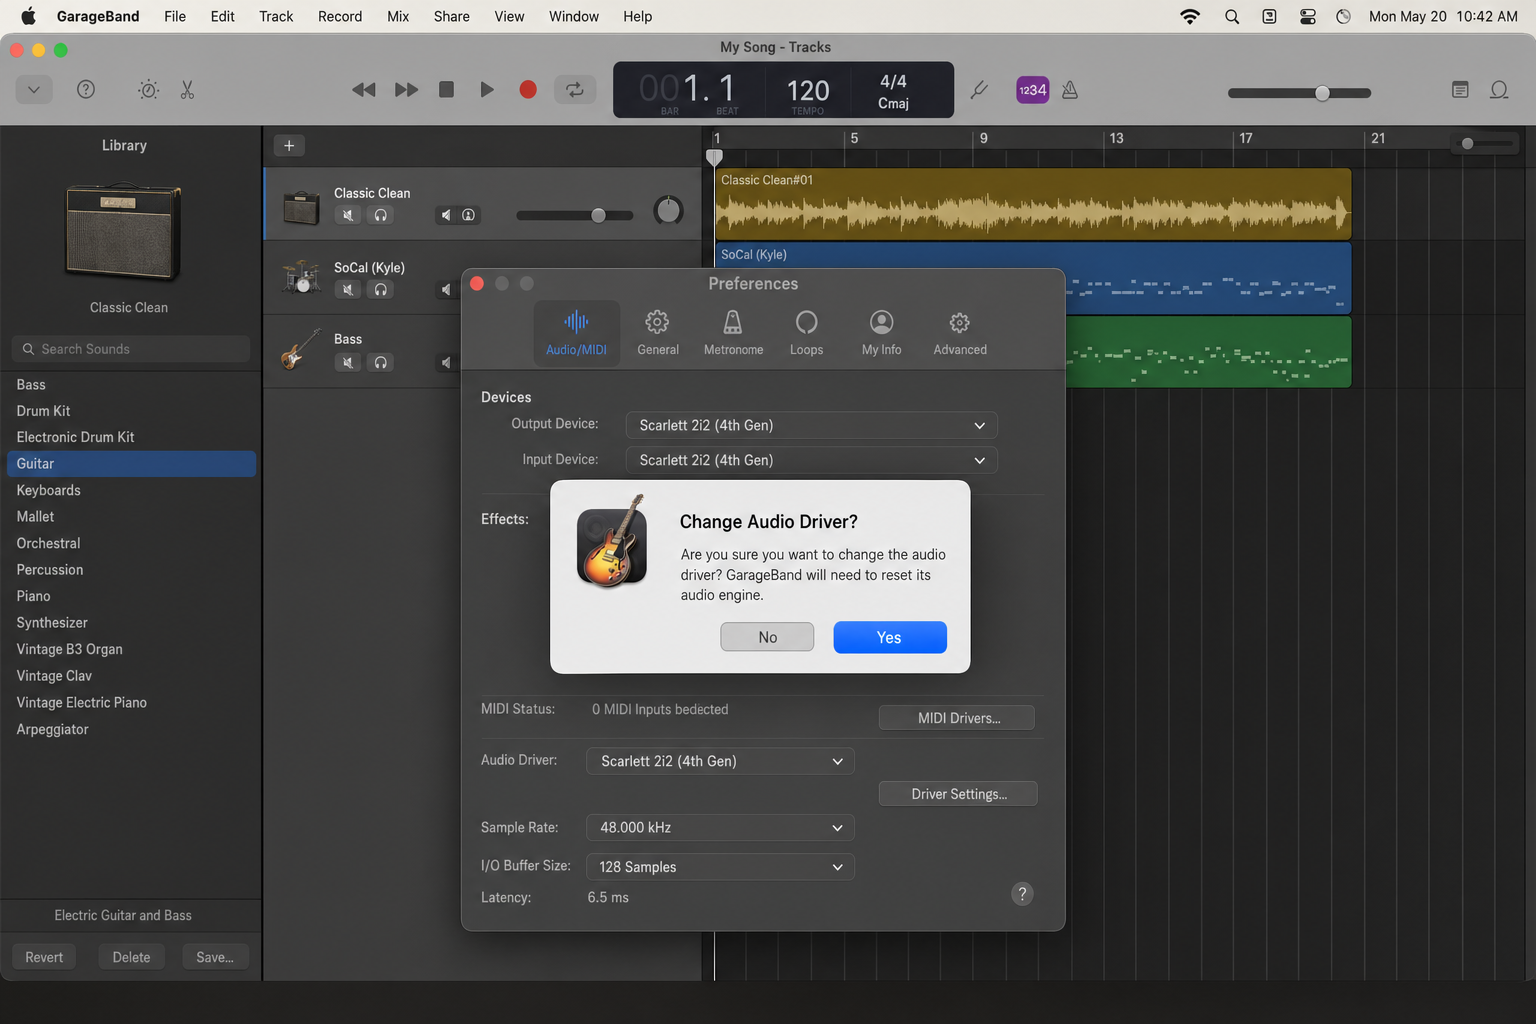
When prompted to change the audio driver, click Yes. This takes about 10 seconds.
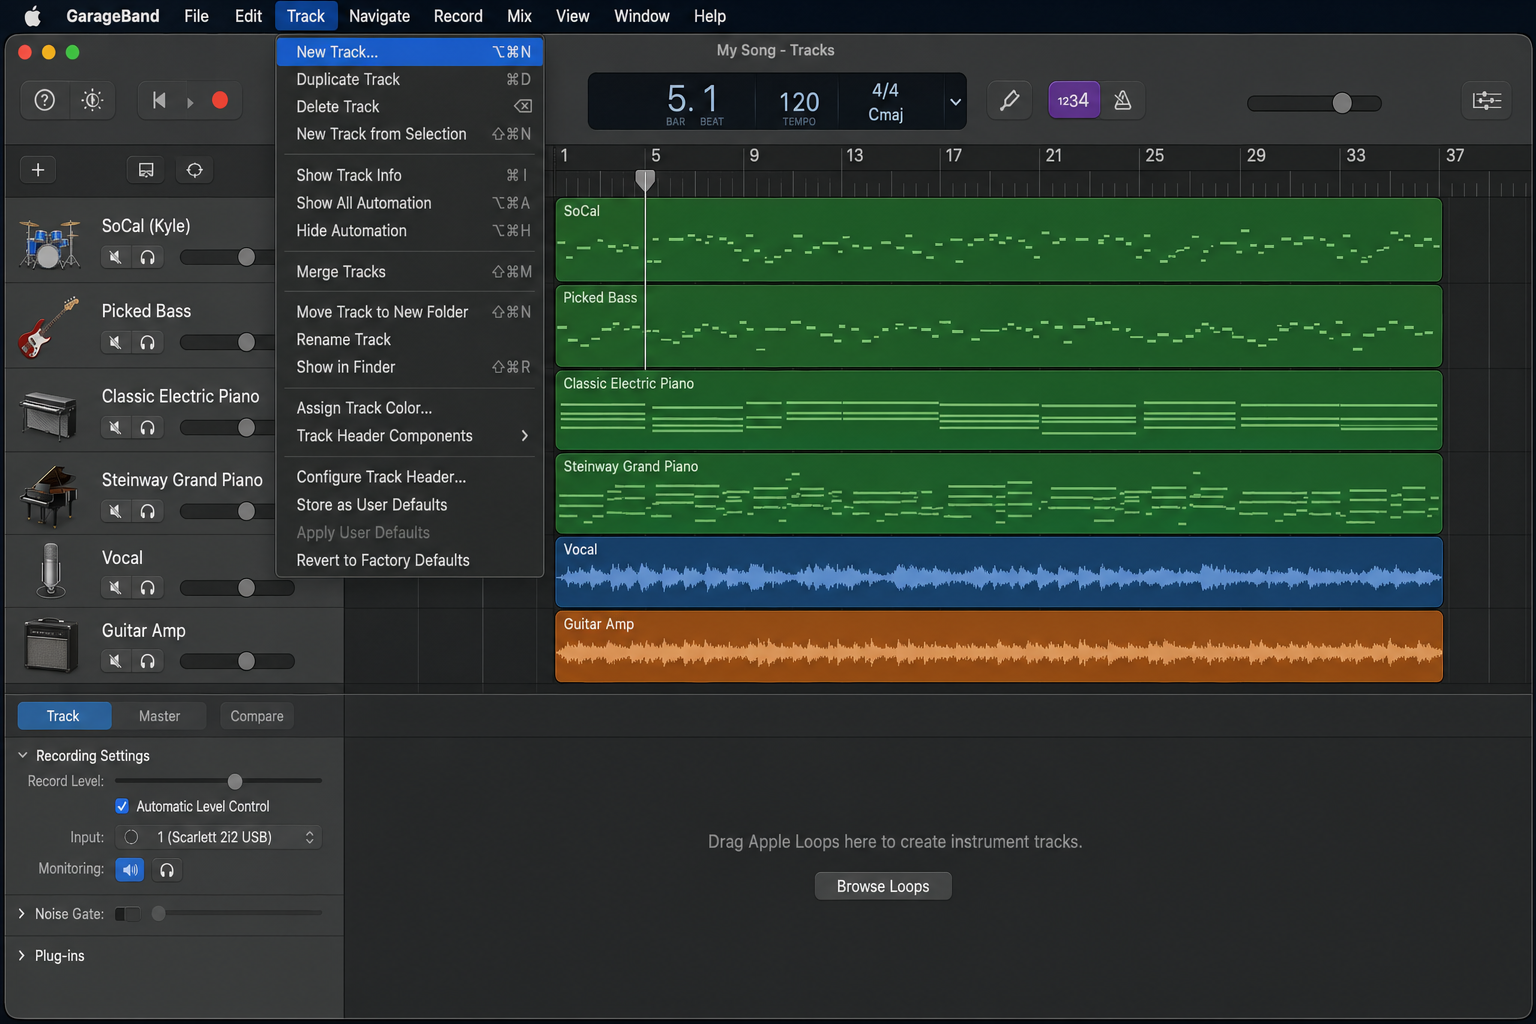
Create Your Recording Track
Go to Track > New Track to add a recording track.
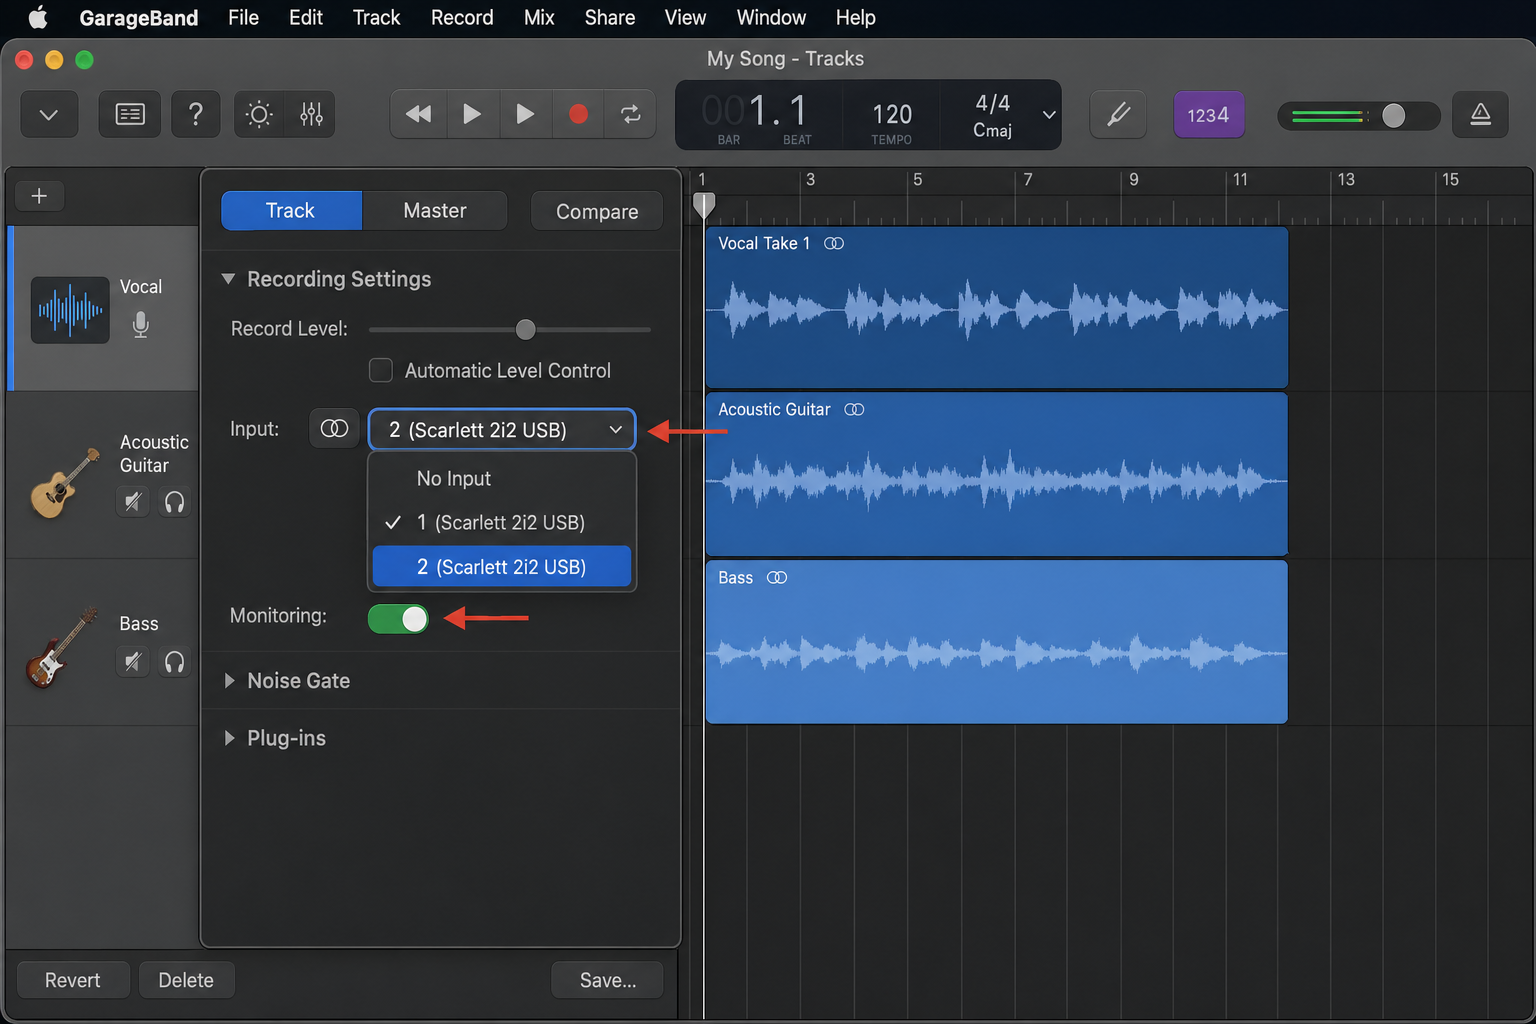
Choose Audio for recording real instruments or vocals. In the input settings:
- Select Input 1 for microphones
- Select Input 2 for instruments (guitars, basses)
- Enable Input Monitoring to hear yourself while recording
Click Create and you’re ready to record.
Fix Common Issues
The setup usually works smoothly, but here are the most common problems and their fixes:
No Input Signal
If you’re not seeing any input levels, check these in order:
- Make sure the interface’s gain knob is turned up (start around 12 o’clock)
- Verify the correct input is selected in your track settings
- Open Audio MIDI Setup (search in Spotlight) and confirm your interface appears in the device list
Distorted or Weird-Sounding Input
This is usually caused by Voice Isolation, a feature introduced in macOS Sonoma that tries to clean up vocal recordings but mangles instrument signals.
To disable it: Open Control Center, click Mic Mode, and turn off Voice Isolation. Your instrument should sound normal again.
Interface Not Recognized
Try these steps:
- Unplug and reconnect the USB cable
- Try a different USB port
- If using a USB hub, connect directly to the Mac
- Restart your DAW with the interface already connected
Beyond GarageBand
This same process works with other recording software on Mac:
- Logic Pro: Similar interface selection in preferences — go to Logic Pro > Settings > Audio and choose your device from the Input and Output Device menus
- Reaper: Go to Preferences > Audio > Device; Reaper lists interfaces by their system device name, which matches what you see in Audio MIDI Setup
- Pro Tools: Setup > Playback Engine
Most DAWs auto-detect USB interfaces when you launch them with the device connected.
Worth the Setup
Once configured, recording through an audio interface becomes second nature. Low-latency recording on Mac is one of the platform’s genuine strengths, and the improved sound quality over built-in inputs is immediately noticeable. Direct monitoring through headphones eliminates the latency issues that make built-in recording frustrating.
The Scarlett Solo remains a solid choice for getting started, though any class-compliant USB interface will work with these same steps. The investment pays off quickly if you do any serious recording on your Mac.