
There are good reasons to wipe your iPhone or iPad: you’re selling it, handing it down, troubleshooting a stubborn software problem, or just want a clean slate. Whatever brought you here, the process is straightforward, but there are a few things you need to do first or you’ll regret skipping them.
One thing worth updating from older advice: you don’t need to wipe your iPhone on a routine schedule. iOS handles storage cleanup, app offloading, and memory management well enough that a periodic “cleanse” isn’t necessary. Do this when you have a real reason to.
Pre-Wipe Checklist
Don’t skip this section. A factory reset is irreversible, and iOS won’t let you proceed without your Apple ID password anyway, so you want everything in order before you tap that button.

1. Back Up to iCloud
Go to Settings > tap your name at the top > iCloud > iCloud Backup > Back Up Now. Stay on Wi-Fi and wait for it to finish completely.
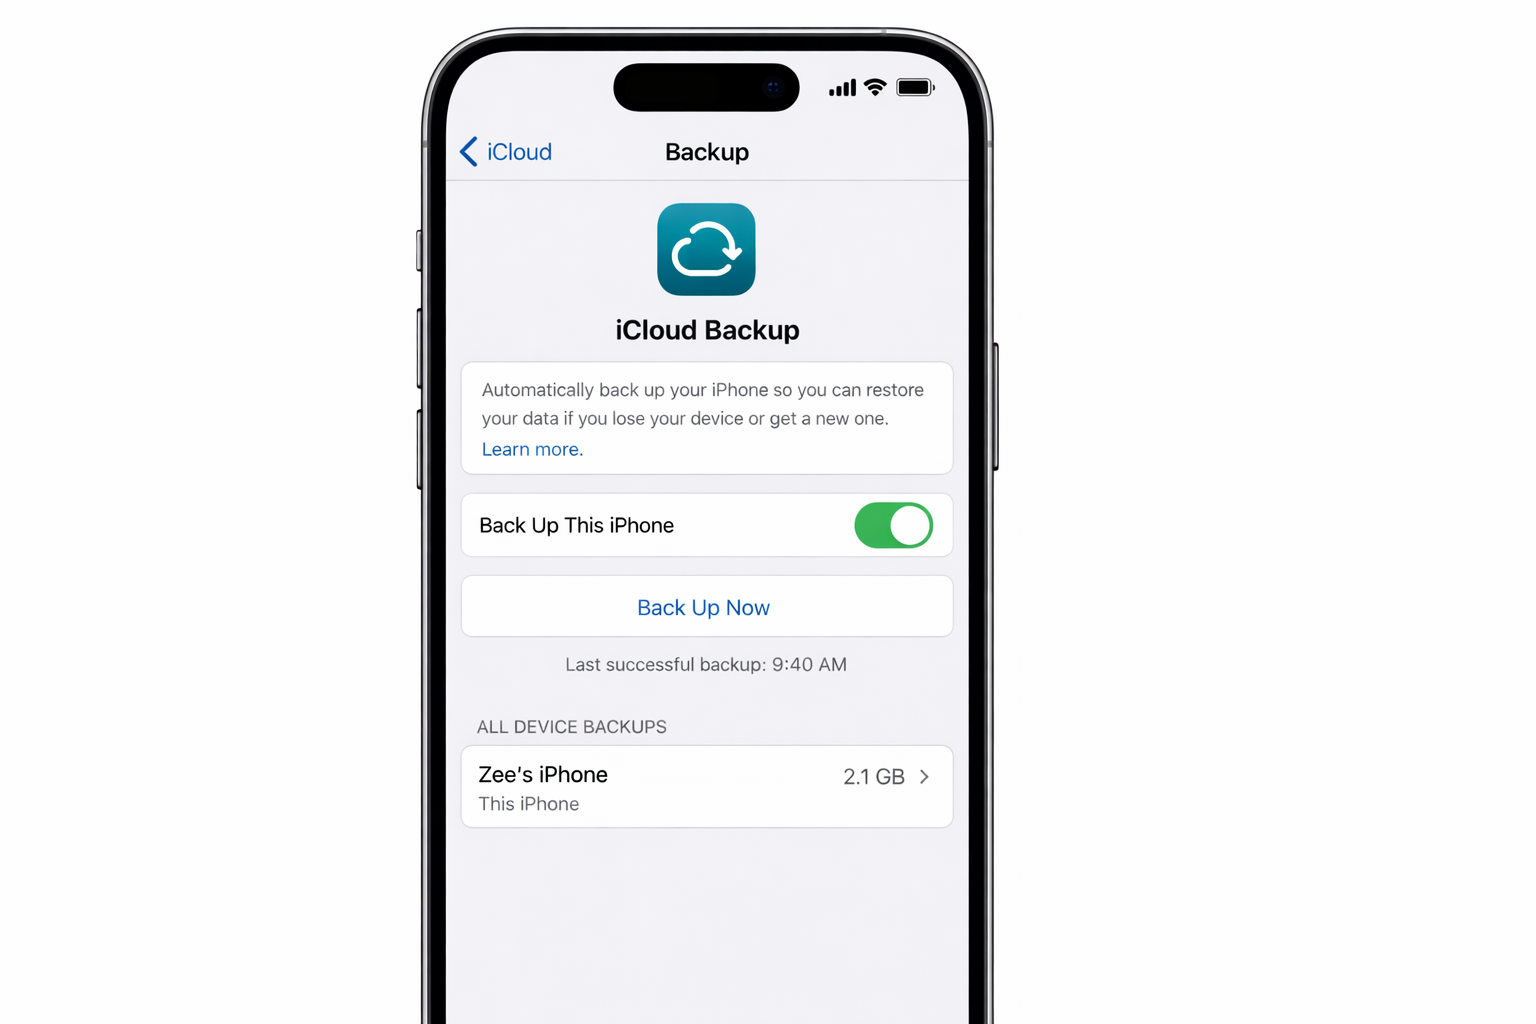
If you’re running low on iCloud storage (the free 5GB fills up fast), either upgrade your iCloud+ plan temporarily or back up to a Mac using Finder, or a Windows computer using the Apple Devices app. A computer backup is actually faster and more complete.
2. Verify Your Photos Are Backed Up
Check that iCloud Photos is syncing. Go to Settings > your name > iCloud > Photos and confirm Sync this iPhone is on and the sync is current.
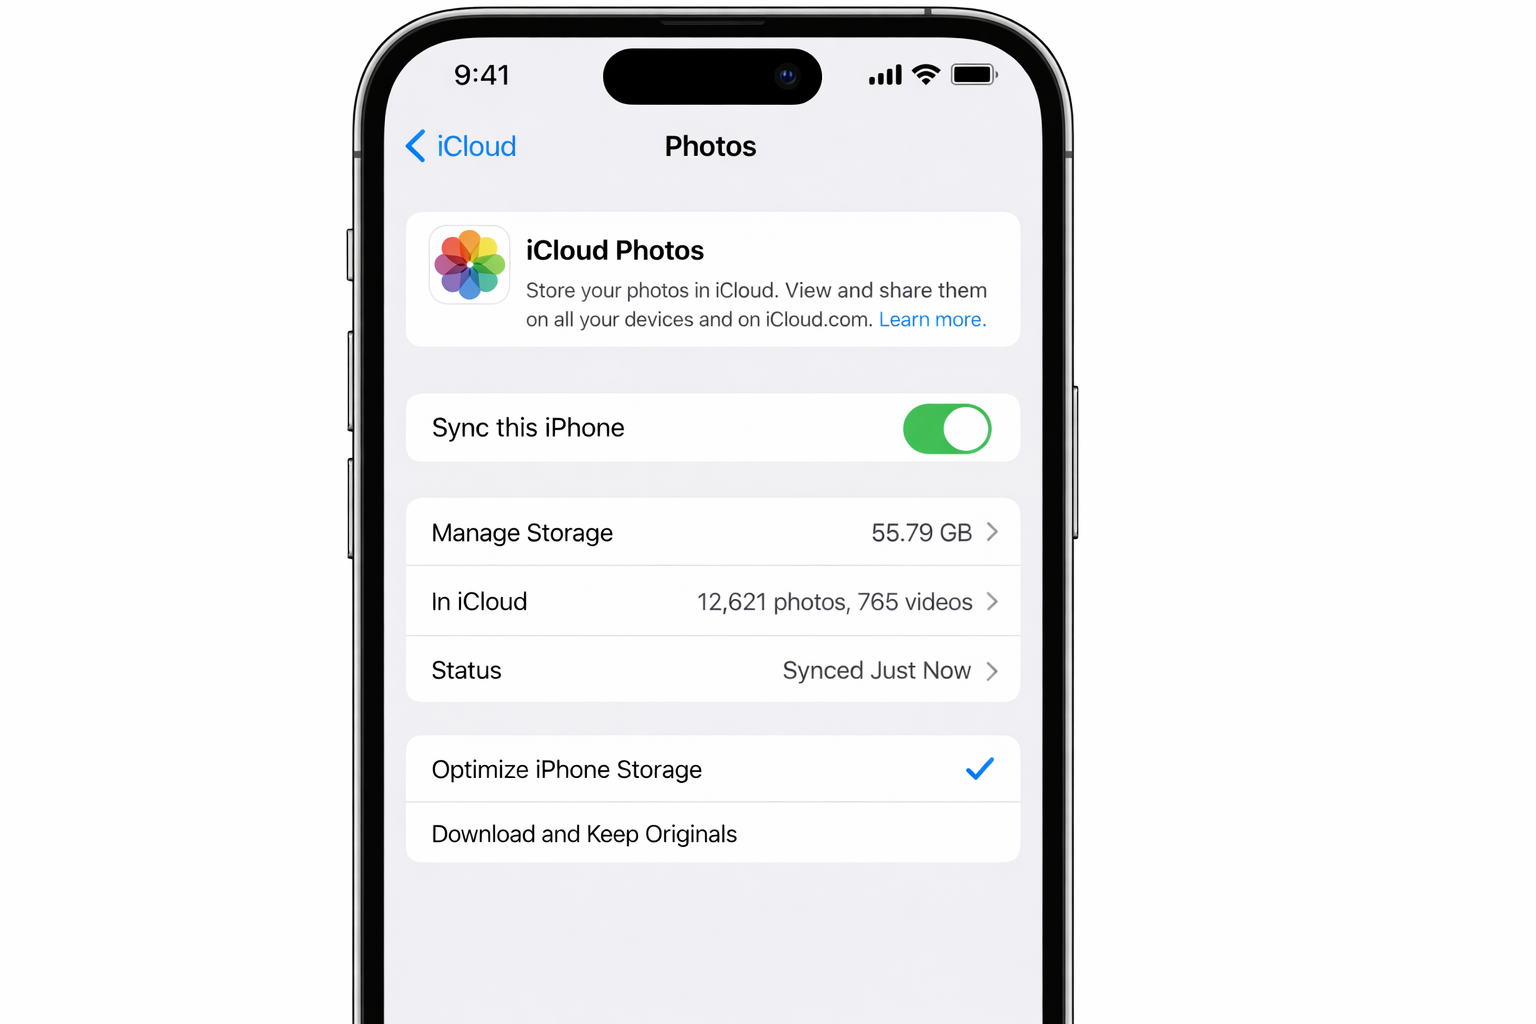
If you don’t use iCloud Photos, make sure your images are exported somewhere, Finder, Google Photos, or Dropbox’s camera upload all work. You have thousands of photos on that phone. Don’t assume they’re safe until you’ve confirmed it.

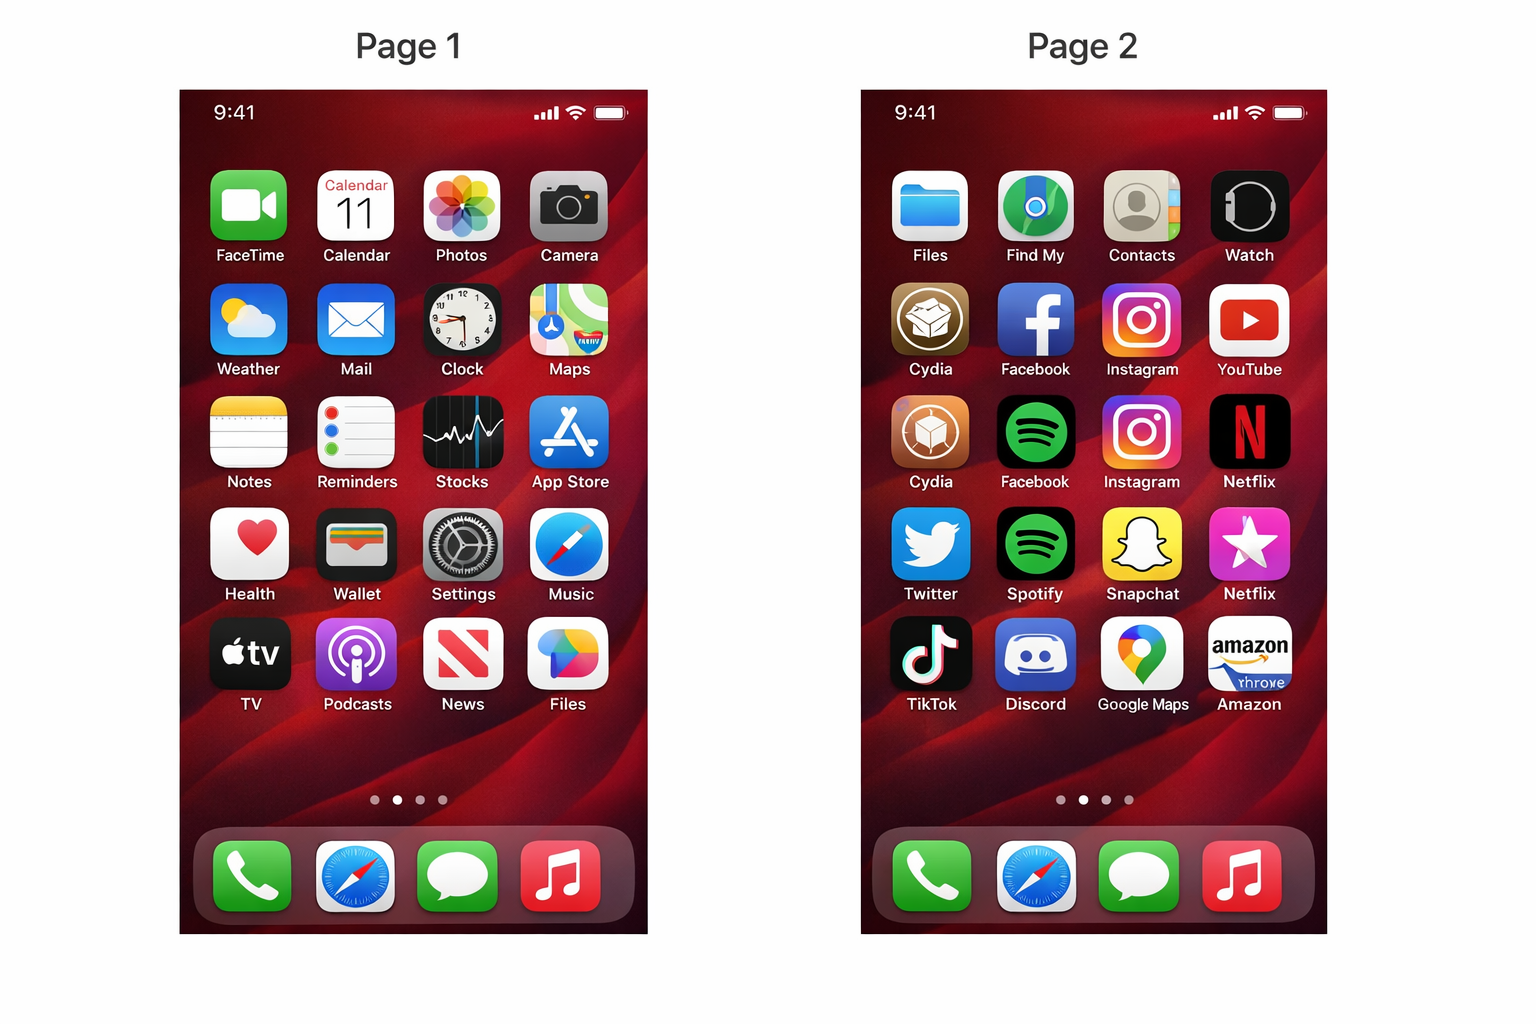
3. Screenshot Your Home Screen Layout
iCloud will restore your apps, but layouts don’t always come back perfectly. Take a few screenshots of your home screens and App Library so you have a reference. Takes 30 seconds and saves a lot of frustration.
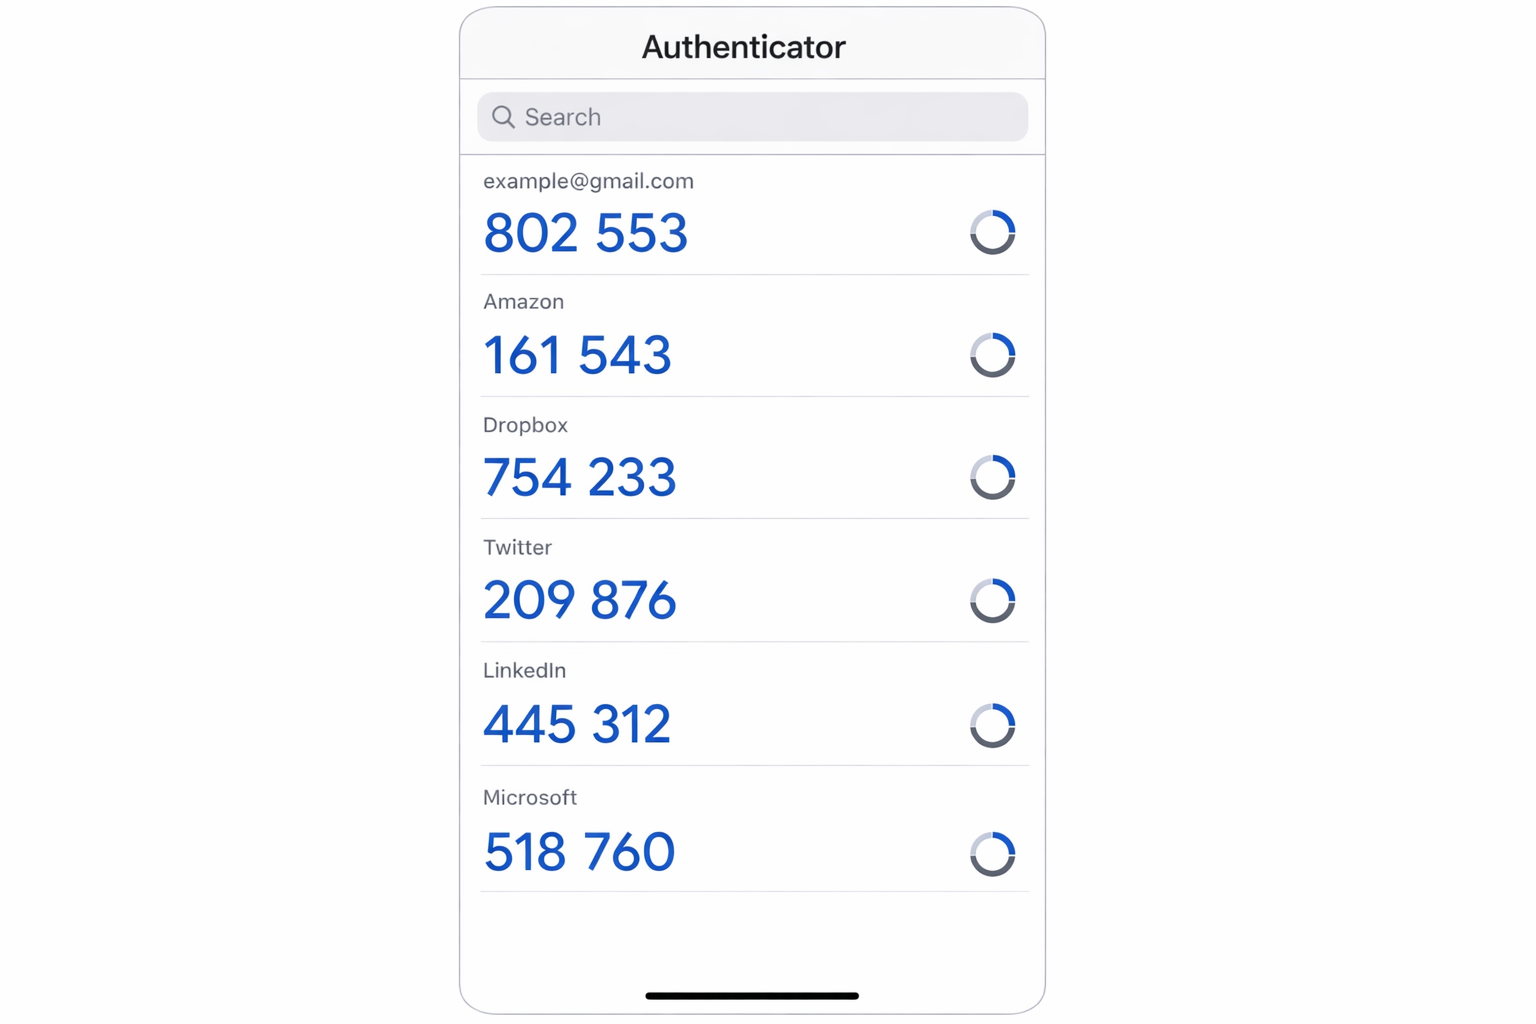
4. Handle Your 2FA Apps
This is the one people forget and then panic about. If you use an authenticator app such as Google Authenticator, Authy, 1Password, or similar, your 2FA codes live on the device. When you wipe it, they’re gone.
Before wiping:
- If you use Authy, enable Authy Backups in the app settings, your codes will sync to your account and restore after setup.
- If you use Google Authenticator, use the built-in export/transfer feature to move accounts to another device first.
- If you use 1Password or similar, your codes are tied to your account and will restore automatically.
- For any accounts where you can’t transfer codes, temporarily disable 2FA on that account, then re-enable it after the wipe.
Make a list of every account with 2FA enabled. You will need it.
5. Note Your Apple ID Password
You’ll need it to complete the erase. iOS requires your Apple ID credentials to disable Activation Lock. This is a theft deterrent, and it can’t be bypassed. If you’ve forgotten your password, sort that out now at iforgot.apple.com before starting.
6. Check Your eSIM Situation
If your iPhone uses an eSIM (most iPhone 14 and later models in the US are eSIM-only), the erase process will ask what you want to do with it. You’ll have two options: Keep eSIM and Erase Data or Delete eSIM and Erase Data.
If you’re keeping the phone, choose Keep eSIM. If you’re selling or giving it away, choose Delete eSIM, then contact your carrier to reprovision it on your new device.
How to Wipe Your iPhone or iPad
Once your checklist is done, the actual reset is quick. Budget 15–30 minutes for the erase itself (longer if you have a 256GB+ device).
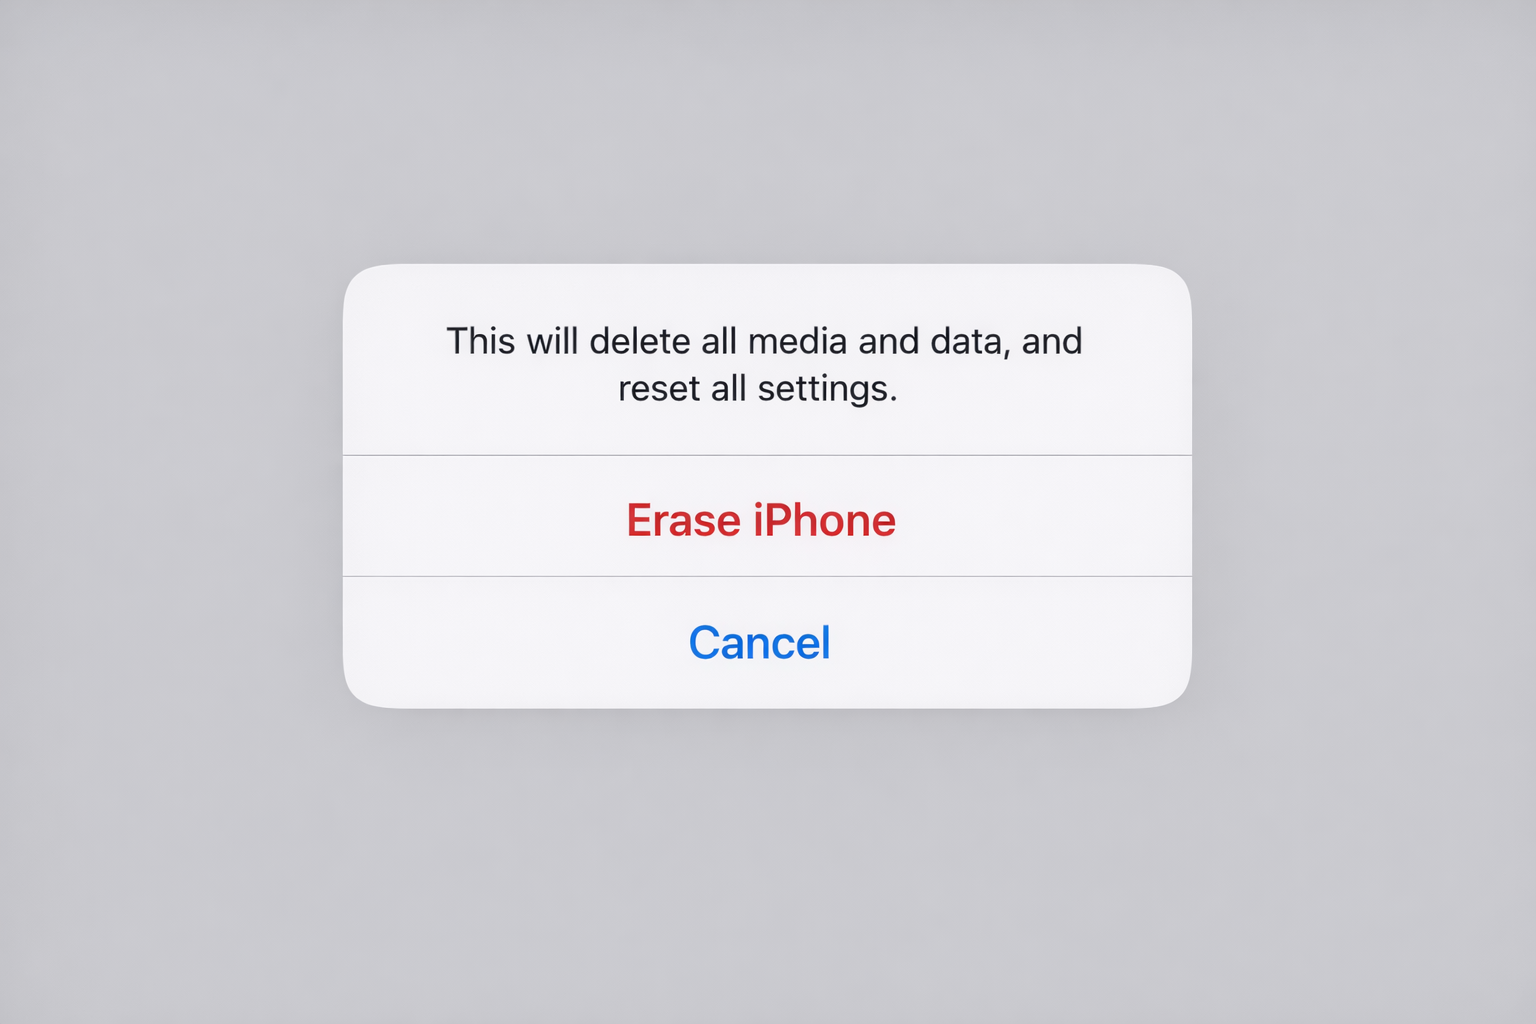
- Open Settings > General > Transfer or Reset iPhone (or iPad).
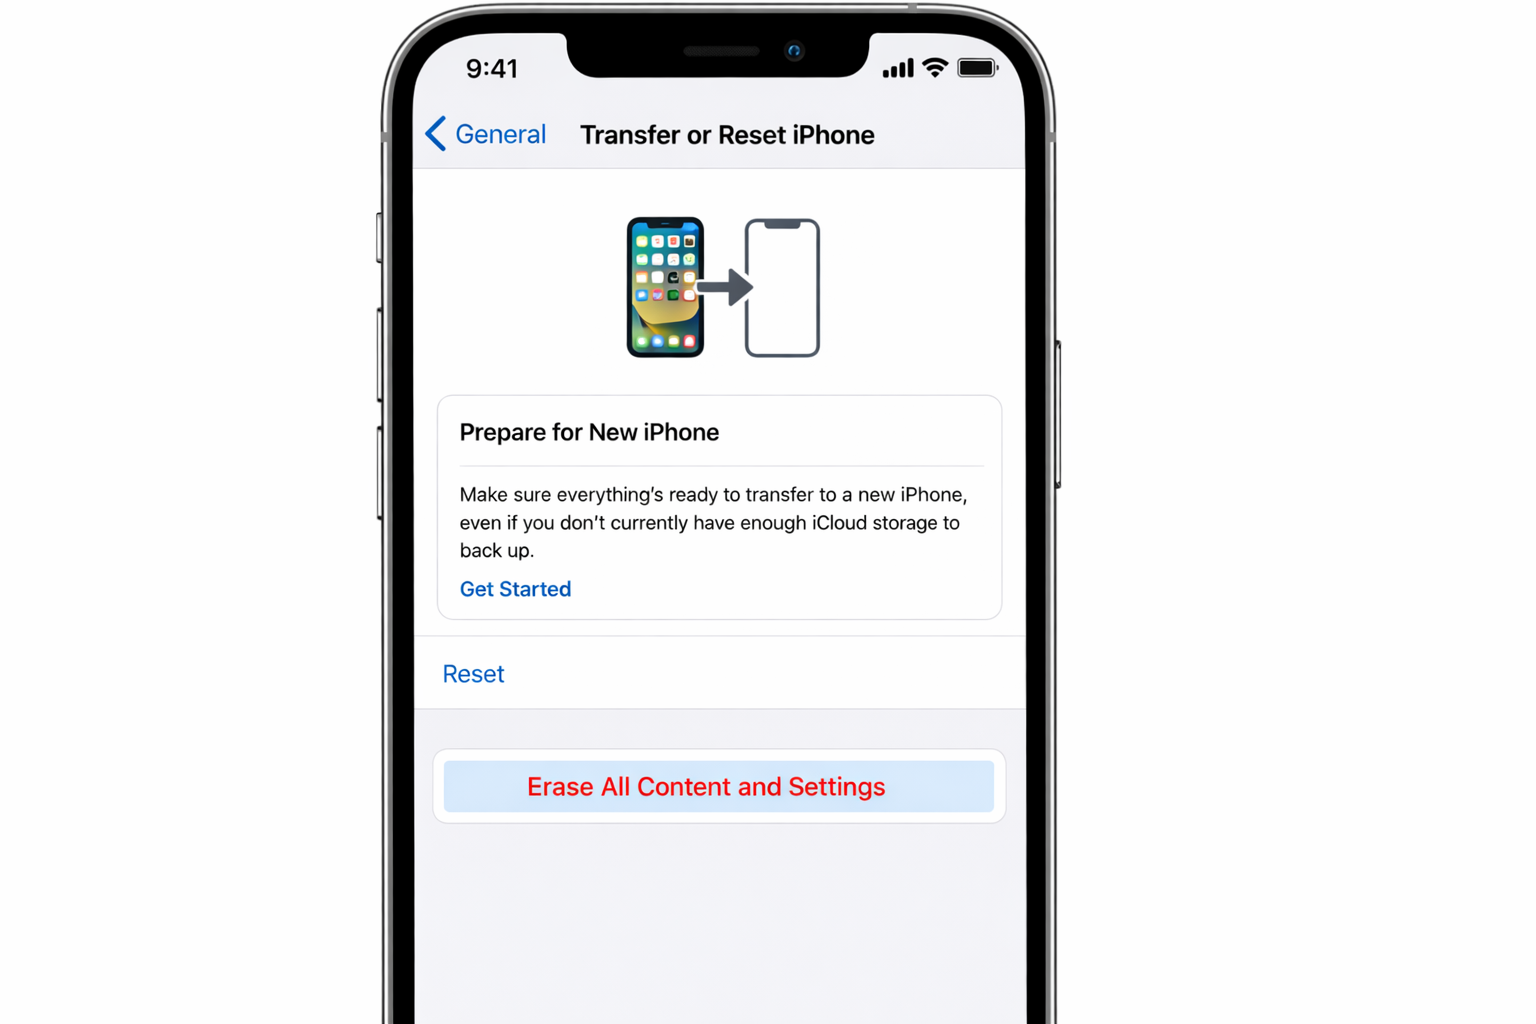
- Tap Erase All Content and Settings.
- Tap Continue. If prompted about your eSIM, choose the appropriate option (see above).
- Enter your device passcode.
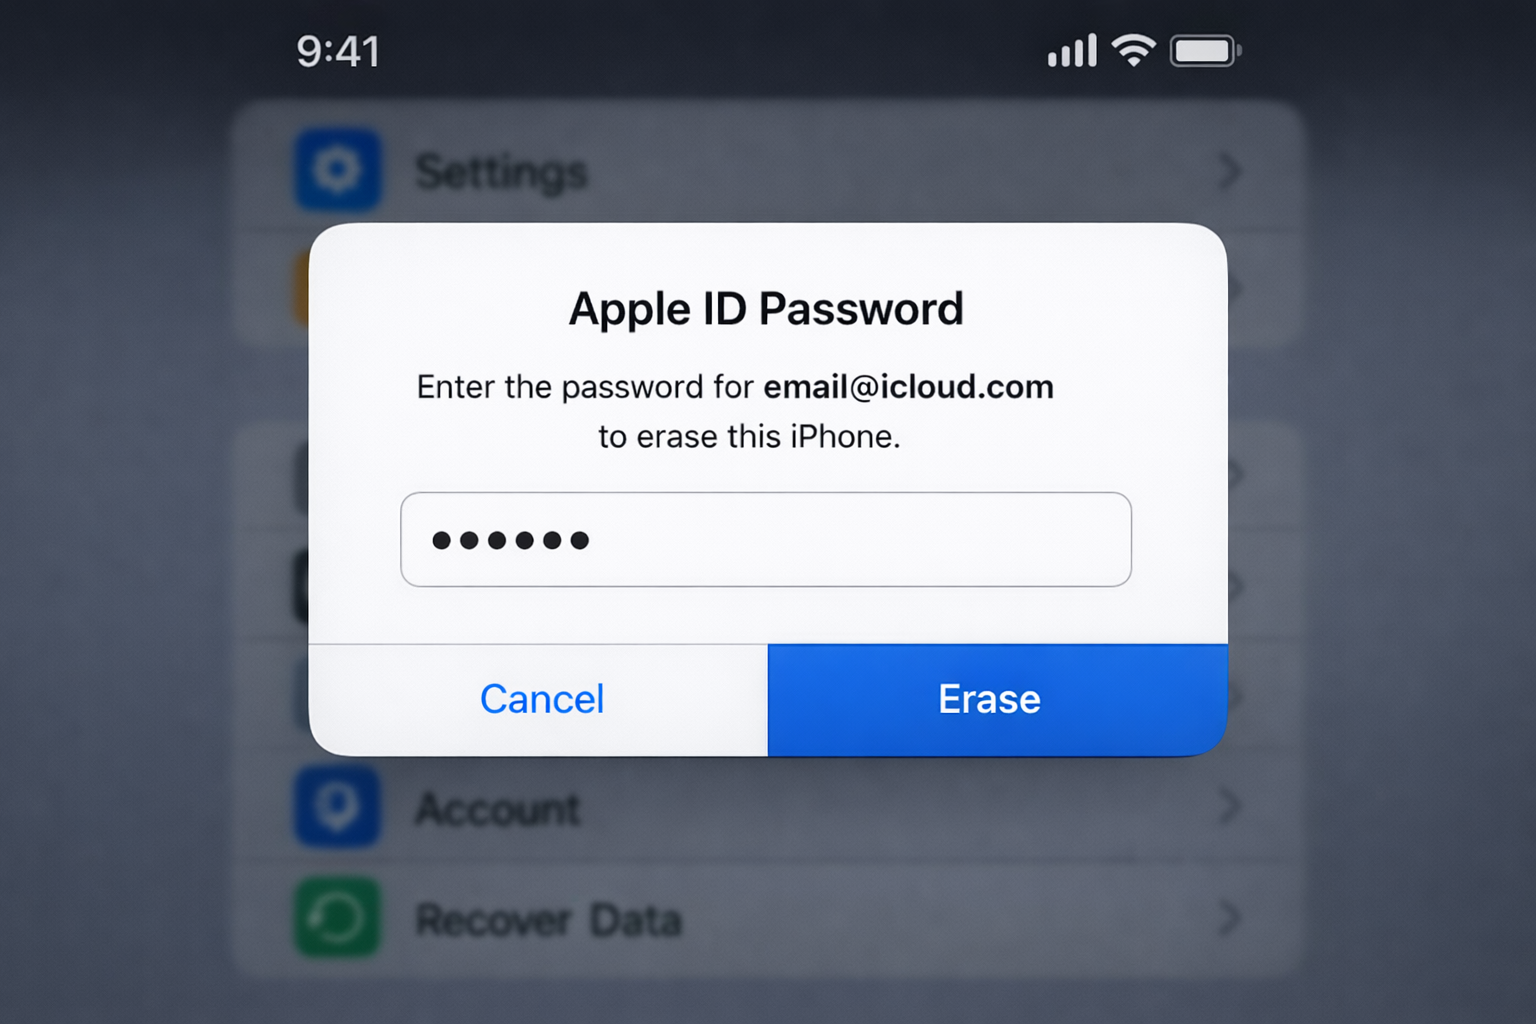
- Enter your Apple ID password to turn off Find My and disable Activation Lock.
- Confirm with Face ID or Touch ID if prompted.
- The device will display the Apple logo on a white screen and begin erasing. Don’t interrupt it.
When it’s done, you’ll see the “Hello” setup screen. Your iPhone is now factory fresh.
If Your iPhone Is Unresponsive
If the device is frozen and you can’t get into Settings, you’ll need to use Recovery Mode instead.
- Connect your iPhone to a Mac with a cable.
- Open Finder and select your iPhone in the sidebar.
- Force restart the device into Recovery Mode (the button combination varies by model; on iPhone 8 and later, press and release Volume Up, press and release Volume Down, then hold the Side button until the recovery screen appears).
- In Finder, click Restore.
For deeper issues, such as a device that won’t enter Recovery Mode at all, DFU Mode is the next step. It’s more involved, but Apple’s support docs walk through it by model.
After the Wipe: Getting Back to Normal
When you power the device back on and reach the “Hello” screen, you can restore from your iCloud backup during setup. Sign in with your Apple ID and choose Restore from iCloud Backup when prompted. It’ll pull down your apps, settings, and data.
Once you’re back in, work through this list:
- Reconnect to your Wi-Fi network.
- Set up Face ID or Touch ID and a passcode.
- Confirm Find My is turned on (Settings > your name > Find My).
- Confirm iCloud Backup is back on and run a fresh backup.
- Re-add your cards to Apple Wallet.
- Re-enable 2FA on all your accounts using your authenticator app.
- Check that your photos are all present and syncing.
- Go through Settings and restore your preferences, keyboards, shortcuts, notification settings, and accessibility options all reset to defaults.
- Check that your eSIM is active and you have cellular service.
iCloud does a solid job of restoring most things, but don’t assume it got everything. Spot-check your most important apps before you consider it done.
Troubleshooting
Forgot your Apple ID password: Go to iforgot.apple.com. You can’t bypass Activation Lock without it. This is by design.
Erase is stuck or frozen: Force restart the device. If it won’t respond, use Recovery Mode via Finder on a Mac.
Not enough iCloud storage for a backup: Back up to a Mac using Finder instead. Connect via cable, open Finder, select your device, and click Back Up Now. You can also delete old iCloud backups from Settings > your name > iCloud > Manage Account Storage to free up space.
eSIM not working after reset: If you chose to delete the eSIM, contact your carrier to reprovision it. If you kept it, it should reactivate automatically. Give it a few minutes after setup.
Activation Lock appearing after reset: This means Find My wasn’t properly disabled before the erase. You’ll need the original Apple ID and password to get past it. There’s no workaround.
Done right, a factory reset is one of the more reliable fixes for persistent iOS weirdness, and it’s the right move before passing the device on to someone else. Cautiously optimistic it’ll solve whatever brought you here.