Windows 11’s compatibility checks for Secure Boot and TPM 2.0 don’t translate well on Intel Mac hardware. So, for example, if you try to use the official Windows 11 ISO from Microsoft in macOS 12 Monterey, the Boot Camp Assistant will fail to procure the necessary drivers or stall at Windows Setup.
Thankfully, you can install Windows 11 in macOS Monterey using Boot Camp with a workaround. It requires upgrading a standard Windows 10 Boot Camp installation to Windows 11 with an automated batch script that bypasses the operating system’s stringent system requirements.

The following method is also secure and less complicated than alternative ways of installing Windows 11 on Mac that you may have read about (such as those involving a modified ISO or bootable USB drive).
Note: If you already have Windows 10 set up on your Intel MacBook Air, MacBook Pro, iMac, or Mac mini, skip to the section that focuses on upgrading it to Windows 11.
Update Your Mac
You can use the instructions in this tutorial to run Windows 11 on all macOS Monterey-compatible Intel Macs. However, to minimize the chances of running into any Boot Camp Assistant errors, we recommend that you install all available macOS Monterey point updates before you begin.
1. Open the System Preferences app.
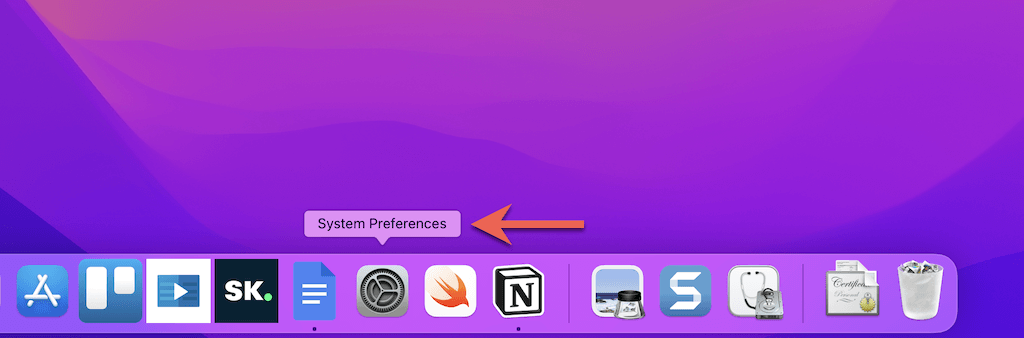
2. Select Software Update.
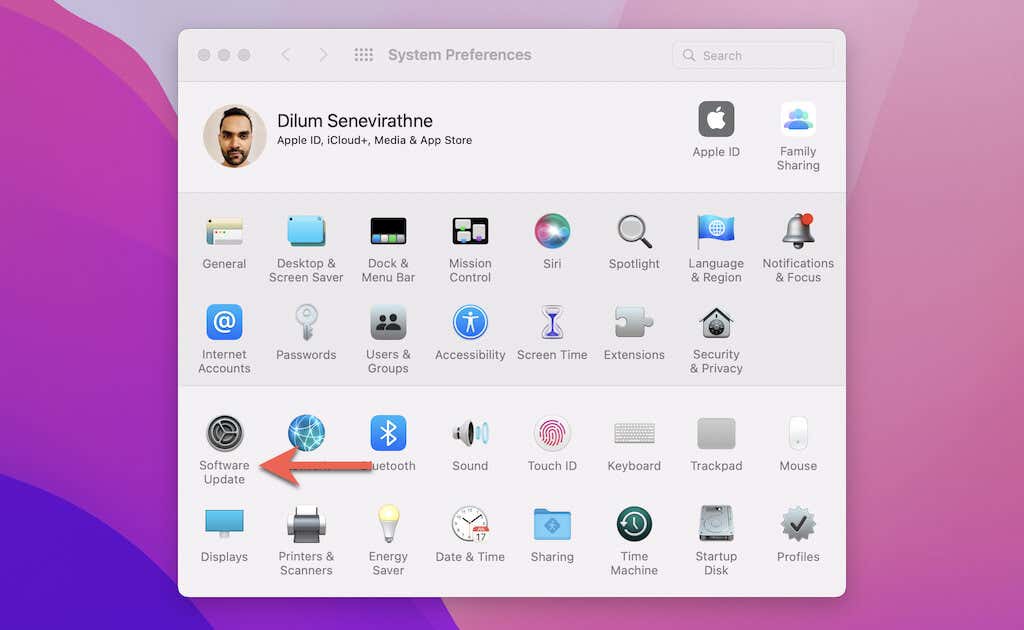
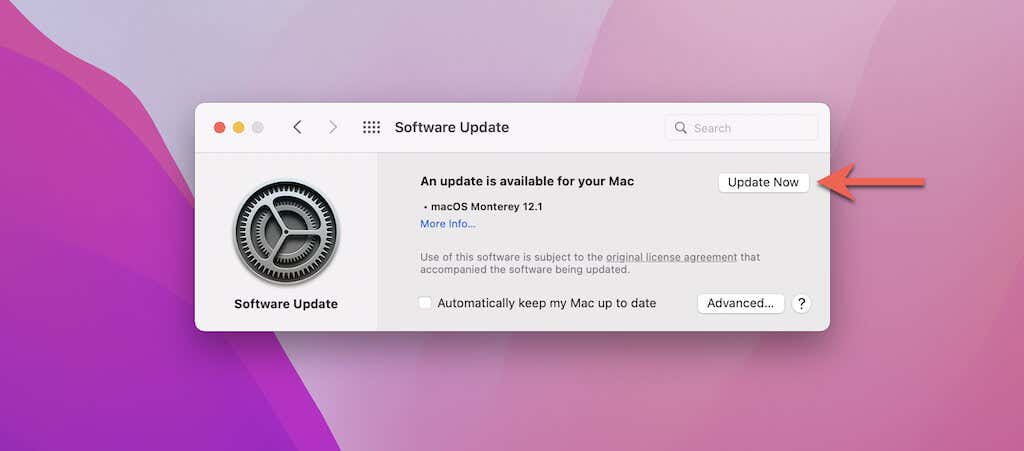
3. Select Update Now to update your Mac to the latest version of macOS Monterey.
Download Windows 10 ISO
Since you must install Windows 10 on your Mac first, the next step involves downloading an up-to-date copy of a 64-bit Windows 10 ISO image file from Microsoft.
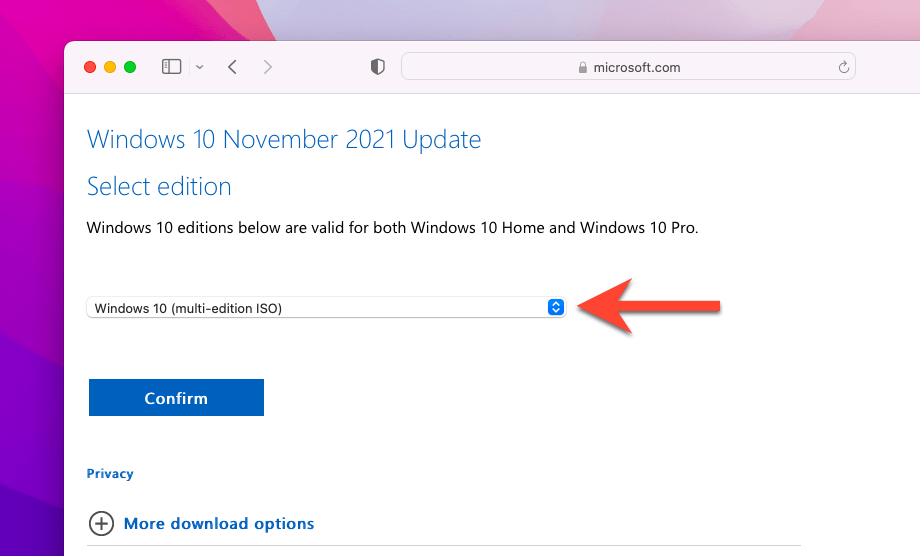
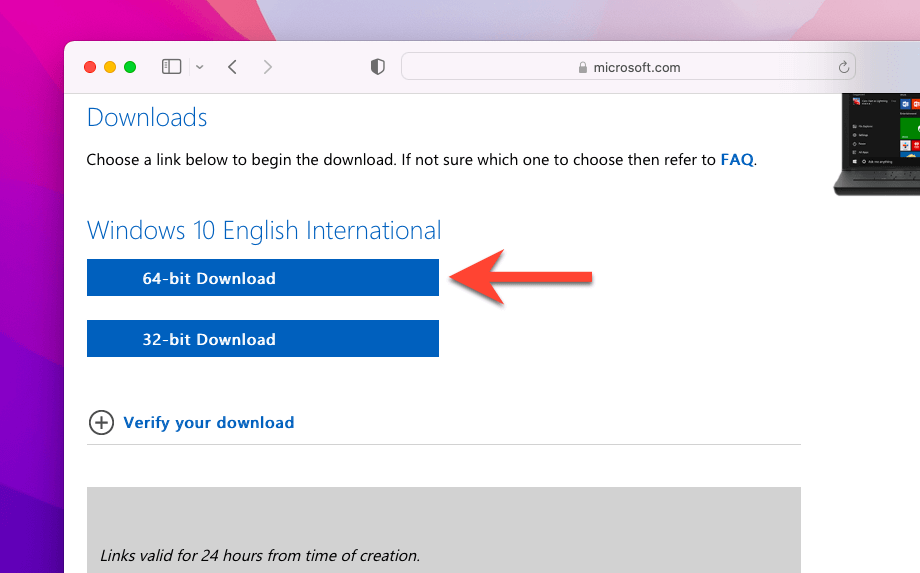
1. Visit the Download Windows 10 Disc Image (ISO File) page on the Microsoft website using Safari or another web browser.
2. Pick the latest version of Windows 10, choose a language (e.g., English or English International), and select Confirm.
3. Select 64-bit Download and wait until your web browser downloads the ISO file to your Mac.
Use Boot Camp to Install Windows 10
After downloading the ISO file, you can start installing Windows 10 on your Mac. Just make sure to have at least 50 gigabytes of free space before you begin.
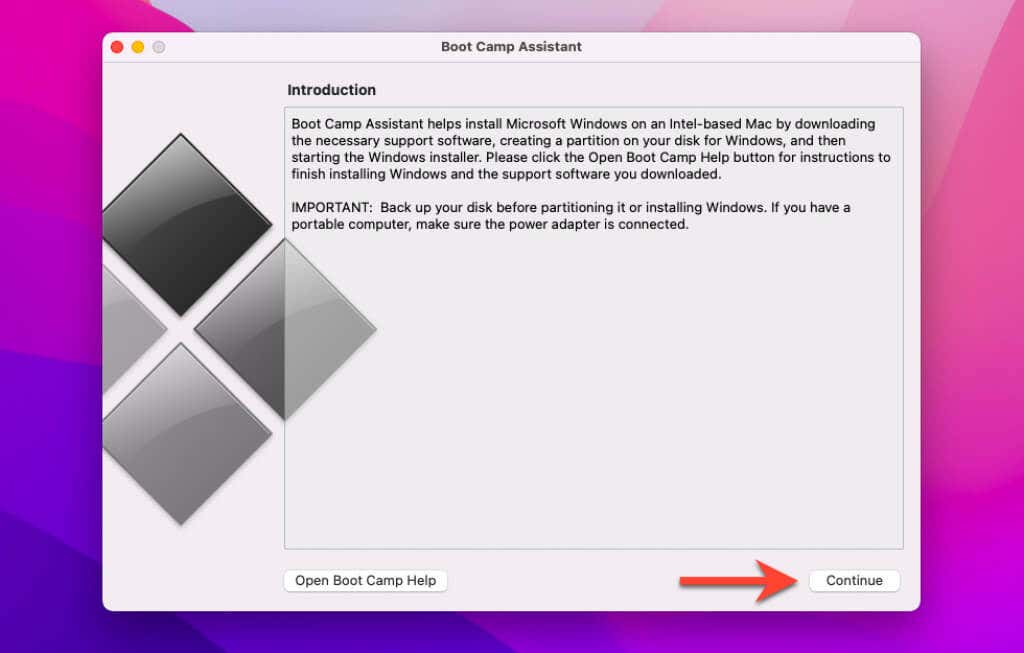
1. Open Boot Camp Assistant via the Mac’s Launchpad.

Note: Boot Camp Assistant is only available on Intel-based Macs. If you use an Apple Silicon M1 Mac, you can’t install Windows via Boot Camp.
2. Select Continue.
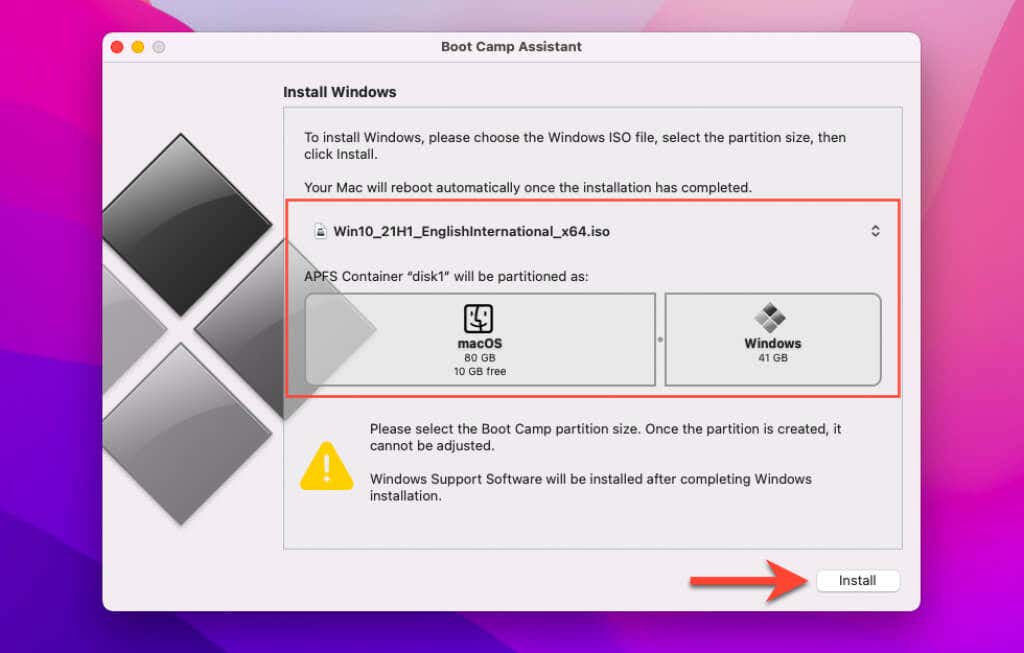
3. Pick the downloaded ISO file from your Mac’s Downloads folder and specify a size for the Windows partition. Then, select Install.
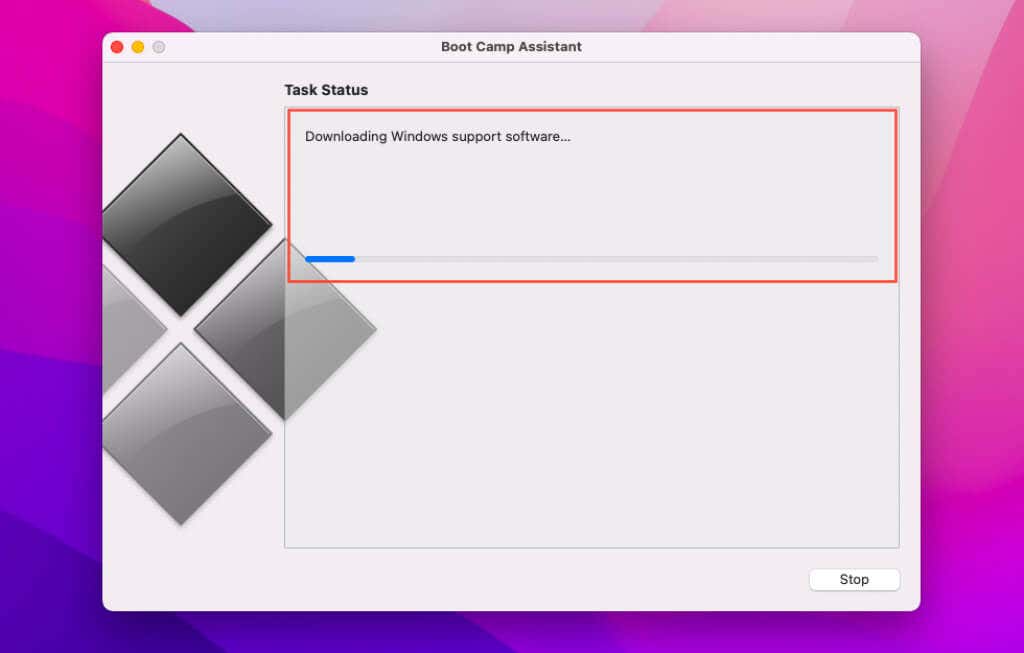
4. Boot Camp Assistant will begin to download Windows support software. Once that finishes, it will create a Windows OS partition and boot your Mac into the Windows Installer.
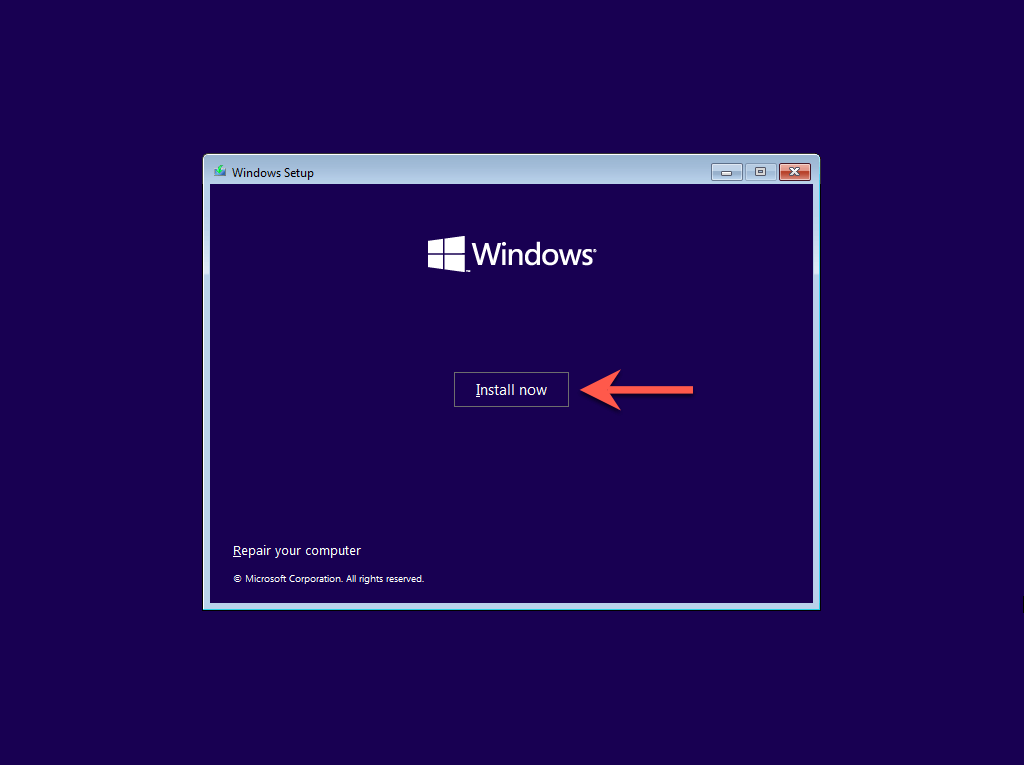
5. Select Install now on the Windows Setup screen.
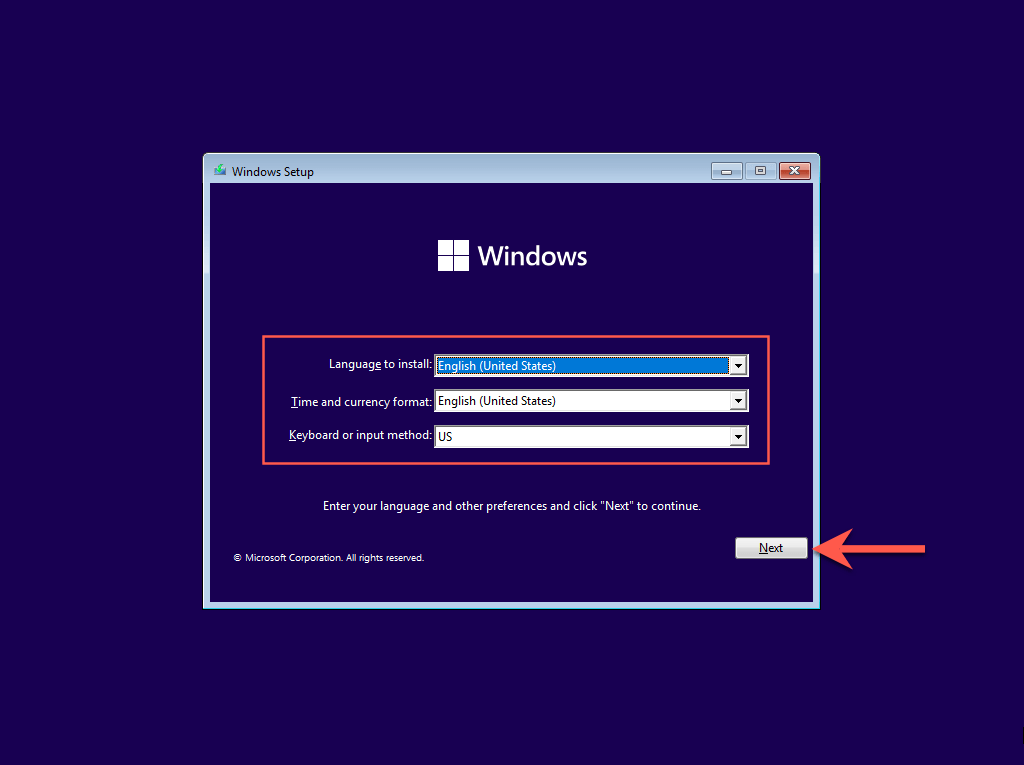
6. Select your language, time and currency format, and keyboard layout. Then, select Next.
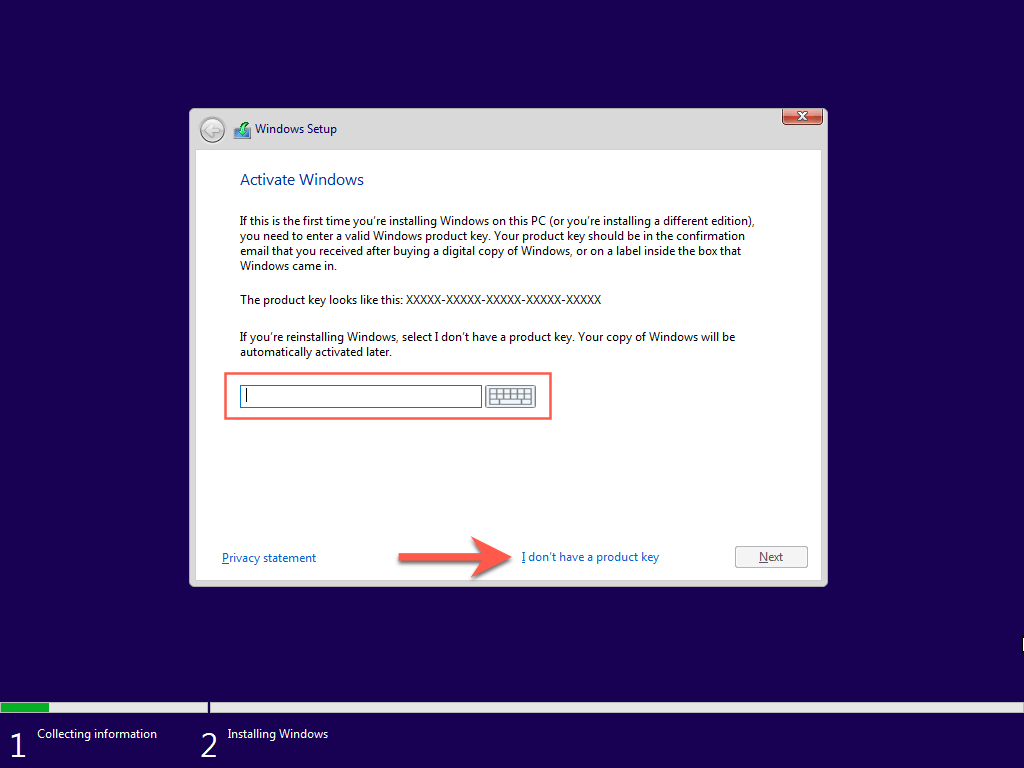
7. Enter your Windows product key. If you don’t have one, select I don’t have a product key.
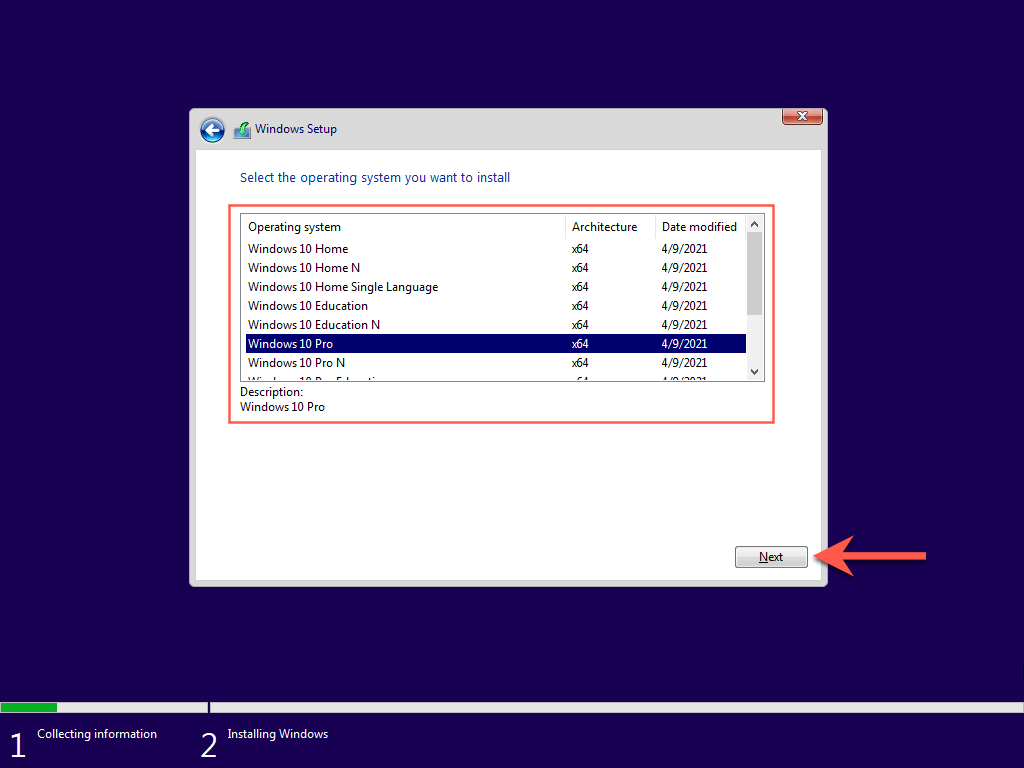
8. Pick the edition of Windows you want to install—Windows 10 Home or Windows 10 Pro—and select Next.
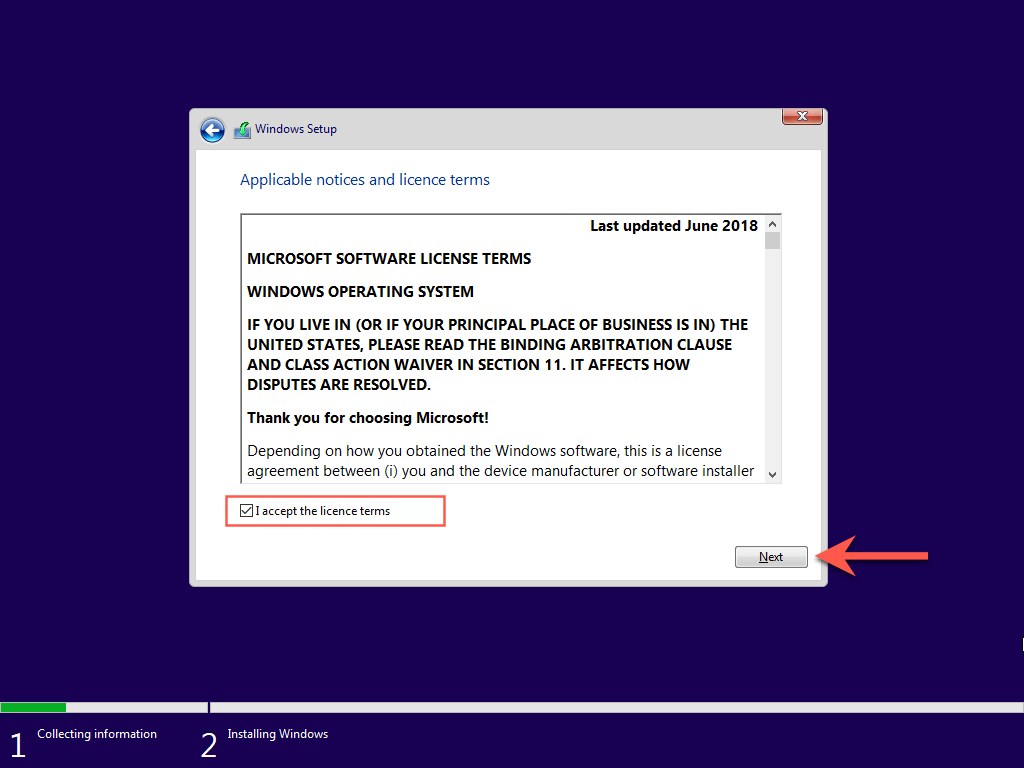
9. Agree to the Microsoft software license terms and select Next.
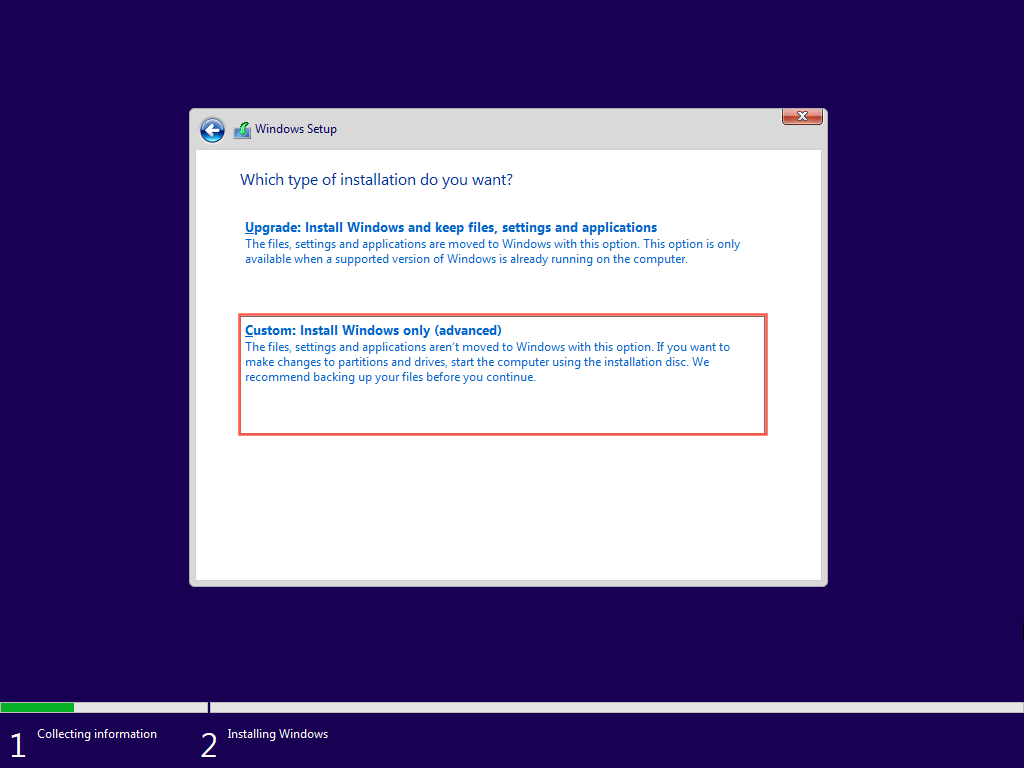
10. Select Custom: Install Windows only (advanced).
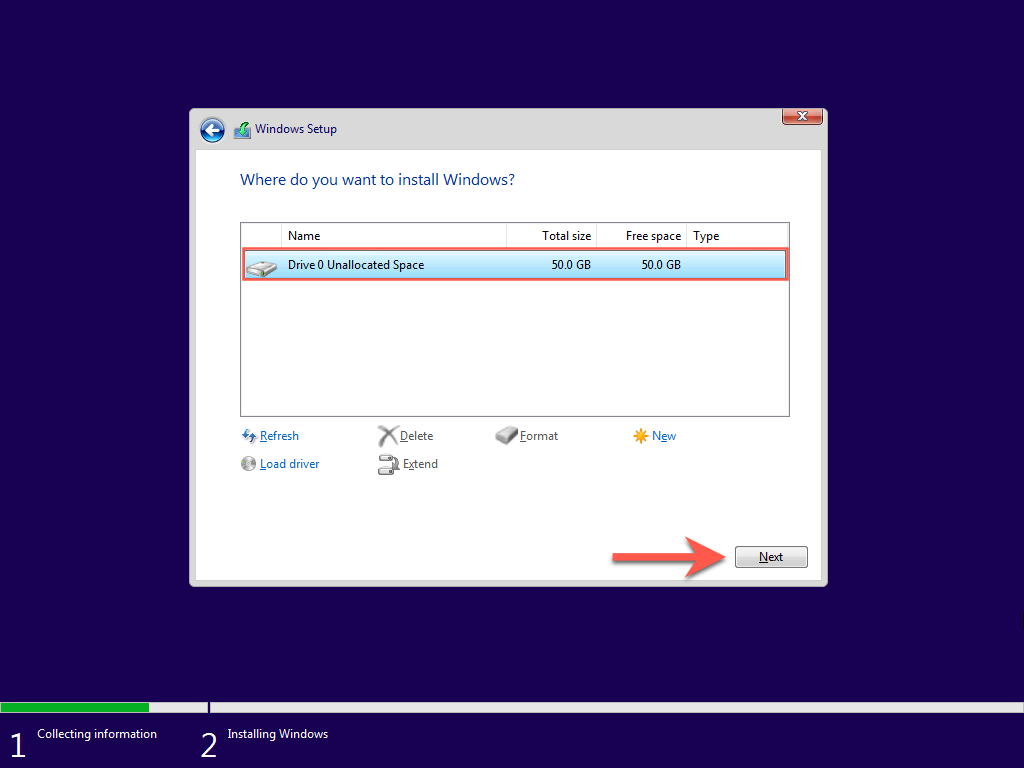
11. Pick your BOOTCAMP (Windows) partition and select Next.
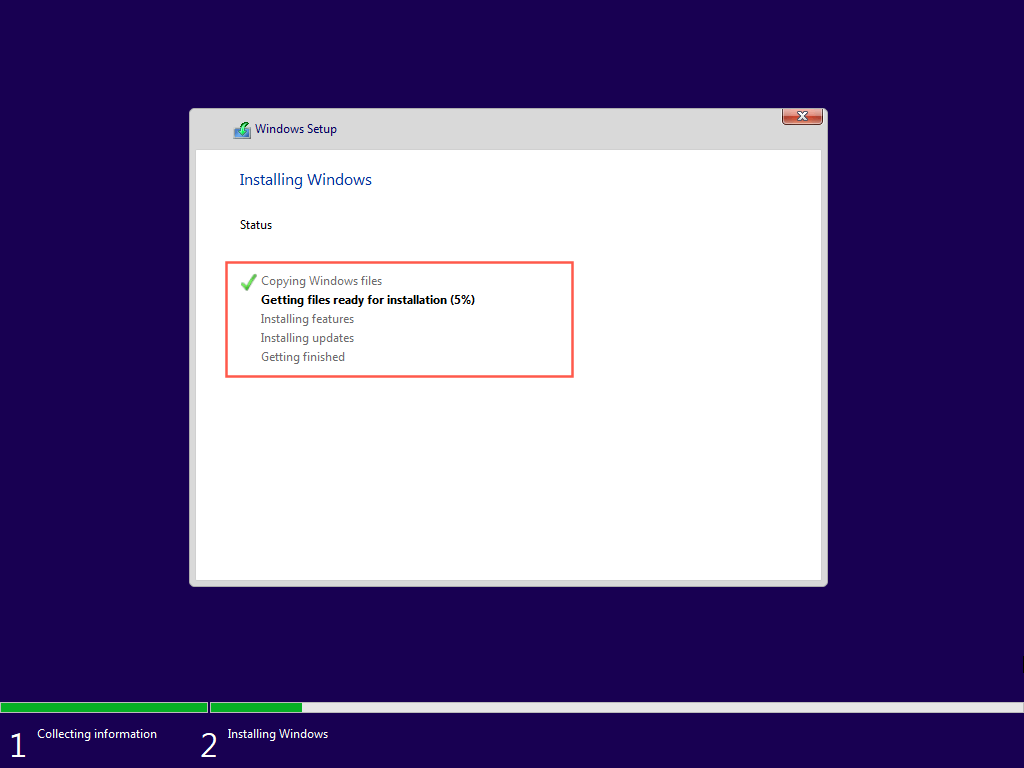
12. Wait until the Windows Setup finishes installing Windows 10 on your Mac.
Set Up Windows 10 on Mac
Once the Windows Setup finishes installing Windows 10, you must specify your language, keyboard, and privacy preferences. You must also create a Windows user account.
Note: Windows Setup will not connect to the internet due to missing network drivers. You can restore online connectivity after reaching the Windows 10 desktop.
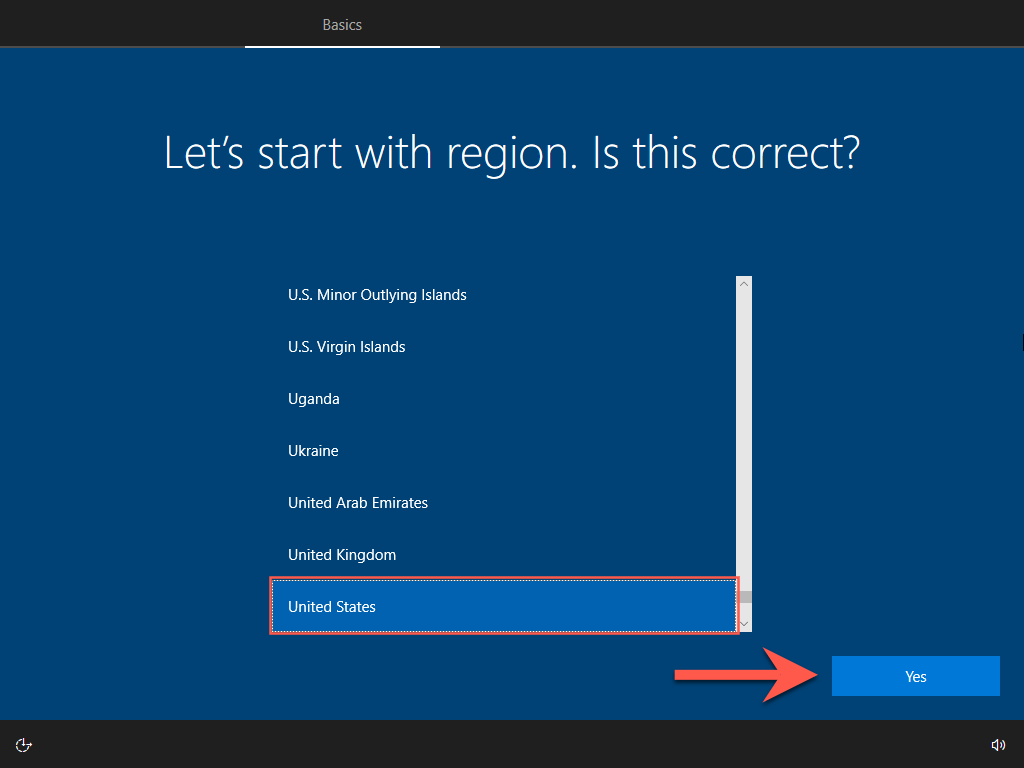
1. Choose a region and select Yes.
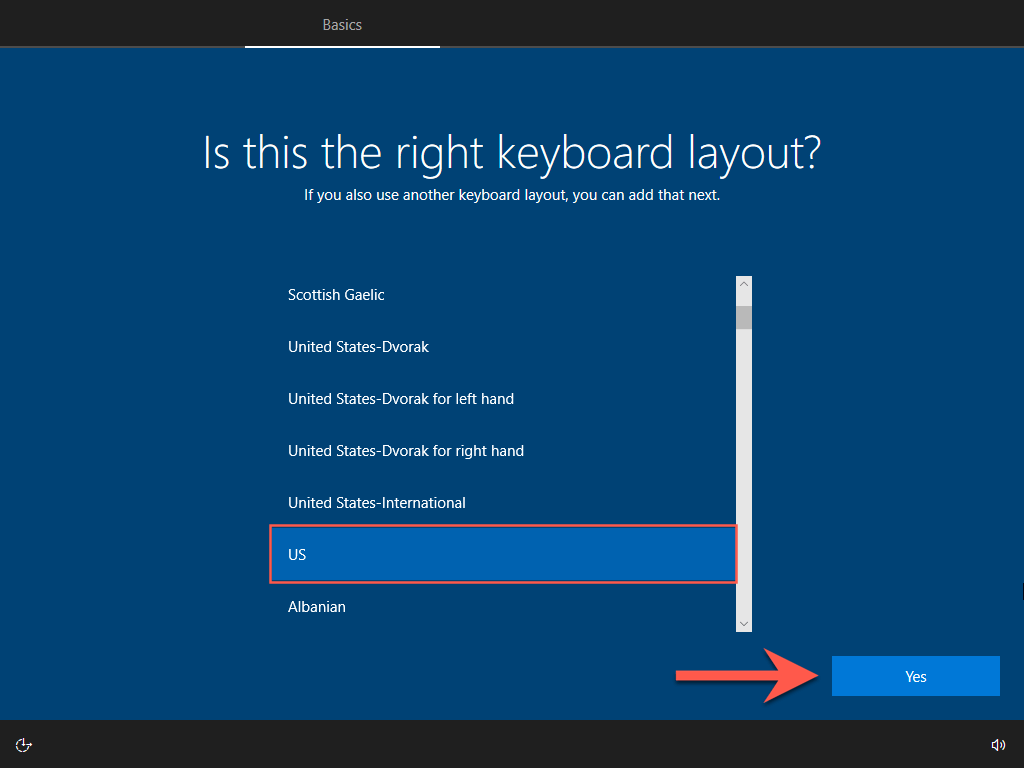
2. Pick a keyboard layout and select Yes.
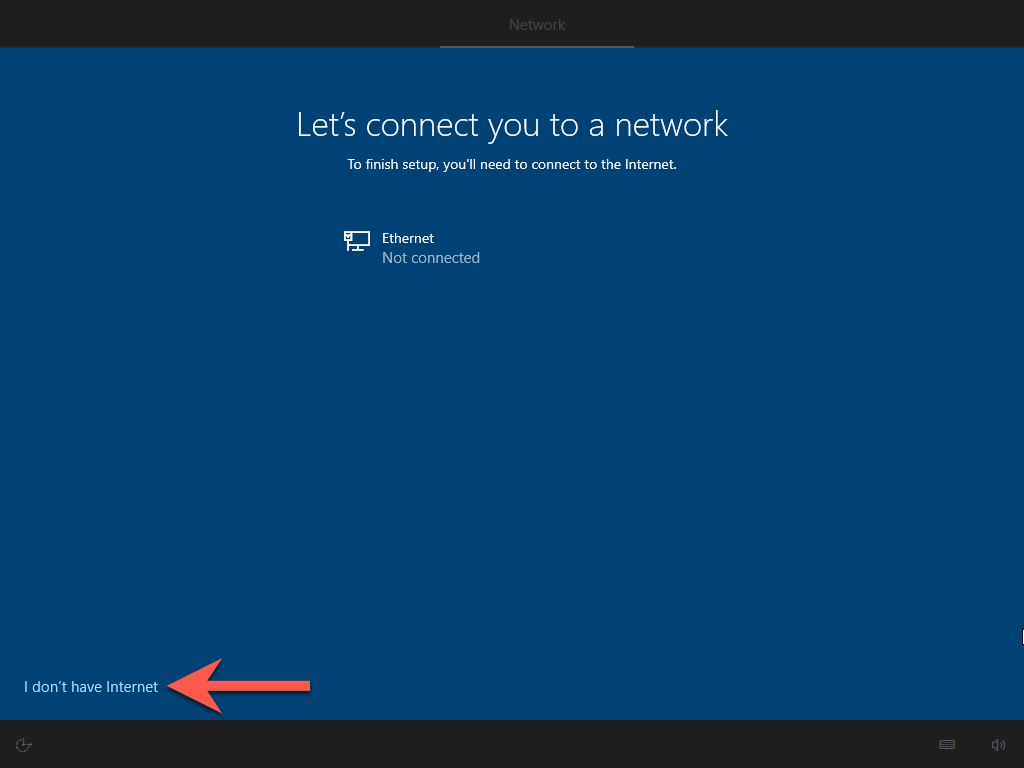
3. Select I don’t have internet.
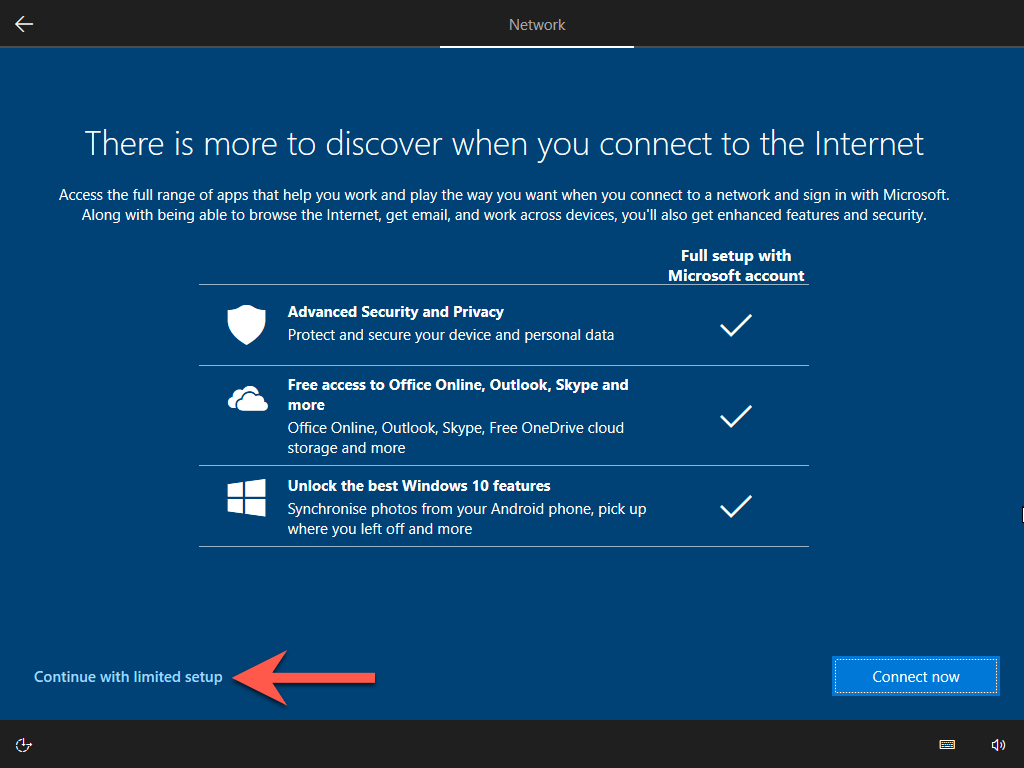
4. Select Continue with limited setup.
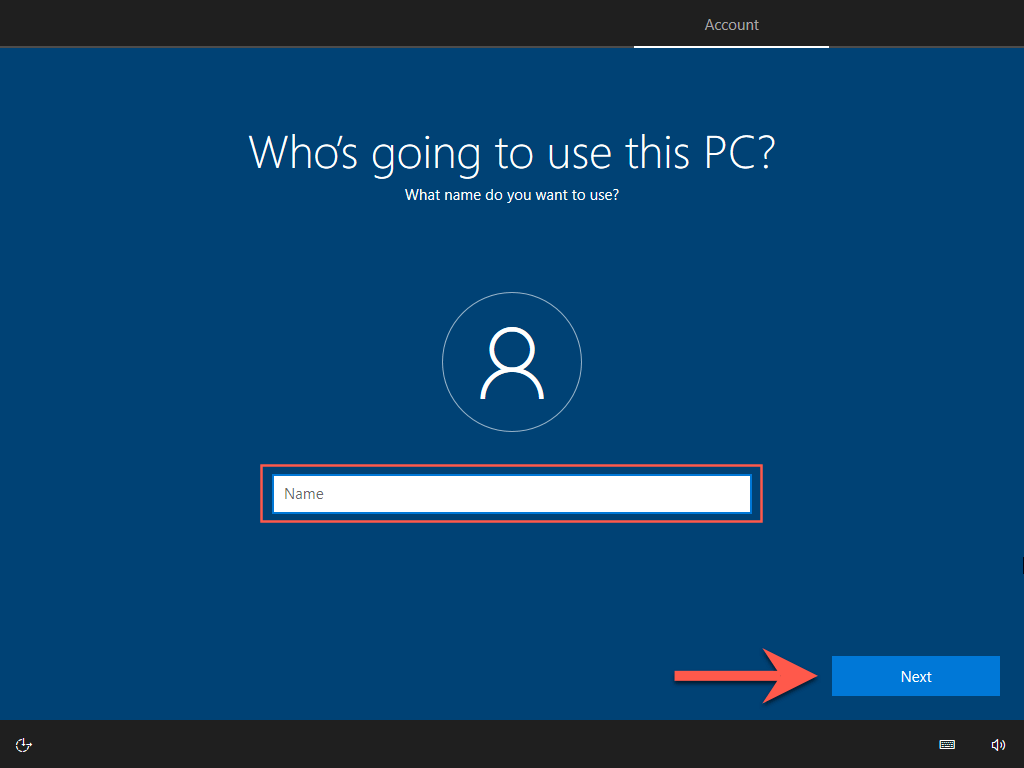
5. Enter your name and select Next to create a local account.
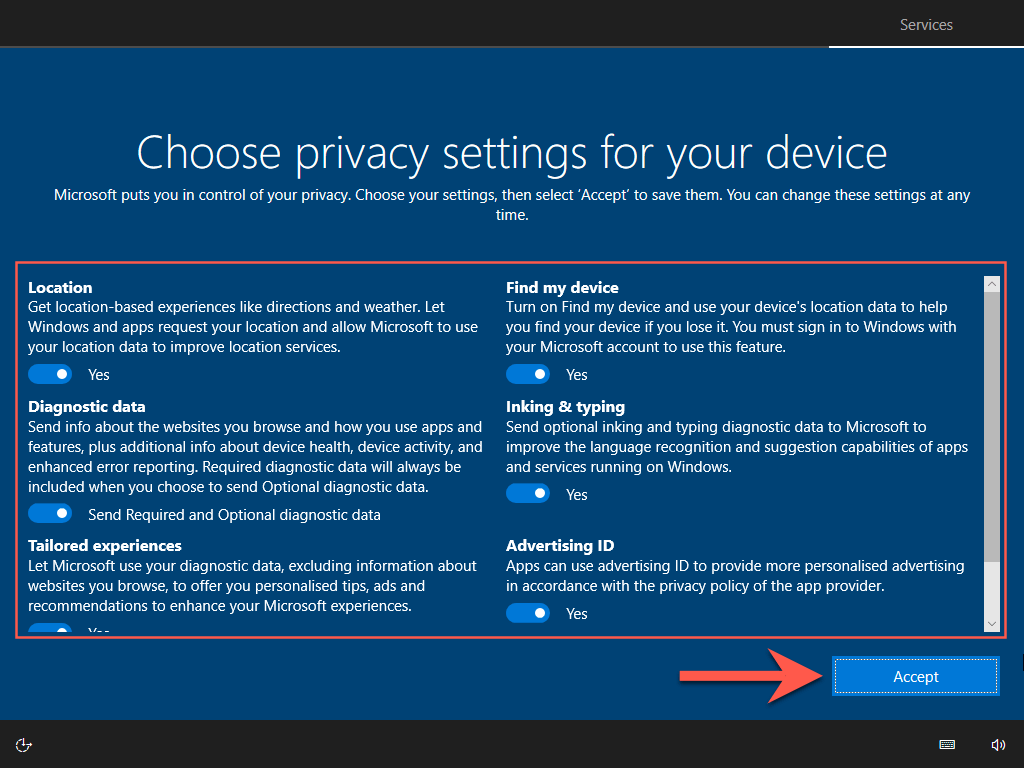
6. Review your privacy settings—e.g., Location, Diagnostic data, and Advertising ID. Disable anything if needed and select Accept.
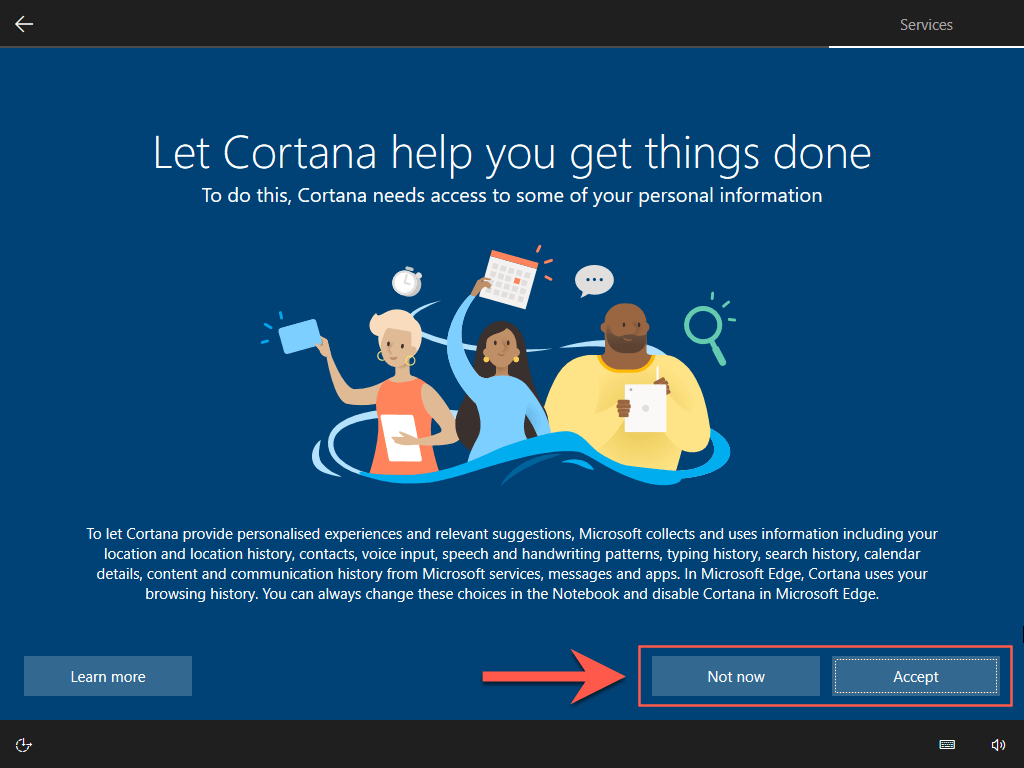
7. Set up Cortana or select Now Now to do that later.
8. Wait for the Windows Setup to finalize the installation.

9. Your Mac will boot into the Windows 10 desktop momentarily. You are halfway there!
Update Windows 10 on Mac
Now that you’ve finished installing Windows 10 on Mac, you must install the hardware drivers, support software, and system updates required to get it working correctly. That also ensures a smooth upgrade to Windows 11.
Run Boot Camp Installer
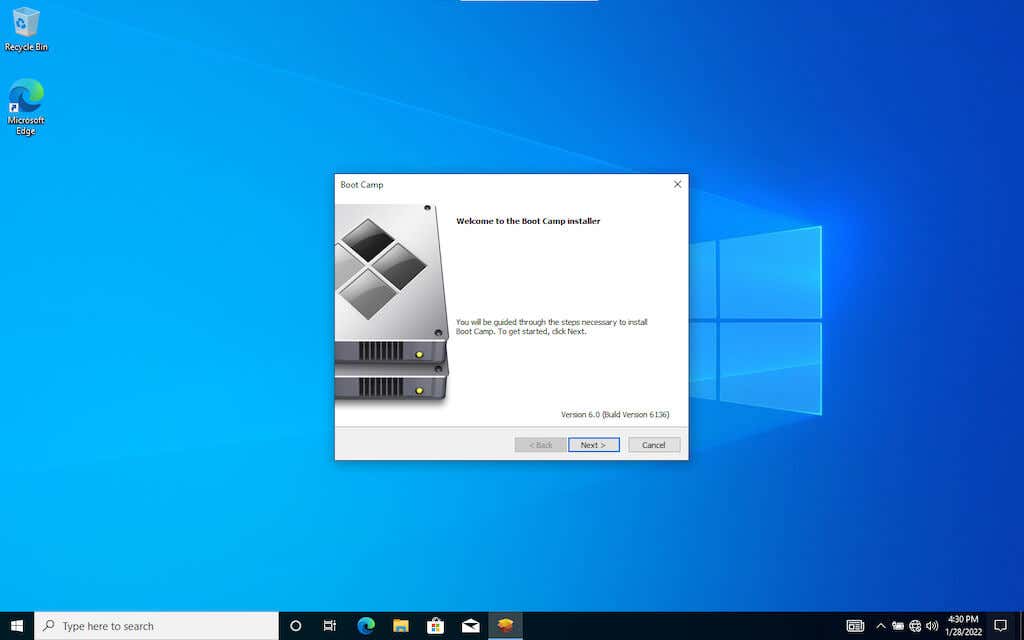
The Boot Camp installer shows up automatically after your Mac boots into Windows 10 for the first time. It contains critical drivers that you must install right away.
1. Select Next.
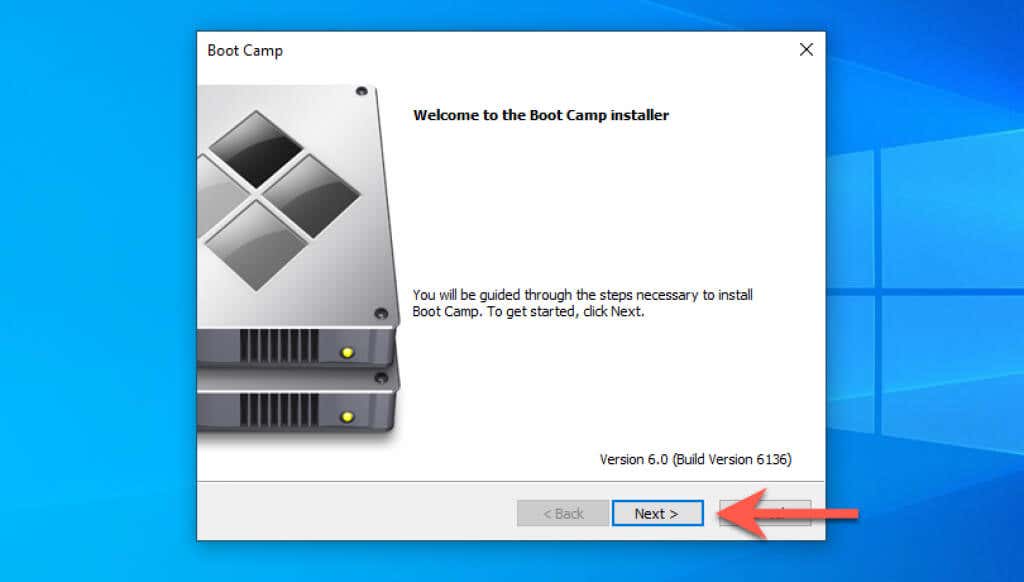
2. Accept the Boot Camp license agreement and select Install.
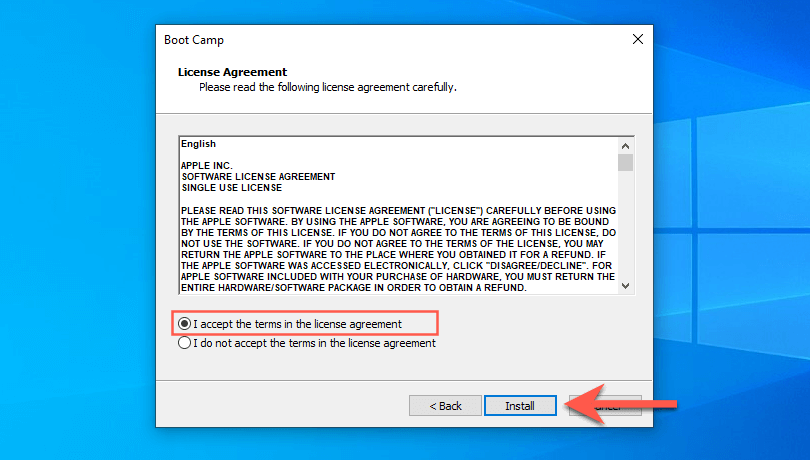
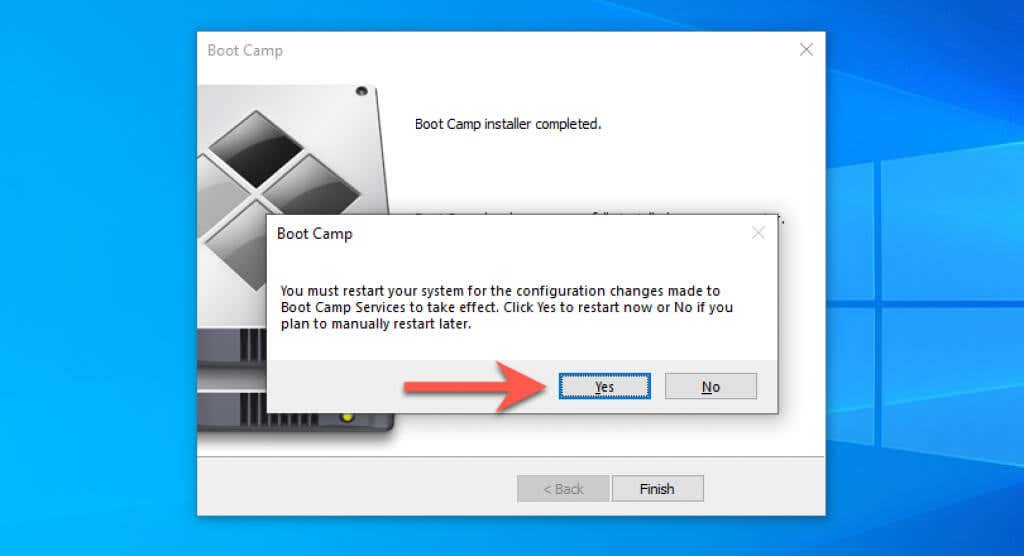
3. Wait for the Boot Camp installer to finish installing all drivers. Then, select Yes to restart your Mac.
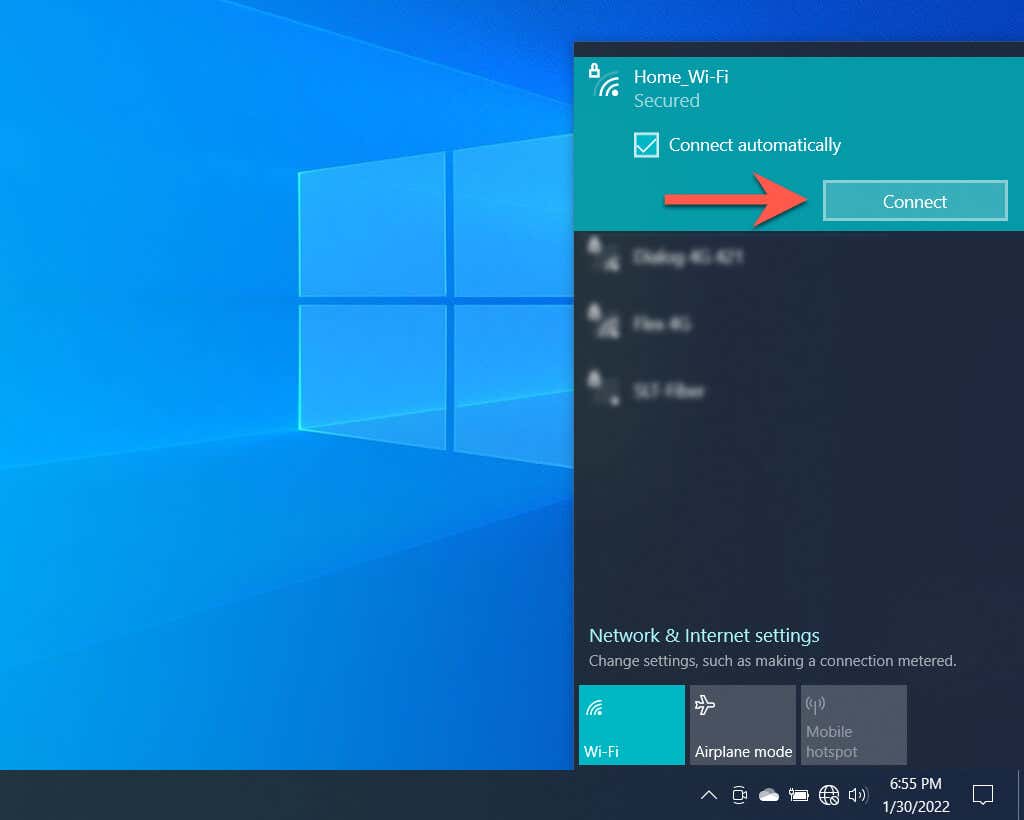
Connect to a Wi-Fi Network
The Boot Camp installer should’ve restored online connectivity in Windows 10. If you don’t use Ethernet, you can connect to Wi-Fi instead. Just select the Globe icon on the system tray (right-corner of the taskbar), pick an available Wi-Fi network, enter its password, and select Connect.
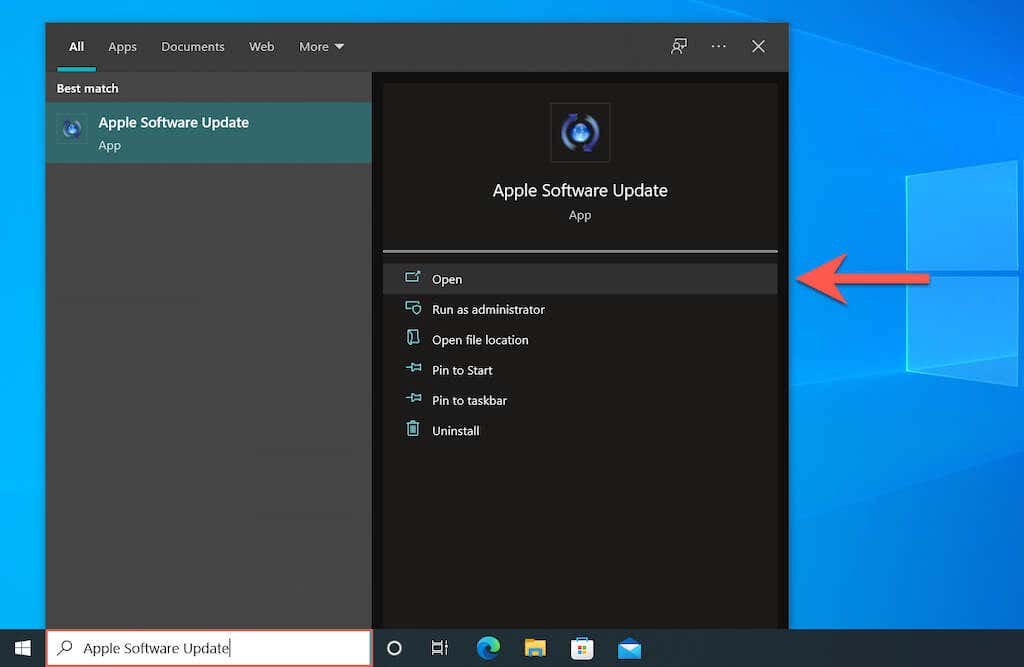
Install Apple Software Update
Next, use the Apple Software Update app to install additional Boot Camp driver updates.
1. Type Apple Software Update into the taskbar and select Open.
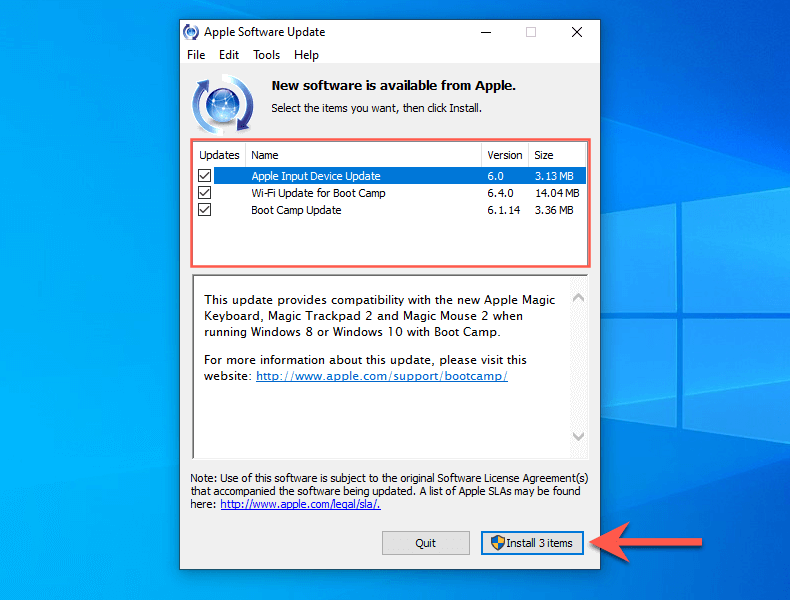
2. Check the boxes next to all available Apple software updates and select Install.
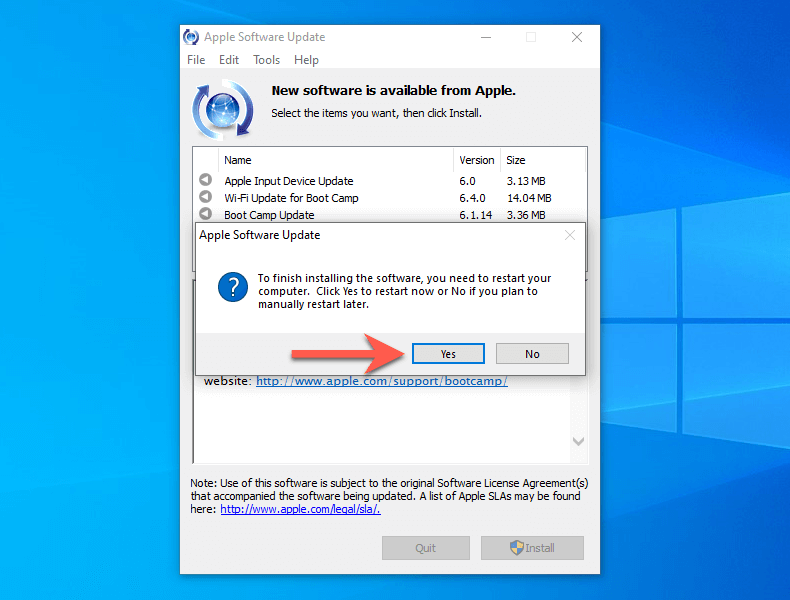
3. Select Yes to restart your PC.
Install Windows Drivers & Updates.
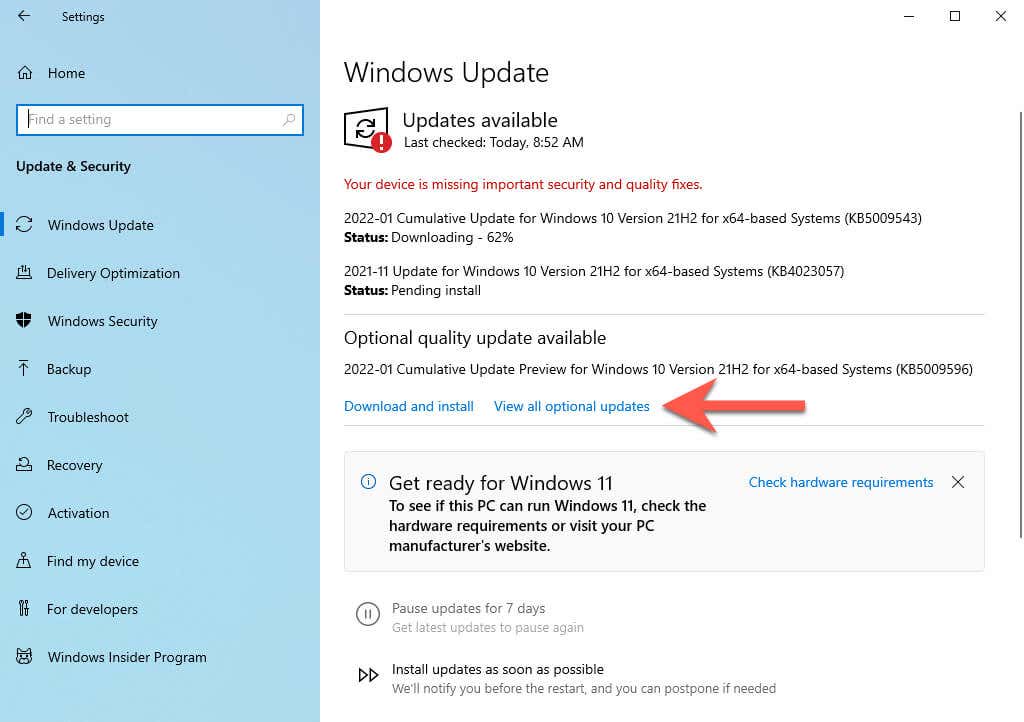
Finally, you must install all Microsoft-verified drivers via Windows Update.
1. Type Windows Update into the taskbar and select Open.
2. Select Check for Updates > View all optional updates.
3. Expand Driver updates. Then, check the boxes next to all driver updates and select Download and install.
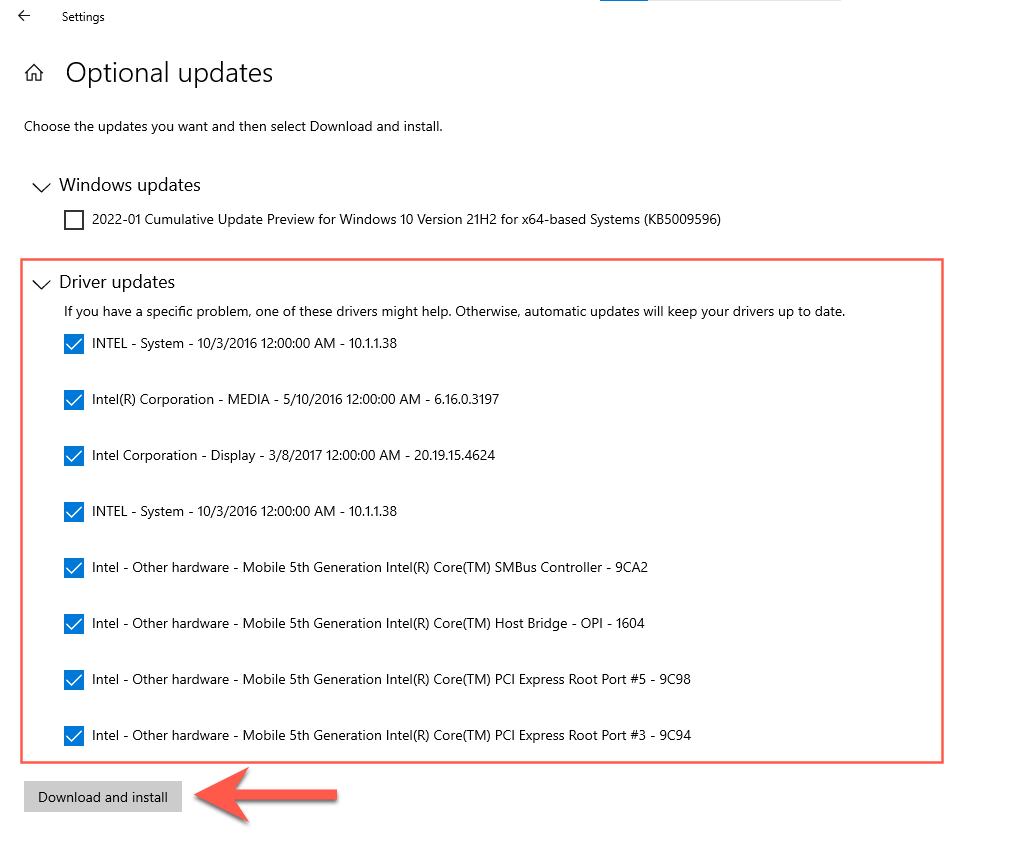
4. Head back to the previous screen and install the latest Windows 10 updates.
5. Select Restart now.

Download the MediaCreationTool GitHub Script
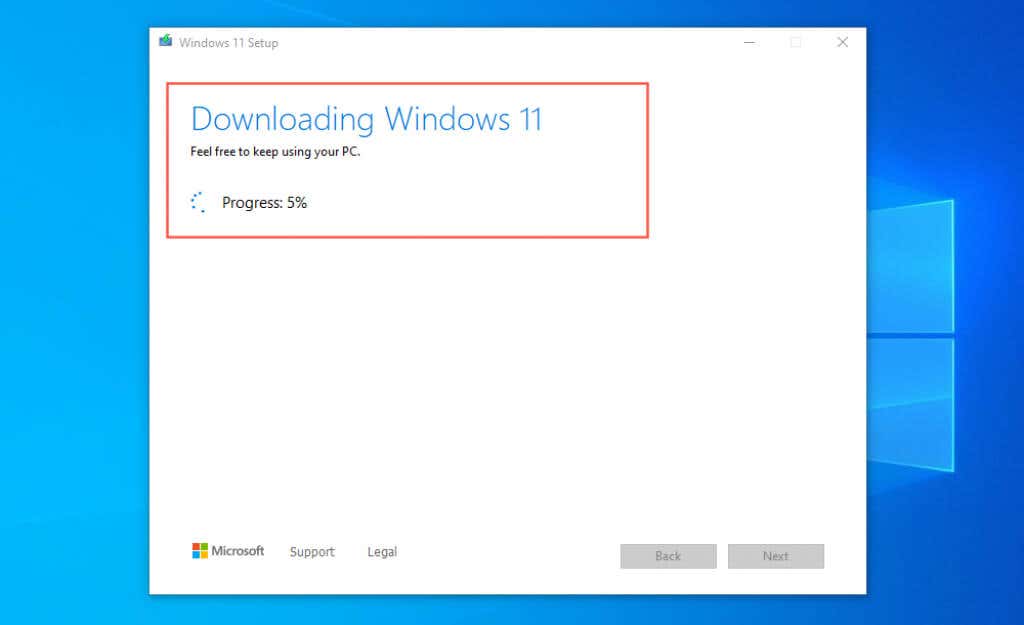
You’re now ready to make the upgrade to Windows 11. To begin, you must download MediaCreationTool (MCT) from GitHub. It’s an automated script that downloads Windows 11 from the official Microsoft servers and installs it by skipping all compatibility checks.
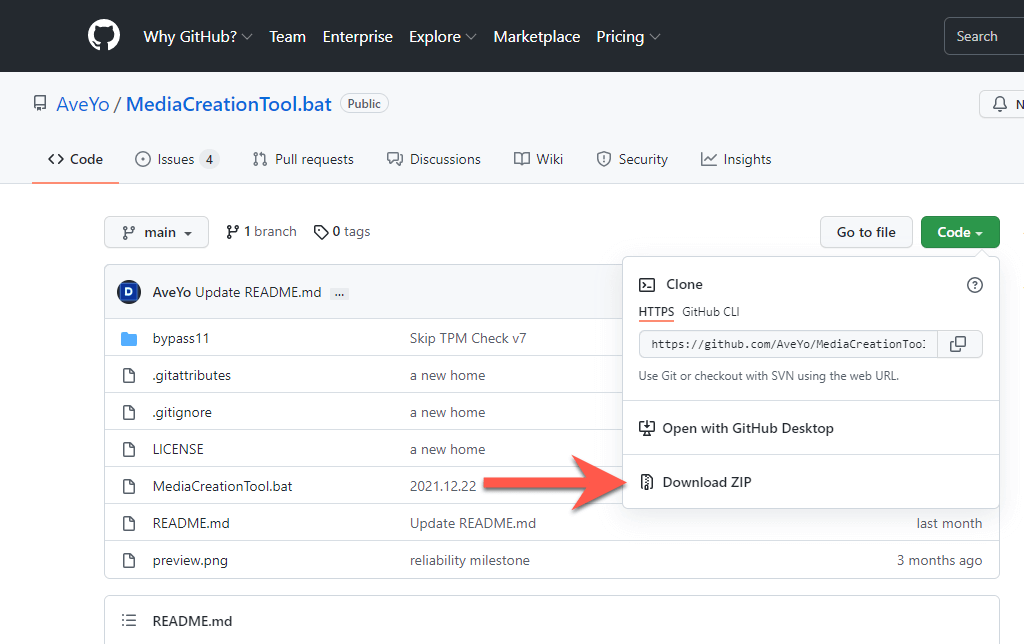
1. Open Microsoft Edge from the Windows 10 taskbar and head over to AveYo’s MediaCreationTool page on GitHub.
2. Select Code and pick the option labeled Download ZIP to download the batch script in ZIP format.
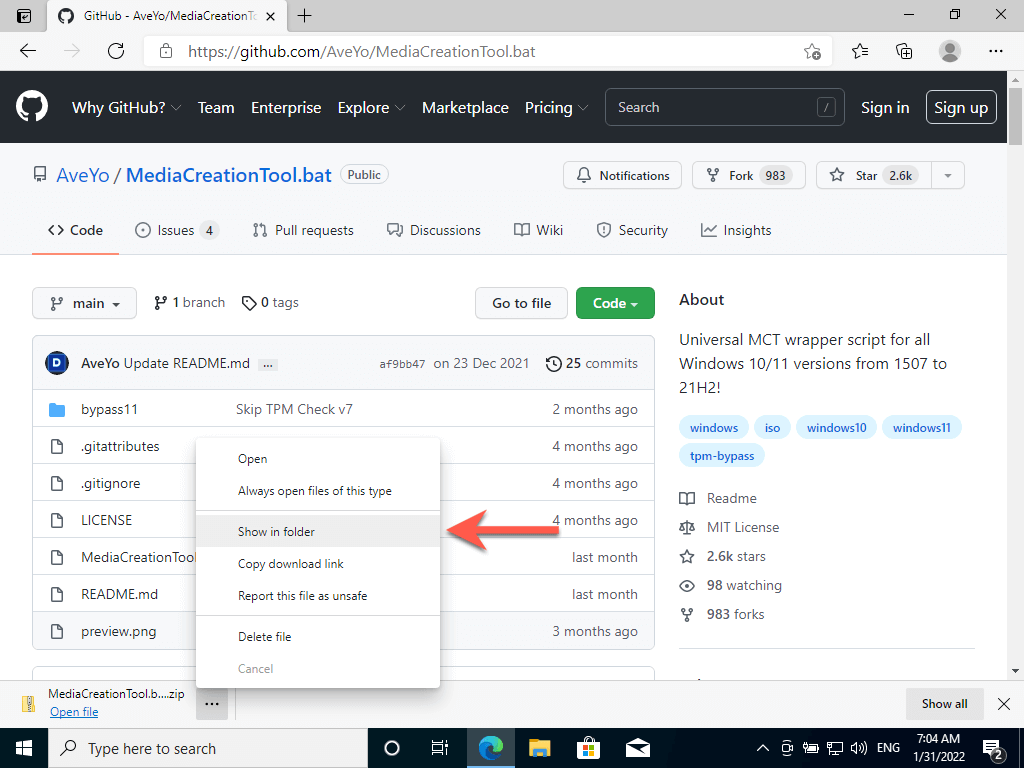
3. Select the More icon (three dots) on the download shelf and choose Show in Folder.
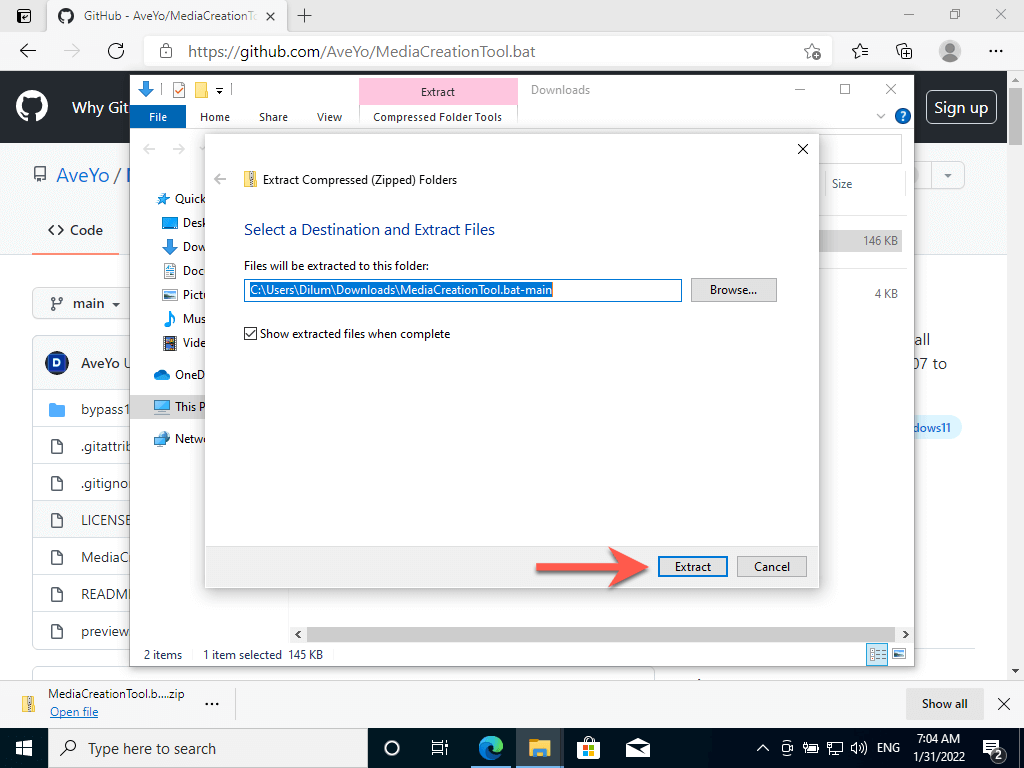
4. Right-click the downloaded ZIP file and select Extract Files. Then, choose Extract. The extracted folder will show up automatically.
Upgrade Windows 10 Installation to Windows 11
Running the batch script will upgrade Windows 10 to Windows 11. If you’re upgrading a previous Windows 10 installation, create a backup of your data before proceeding.
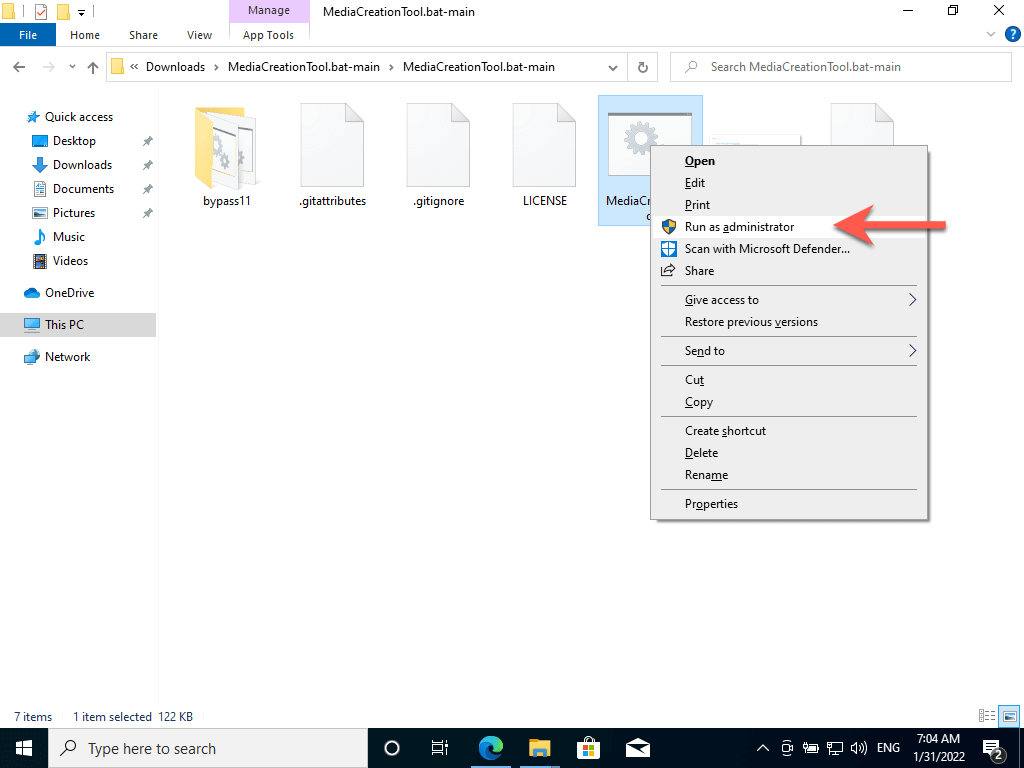
1. Right-click the MediaCreationTool.bat file and select Run as an administrator.
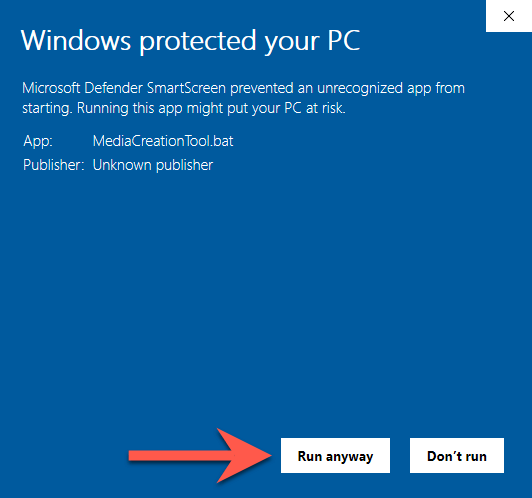
2. Select More info > Run anyway on the Windows SmartScreen pop-up.
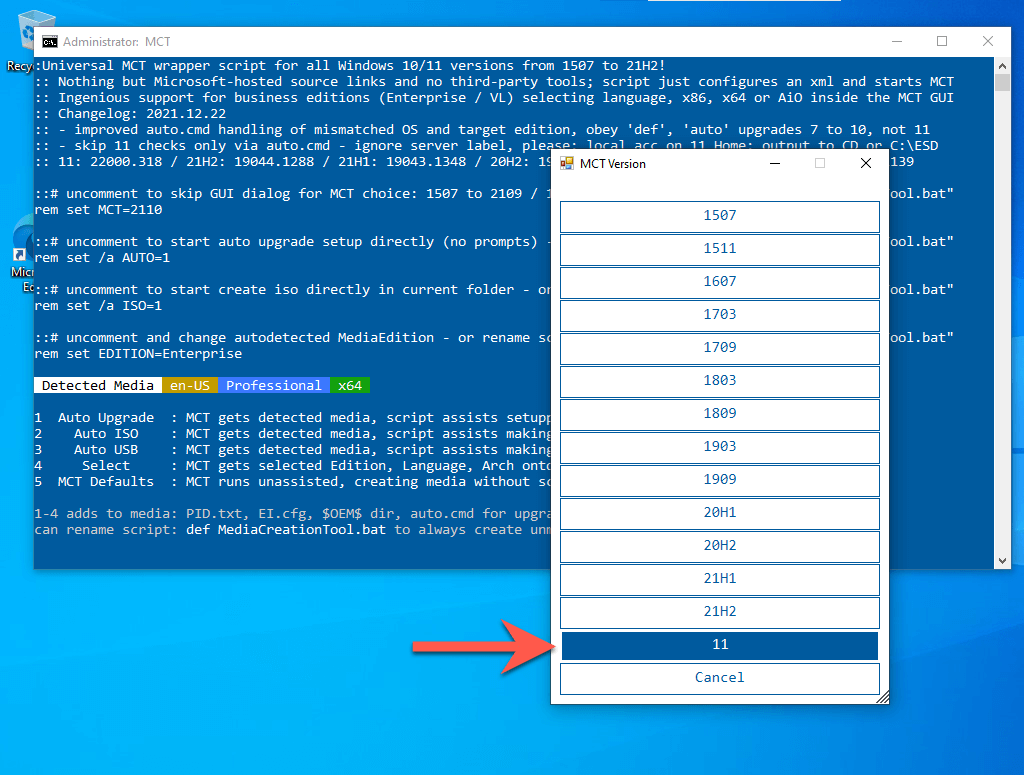
3. Select 11.
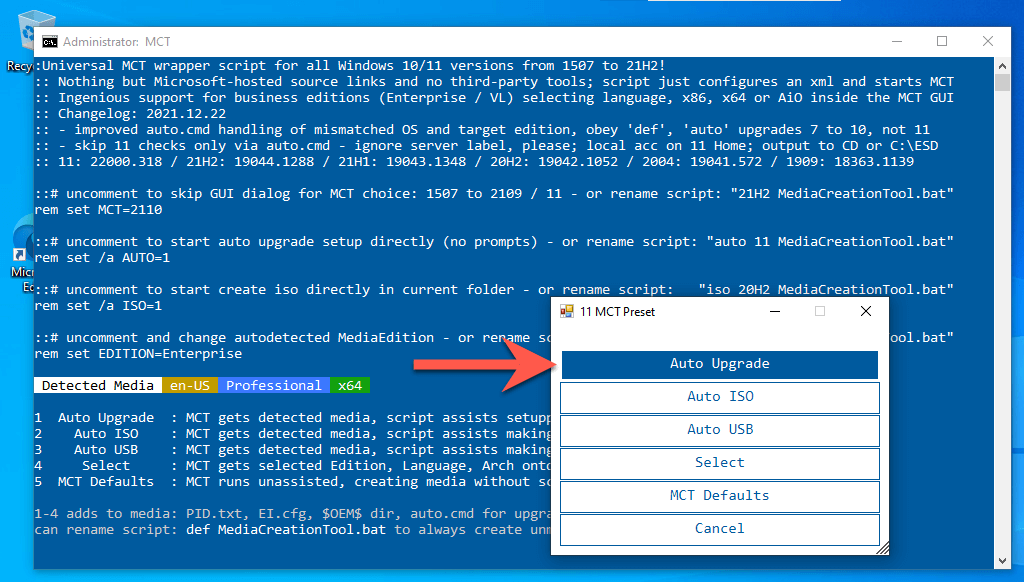
4. Select Auto Upgrade.
5. Wait until the MediaCreationTool script downloads Windows 11 onto your PC. You don’t have to do anything from this point onward.
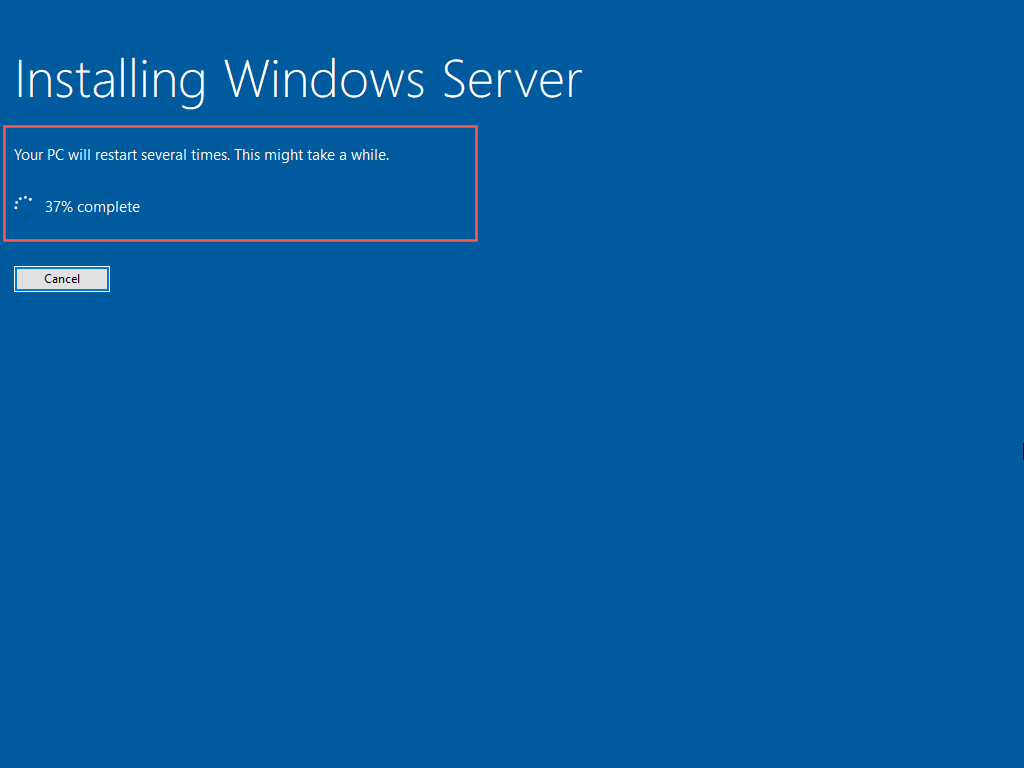
6. The MediaCreationTool will reboot your Mac and begin installing Windows 11. The procedure may take up to an hour or more to complete.
7. Your Mac will boot into the Windows 11 desktop after the upgrade. Congratulations!
Optional: Sign Into Microsoft Account
You’ve finished setting up Windows 11 on your Mac. You can begin using it immediately since you installed all drivers and updates in Windows 10.
You can also sign into Windows 11 with a Microsoft Account to unlock additional features—such as the ability to sync PC settings and download age-restricted content from the Microsoft Store—or activate Windows if it’s linked with a digital license.
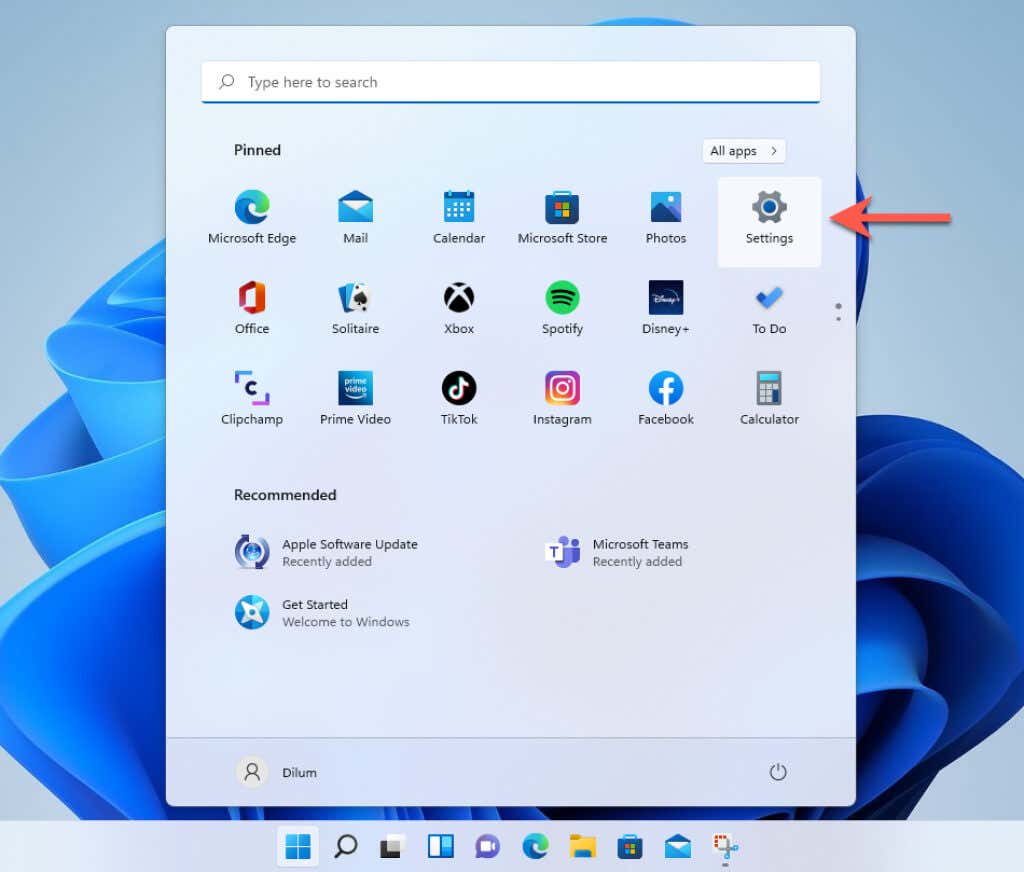
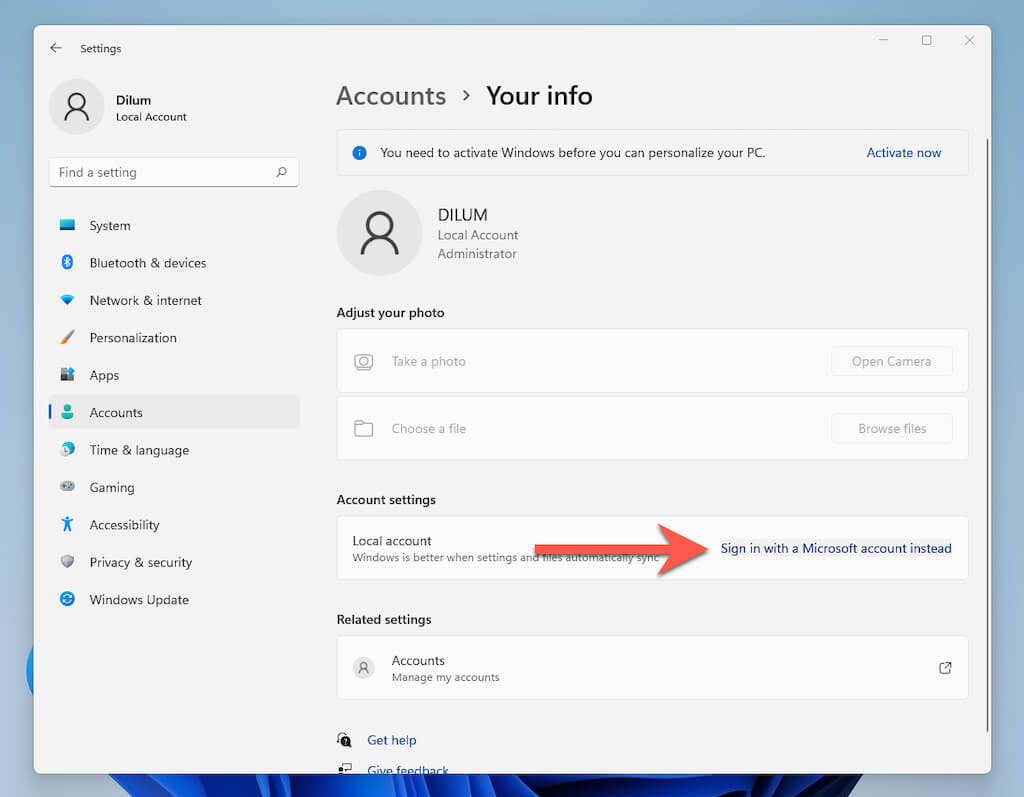
1. Open the Start menu and select Settings.
2. Select Accounts > Your info.
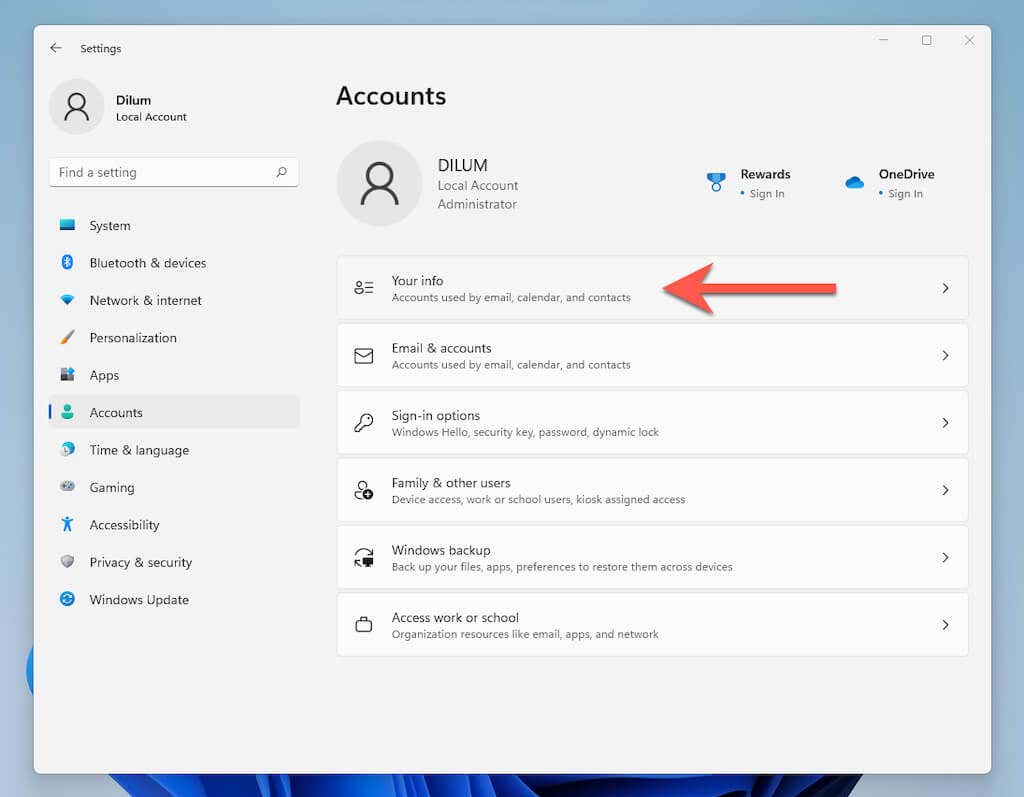
3. Select Sign in with a Microsoft Account instead.
4. Enter your Microsoft Account credentials (or choose to create one) and sign in to Windows 10.
Activate Windows 11 on Mac
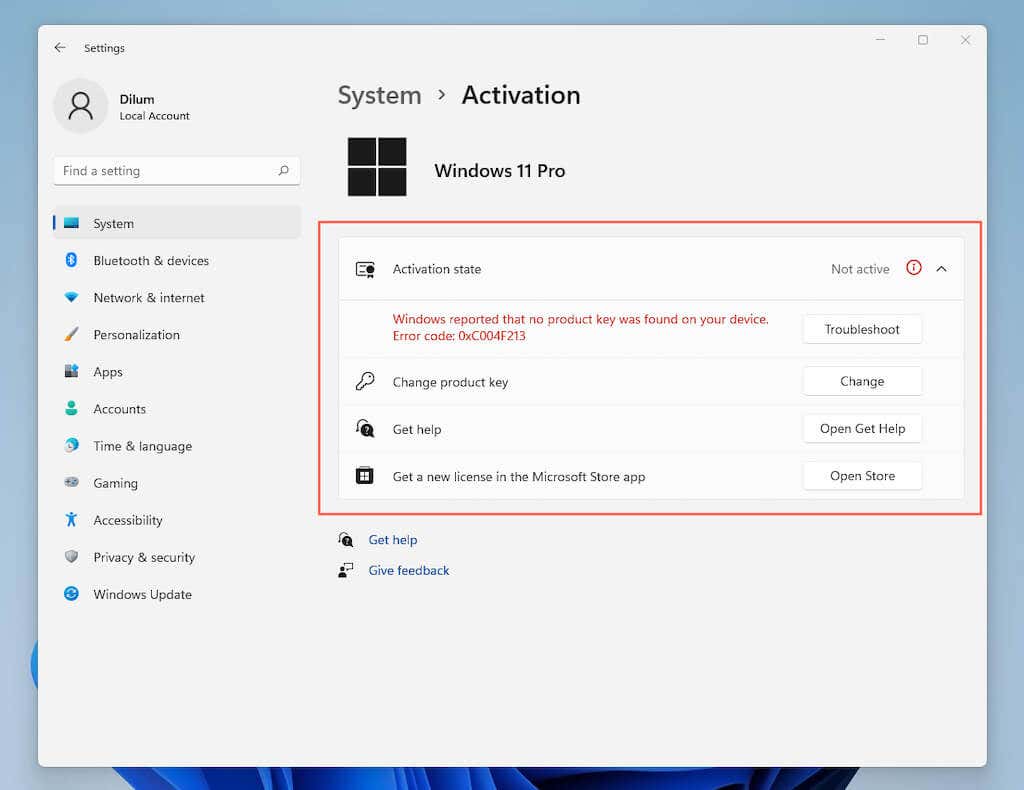
You don’t have to activate Windows 11 to keep using it on your Mac, but you will lose the ability to customize your desktop. Regardless, you can check your activation status and enter/purchase a product key by heading to Start > Settings >System > Activation.
Switch Between Windows and macOS
You can switch between your Windows 11 and macOS Monterey installations on your Mac via the boot selection screen.
1. Open the Start menu and select Power > Restart.
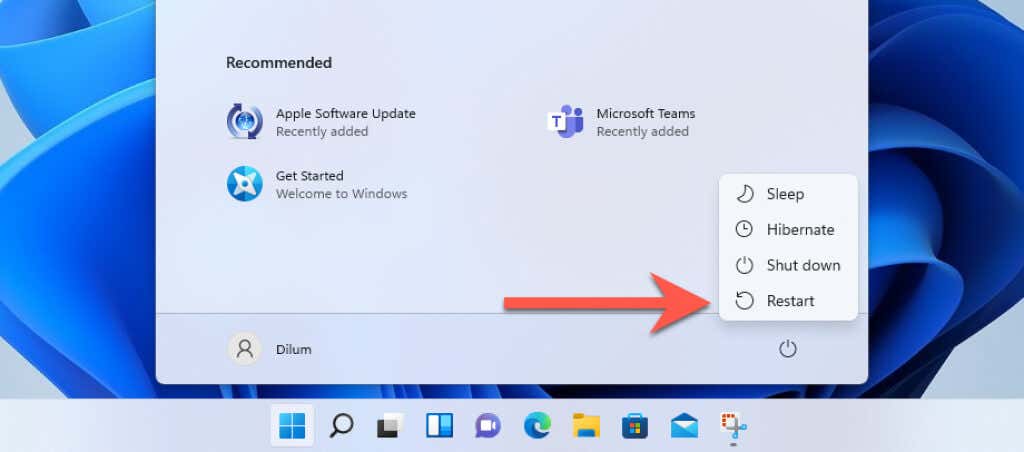
2. Hold down the Option key until you get to the boot selection screen.
3. Select Macintosh HD > Continue to boot into macOS Monterey.
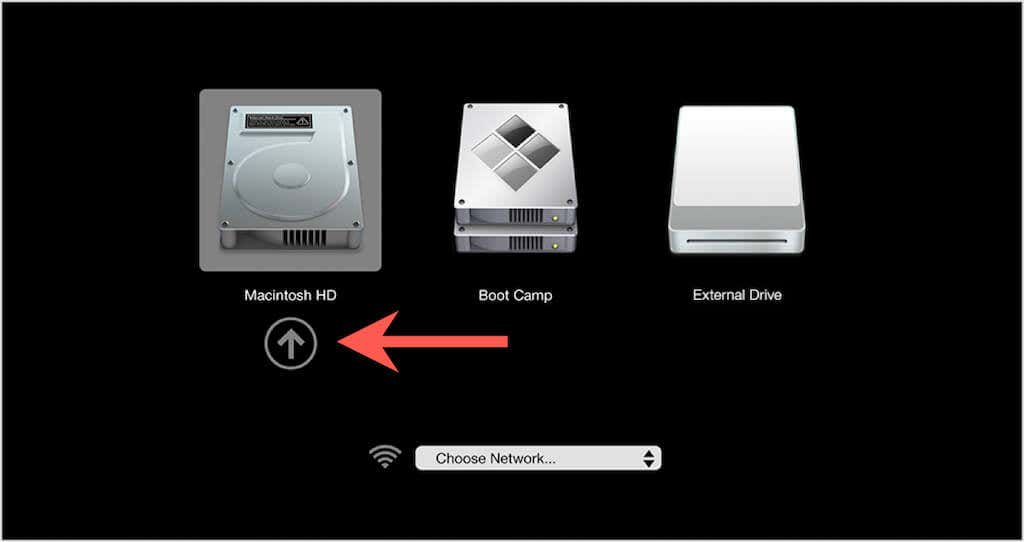
If you want to load Windows 11, restart your Mac while holding down the Option key again and select Boot Camp > Continue.
Note: To manage your default startup disk preferences, open the System Preferences app in macOS Monterey and select Startup Disk.
Using Virtualization Software to Install Windows 11 on Mac
If installing Windows 11 using Boot Camp feels time-consuming and complicated, you can use the following virtualization software to run Windows 11 on Mac.
VirtualBox: Free virtualization software that requires a registry hack to install Windows 11. You can read all about it in the Oracle blog.
Parallels Desktop or VMWare Fusion: Paid virtualization software that works better than VirtualBox. It also lets you install the ARM-based version of Windows 11 on Apple Silicon Macs.