
Screenshot lets you preserve the content of your Mac’s screen. However, you may still need to cut out some parts of the screenshot to hide sensitive information or keep what you need. This tutorial will show you how to crop a screenshot on Mac using the macOS Screenshot app, third-party software, and online tools.
Why Crop a Screenshot on Mac?
There are many reasons to crop screenshots on a Mac. As mentioned earlier, trimming off the portion of a screenshot containing personal information or sensitive data (address, credit card information, etc.) can help protect your privacy. You could also crop out unnecessary portions of a screenshot to reduce the file size.
If a screenshot contains tiny text, chopping off the nonessential parts helps highlight important information and improves readability. Using the built-in Screenshot app, you can crop new, old, regular, or scrolling screenshots on your Mac.
The app simplifies the process of capturing and cropping screenshots and screen recordings. If you’re unsure where to find the Screenshot app, you can use the Preview app, third-party tools, and online services.
How to Crop a Screenshot on Mac Using the Cropping Tool
Usually, when you want to take a screenshot on your Mac, you’d use hotkeys or keyboard shortcuts such as:
- Command + Shift + 3 to capture the entire screen.
- Command + Shift + 4 to capture a portion of your screen.
- Command + Shift + 5 to launch the Screenshot app.
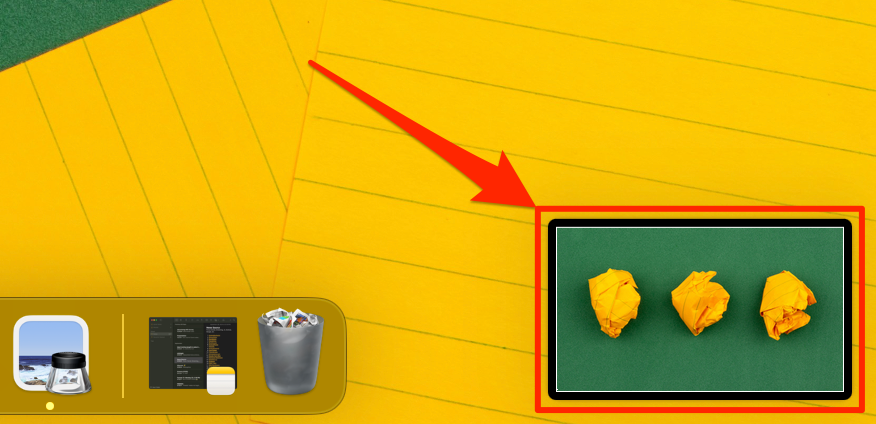
After capturing your screenshot, follow the steps below to crop the image.
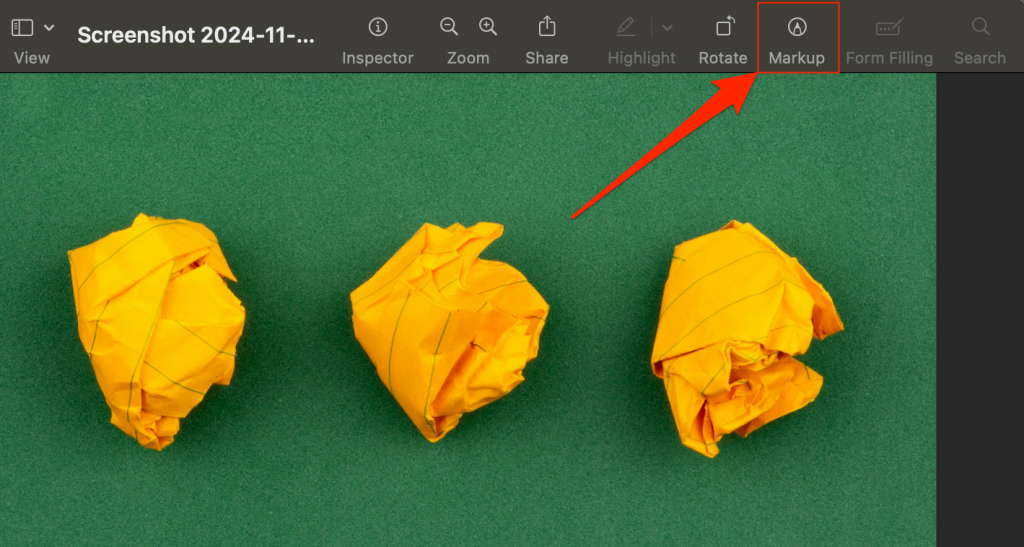
- Select the thumbnail in the bottom-right corner of your screen to edit the screenshot.
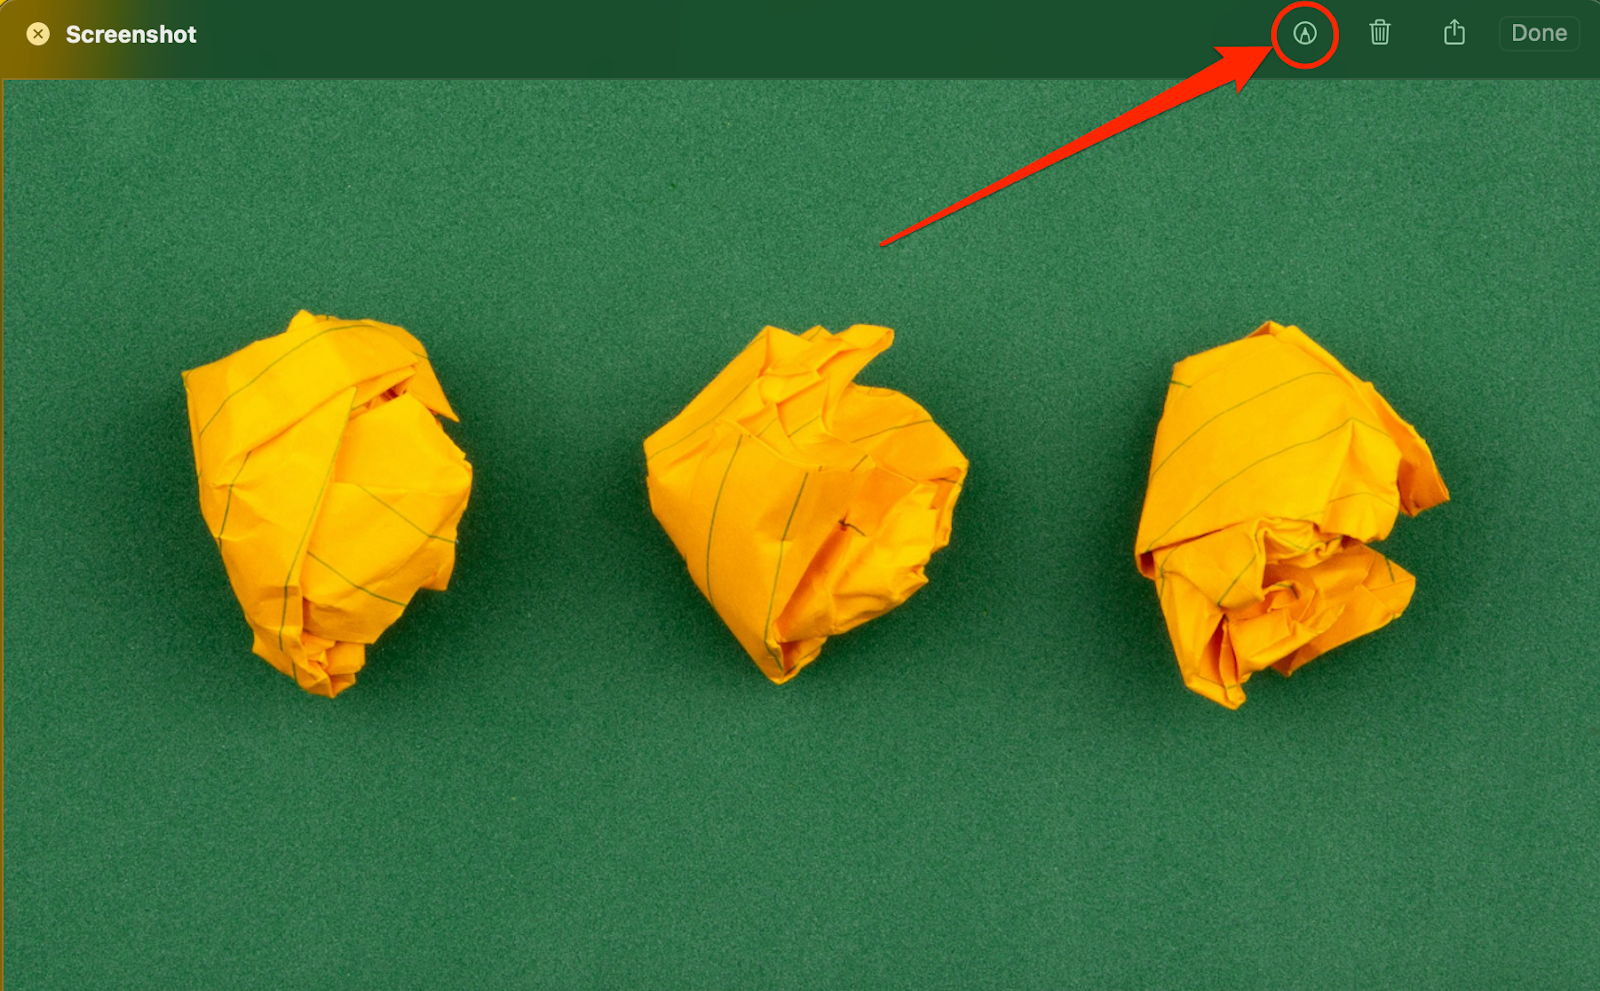
- Next, select the Markup toolbar to reveal the editing tools.
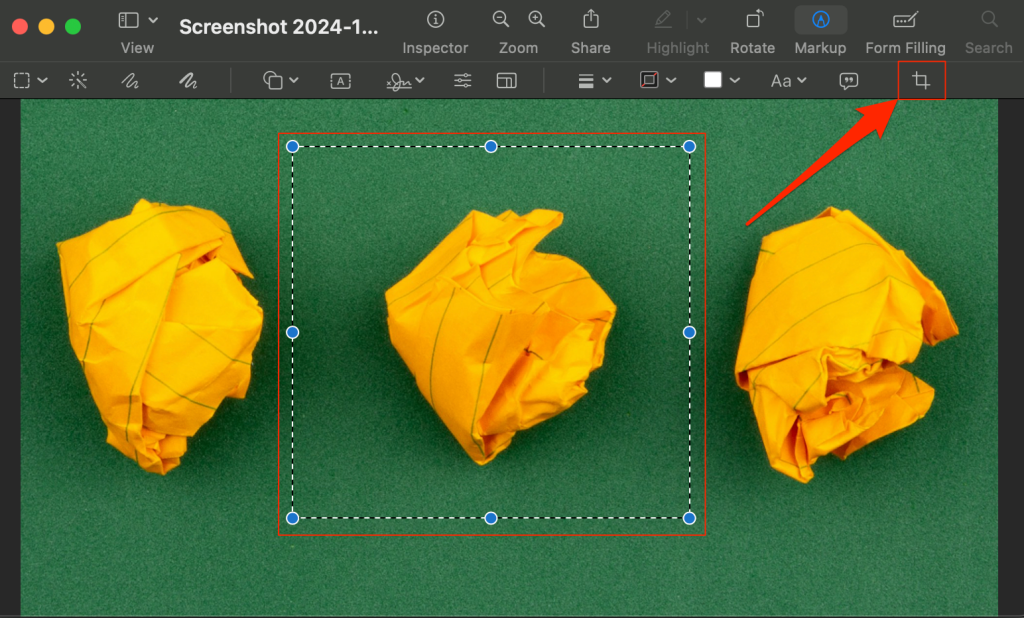
- Select the Cropping tool on the toolbar to start cropping your screenshot.
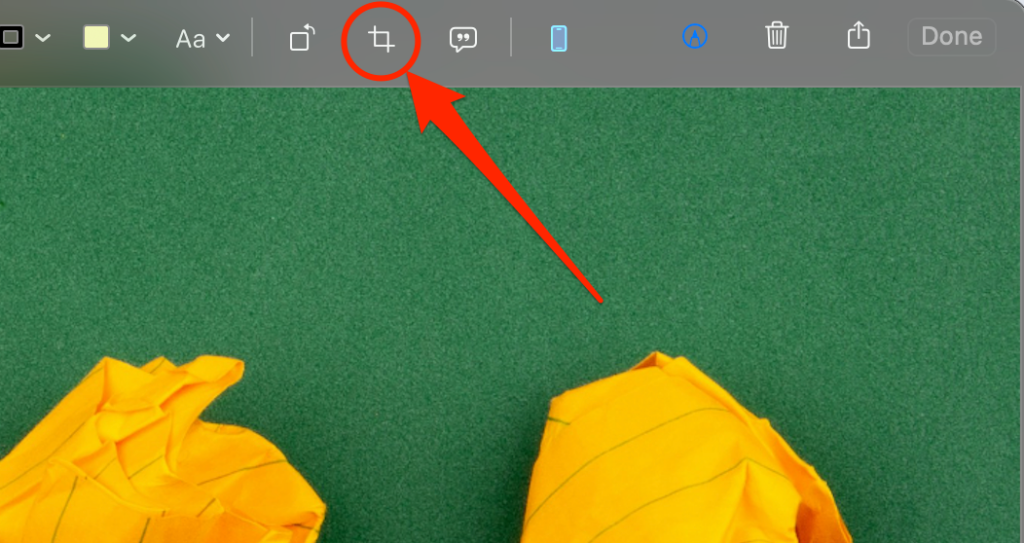
- Use the crop handles in the four corners to select the portion of the screenshot you want to keep.

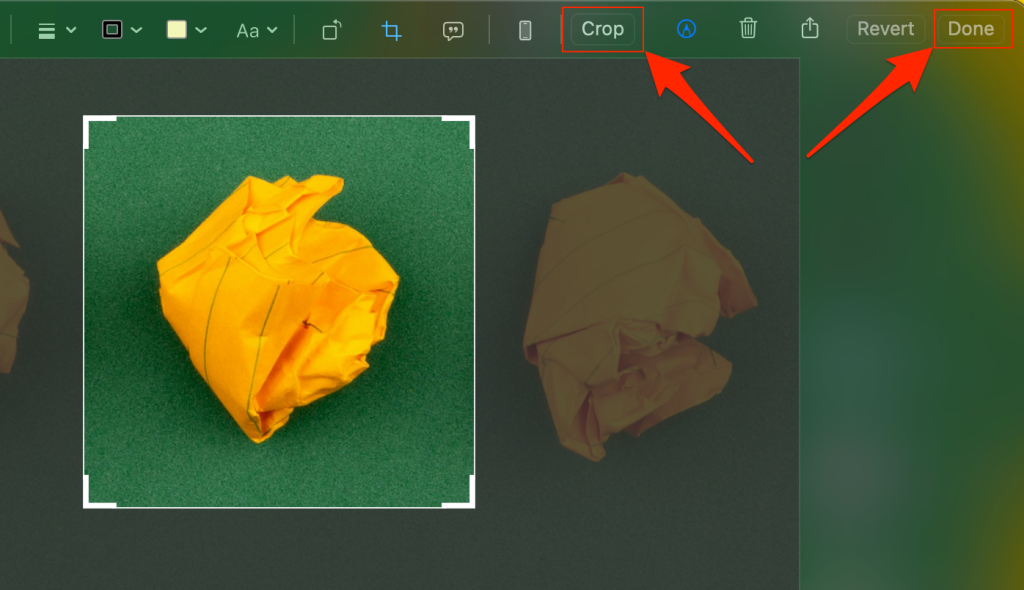
- Select the Crop button to save the changes and Done to save the cropped screenshot.
How to Use Preview to Crop a Screenshot on Mac?
The Preview app allows you to view images and documents. It also has several editing and markup features, including a cropping tool. If you’ve taken a screenshot or someone sent you one, open it in Preview to crop the unwanted portion. Here’s how:
- Locate the screenshot file in Finder and double-click to open it in Preview. Next, select the Markup toolbar icon.
- Your Mac’s cursor becomes a crosshair icon in the Preview window. Use your cursor/crosshair icon to select the portion of the screenshot you want to keep. Then, select the Crop button on the top menu to crop out the unwanted portion.
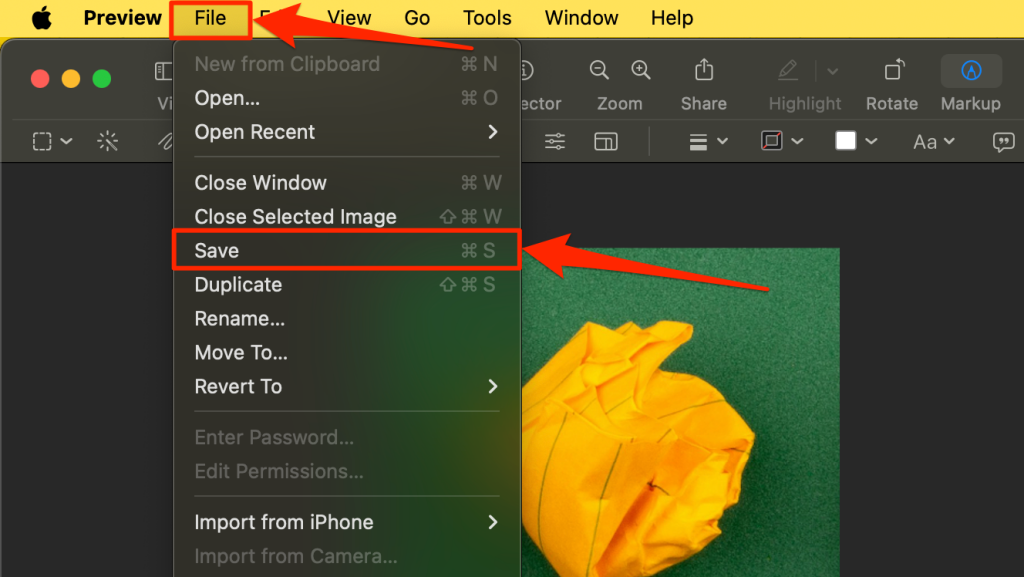
- Press Command + S to save the cropped image. Alternatively, select File on the menu bar and choose Save.
How to Use Photos App to Crop a Screenshot on Mac?
Many Mac owners primarily use Photos to view and organize pictures, but the app also functions as a basic photo editing tool. Follow the steps below to crop or edit screenshots in Photos.
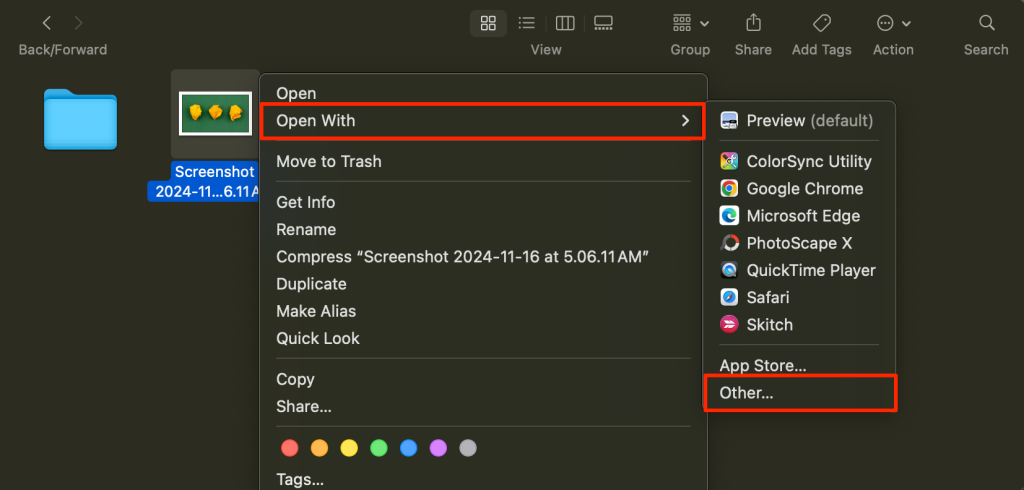
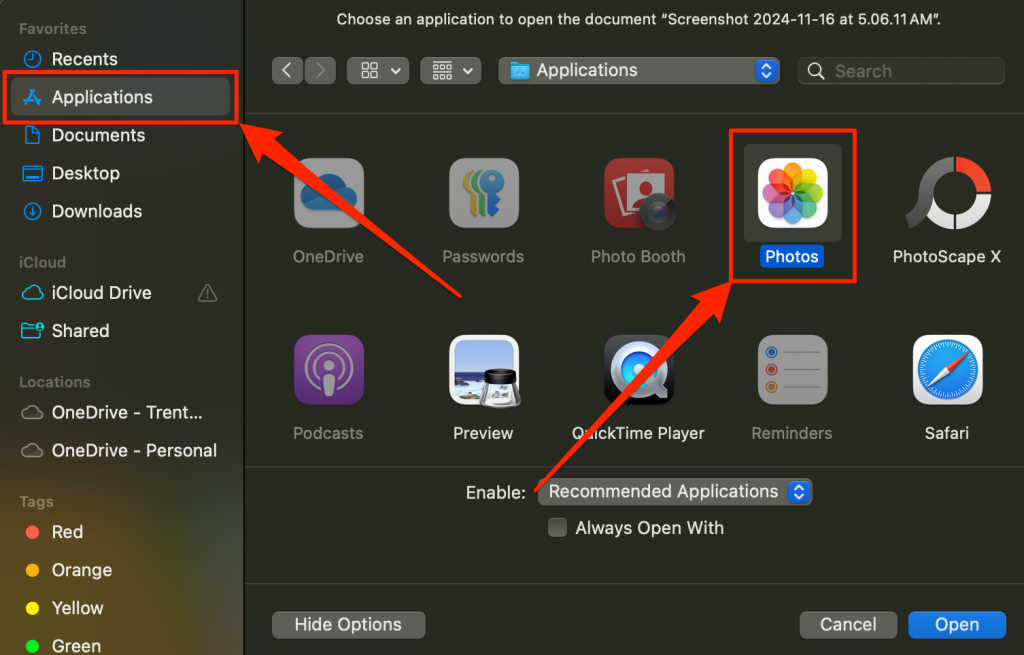
- Right-click the screenshot you want to crop and select Open with > Other.
- Next, select the Applications folder in the sidebar and double-click Photos.
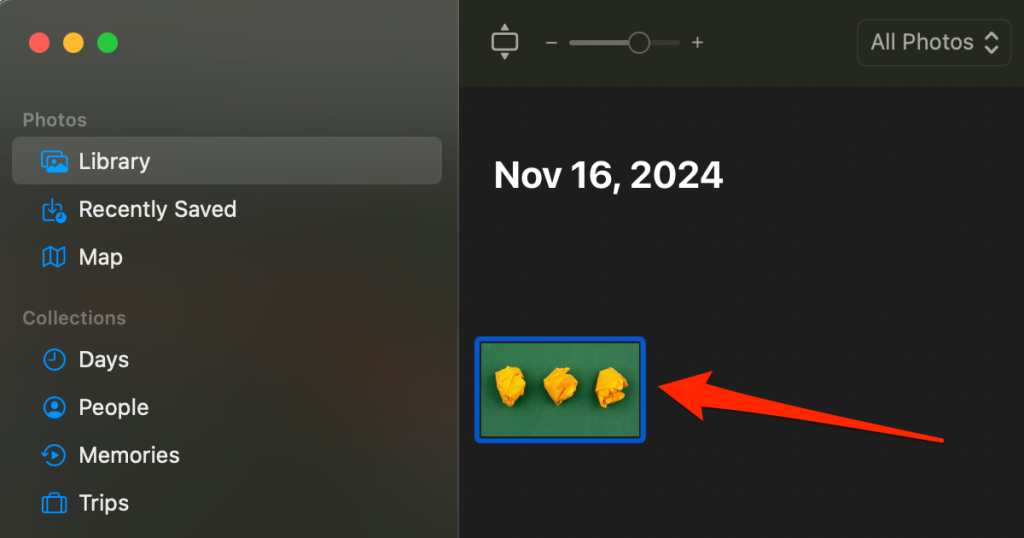
- macOS will import the screenshot to Photos. Double-click the screenshot and proceed to the next step to crop it.
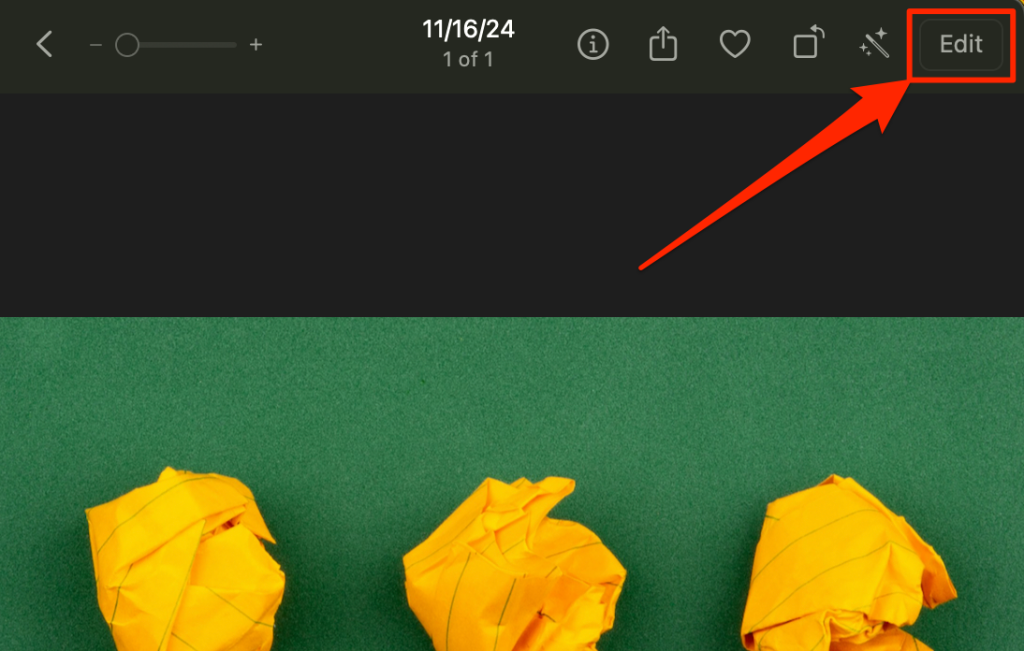
- Next, select Edit in the top-right corner.
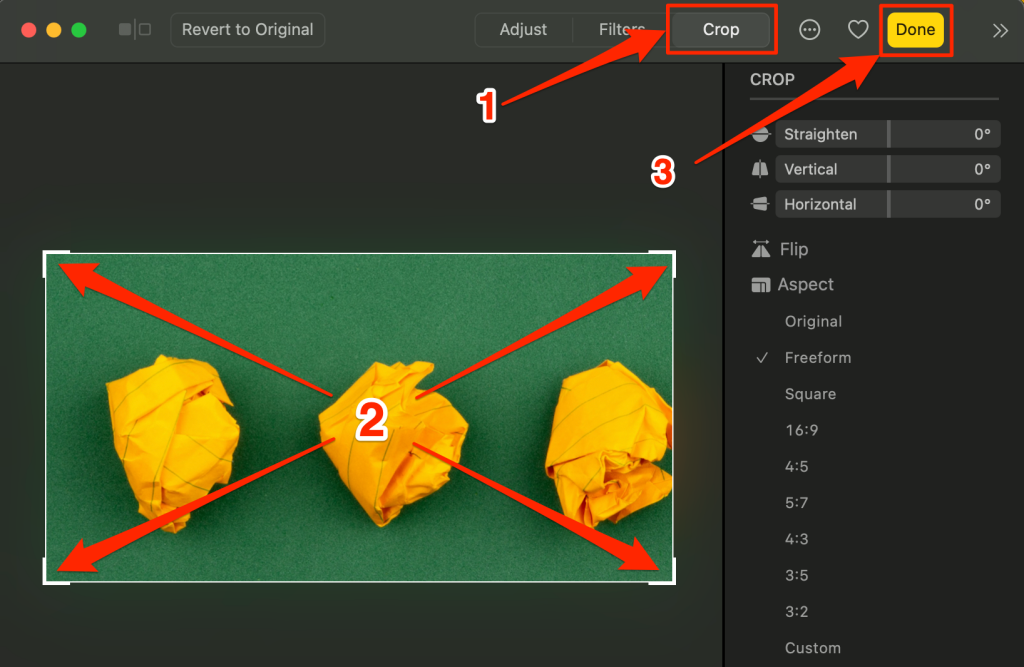
- Select the Crop tab and drag the crop handles to trim the screenshot to your preference. Then, tap Done in the top-right corner to save the cropped image.
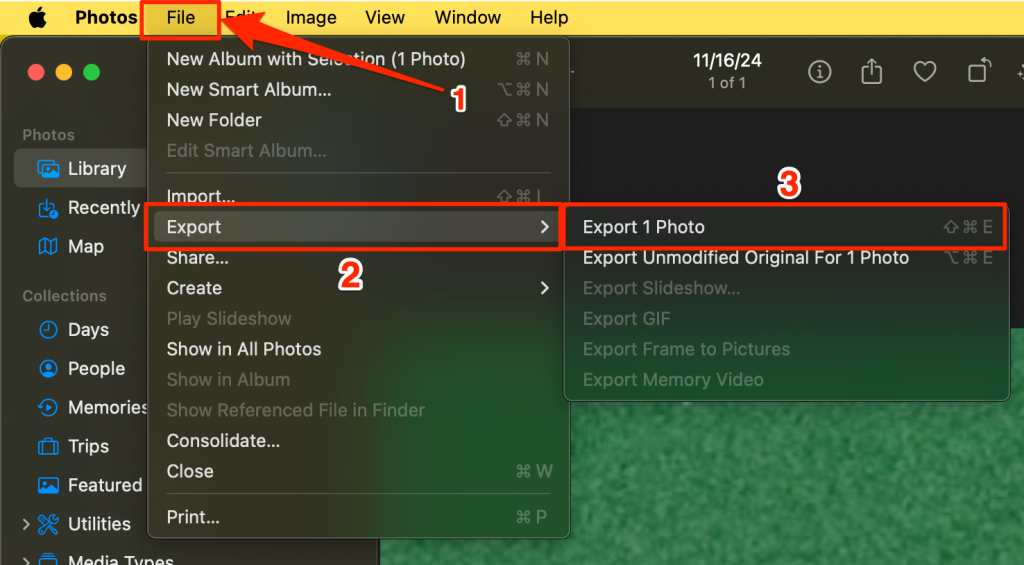
- The next step is to export the cropped screenshot to your Mac. Select File on the menu bar and choose Export > Export 1 Photo. Alternatively, use the Shift + Command + E keyboard shortcut.
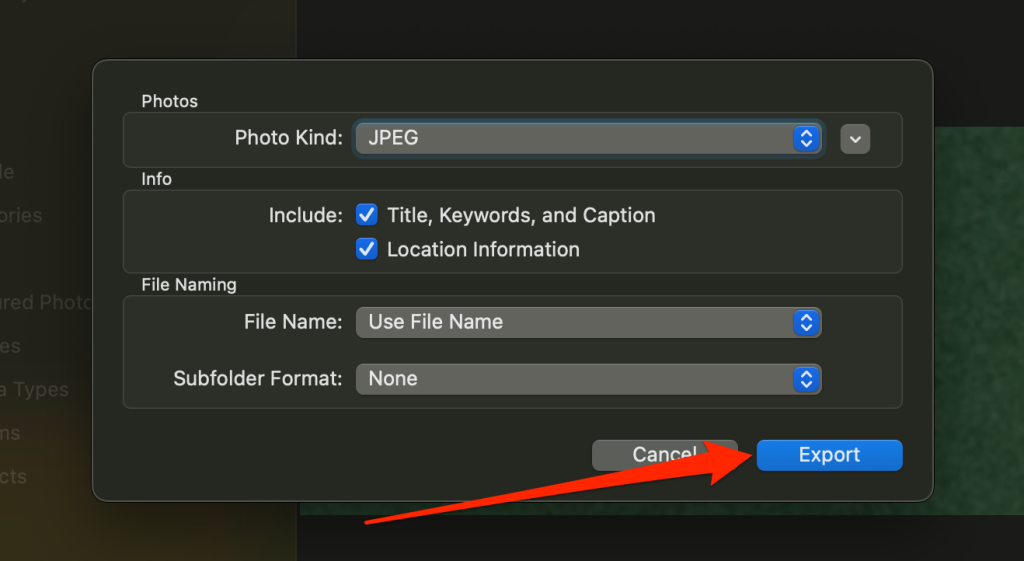
- Choose your preferred image format and file naming options and select Export.
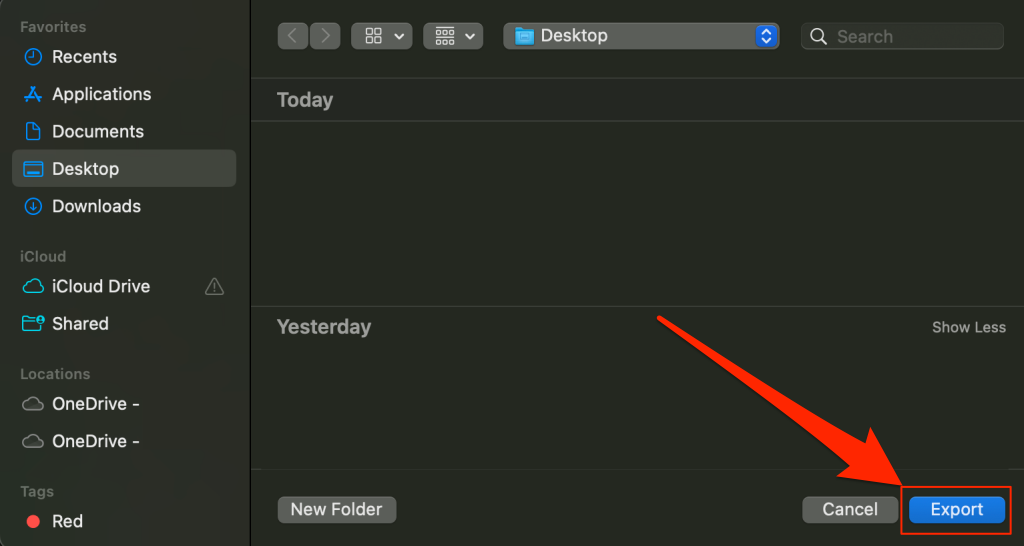
- Choose where you want to export/save the screenshot and select Export.
How to Crop a Screenshot on Mac Using Third-Party Tools?
You can also use third-party apps to crop screenshots on a Mac. Photo editing apps like Photoscape X and GIMP are excellent options and are completely free to use. Some snipping or screen capture apps also have built-in tools for editing screenshots. Find the Crop icon/tool in these applications and use it to trim your screenshot.
How to Use Online Tools to Crop a Screenshot on Mac?
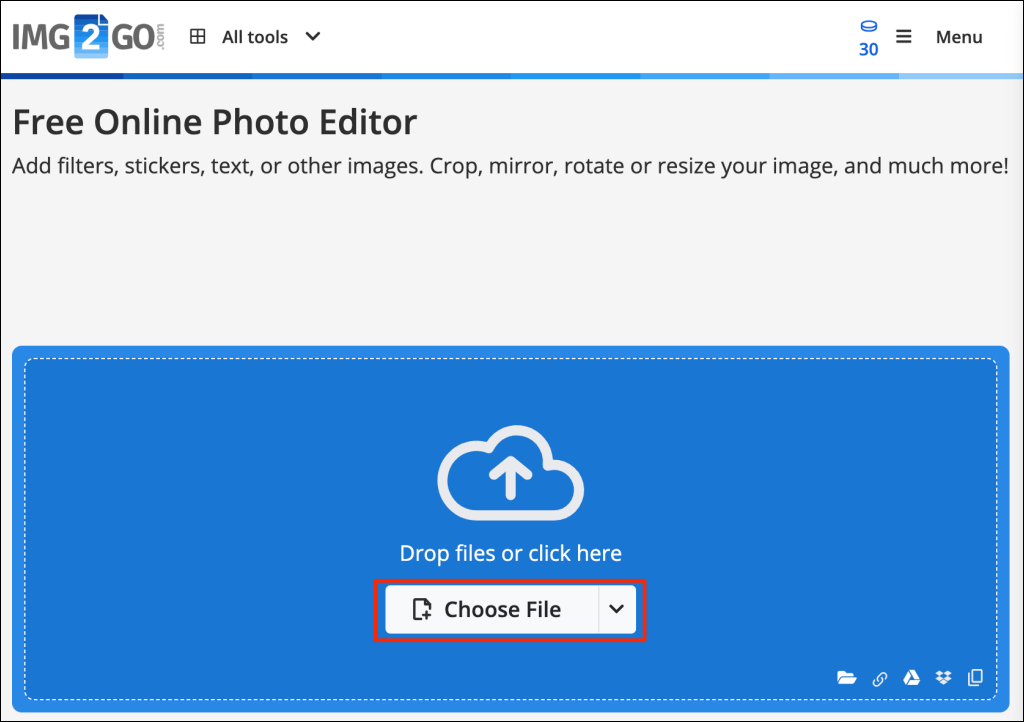
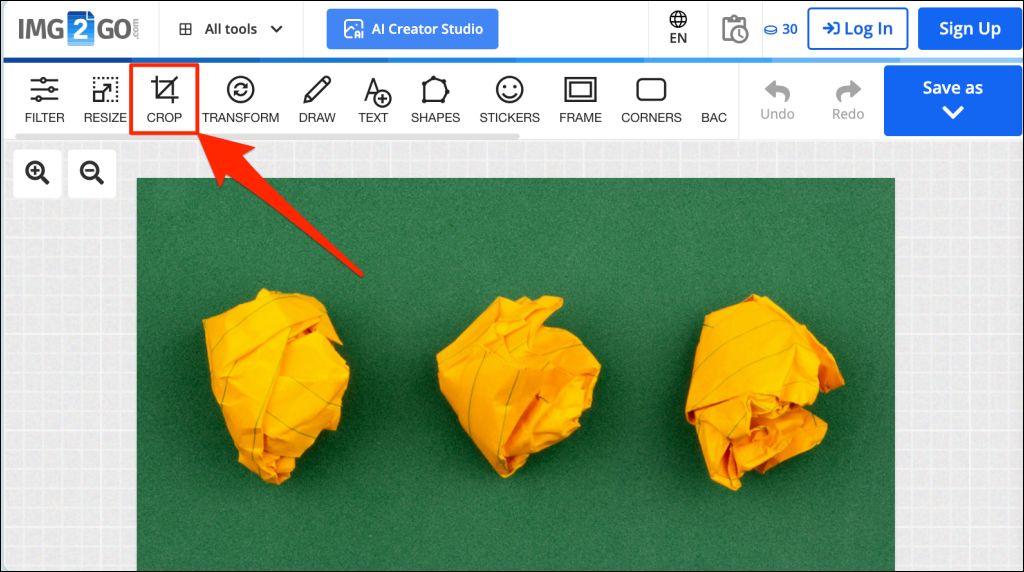
Online tools like IMG2Go, Picresize, ResizeImage, and Cropp.me let you crop images quickly and efficiently. Use these online tools if you don’t want to download third-party apps, perhaps because your Mac is running low on storage space. For this tutorial, we’ll show you how to use IMG2Go to crop and edit screenshots on your Mac.
- Open the IMG2Go online photo editor in Safari or any web browser. Drag the screenshot into the file upload window, or select Choose Files and upload the screenshot through Finder.
- Select Crop on the toolbar.
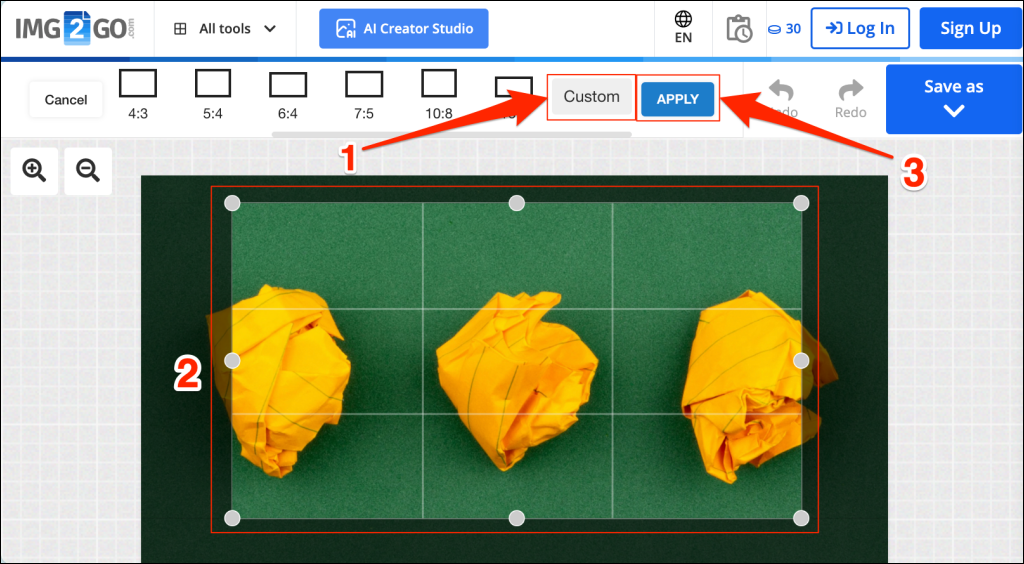
- Choose the Custom dimension option and move the crop points to cover the portion you want to keep. Then, select Apply to save your selection.
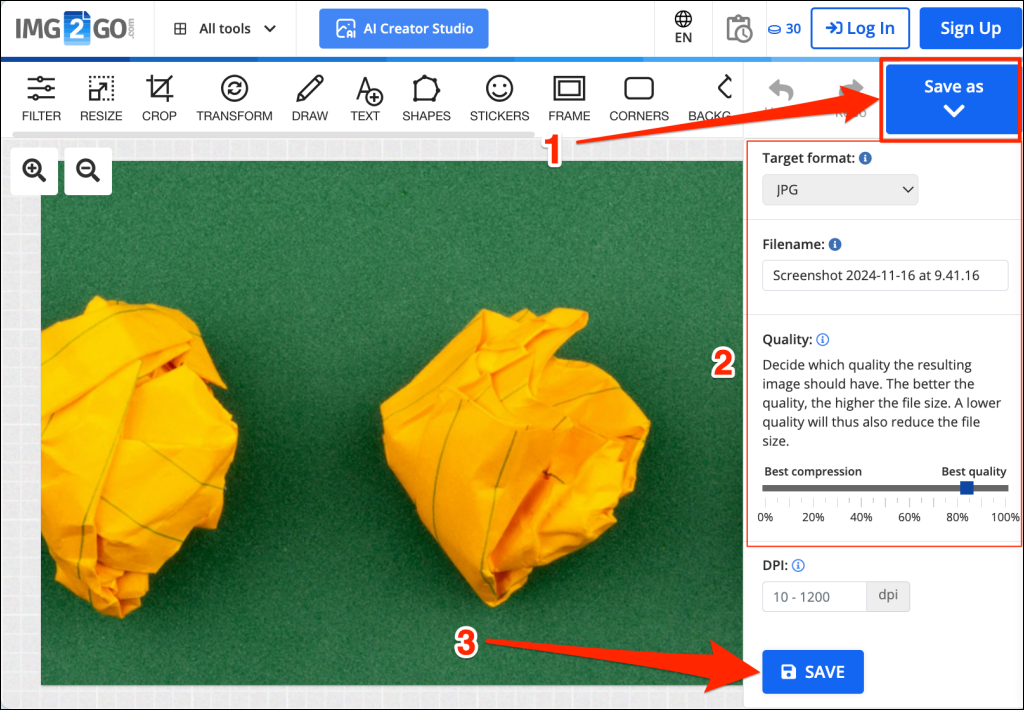
- Select the Save as drop-down icon and choose the file format for the resulting image. You can also rename the screenshot or adjust its quality to your preference. Afterward, select the Save icon to download the cropped screenshot to your Mac.
Cropped Mac Screenshots: Focus on What Matters
Any of the applications and tools will help crop screenshots so that they contain only relevant information. We recommend using the Screenshot or Preview app because, unlike online editors, they’re easier to use. Additionally, you can quickly crop screenshots without an internet connection. Cropping screenshots in the Photos app is also straightforward, but it entails importing and exporting the screenshots.