We'll show you in Garageband
Recording instrument audio through an interface on a Mac using OS X is surprisingly easy and has significant advantages over a built-in recording device. It can be used to connect your computer to professional microphones, bass, and electric guitars.
Setting it up is fairly quick and easy. For the sake of consistency, I will be using the Scarlett Solo as the audio interface, but many of these settings apply to different brands and devices.
If you own a Mac computer, you are in luck! Most USB 2.0 audio interfaces (including the Scarlett Solo) are Class Compliant or Plug-n-play, which means they can be connected to a Mac without a third-party driver download.
Record Sound through Audio Interface
Let’s get started.
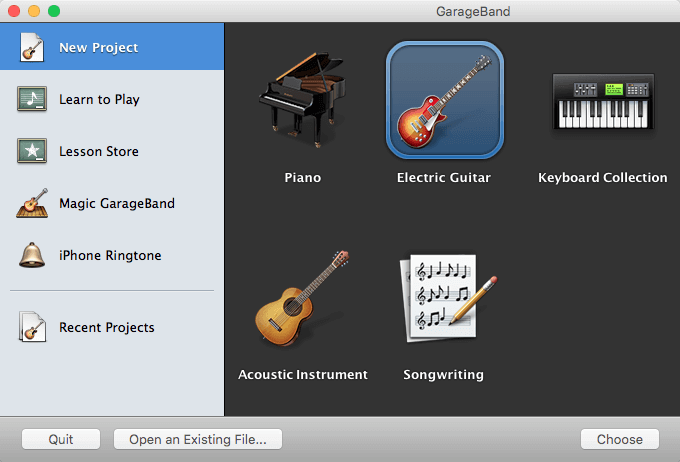
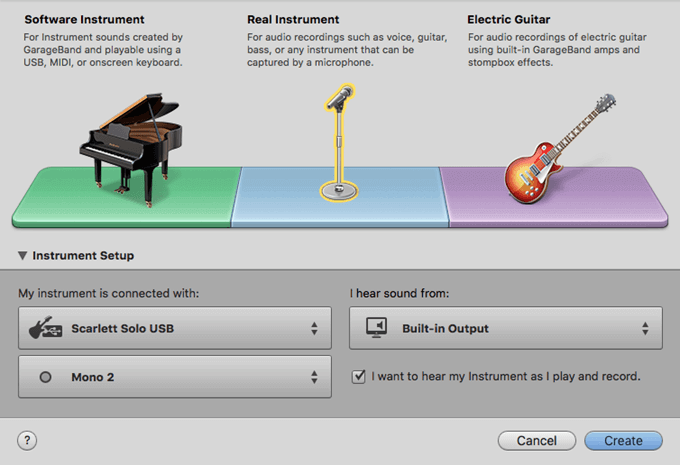
After plugging in your device, find your way to your recording software. On a Mac, the most basic one that comes built-in is GarageBand. Once this has booted up, navigate to New Project and choose what kind of recording you will be doing.
Then, Save your new project. (Don’t worry about Tempo, Time Signature, and Key settings as these can all be changed later).
After this, you’re going to head over to the GarageBand tab on the top left of your screen and select Preferences to get to General Settings.
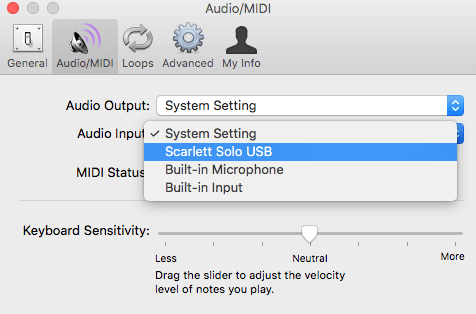
From there you will go to the Audio/MIDI tab. For Audio Input, set this to your Audio interface (Scarlett Solo). Audio Output depends on your configuration, but for me, most of the time this will be set to Scarlett Solo USB or Built-In Input. For now, I’m going to set it to Built-In Input.
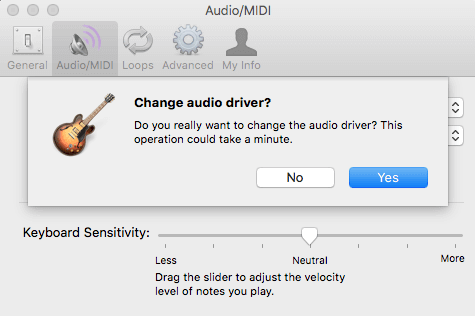
When the prompt to confirm the change to the audio driver pops up, select Yes. This process shouldn’t take any longer than 10-15 seconds.
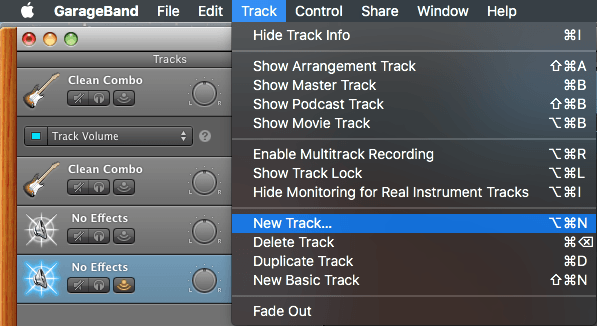
From here you can exit Audio/MIDI settings and navigate to the Track tab at the top of your screen and then create a New Track.
Once there, specify which recording device you’re using (microphone or instrument). Then hit the Instrument Setup drop-down menu to select your mono settings.
I record guitar, so I would select the instrument on the far right and I would select Mono 2; if you’re recording with a microphone you would select the middle option and would be using Mono 1.
I also find it helpful to check the box marked I want to hear my instrument as I play and record. Select Create when your settings are to your liking.
After you Create your new track, you are ready to record! If you have any questions or comments, please feel free to ask! Enjoy!


