So you can get some sleep
Do Not Disturb (DND) is a great feature for blocking out digital distractions when necessary, especially if you don’t want to turn off your phone. Do Not Disturb will mute incoming calls, texts, as well as app notifications. Need to execute a task that requires deep focus? Or perhaps you need some alone time and don’t want to be bothered by calls or texts? Do Not Disturb can be your white knight.
Conversely, Do Not Disturb can also be a pain, particularly when it fails to work. Say you’re getting calls and text alerts despite having Do Not Disturb enabled. Or DND blocks your alarm from ringing out. What could possibly be the cause of the problem?
There are various things that could cause notifications to override your iPhone’s Do Not Disturb settings. In this guide, we outline every possible issue relating to Do Not Disturb not working on iPhone (and iPad) and how you can fix them.
1. Change When Do Not Disturb Silences Your Device
By default, Do Not Disturb on iOS will silence your incoming calls and alerts only when you lock your device. If you want the feature to silence all notification alerts even while using your phone, here’s what you need to do.
1. Go to the Do Not Disturb settings menu (Settings > Do Not Disturb).
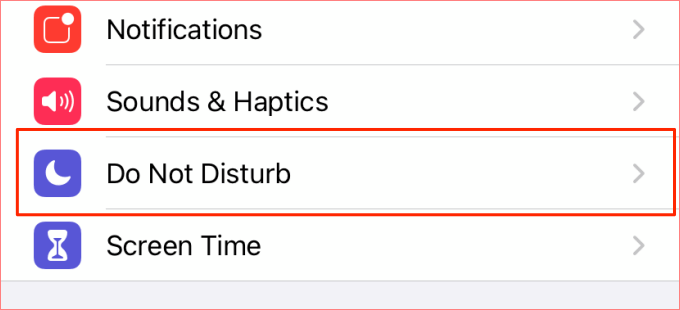
2. In the Silence section, select Always.
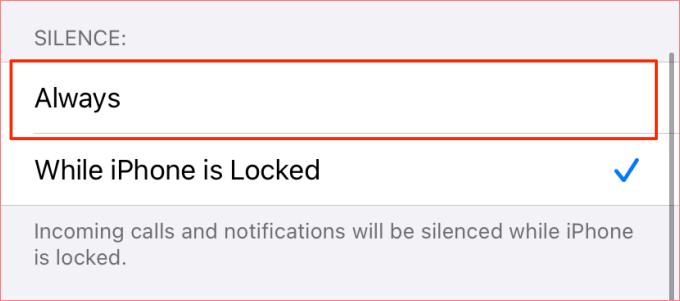
Proceed to the next solution if Do Not Disturb doesn’t mute incoming calls while using your iPhone or when it’s locked.
2. Turn Off Repeated Calls
Although iOS silences phone calls, texts, and other app notifications when Do Not Disturb is active, people can still reach you when they call multiple times. Yes, repeated calls (from the same person) can override your iPhone’s Do Not Disturb mode. That is, if the person calls you twice within three minutes.
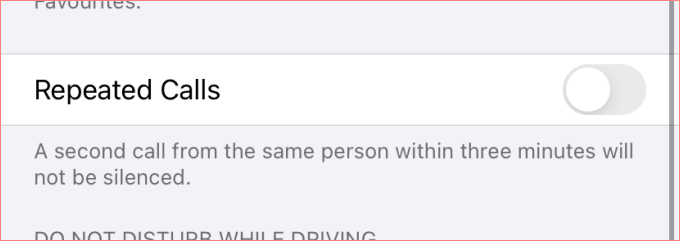
To prevent this from happening, turn off the Repeated Calls in your device’s Do Not Disturb settings.
Go to Settings > Do Not Disturb and toggle off the Repeated Calls option.
3. Disable or Adjust Do Not Disturb Schedule
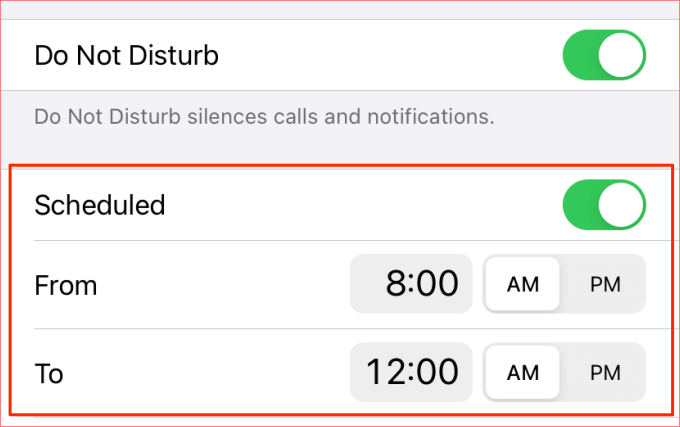
If you notice that Do Not Disturb only works during a particular time of the day, confirm that you haven’t set a Do Not Disturb schedule by accident. Go to Settings > Do Not Disturb and make sure you have the Schedule option disabled.
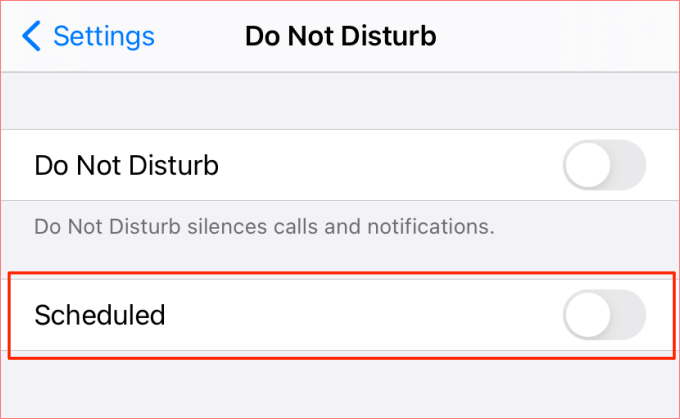
If you indeed set a Do Not Disturb schedule, make sure the quiet hours (i.e. the start time and end time) are correctly configured. Crosscheck both the preferred hours and the meridian designation (i.e. A.M and P.M).
4. Change Contact Status
Just like Repeated Calls, your “favorite” contacts can also override your iPhone’s Do Not Disturb configurations. Favoriting a contact on your iPhone means the person can reach you (via phone call or text) at any hour of the day or night, even when Do Not Disturb is enabled.
So, if you’re getting calls from a random contact when Do Not Disturb is enabled, check that you haven’t favorited the contact by accident. Follow the steps below to check your favorite contacts on your iPhone or iPad. We’ll also show you how to unfavorite a contact.
- Open the Phone app and tap Favorites at the bottom-left corner.
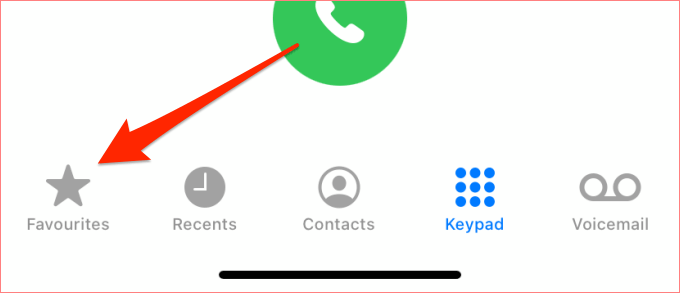
Crosscheck the contacts on the list and look out for any strange/unknown contact.
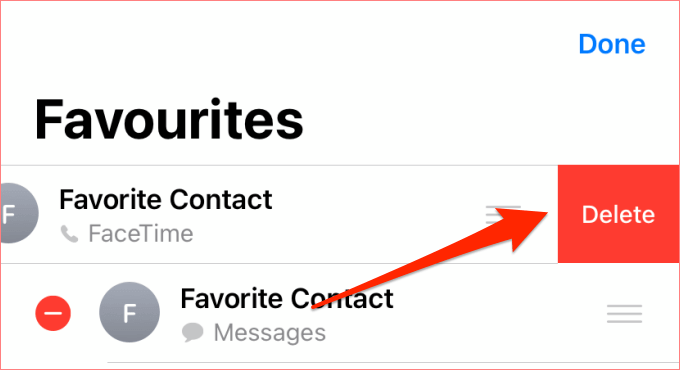
- To unfavorite a contact, tap Edit at the top-right corner.
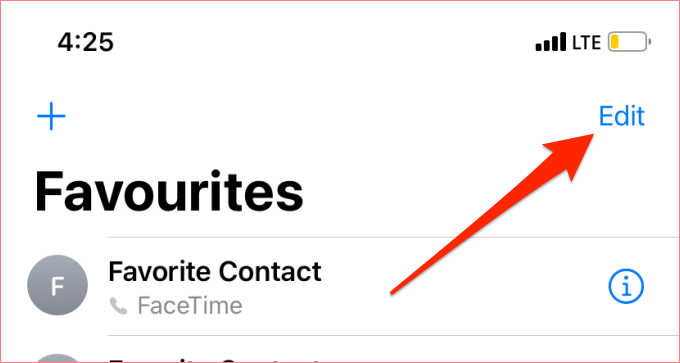
- Click the red minus (—) button.
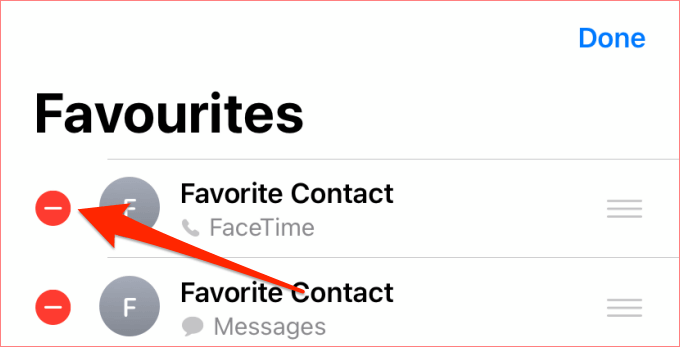
- Finally, tap Delete to remove the contact from the list and select Done to save the change.
5. Change Incoming Call Settings
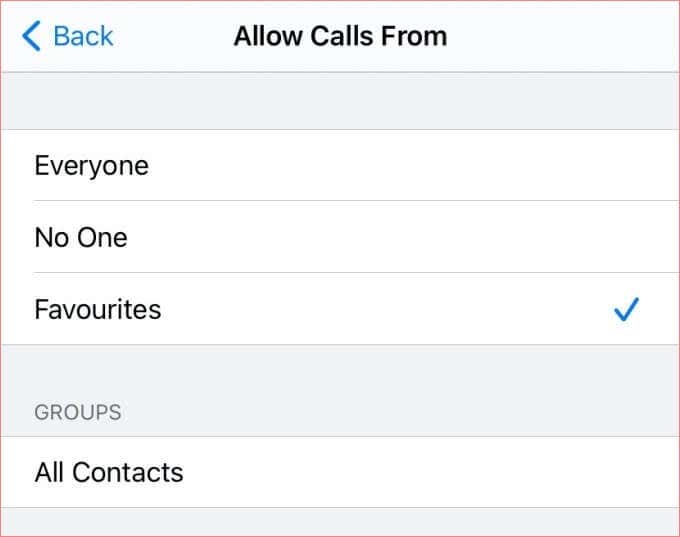
Does your iPhone or iPad fail to silence incoming phone calls when Do Not Disturb is active? That could be because you’ve set Do Not Disturb to allow all incoming calls. Go to the Do Not Disturb settings and tap the Allow Calls From option.
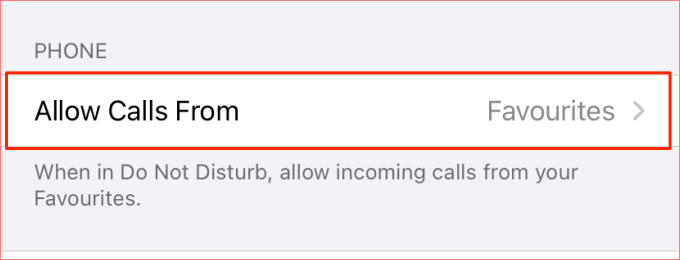
Make sure you set this to either Favorites or No One. You can choose All Contacts if you want to silence only incoming calls from unknown numbers while on Do Not Disturb.
6. Restart iPhone
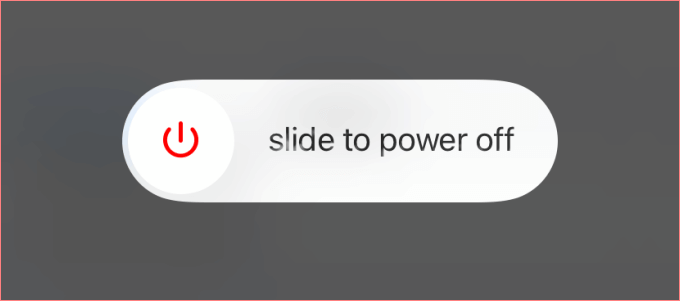
Performing a device reboot is a tried-and-trusted solution to many weird iOS problems. If Do Not Disturb is still not working on your iPhone, shut it down and turn it back on after some seconds. You should also make sure Do Not Disturb is enabled and properly configured according to your preference.
7. Reset All Settings
Do Not Disturb should only mute phone calls, texts, and other app notifications. Your alarms and reminders won’t be silenced. Surprisingly, we found reports from some iPhone users indicating that Do Not Disturb sometimes messes with alarm notifications and sound.
If that describes your present situation, try resetting your device’s settings. Doing that will revert your device’s settings (network, widgets, notifications, etc.) to factory default. You should note that your alarms will be deleted.
Note: Resetting your iPhone or iPad settings will not erase media files and documents.
Go to Settings > General > Reset > Reset All Settings and enter your phone’s passcode to proceed.
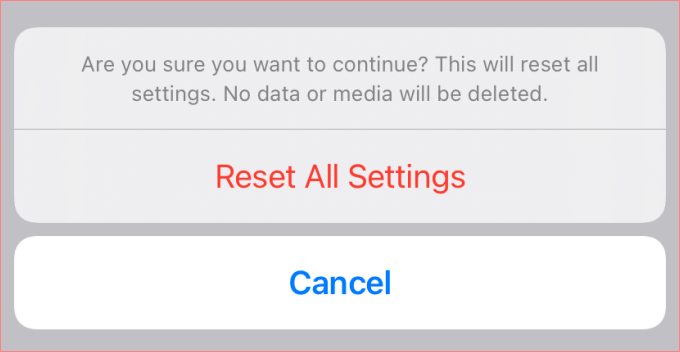
This takes about 3 – 5 minutes, during which your device will shut down and come back on. Afterward, activate Do Not Disturb and create a dummy alarm. Now, check if the alarm rings out at the set time.
8. Update Your Phone
Some features and apps may malfunction if there’s a problem with your phone’s operating system. It’s hard to know if Do Not Disturb is not working due to a software bug. So make sure you have the latest iOS version installed on your iPhone and iPad.
Go to Settings > General > Software Update to check if there’s a new iOS update available for your device.
Block Out the Distractions
Do Not Disturb is like an obedient pet dog that follows instructions to the letter. Set it up correctly and you should have no issues with the feature. You should read our guide on how to set up Do Not Disturb on iOS.
If none of the troubleshooting methods mentioned above fix the problem, you should reach out to Apple Support or visit an authorized Apple Service Provider near you to get your device checked for possible software or hardware damage. You can also try resetting your device to factory default, but make sure you backup your files and data.


