You'll need a Mac or PC computer
Keeping an iPhone up-to-date is the best way to get it to run in top shape. Not only do major updates such as iOS 14 and iOS 15 come with amazing features, but you also benefit from performance enhancements, security updates, and bug fixes. It’s also essential that you install any point updates as soon as they become available.
However, iOS mandates that you use a strong Wi-Fi connection to download and install system software updates on the iPhone. So unless you use a cellular-based workaround or a 5G-capable iPhone, attempting to use your mobile data plan by disabling Wi-Fi will cause updates to fail.
So if your iPhone has no access to a stable Wi-Fi network, try these three methods to update your iPhone without Wi-Fi. You can also use them to update your iPadOS on iPad without Wi-Fi too.
1. Update Using Cellular Data on 5G iPhone
If your iPhone or iPad supports 5G (such as an iPhone 12 or later), you should have no problem using your 5G cellular data plan to update iOS. You just need to activate the setting that allows unrestricted access to 5G on the iPhone.
Activate More Data on 5G
1. Open the Settings app on your iPhone.
2. Go to Cellular > Cellular Data Options > Data Mode.
3. Select Allow More Data on 5G.

Update iPhone Using 5G
1. Open the Control Center (swipe down from the top-right of the screen) and disable Wi-Fi.
2. Tap General > Software Update on the Settings app.
3. Tap Download & Install to download iOS updates.
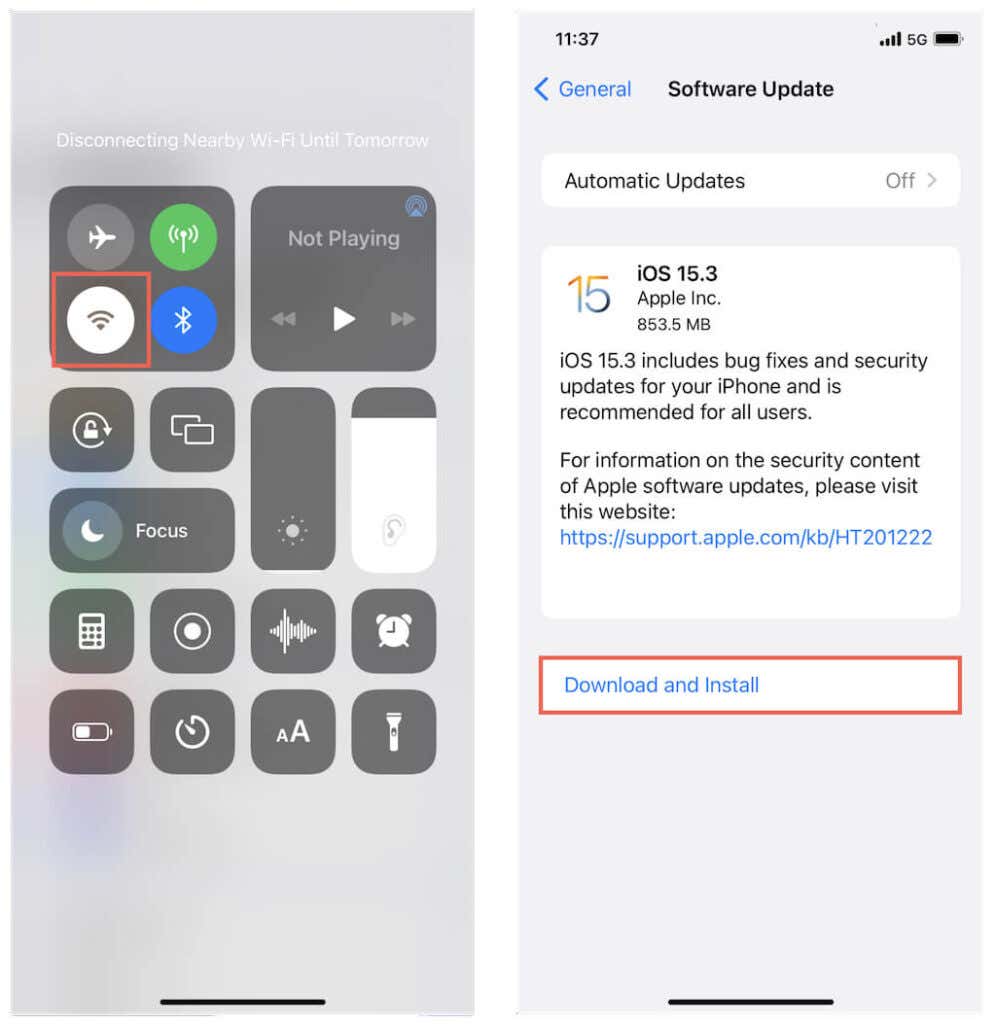
Note: If your iPhone fails to update, go to Settings > Cellular > Voice & Data and make sure that 5G Auto or 5G On is selected. If the problem continues, activate and disable Airplane Mode or restart your iPhone.
2. Update Using iTunes/Finder Using Cellular Data
If you use an iPhone without 5G or a 5G data plan, you can tether it to the Mac or PC via USB and use its cellular data to install new updates for iOS. However, this method downloads a complete IPSW file (iPhone Software) and typically uses around 5-6GB of mobile bandwidth. If you don’t have enough data, use the next method for a slightly complicated but more data-friendly workaround.
Note: If you use a PC, make sure to install iTunes via the Microsoft Store or Apple website before you begin. You do not have to sign in to it using your Apple ID.
1. Open the Settings app on your iPhone and tap Personal Hotspot. Then, turn on the switch next to Allow Others to Join.
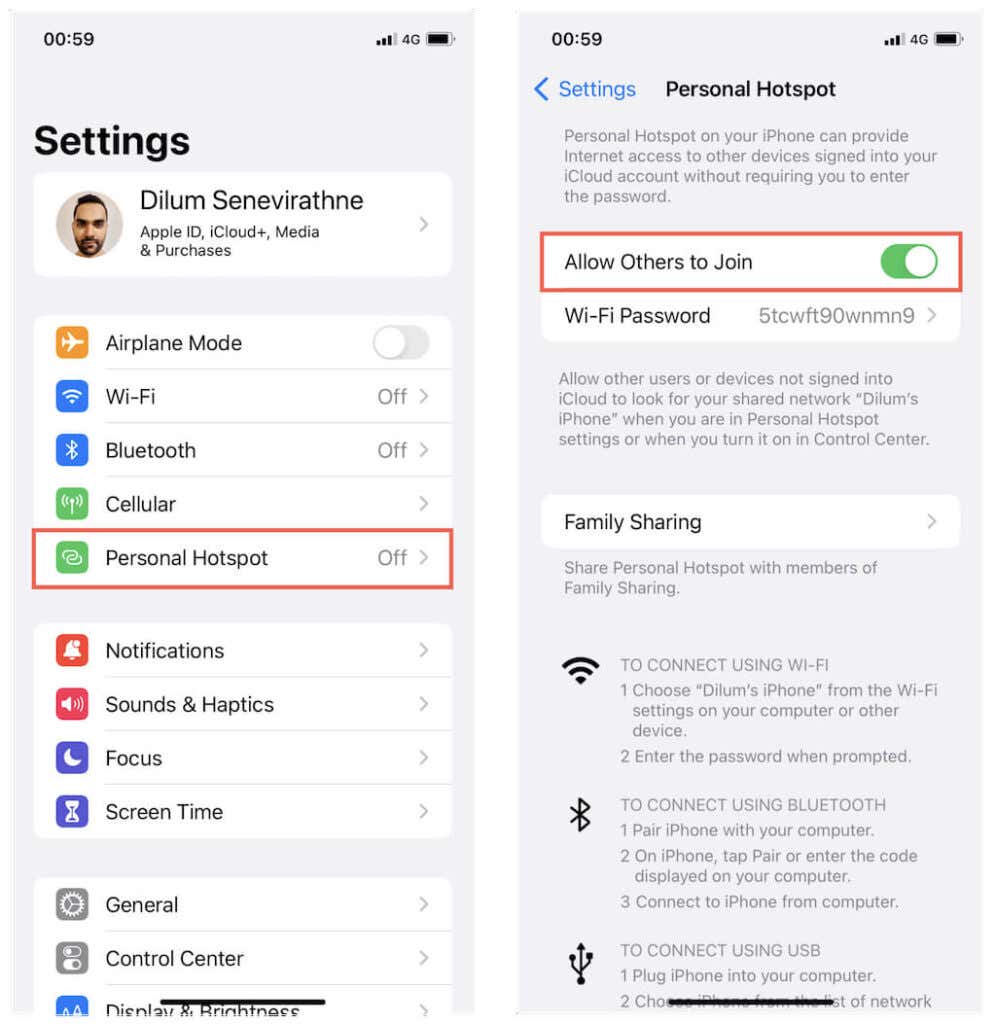
2. Use a USB cable to connect your iPhone to your Mac or PC. If you’ve never done that before, tap Trust on the iOS device when prompted.
3. Disable the Wi-Fi module on your Mac or PC to start using your iPhone’s mobile data.

Mac: Select the Wi-Fi icon on the menu bar and turn off the switch next to Wi-Fi.
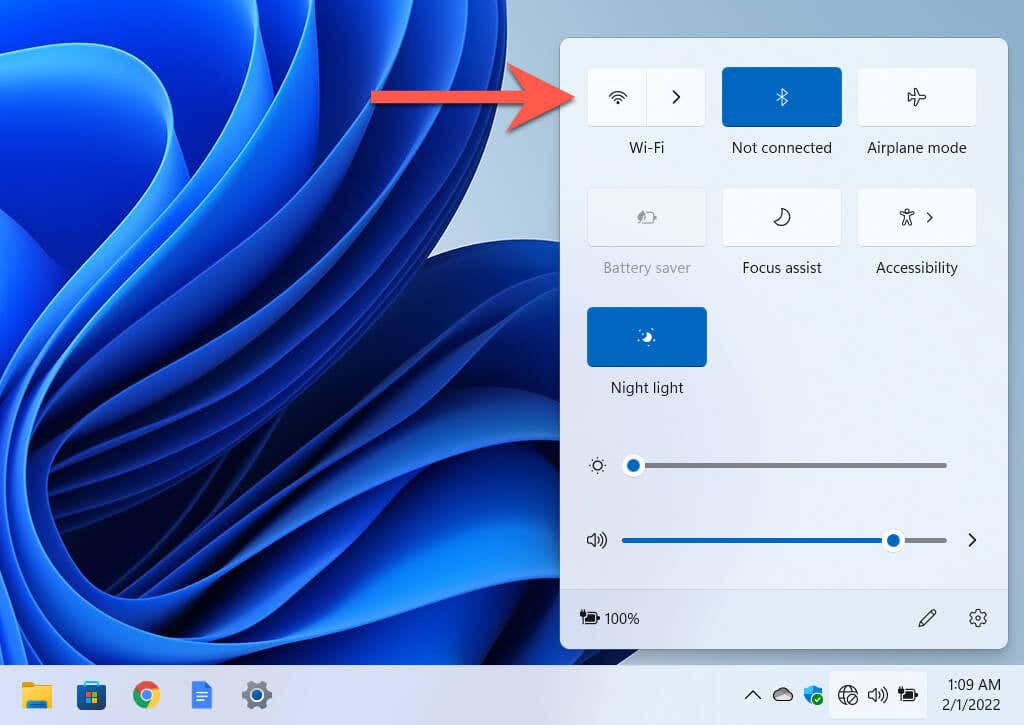
PC: Select the Wi-Fi icon on the system tray and select the Wi-Fi tile to disable it.
4. Open Finder on your Mac. If you use a PC or a Mac running macOS Mojave or earlier, open iTunes.

5. Select your iPhone on the Finder sidebar (or the iPhone device icon in iTunes).
6. Select Check for Updates.
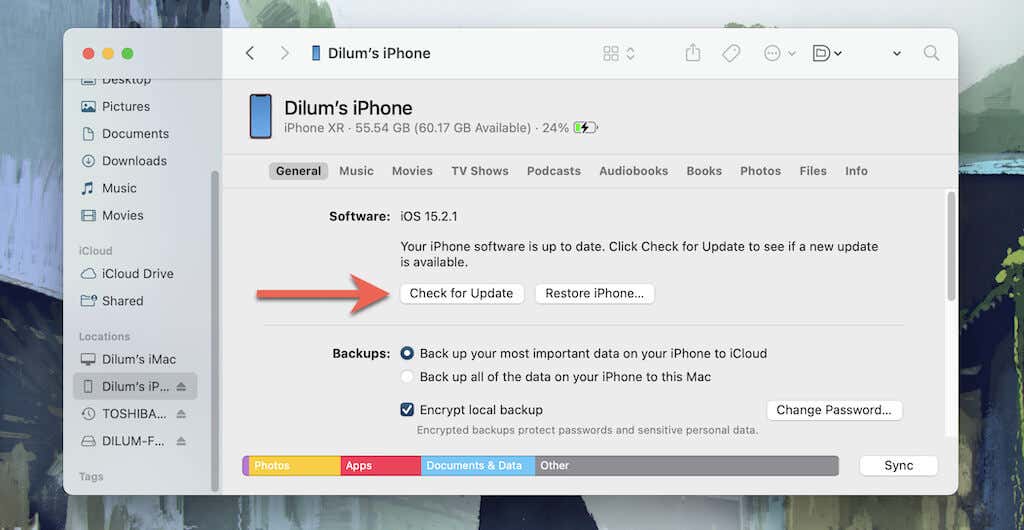
7. Select Download and Update.
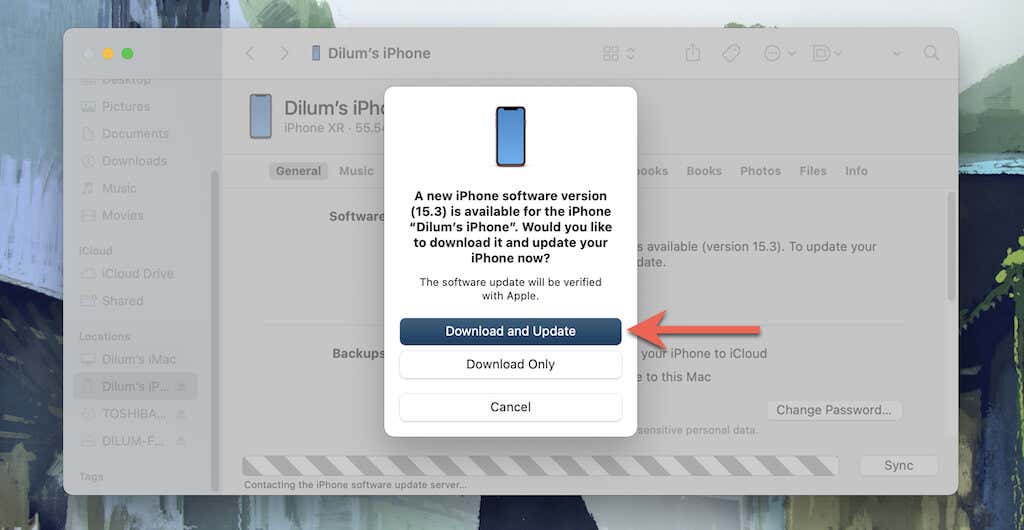
8. Review the update notes and select Next.
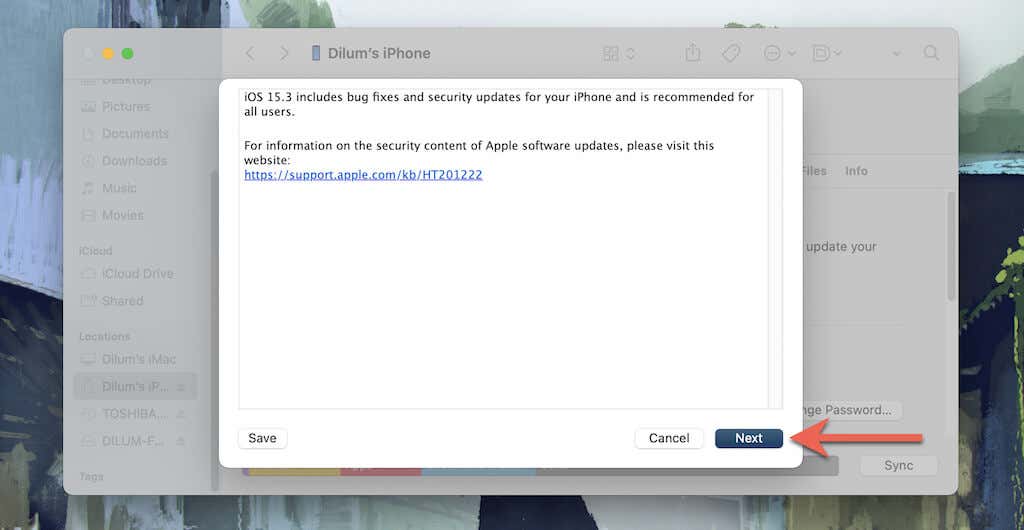
9. Select Agree to accept the license terms.
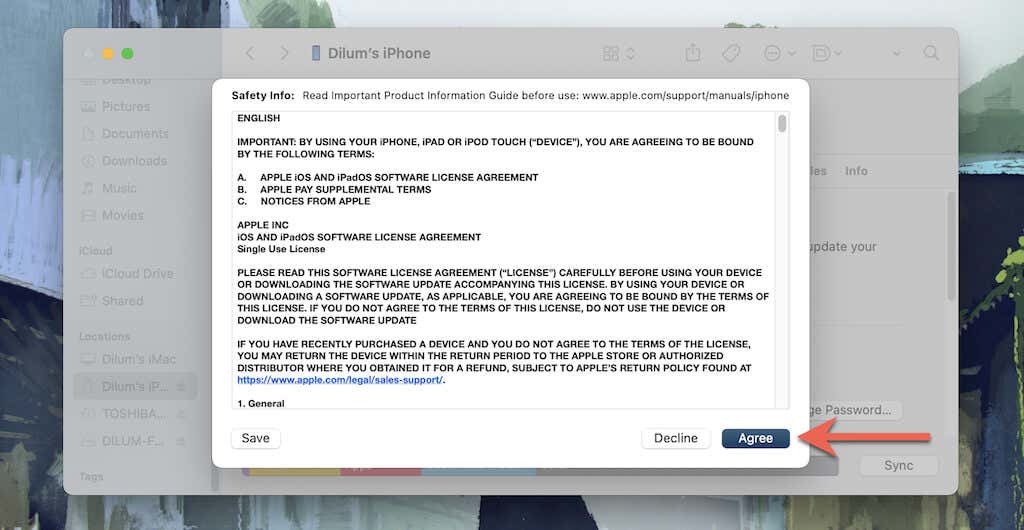
10. Type in your device passcode on the iPhone. Then, select Continue.
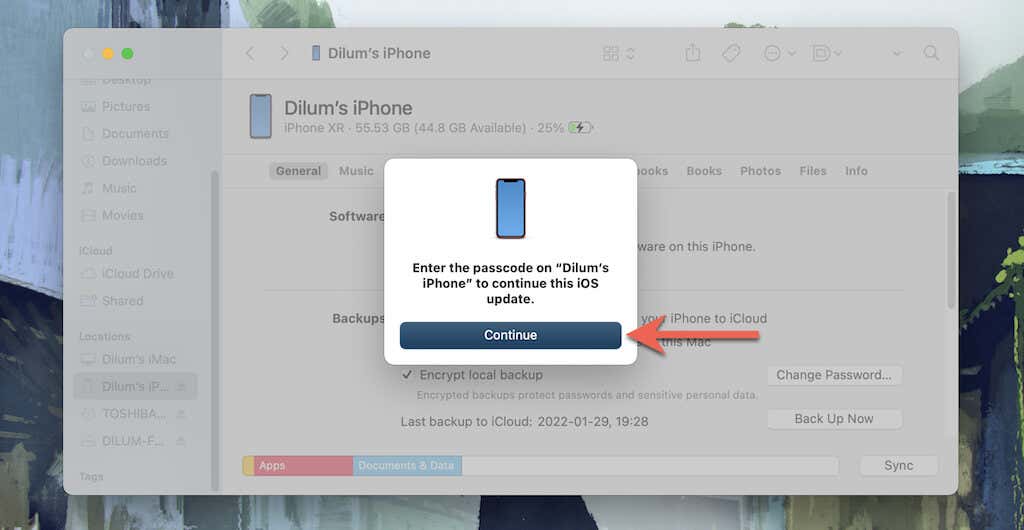
11. Wait until Finder or iTunes downloads the system software file. It will then automatically initiate and install iOS on your iPhone. Use the progress bar at the bottom of the window to track the progress.
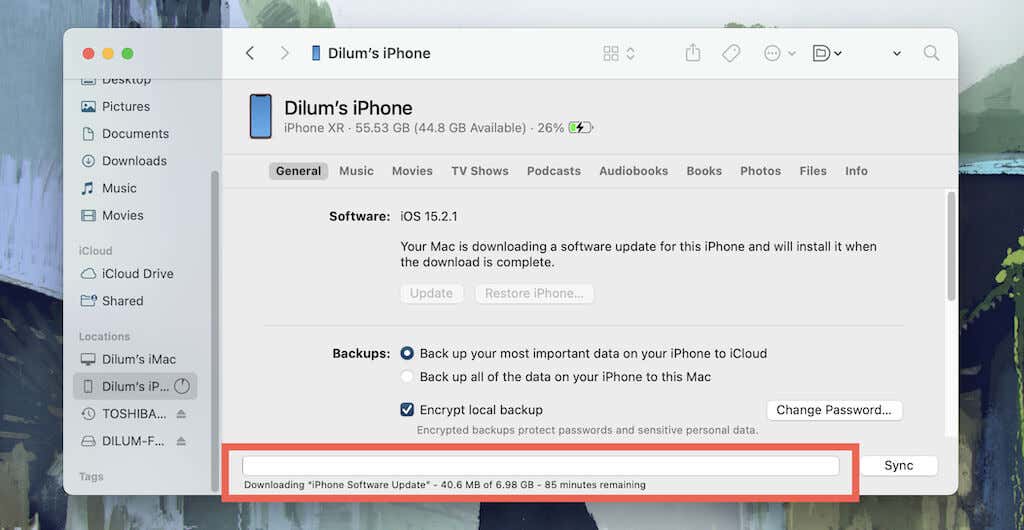
Warning: To avoid system software corruption and data loss, do not disconnect your iPhone from your Mac or PC until the end of the update process.
3. Update iPhone Using Cellular Data via a Mac/PC Hotspot
The following method also requires a Mac or PC, but it focuses on creating a mobile hotspot based on a tethered iPhone cellular connection. You then connect your iOS device to it and perform a system update. Basically, you trick your iPhone into using its cellular data!
Update iPhone Using Cellular Data via a Mac Hotspot
1. Open the iPhone’s Settings app and turn off Wi-Fi, Bluetooth, and Personal Hotspot.
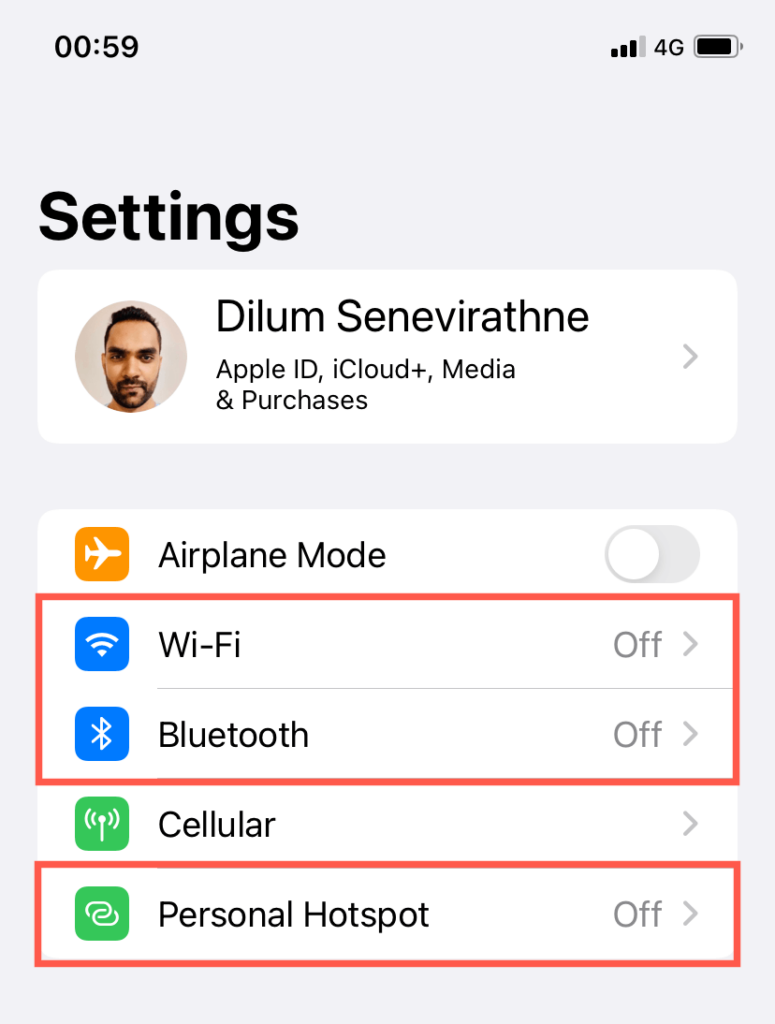
2. Connect your iOS device to your Mac with a USB cable.
3. Re-activate Personal Hotspot and select USB Only.
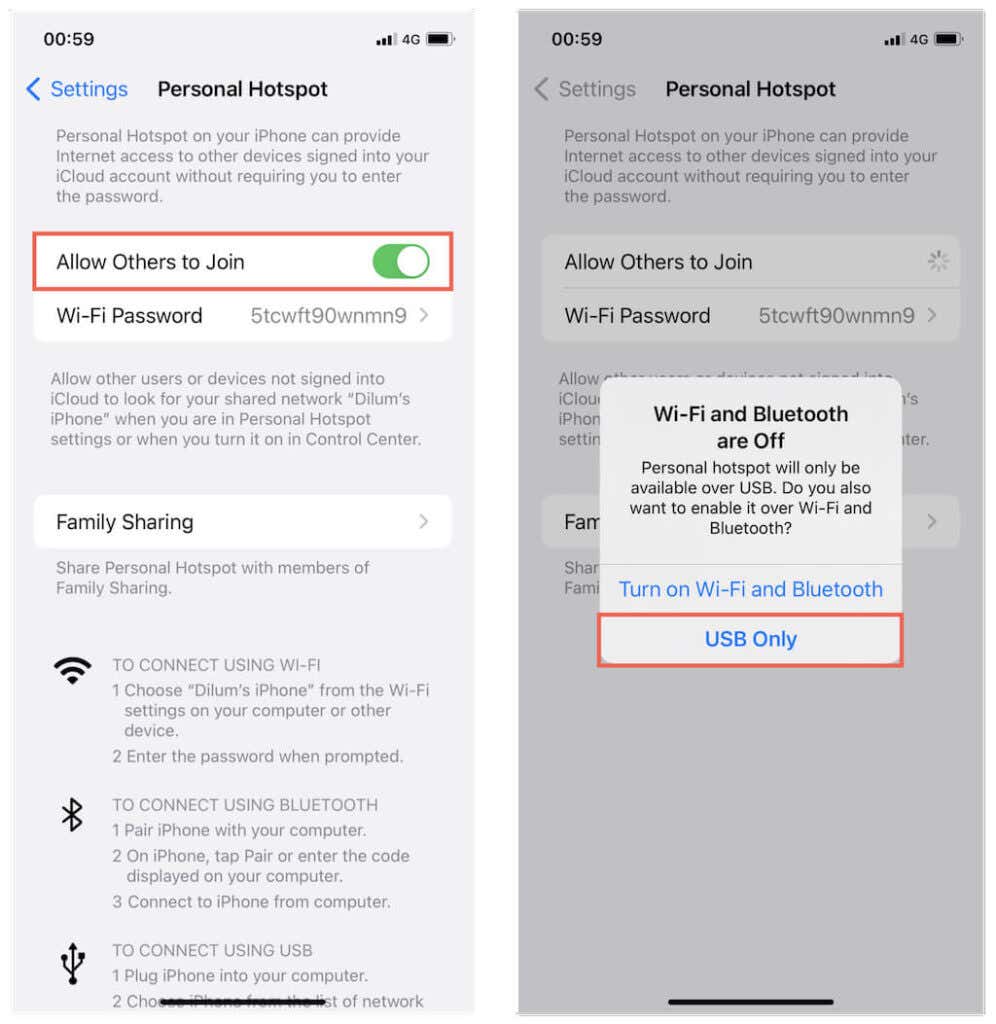
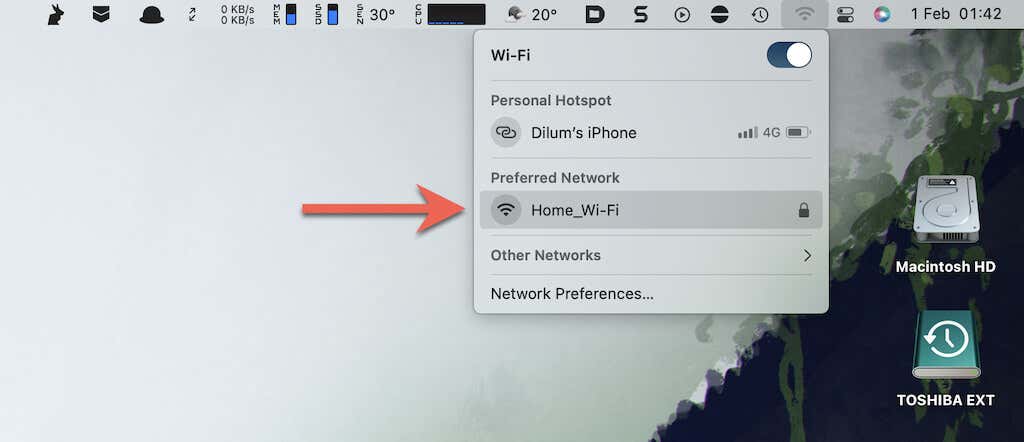
4. Disconnect your Mac from any Wi-Fi networks, but do not disable the Wi-Fi module.
5. Select the Apple logo on the menu bar and select System Preferences. Or, open the System Preferences app via the Mac’s Dock.

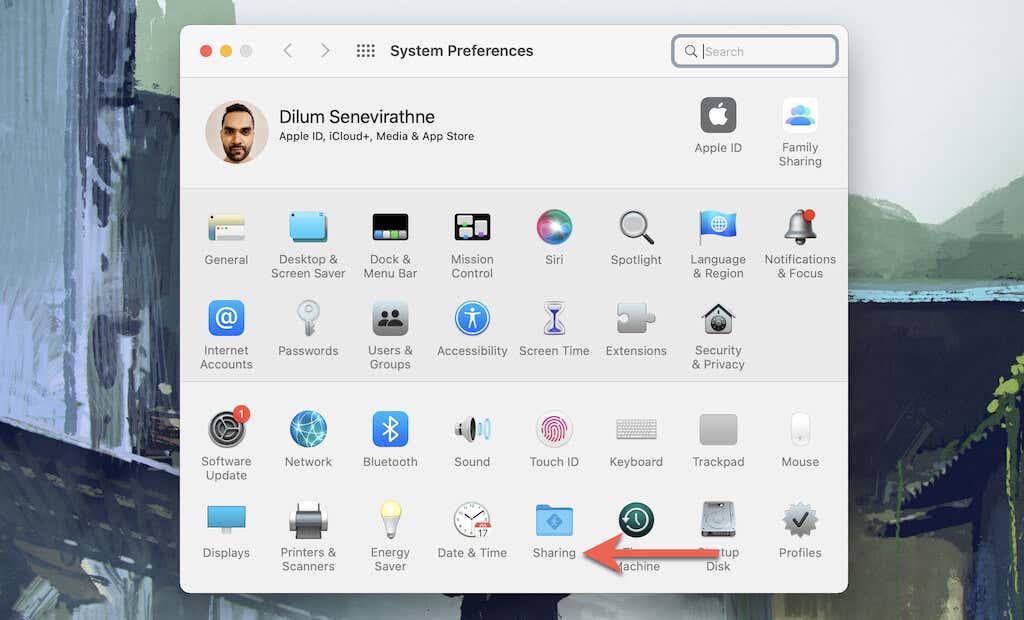
6. Select the Sharing category.
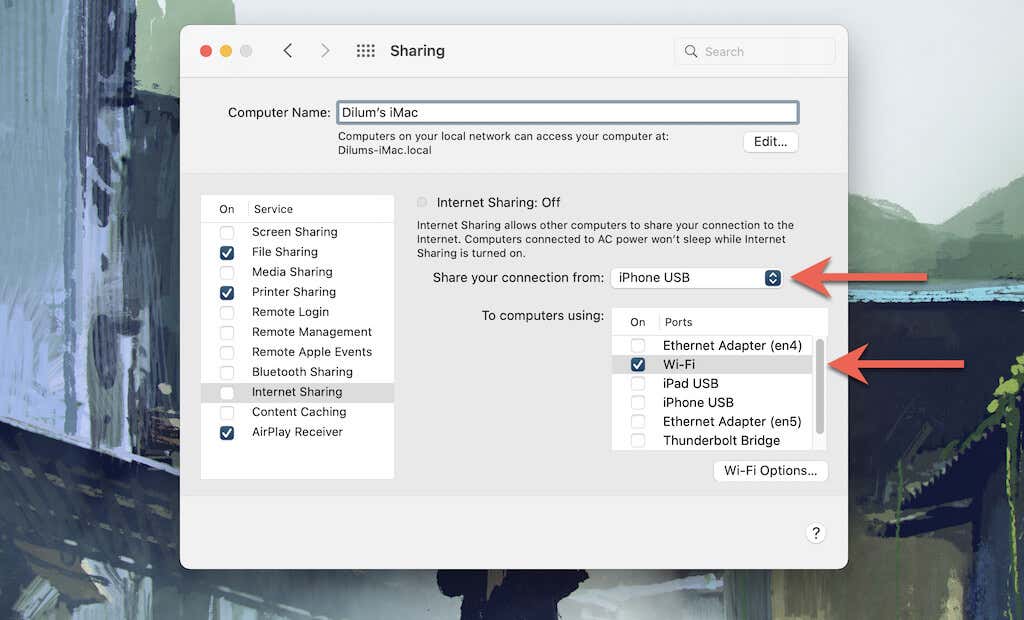
7. Select Internet Sharing on the sidebar (but do not check the box next to it) and modify the following settings:
- Set Share your connection from to iPhone USB.
- Set To computers using to Wi-Fi.
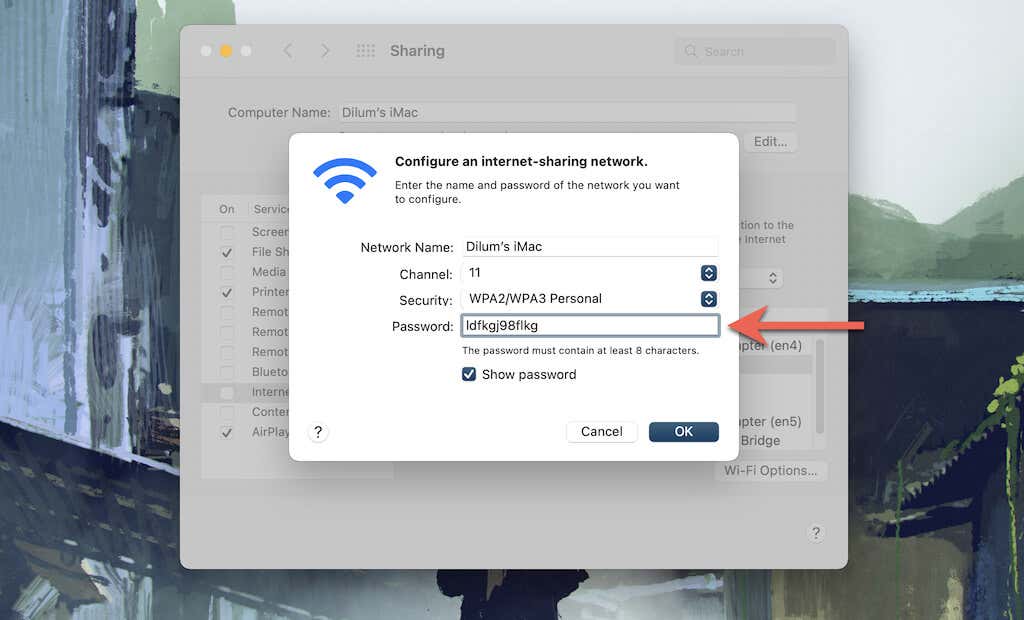
8. Select Wi-Fi Options, note down the Wi-Fi network’s password (or set a different password), and select OK.
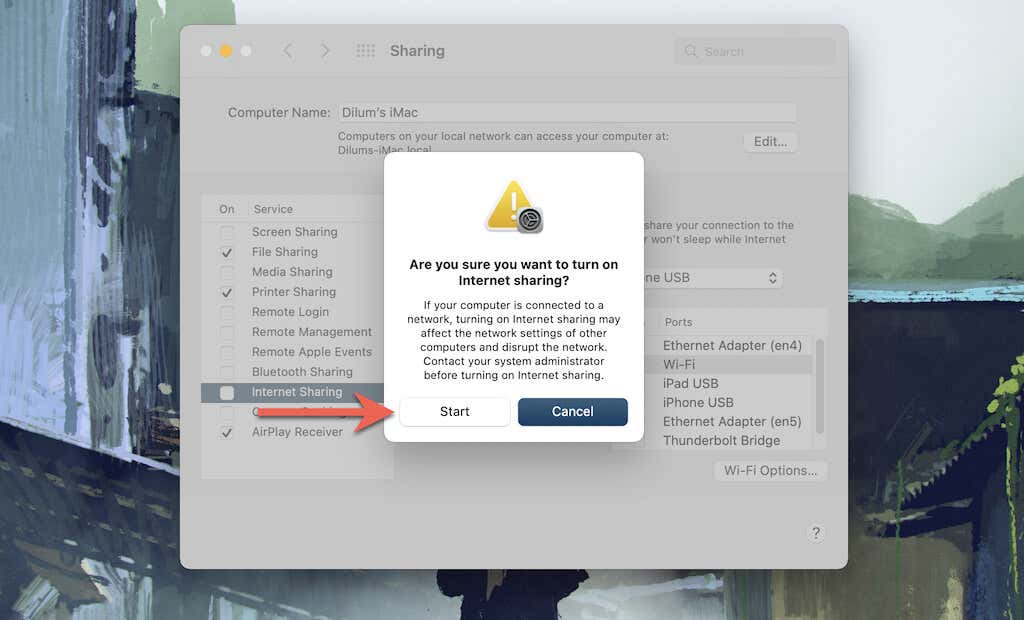
9. Check the box next to Internet Sharing. Then, select Start.
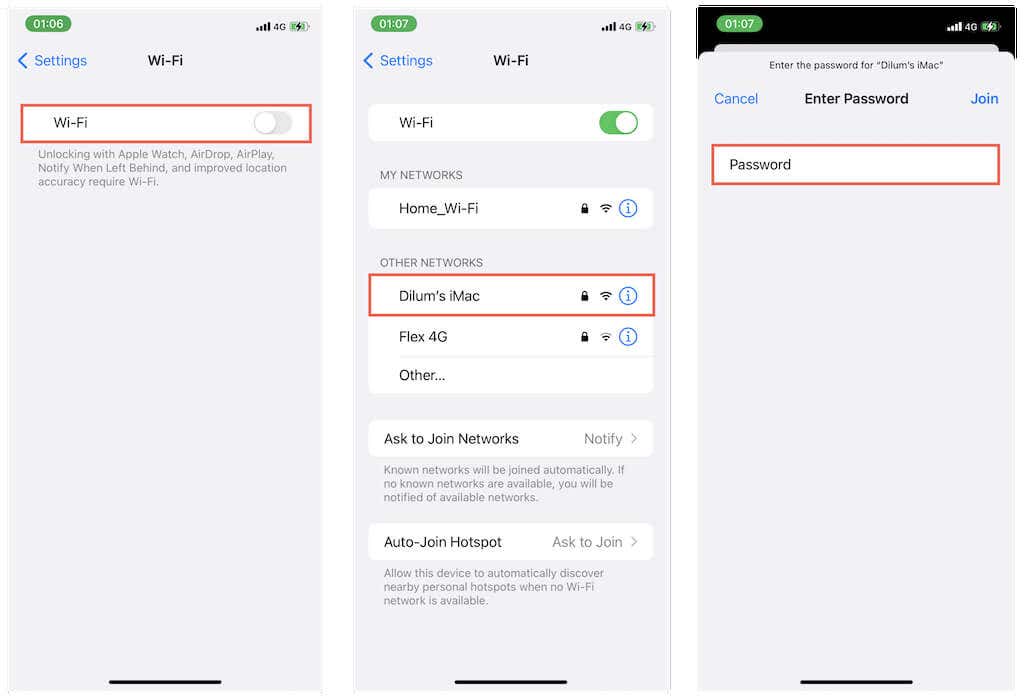
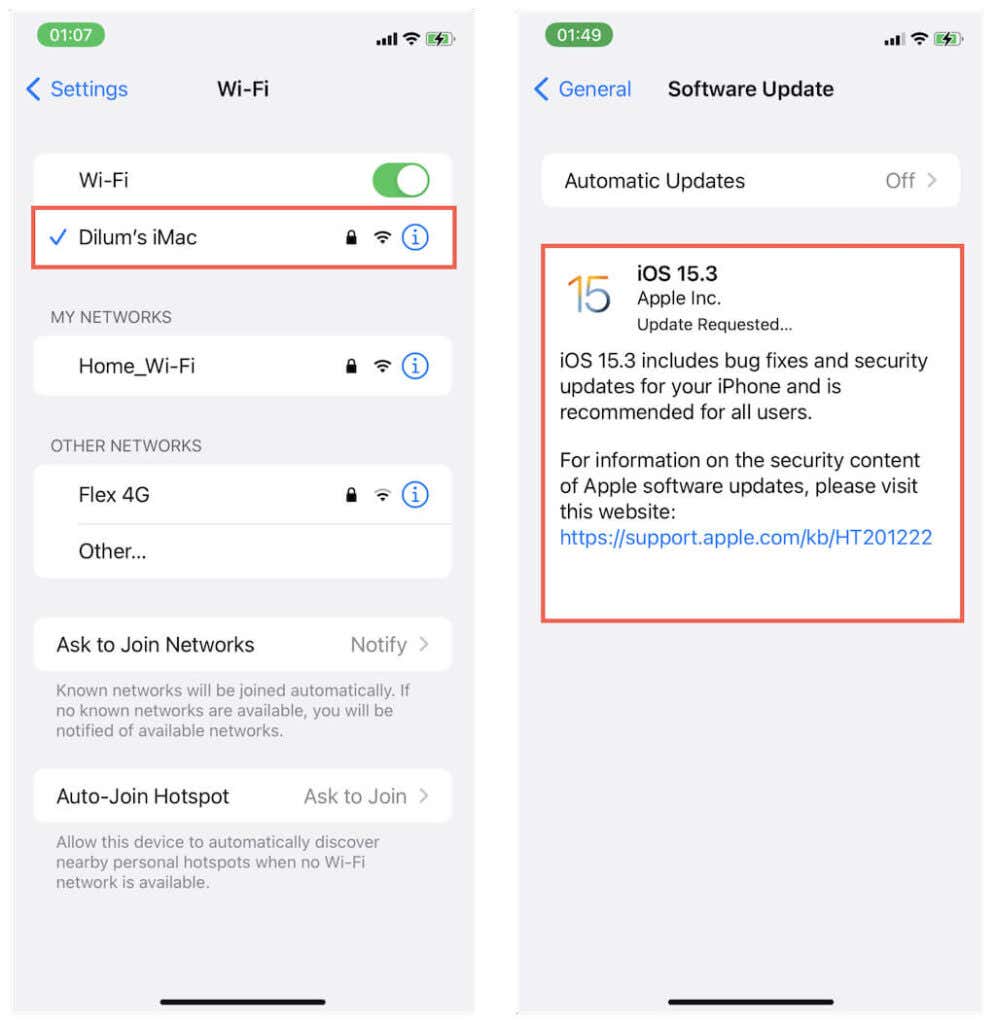
10. Open the Settings app on iPhone and turn on Wi-Fi. Your Mac will show up as a Wi-Fi hotspot. Tap it and enter the password you noted down earlier to Join it.
11. Go to Settings > General > Software Update to update your iPhone.
Update iPhone Using Cellular Data via a PC Hotspot
Note: Make sure that you have iTunes installed on your PC before working through the steps below. If you run into any issues, launch iTunes, keep it running in the background, and try again. You may also want to update to a newer version of iTunes.
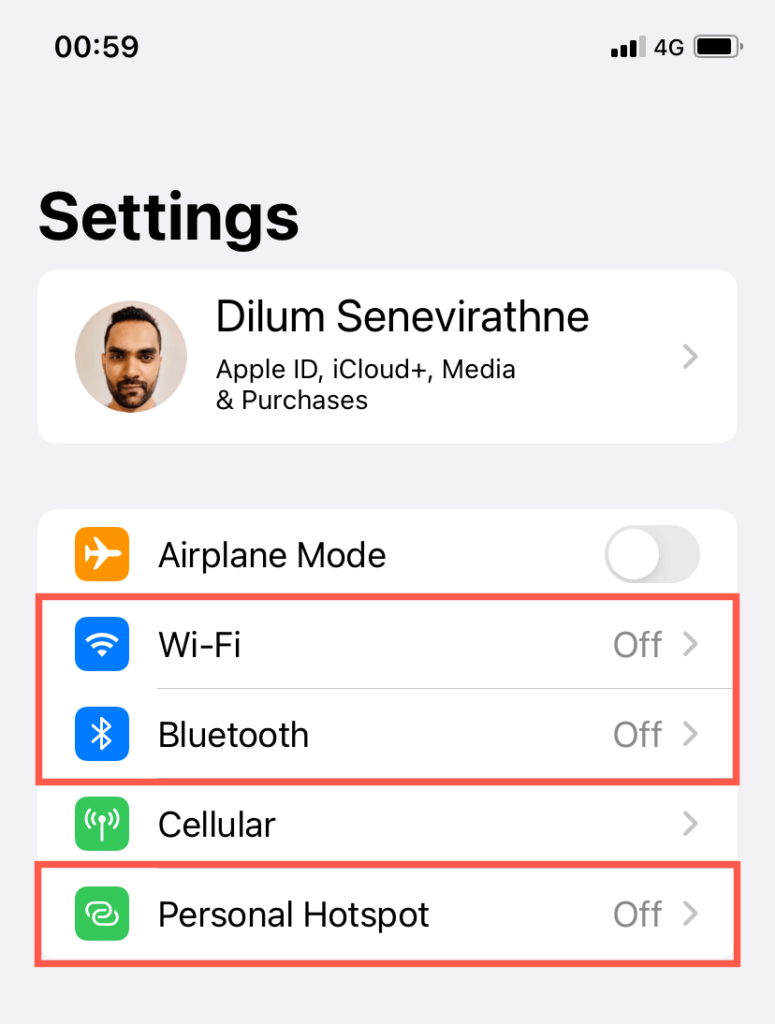
1. Open the iPhone’s Settings app and turn off Wi-Fi, Bluetooth, and Personal Hotspot.
2. Connect your iPhone to your PC via USB.
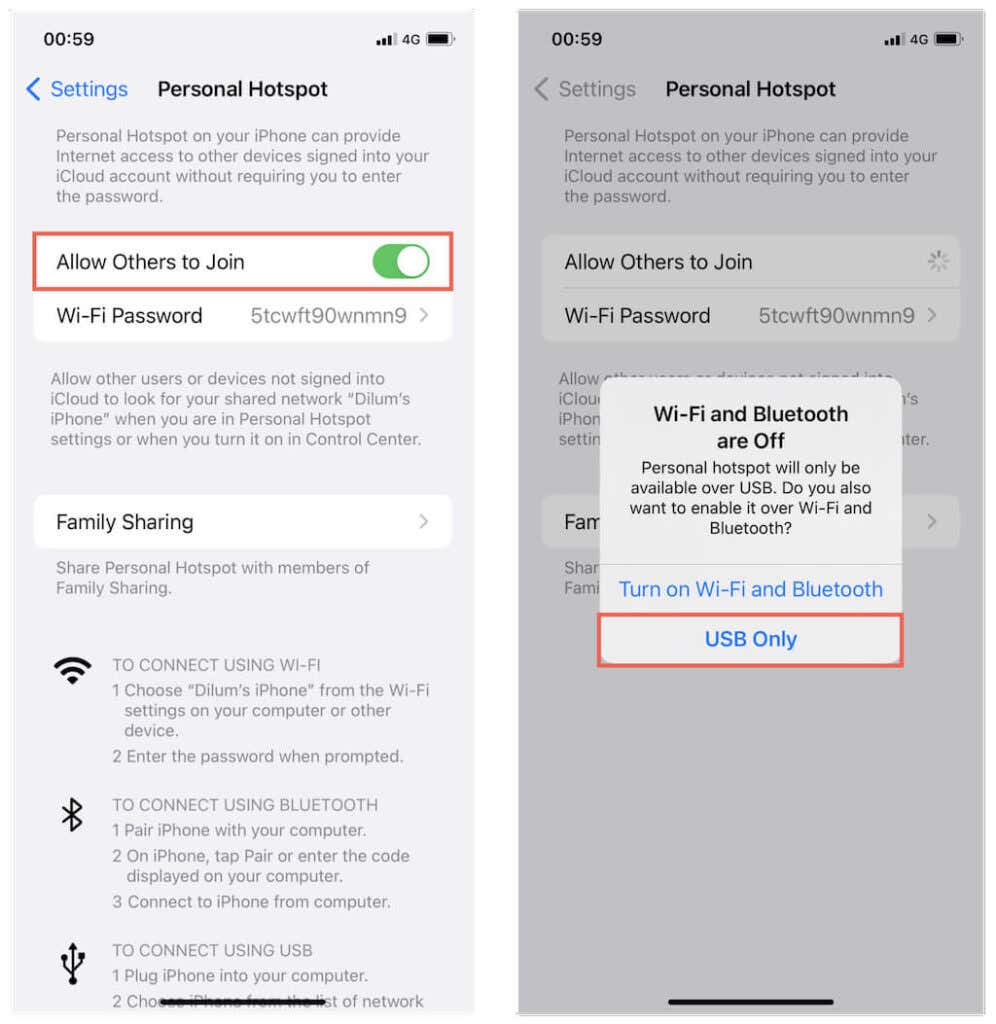
3. Reactivate Personal Hotspot and select USB Only.
4. Deactivate your PC’s Wi-Fi module.
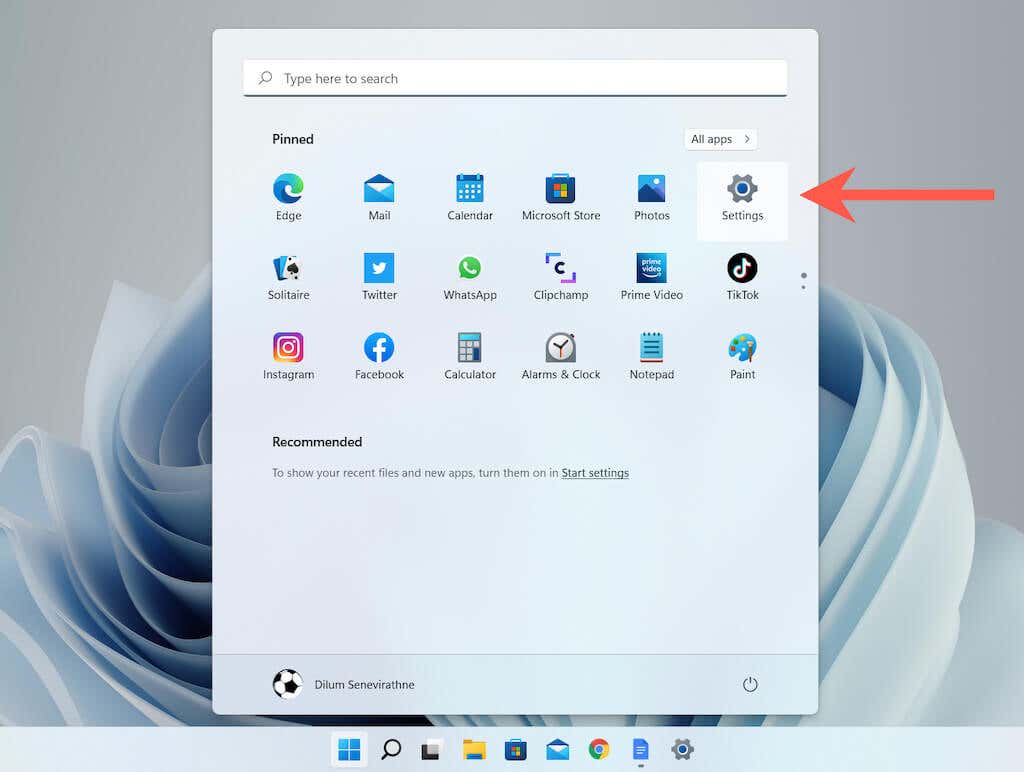
5. Open the Start menu and select Settings.
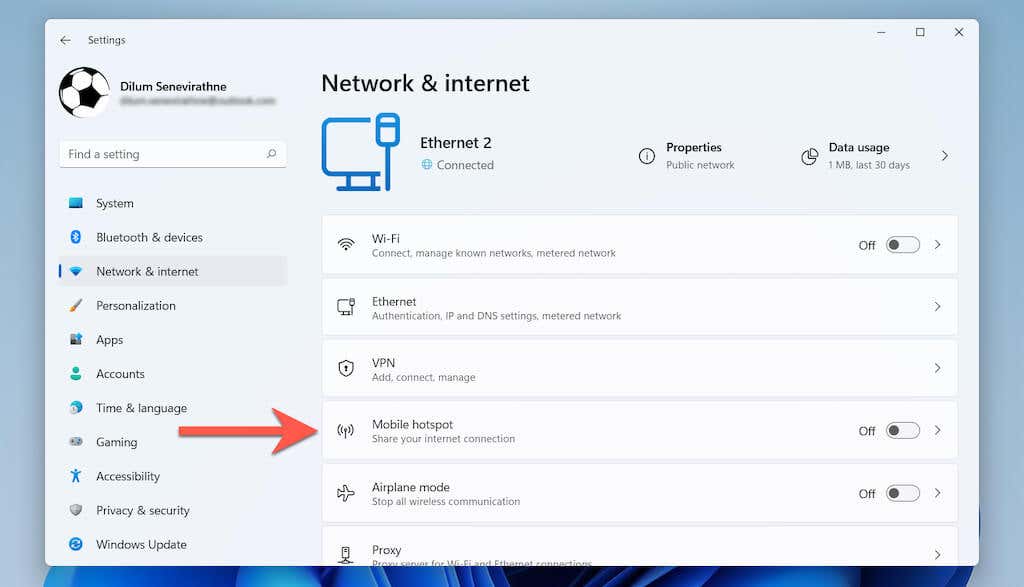
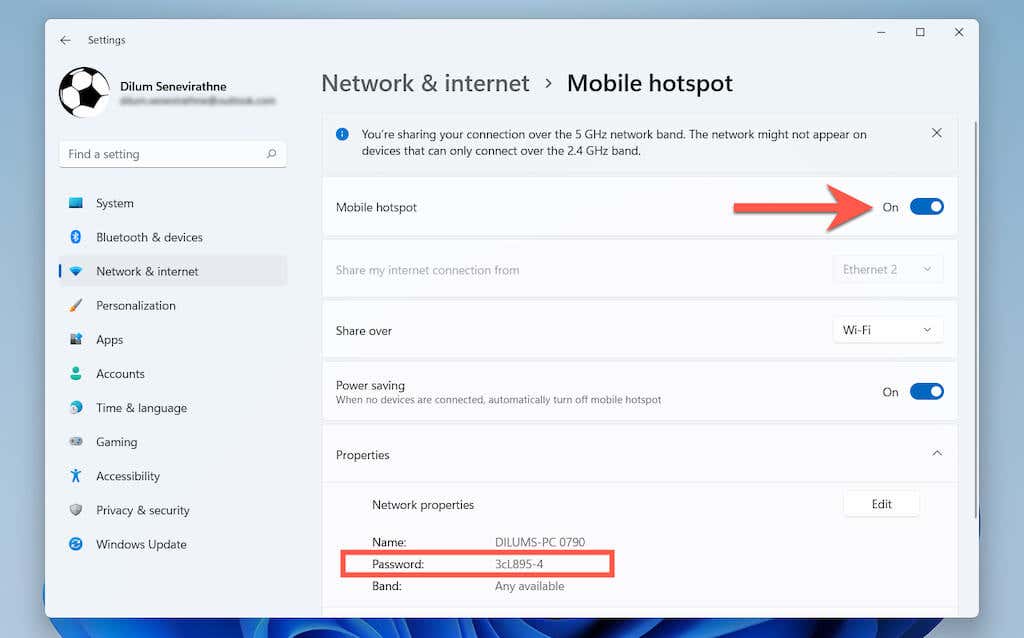
6. Select Network & internet > Mobile hotspot.
7. Adjust the settings as follows:
- Set Share my internet connection from to Ethernet.
- Set Share over to Wi-Fi.
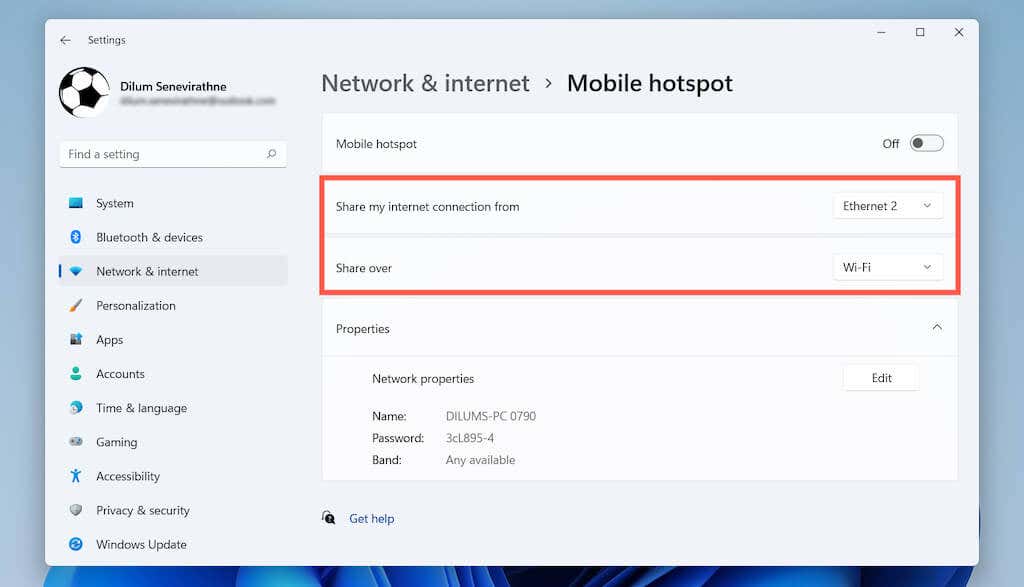
8. Note down your PC’s mobile hotspot password. Then, turn on the switch next to the Mobile hotspot.
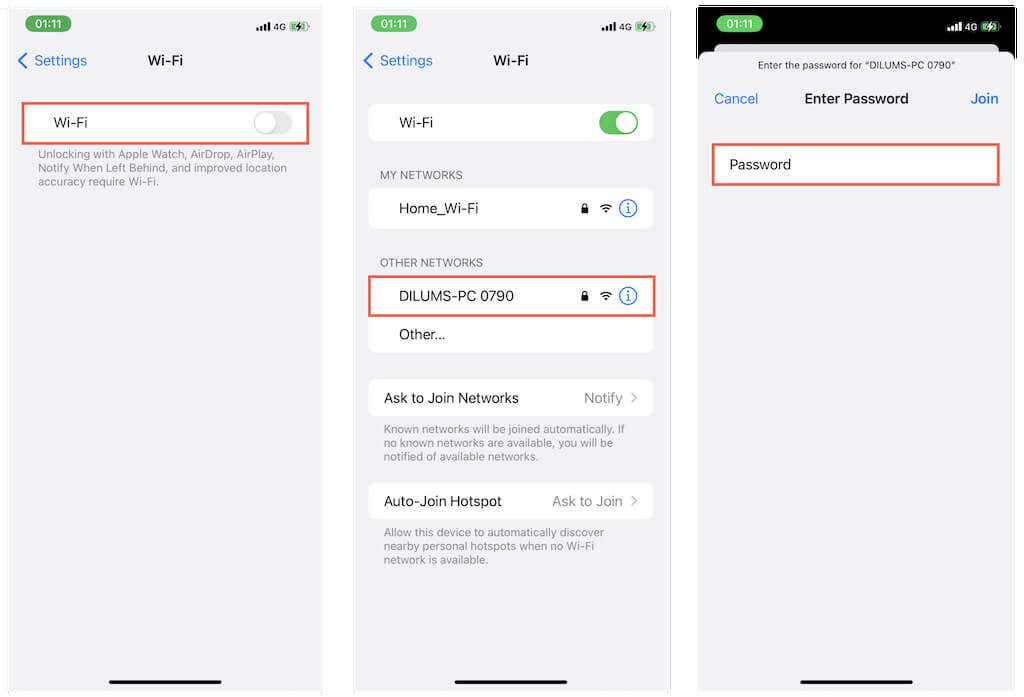
9. Open the Settings app on iPhone and turn on Wi-Fi. Your PC will show up as a mobile hotspot. Enter its password and tap Join.
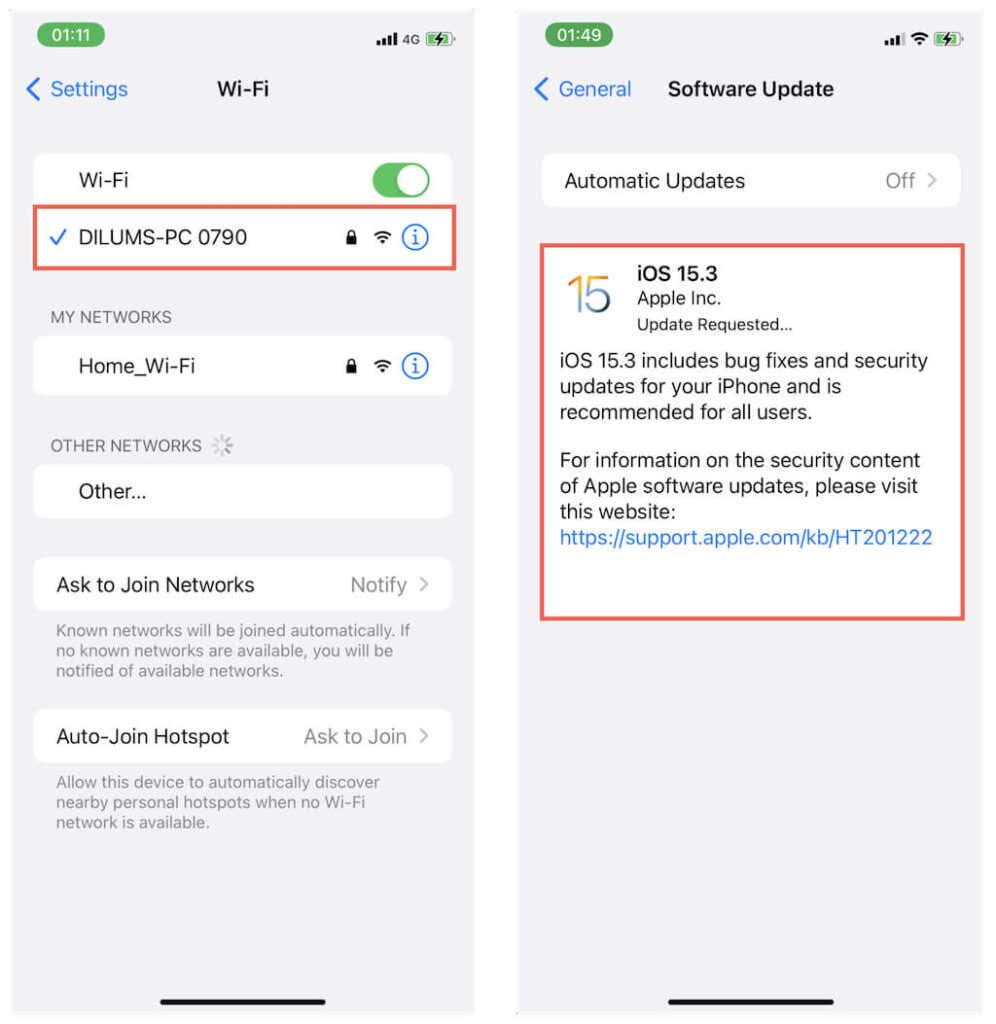
10. Go to Settings > General > Software Update to update your iPhone to the latest iOS version.
iPhone Fully Up-to-Date Without Wi-Fi
Unless you have a 5G capable iPhone, updating an iOS device with cellular data isn’t exactly convenient. But until Apple provides the native ability to perform iOS updates without Wi-Fi, you’ve got no other option but to enlist the help of a Mac or PC to get your iPhone’s operating system up-to-date.


